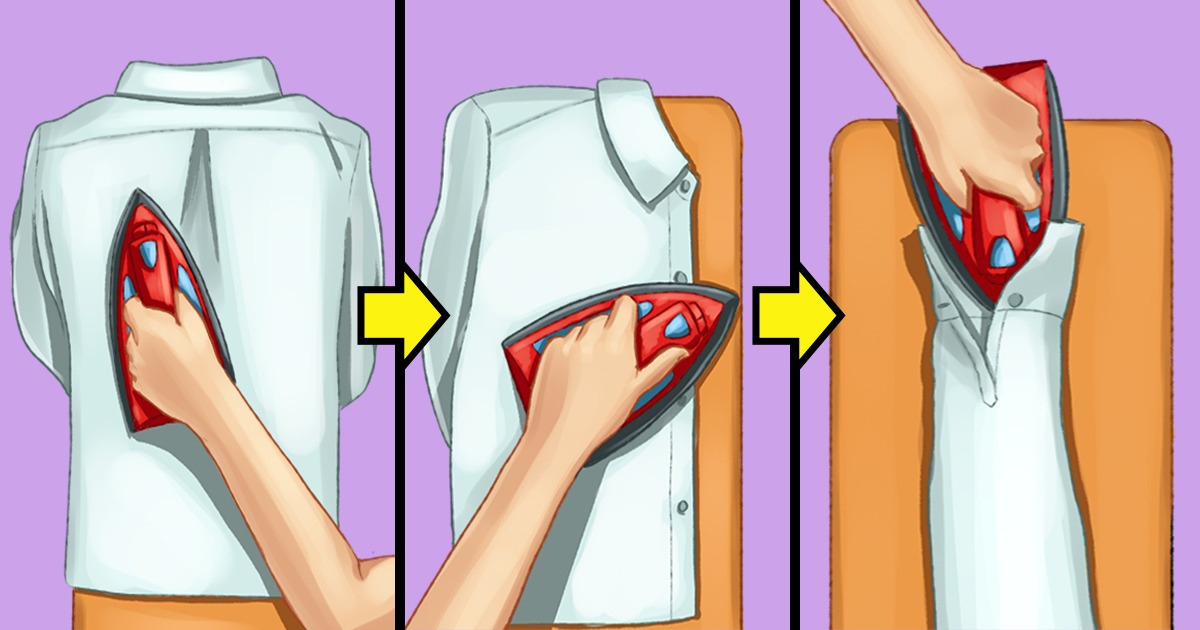
How to Iron Different Items of Clothing

Despite the fact that ironing is not a complicated process, it may make you feel uncomfortable. Especially if you have to iron items with a lot of elements, each of which requires special attention otherwise wrinkles and creases may appear on them.
5-Minute Crafts would like to tell you about how to iron different items of clothing.
❗ Before ironing any item, read its tag carefully. Stick to the recommended ironing temperature and never try to iron things that are not designed to be ironed. The improper handling of an item can ruin it irreversibly.
A shirt
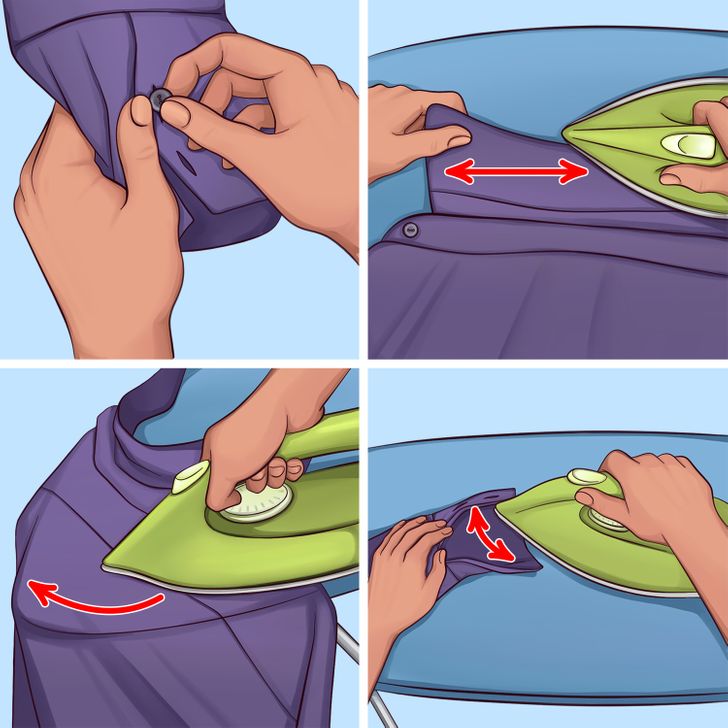
1. Unbutton the cuffs and collar before ironing the shirt.
2. Lay the collar, wrong side up, on the board. Starting from the middle of the collar, move the iron to one edge first, and then to the other.
3. Use the narrow ending of the ironing board to drape the top of the shirt back (yoke) on it. Move the iron from the shoulder toward the center of the back to iron one edge of the designated area. Then iron the other shoulder in the same way.
4. Spread the cuffs of the shirt on the board and iron them from the inside.
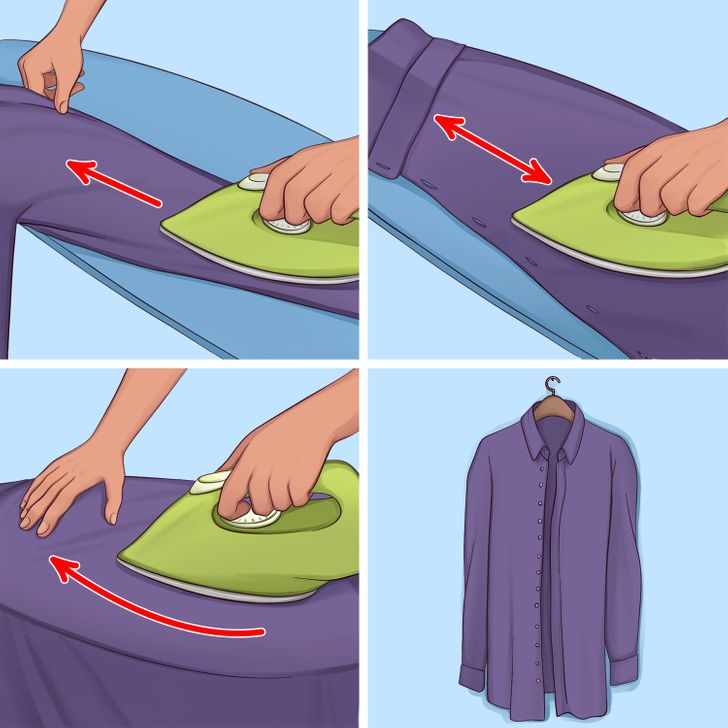
5. Place the sleeve on the board and iron it from the cuff to the shoulder. Iron the outside of the sleeve first, then the inside. Repeat the same with the other sleeve.
✅ If you have a sleeve board, use it to make your work easier.
6. Take the front panels of the shirt. First, lay out one panel on the board and iron it, then do the same with the other panel.
7. After ironing the front panels, proceed to the back of the shirt, moving from top to bottom.
8. Finally, iron the collar one more time, hang the shirt on the hanger, and let it cool.
Pants
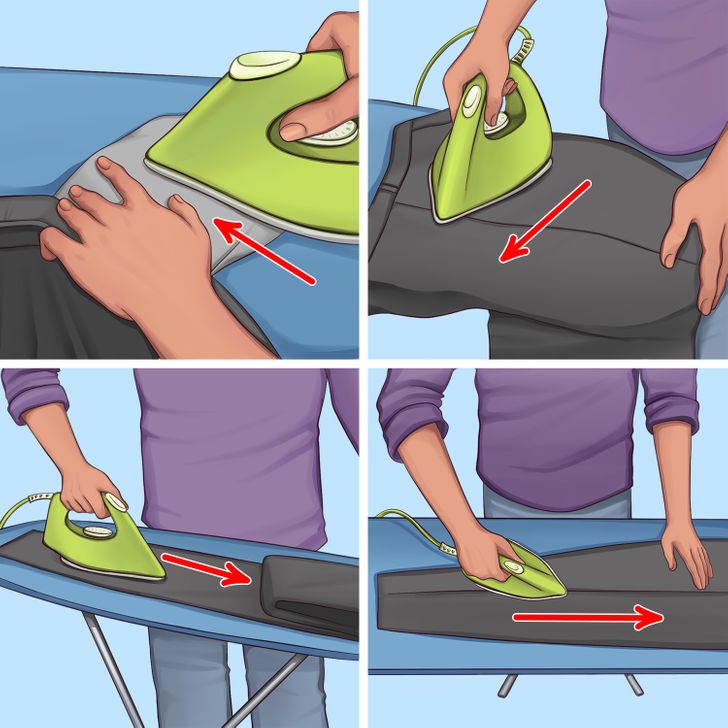
1. Turn the pants inside out and iron the pockets. If they are not attached to the inside seam, just lay the pocket on the board to iron. If the pocket is attached, pull the top of the pants over the narrow end of the board and iron.
2. Turn the pants right side out. Pull the top of your pants over the narrow end of the board and iron it working around the waist. Then iron the pockets slightly from the front side so that their lines are not visible from the outside.
3. Align the legs and place the pants on the ironing board with one leg on top of the other. Align the inside and outside seams. Fold back the top leg and iron the inside of the bottom leg. Flip and repeat with the other pant leg.
4. To iron the crease on your pants, place them on the board and align the inner and outer seams. Press the outside of each leg. Use steam mode if necessary.
❗ Please note that some fabrics should not be ironed directly. Carefully read the manufacturer’s recommendations before you start ironing.
A skirt
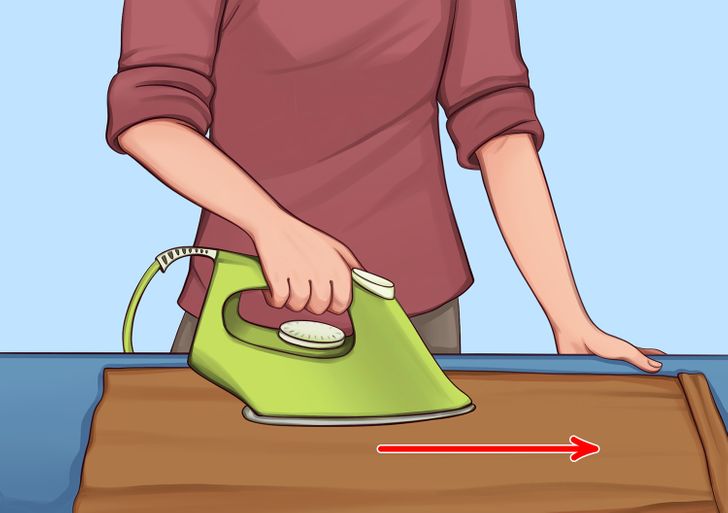
1. Lay the skirt on the ironing board. Move the iron from the bottom to the waist.
2. If the skirt has gathers or ruffles, iron the inside surface of the skirt, moving from the hem toward the center. If there are folds on the skirt, each of them should be ironed separately. Start on the inside and then iron them on the top. If steaming is not prohibited, use it to make the fold more visible.
A dress
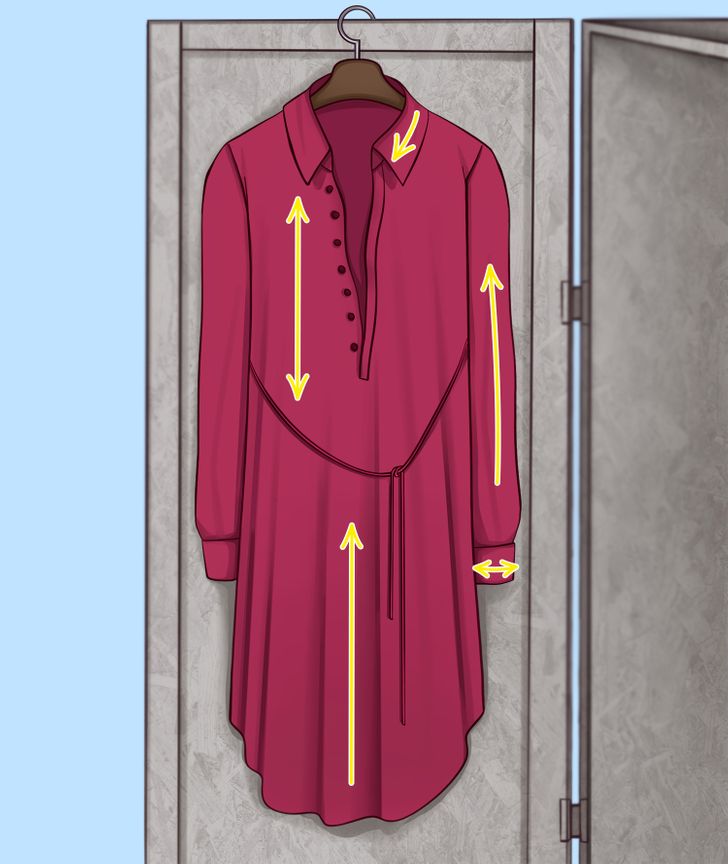
1. If your dress has sleeves and a collar, use the shirt ironing instructions first to iron the top. Start at the collar, then move on toward the yoke, cuffs, sleeves, front, and back.
2. Iron the hem of the dress according to the instructions intended for a skirt: start from the bottom and move up.
3. If the dress has buttons, be careful not to get the iron too close to them. Many materials can get damaged from exposure to high temperatures.