How to Tie a Necktie: 4 Ways and a Bonus Trick
At first glance, it seems that tying a necktie is no simple task. There are a few dozen ways to do it, from simple and universal knots to complicated and sophisticated ones. But it’s actually easy to tie a necktie, and it will take just a few seconds. You just have to learn a few knots and alternate them depending on the occasion.
5-Minute Crafts would like to show you the most popular and simple necktie knots. And at the end, you’ll find a bonus trick: we’ll show you how to tie a necktie in 5 seconds.
A simple knot
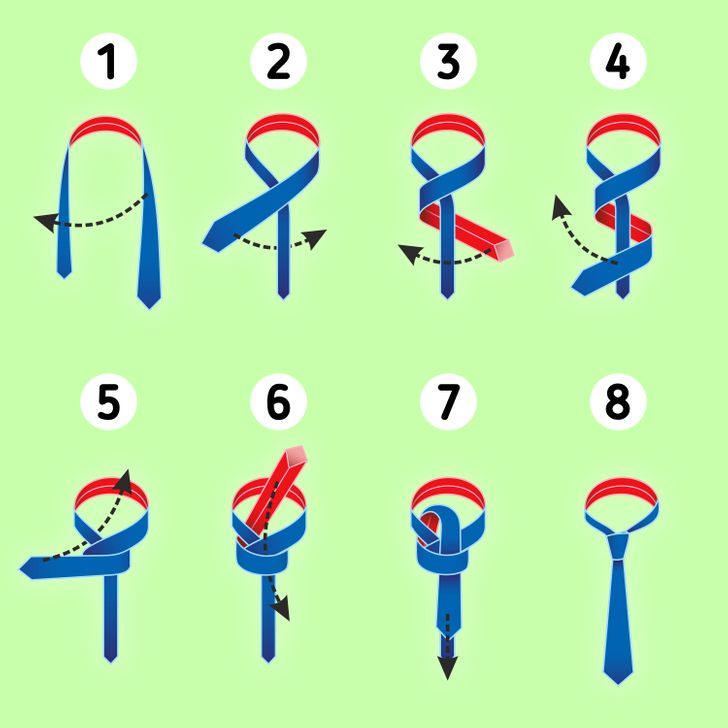
This is the easiest way for beginners to tie a necktie. As a result, you’ll get a thin, asymmetrical knot that looks simple and elegant at the same time. It’s suitable for any necktie and collars of different shapes.
🔷 Put the tie around your neck. The wide end should be on the left side of your chest and lower than the opposite end.
🔷 Cross the ends so that the wide end is on top of the narrow end and then goes under it to the left side of your chest.
🔷 Bring the wide end to the right side of your chest, overlapping the narrow end, then bring it up through the neck loop from the inside and tuck into the eyelet.
🔷 Pull the knot closer to your neck and straighten it. Done!
Van Wijk knot
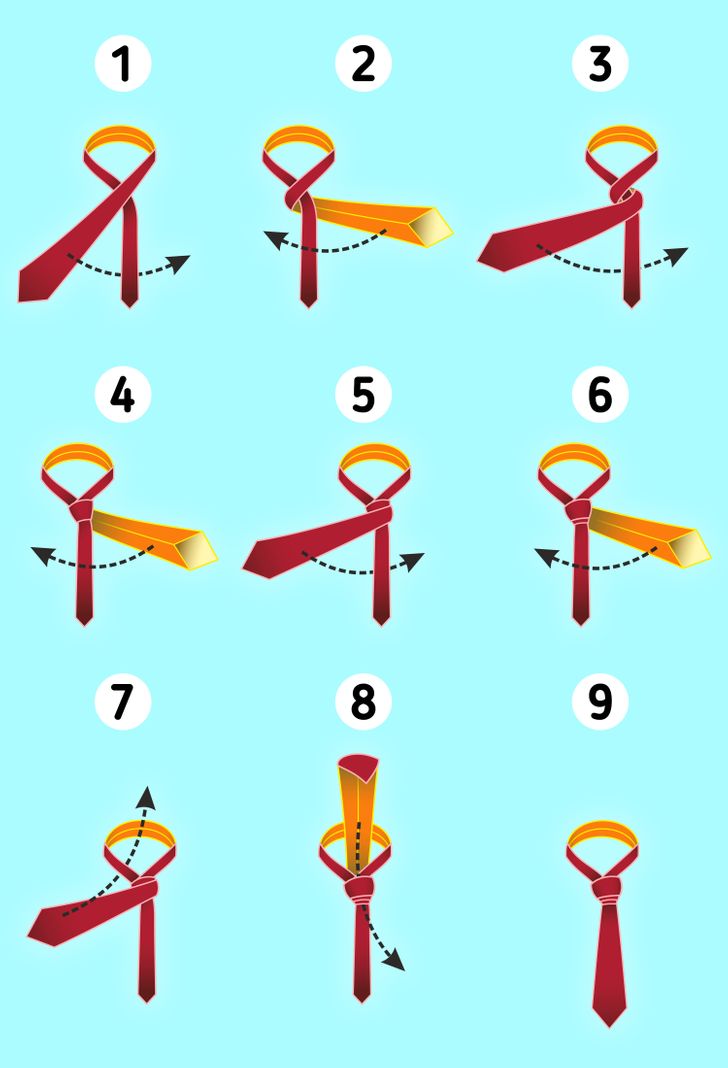
This unusual cylindrical knot was invented by artist Lisa Van Wijk. It’s versatile and will look good on any type of tie.
🔷 Put the tie around your neck, face up. The wide end should be on the left side of your chest and lower than the opposite end.
🔷 Cross the ends so that the wide end is on top of the narrow end. Wrap the wide end of the tie 3 times around the narrow end.
🔷 Then pass the wide end up through the neck loop and tuck it into the knot. Pull it up and straighten it. Done!
Pratt knot
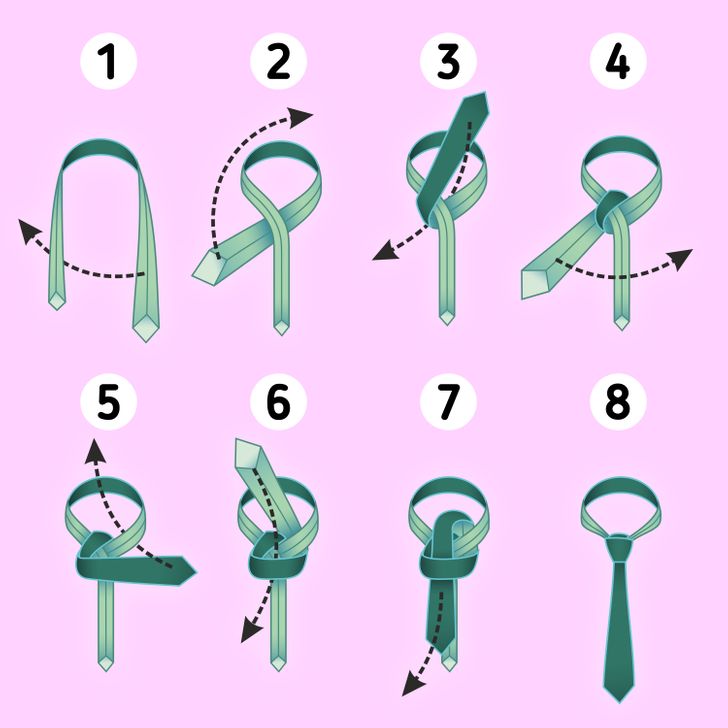
This is another medium-sized universal knot. It’s named after its inventor, Jerry Pratt, an employee of the Chamber of Commerce. It’s perfect for shirts with rounded collars.
🔷 Put the tie around your neck with the backside of your tie facing forward. The wide end should be on the left side of the chest and lower than the narrow end.
🔷 Cross the ends so that the wide end is under the narrow end and pull it from above through the resulting neck loop.
🔷 Wrap the resulting knot with the wide end, bring it to the left, under the loop, and pull it up. Now just tuck the wide end into the knot and pull down. Done!
Murrell knot
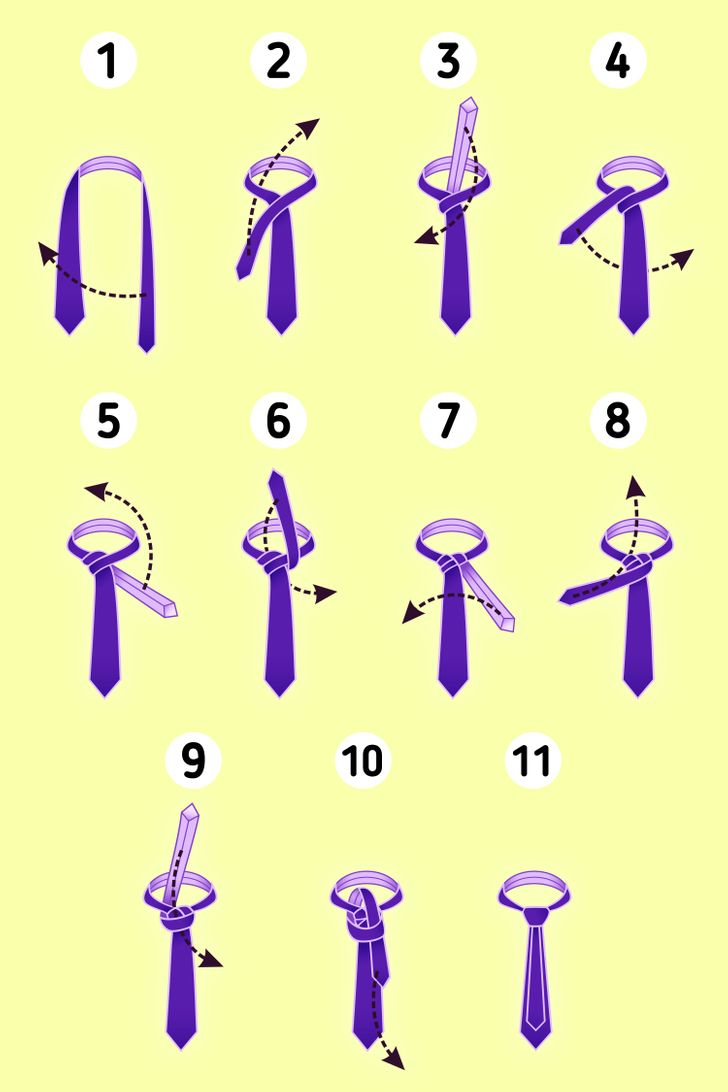
This unusual knot was invented by Brent Murrell not so long ago. Unlike classic knots, this one requires the narrow end of the tie to be on top, and the knot looks symmetrical and slightly elongated, so it’s perfect for shirts with a wide collar.
🔷 Put the tie around your neck, face up. The wide end should be on the right side of the chest and higher than the narrow end.
🔷 Wrap the narrow end around the wide one and pull it through the neck loop upward, bringing it to the right side of your chest. Then pass it under the wider end so that it’s on the left side of your chest.
🔷 Now tuck it into the neck loop, upward, in front of the main knot, pull it back to the left side of the chest, and wrap it around the knot again.
🔷 Now that the narrow end is on the right side of your chest again, pull it through the loop, upward.
🔷 All that’s left to do is tuck the narrow end of the tie into the knot from above and pull it down, smoothing out the tie. Done!
Bonus: how to tie a necktie in 5 seconds
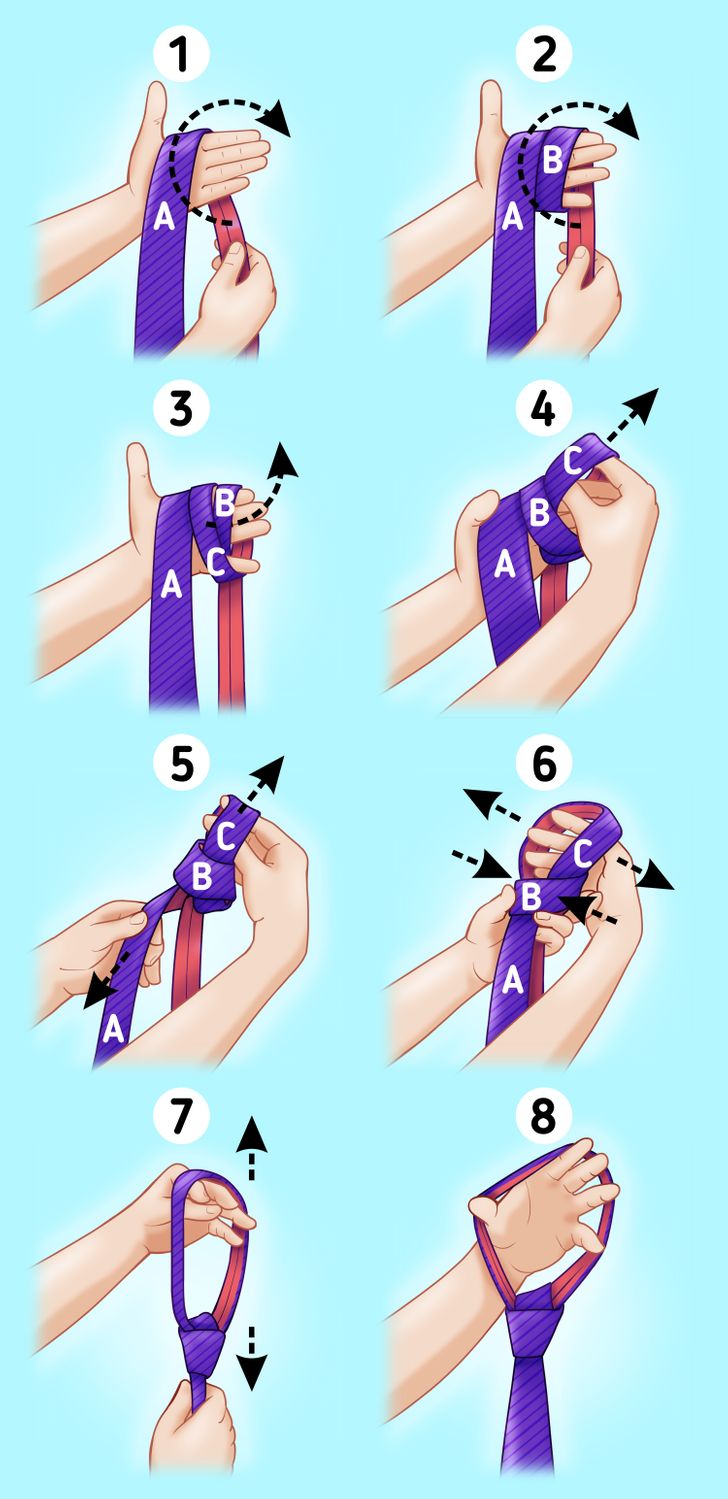
This is an easy way to tie a necktie on your hands, which allows you to put it on and off your neck without untying it. The result is a simple knot.
🔷 Take the tie in your hand with the wide end’s right side facing forward.
🔷 Wrap your hand with the narrow end 2 times.
🔷 Take the outermost loop and pass the remaining 2 loops through it to form a knot. Hold it with your other hand.
🔷Now pull the narrow loop upward until the tie is pulled into the correct simple knot. Done!