10 Adorable Polymer Clay and Epoxy Resin Mini Crafts Step-by-Step
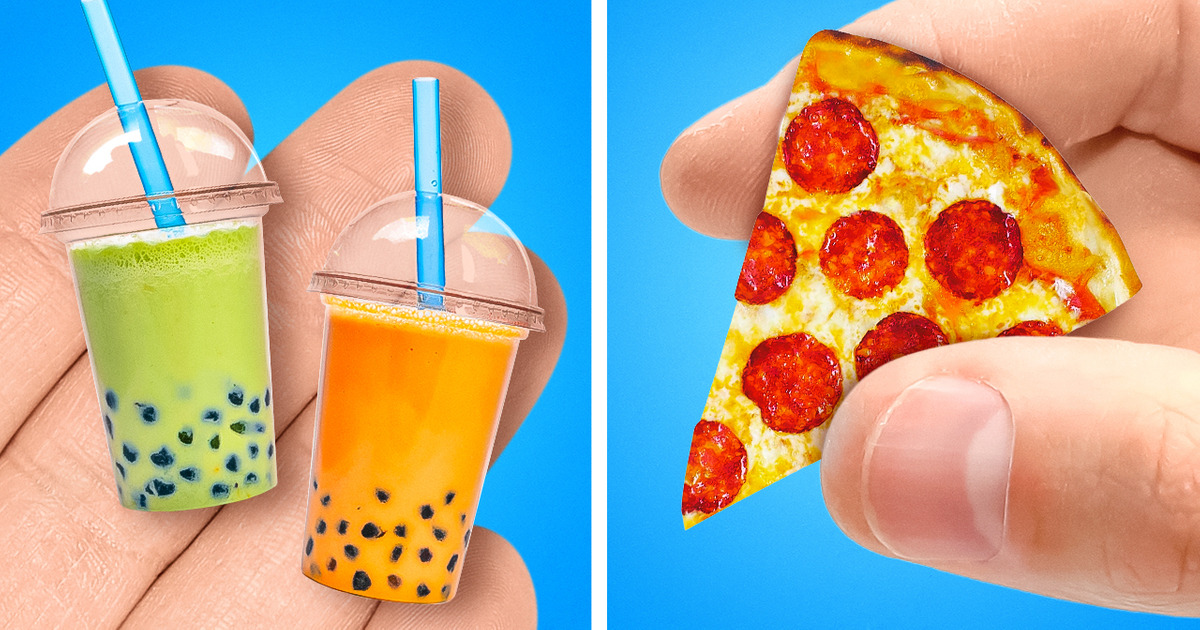
Welcome to the magical world of mini crafts! We’ll dive into the art of creating tiny treasures using polymer clay and epoxy resin. Join us as we sculpt, mold, and design intricate miniature masterpieces that will leave you in awe. So, gather your materials and let your creativity run wild as we embark on this exciting journey of mini craft-making!
1. USB Donut
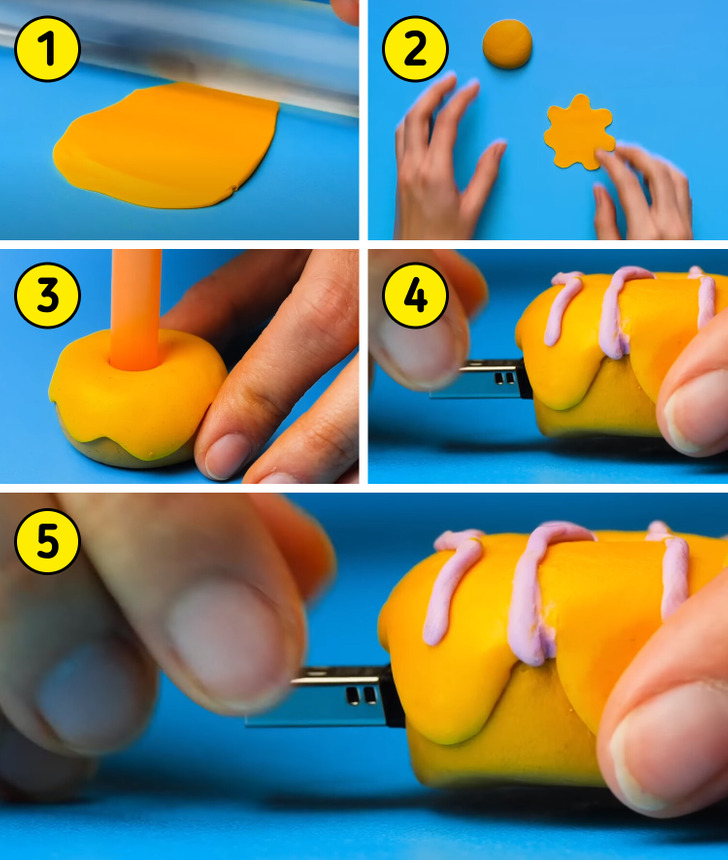
You will need:
- Brown, orange, and pink polymer clay
- A straw
- USB external drive
How to do it:
- Form an orange polymer clay ball to create the donut glaze.
- Make a brown polymer clay ball.
- Place the glaze on the brown ball and use a straw to create the inner hole.
- While the polymer clay is still fresh, insert the USB external drive into one of its sides, and let it dry.
2. Decorated Mobile
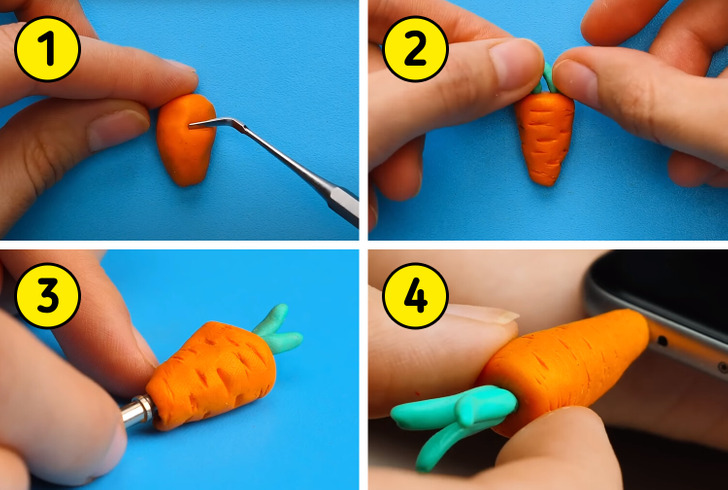
You will need:
- Orange and green polymer clay
- Old headphones
How to do it:
- Create a cone shape with the orange polymer clay and use a toothpick or similar to draw asymmetrical horizontal lines for texture.
- Shape a thin strip of green polymer clay and cut three small strips to create the top leaves.
- Cut the plug from the old headphones and insert them from the bottom of the carrot while the polymer clay is still soft.
- Allow it to dry completely.
3. Forever Lipstick
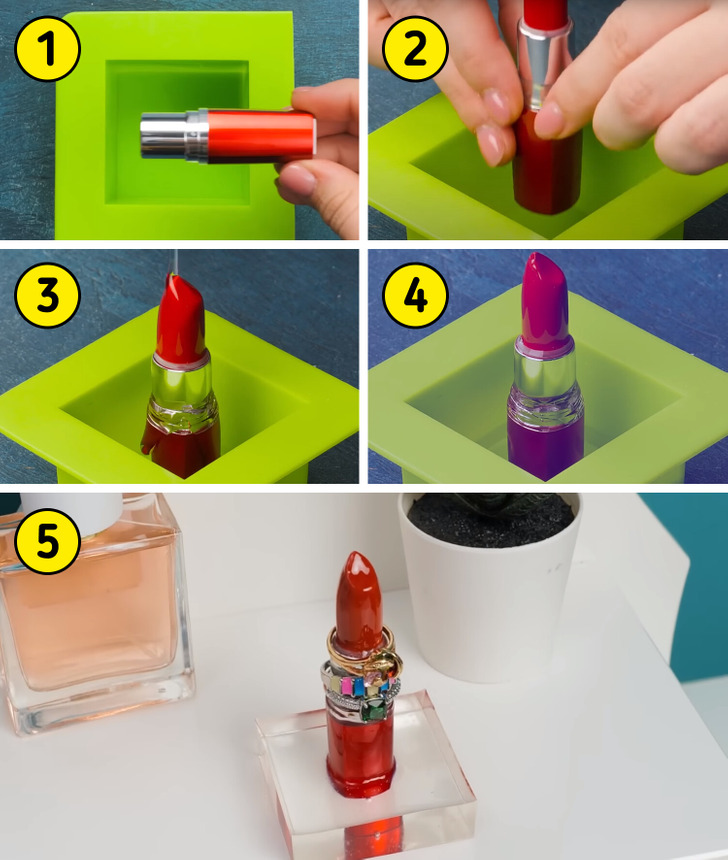
You will need:
- UV resin and lamp
- Lipstick
- Mold
How to do it:
- Place the lipstick upright in the center of the mold.
- Pour UV resin over it, making sure to fully cover the lipstick, while adding enough resin in the mold to create a stable base.
- Cure it under a UV lamp and then demold it.
4. Sailor Pendant
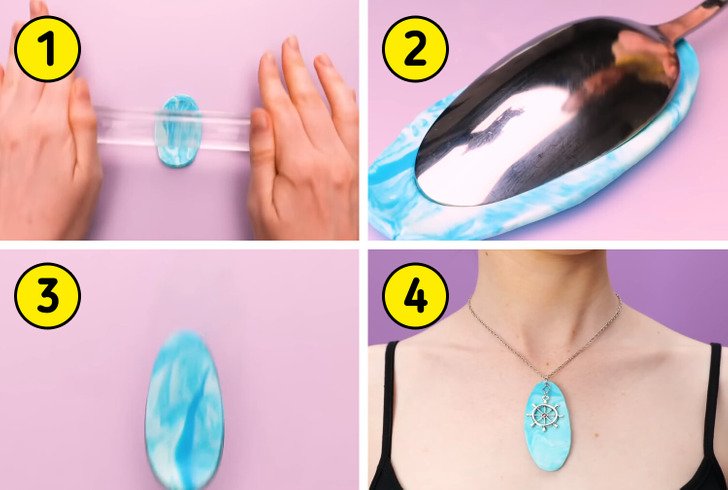
You will need:
- Blue and white polymer clay
- Rolling pin and spoon
- Ship’s wheel pendant or similar
- Jump ring and chain
How to do it:
- Create a marbled effect by mixing blue and white polymer clay and shaping it into a small ball.
- Flatten the clay ball and use a spoon to cut out an oval shape.
- Place the pendant in the center of the oval and attach the jump ring for the chain at the top.
- Allow it to dry thoroughly before lifting it from the work surface and attaching it to the chain.
5. Shell Pendant
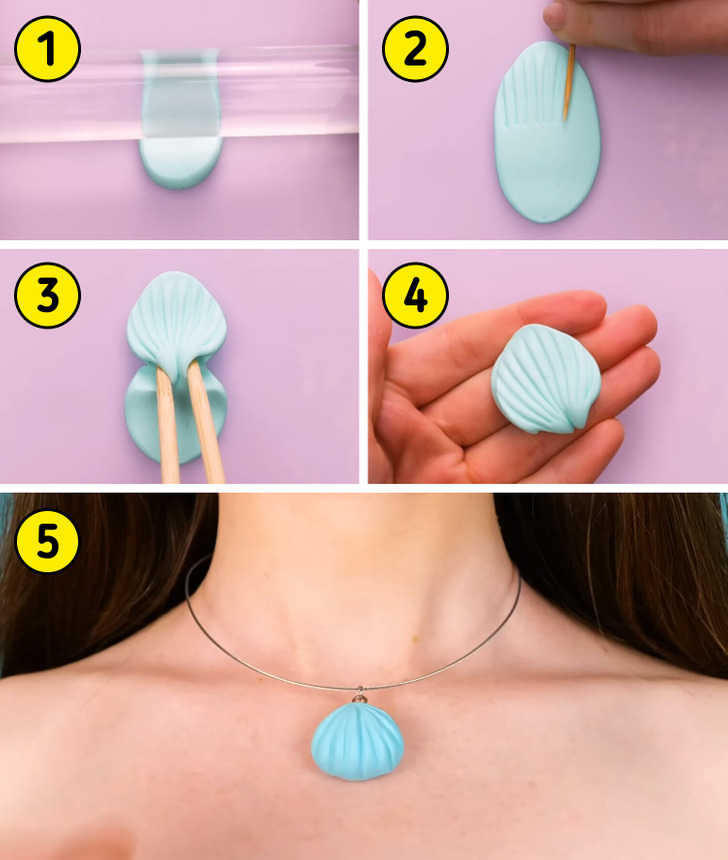
You will need:
- Blue polymer clay
- Rolling pin, toothpick, and small sticks
- Jump ring and chain
How to do it:
- Create a small ball from blue polymer clay.
- Flatten the clay ball to create an oval shape.
- Use a toothpick to mark vertical lines on the clay to give it the texture of a seashell.
- Using the small sticks, press the center of the oval and cut the piece along that line.
- Attach the jump ring to the top of the seashell and allow it to dry completely before lifting it from the work surface and placing it on the chain.
6. Macaron Headphone Holder
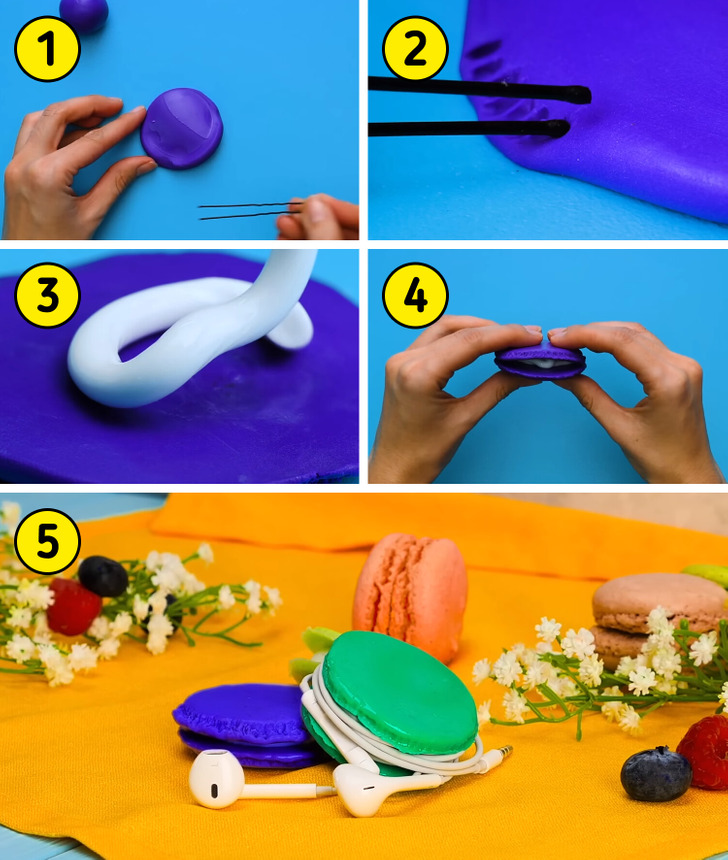
You will need:
- White and colored polymer clay
- Hairpin or toothpick
- Flatten two same-sized balls of colored polymer clay to create the two macaron shells
How to do it:
- Do not flatten them too much; they don’t need to be very thin.
- Use a hairpin or toothpick to add texture to the edges of both circles.
- Create a strip of white polymer clay and shape it into a spiral on top of one of the macaron shells.
- Place the other shell on top, press gently, and let it dry.
7. Nutella Pencil Sharpener
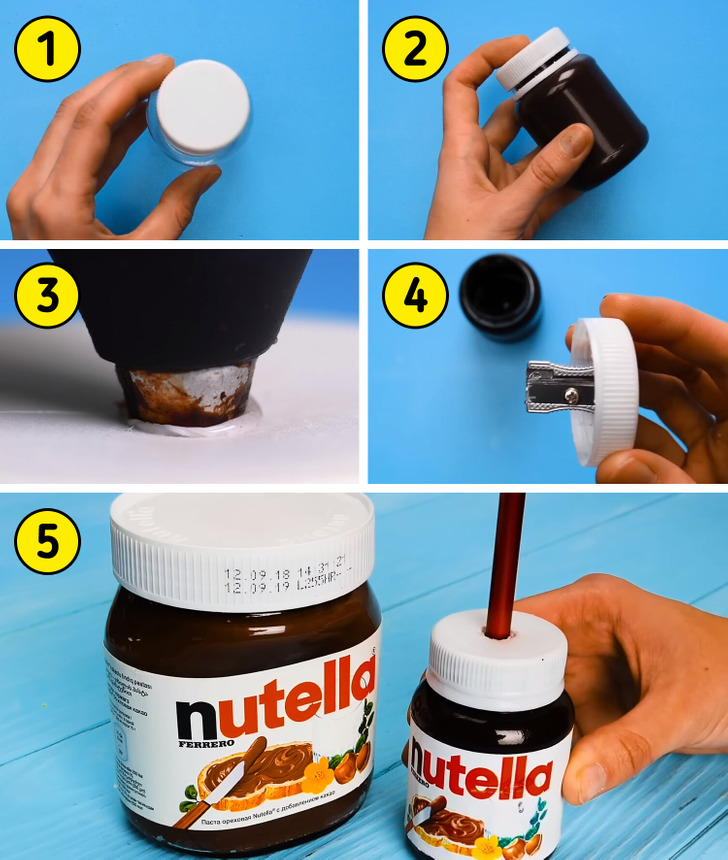
You will need:
- Plastic container with lid
- Pencil sharpener
- Hot glue and paint
- Printed product label
How to do it:
- Clean the plastic container and peel off the original label from the container.
- Paint the container and allow it to dry completely before proceeding.
- Create a hole in the container’s lid, ensuring it is large enough to comfortably fit the pencil sharpener.
- Paste the pencil sharpener on the inside lid’s face and ensure its hole aligns with the lid’s hole.
- Attach the printed product label to the container and let the glue dry completely before using.
8. ESC Hamburger
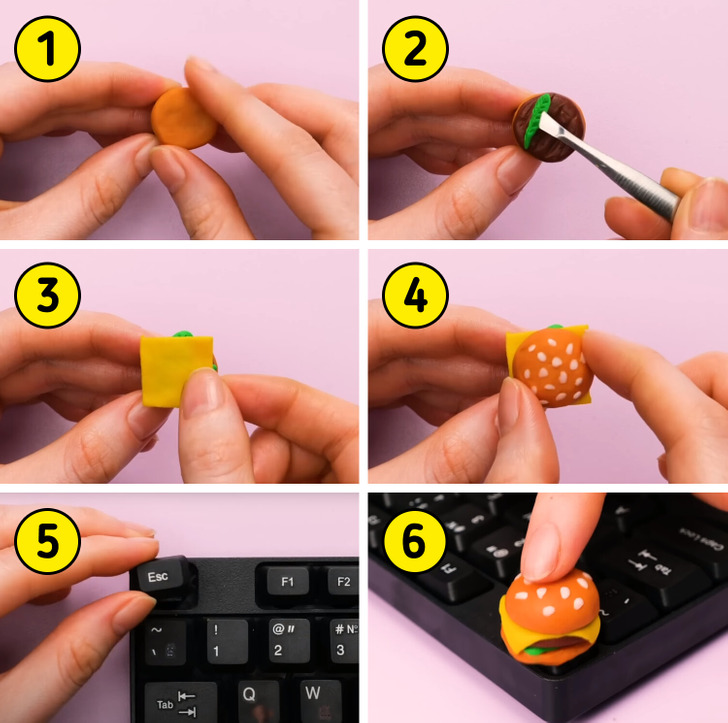
You will need:
- Colored polymer clay
- Toothpick or similar tool
How to do it:
- Shape each ingredient of the burger one by one: Bun, Meat, Lettuce, and Cheese.
- Once they are finished, stack them on top of each other.
- While the polymer clay is still fresh, insert the ESC key from your keyboard through the base of the burger.
- Allow it to dry thoroughly before placing it back on the keyboard.
9. Flowers Ring
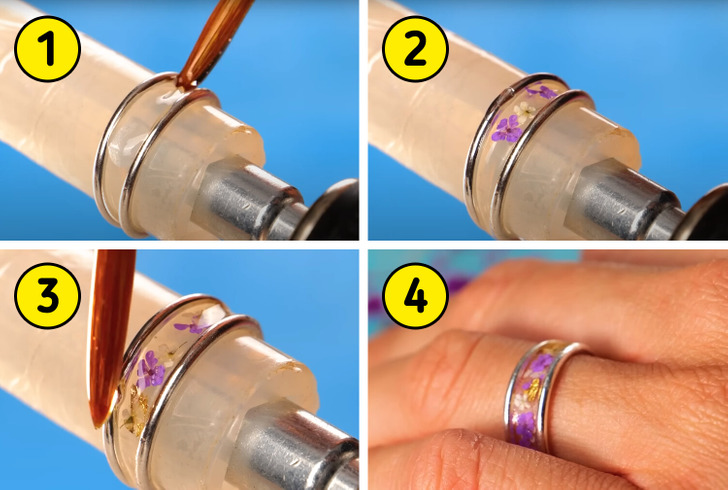
You will need:
- Double ring
- UV resin and lamp
- Dried flowers or everlasting blooms
How to do it:
- Place a few drops of UV resin in the channel formed between the two rings.
- Position the dried or everlasting flowers onto the still fresh resin and cover them with resin.
- Cure using the UV lamp.
10. Party Time Mobile Case
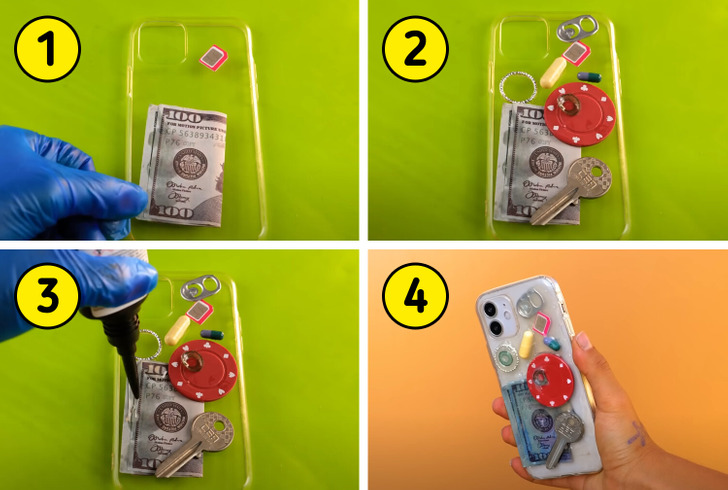
You will need:
- Clear mobile phone case
- Decorative objects
- UV resin and lamp
How to do it:
- Clean the case and place all the decorative objects you desire onto it in your preferred arrangement.
- One by one, coat the objects with resin, ensuring complete coverage both on top and at their base, as well as the connection between the object and the mobile phone case.
- Once every corner is covered, cure using the UV lamp.
Check out more adorable mini crafts using polymer clay and epoxy resin
Share This Article