10 Amazing DIY Jewelry Pieces for Any Occasion and Style

Get ready for some amazing projects and creative solutions for any occasion! Join us as we explore the versatility and unique capabilities of both the glue gun and the 3D pen. Whether you’re an experienced crafter or just starting out, this video is filled with inspiration and practical tips.
1. Creative Ring

You will need:
- 3D Pen
- Syringe, thin tube, or any other circular object with a similar diameter to fingers that can be used for shaping
How to do it:
- Start by drawing a flower on your shaper object with the 3D pen.
- Draw another one a few millimeters below, without touching the previous one.
- Connect them together with several lines, looping around the back.
- Allow it to dry thoroughly before using.

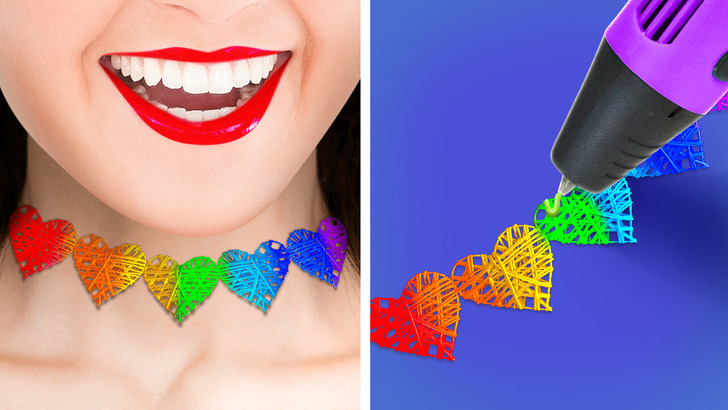
Following the same technique, you can create choker-style necklaces and bracelets as well. Let your imagination run wild, and you’ll discover an endless array of possibilities.
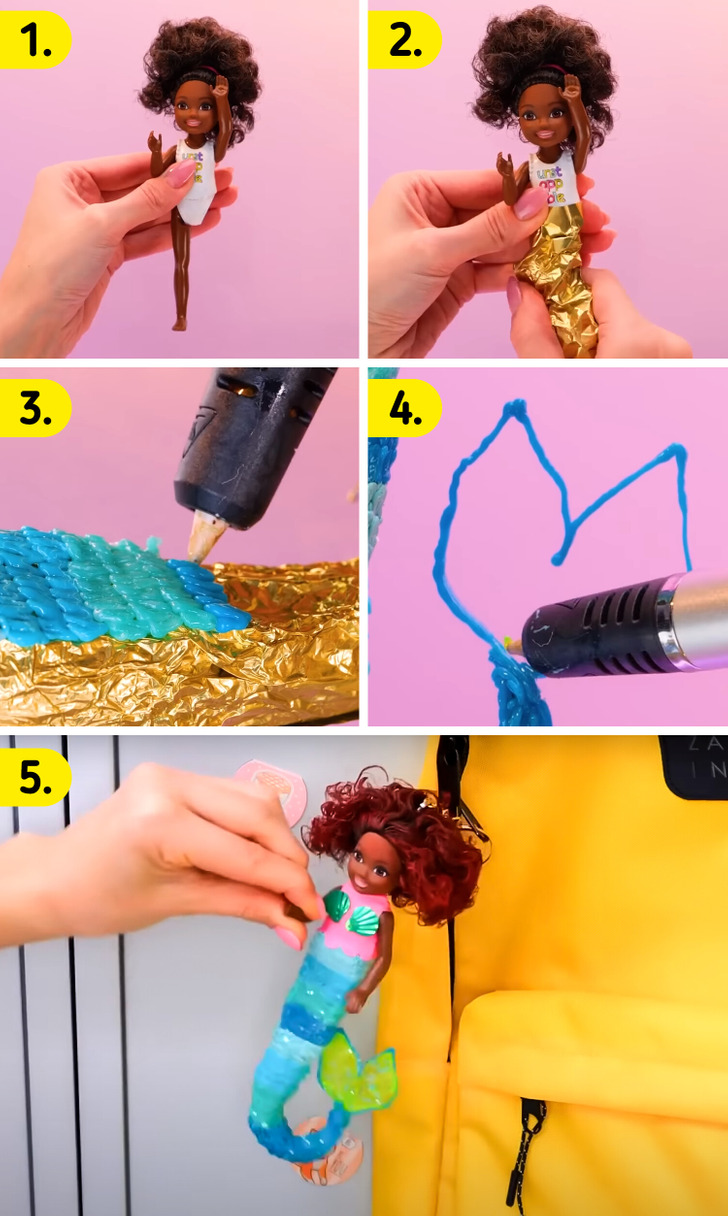
2. Mermaid keychain

You will need:
- Doll
- Aluminum foil
- 3D pen
- Keyring hook
How to do it:
- Wrap the doll’s legs in aluminum foil, using the foil to create the basic shape of the mermaid tail.
- With the 3D pen, start drawing small scales to completely cover the tail from the front and back.
- The fins that will go at the end of the tail will be created solely with the 3D pen, outlining their shape first and then filling them in.
- Allow it to dry thoroughly before lifting it from the surface, attaching the keyring hook, and hanging it up.
3. Double-sided hairbrush

You will need:
- Brushes
- Binder clips
- Hot glue
How to do it:
- Attach the binder clip to the brush using hot glue.
- Allow it to dry thoroughly, and in the same manner, attach the other side.
- Let it dry well before using.
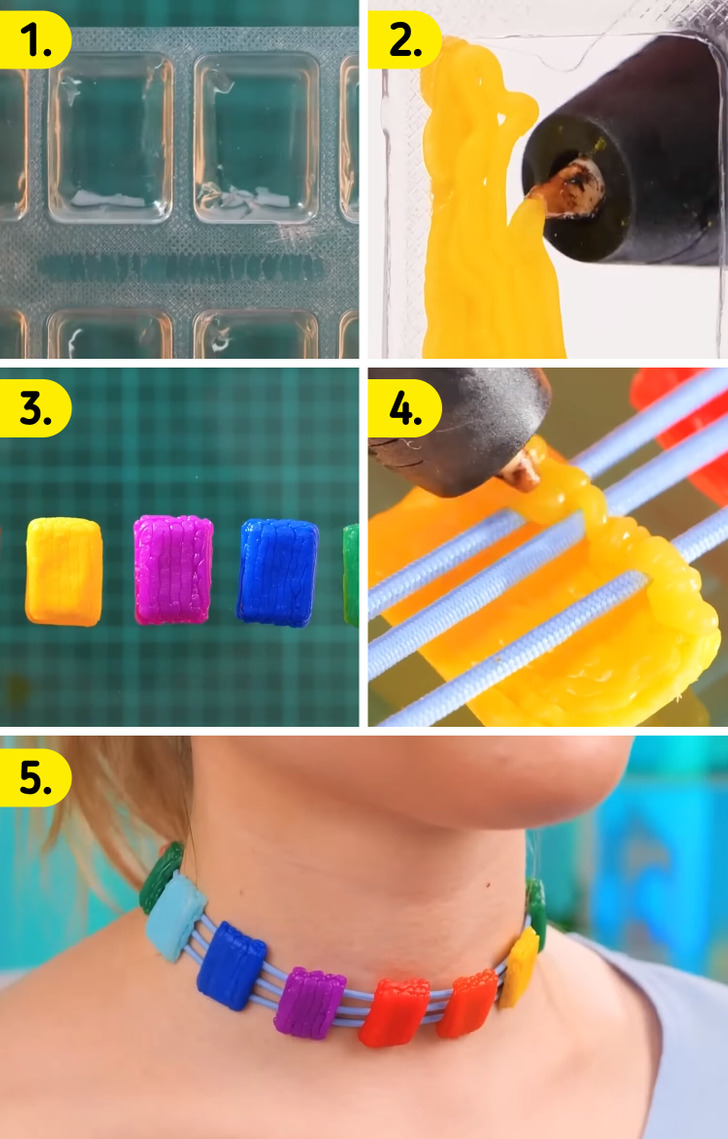
4. Colorful choker

You will need:
- 3D pen
- Elastic cord
How to do it:
- Using the 3D pen, either with a template or freehand, draw small rectangles in various colors and allow them to fully dry.
- Once dry, arrange them with their front side facing down.
- Attach them together by gluing an elastic cord to the back of each rectangle.
5. Retro-style ring

You will need:
- 3D pen
- Syringe, thin tube, or any other circular object with a similar diameter to fingers that can be used for shaping
How to do it:
- Choose the ring shape you want to create.
- Outline its outer shape and then fill it in.
- Next, use the circular object you’ve selected to shape the ring band, tracing several closely overlapped lines to give it more solidity.
- Finally, attach the previously designed shape to the band and let it dry.
6. Ice cream keychain

You will need:
- 3D pen
- Colored baking granules or similar material
How to do it:
- Start by drawing the outer outline of the cone using the 3D pen.
- Then fill it in and add some top lines to give it volume.
- Using a different color, create the ice cream scoop and cover its top with a dark brown shade, as if it’s a layer of chocolate.
- As a final touch, attach some pieces of colored baking granules or the chosen decorating material.
7. Flower bracelet

You will need:
- 3D pen
How to do it:
- We’ll begin by creating the bracelet’s wristband, drawing a wavy line with the 3D pen and then another line crossing over the first one.
- We’ll make the flower by outlining its outer shape with the 3D pen and then filling it in.
- Finally, we’ll attach the flower to the bracelet’s wristband.
8. Resin ring

You will need:
- Epoxy resin
- Dye
- Ring mold and syringe
- Hot glue gun
- Small plastic beads
How to do it:
- We’ll start by coloring a small portion of epoxy resin and, using a syringe, fill the ring mold.
- We’ll let it dry thoroughly and then remove it from the mold.
- Next, we’ll apply a small layer of hot glue to the top of the ring, dip it into the small plastic beads, and allow it to dry.
9. Encapsulated heart pendant

You will need:
- Plaster
- Epoxy resin
- Molds
- Clear nail polish
- Gold foil paper
- Fine wire
How to do it:
- Start by filling one of your chosen molds with plaster and let it solidify.
- Remove it from the mold, apply clear nail polish, place gold foil paper on top, and let it dry again before removing the paper.
- Then, place the piece into another mold and cover it completely with epoxy resin. Allow it to dry thoroughly before removing from the mold and attaching the wire loop for hanging.
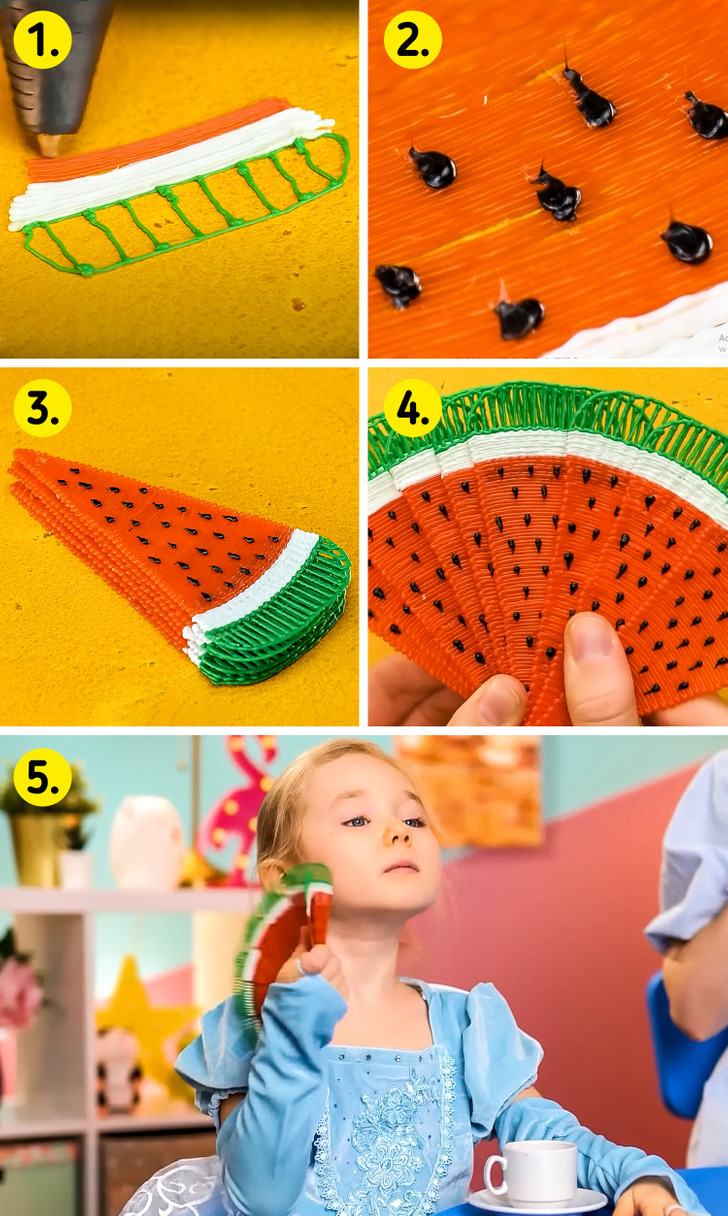
10. Watermelon fan

You will need:
- Multicolored 3D Pen
How to do it:
- Use the 3D pen to draw triangular watermelon slices.
- Once you have eight slices, stack them on top of each other and connect them at their narrowest part to create a fan.
Check out these amazing hot glue and 3D pen DIY crafts
Share This Article