10 Amazing DIY using Polymer Clay, Epoxy Resin and 3D-pen For Crafty People
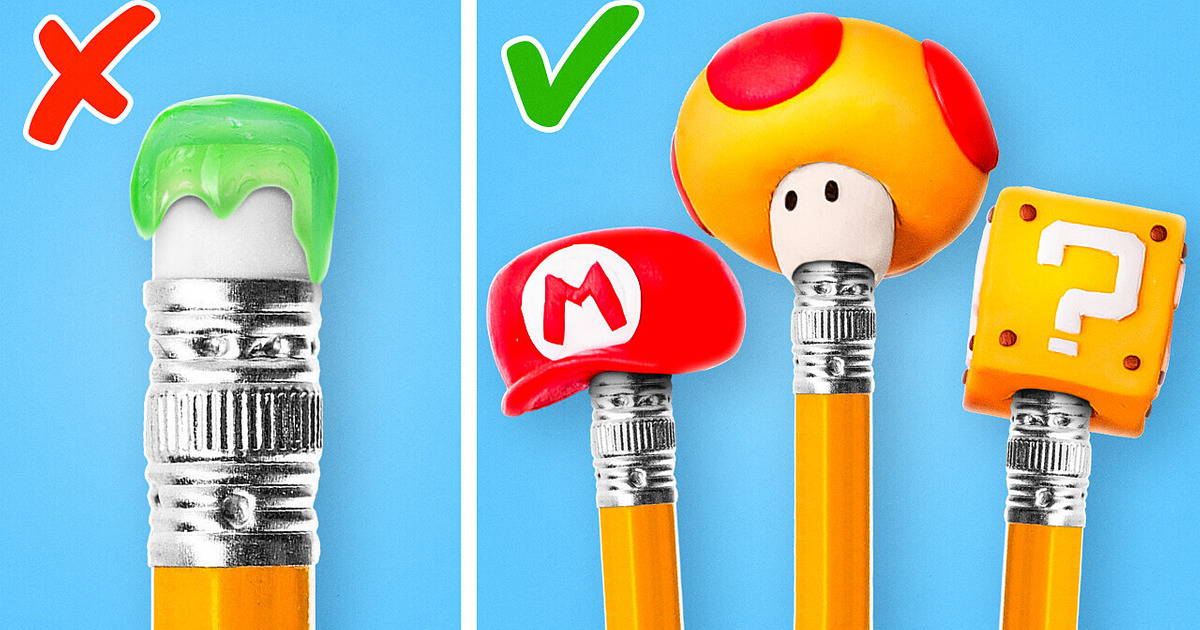
Today, we explore the world of crafting with Polymer Clay, Epoxy Resin, and 3D-pen. We’ll show you some amazing DIY ideas that will inspire your creativity and help you create beautiful and unique crafts. Whether you’re a seasoned crafter or just starting out, we have projects for everyone.
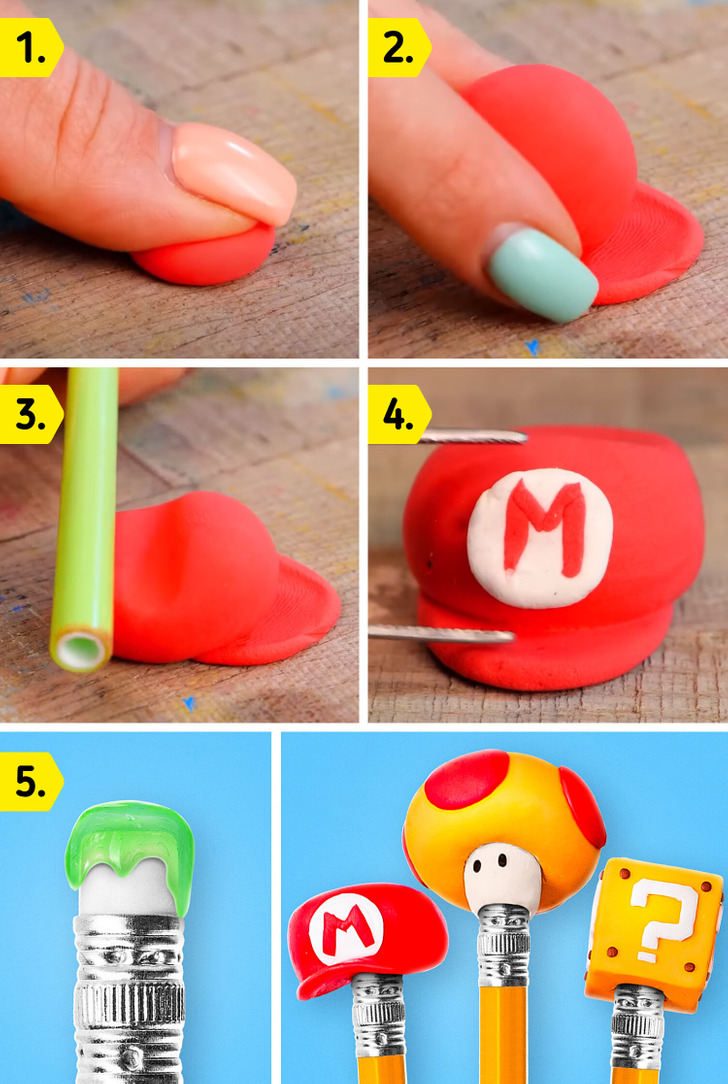
1. Mario Bros Pencils
You will need:
- Colored Polymer Clay
- Pencils
How to do it:
- Mold a small ball from the colored polymer clay and flatten it completely.
- Place another small ball of polymer clay on top of the flattened one without flattening its top.
- Add the details and insert the pencil from the bottom.
- Allow the polymer clay to harden.
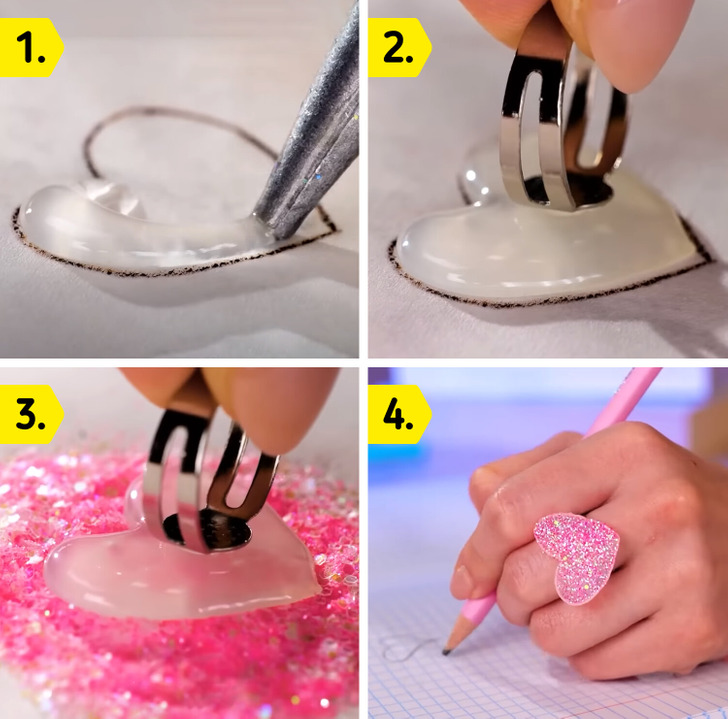
2. Sparkling Ring
You will need:
- Hot Glue
- Glitter
- Ring Base
How to do it:
- Use the hot glue to draw a heart shape, fill it in, and before it’s completely dry, place the ring base in the center.
- Press it onto the glitter and let it dry.
- To protect the glitter and prevent it from falling off, you can apply a coat of clear nail polish on top.
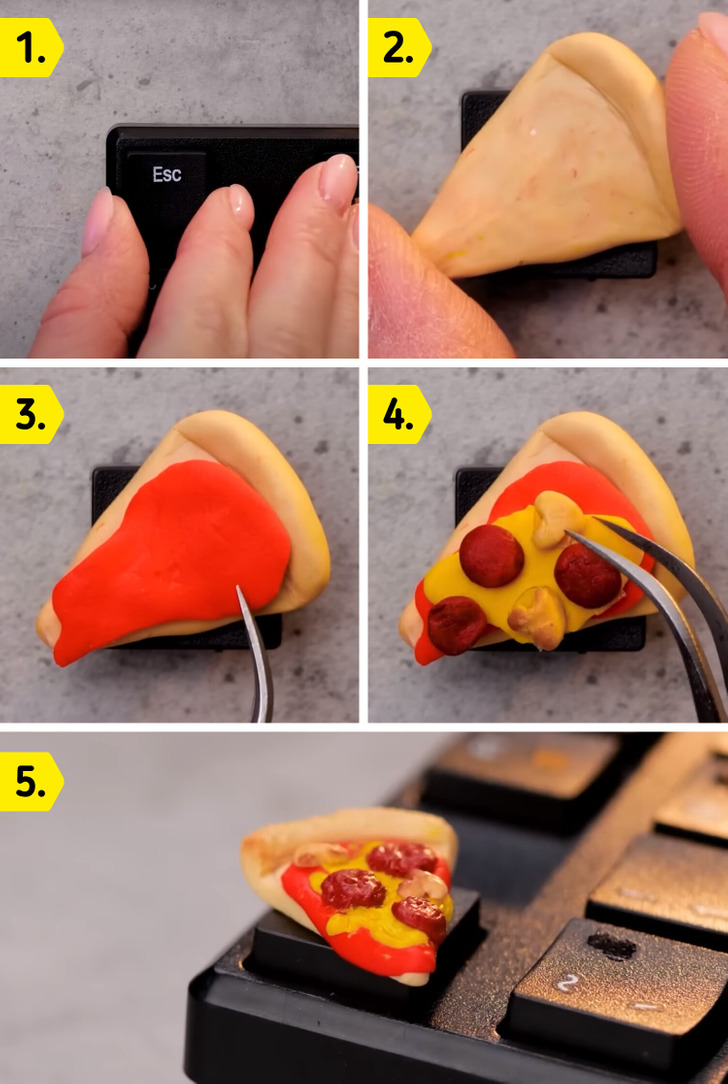
3. Pizza Key
You will need:
- Polymer Clay
- Keyboard
How to do it:
- Remove the key from the keyboard that you want to customize.
- Mold the base of the pizza slice onto it.
- Layer on the different ingredients.
- Let it dry and then reattach it to the keyboard.
4. Donut Paper Clip
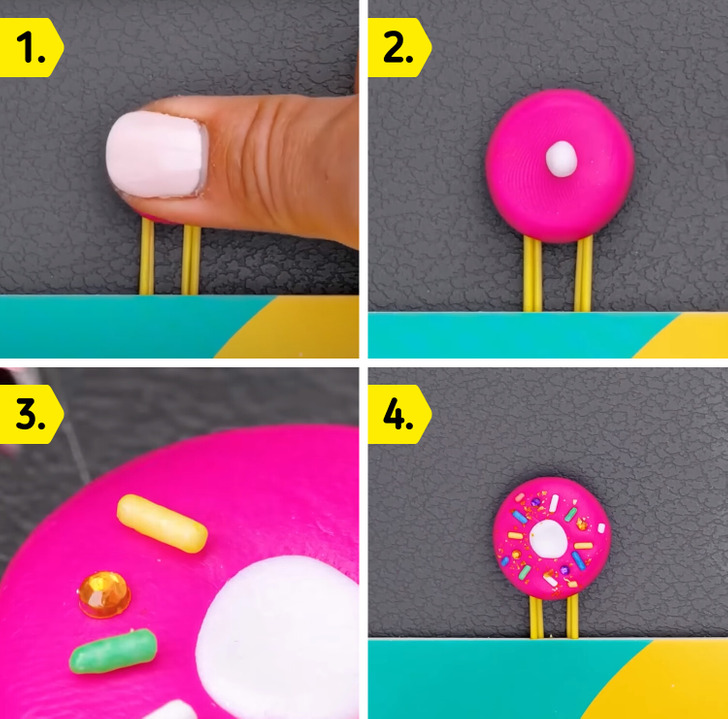
You will need:
- Polymer Clay
- Paper Clip
How to do it:
- Create a small ball of polymer clay and partially flatten it onto the top of the paper clip.
- Add another smaller one in the center and flatten it again.
- Include decorative details and let it dry.
5. Hot Dog Earrings
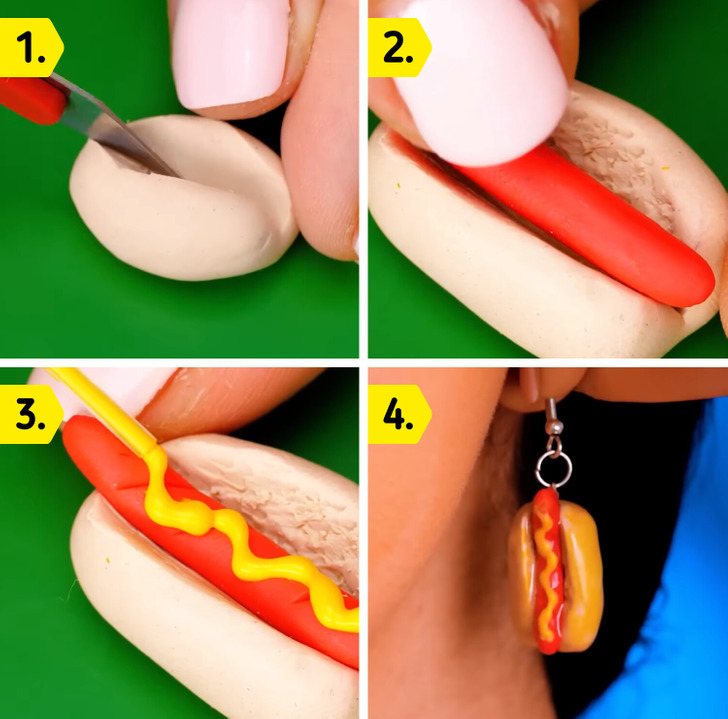
You will need:
- Polymer Clay
- Earring Hook
How to do it:
- Create an oval shape from polymer clay.
- Partially cut it in half and place a rounded strip of polymer clay in the center.
- Add desired details and let it dry.
- Once it’s dry, attach the earring hook to one of its ends.
6. Modern Pen
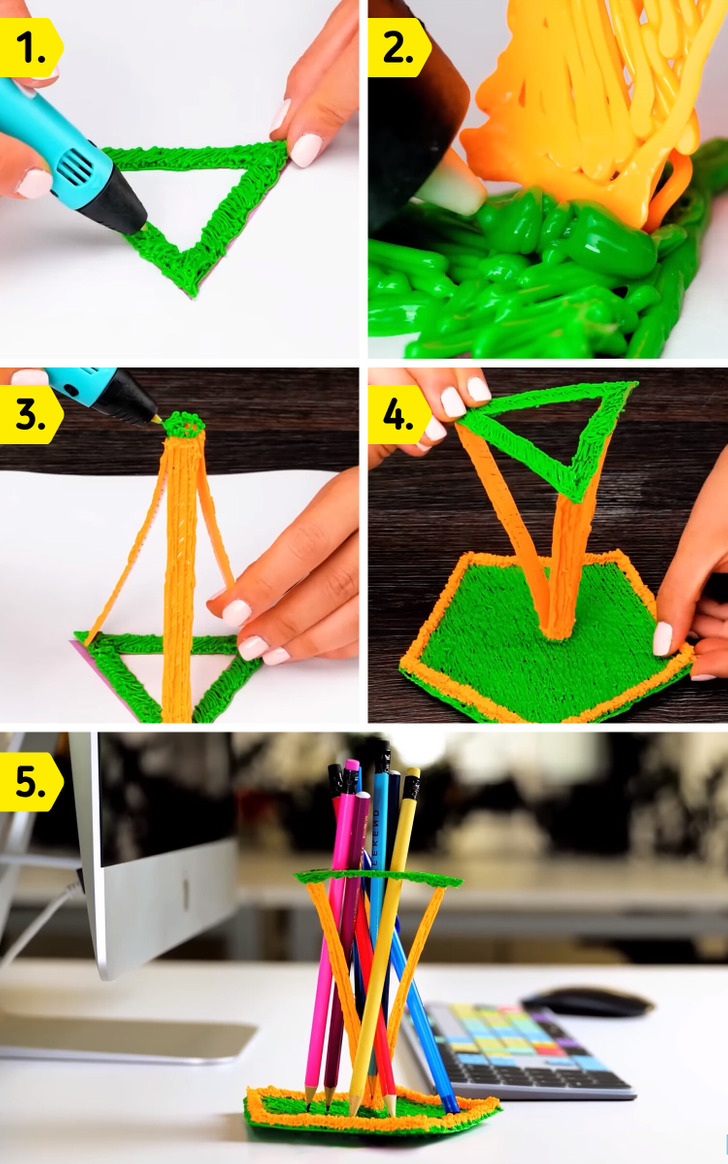
You will need:
- 3D Pen
How to do it:
- Create a triangle using the 3D pen, giving it several layers and thickness for durability.
- Next, create three strips of the same size in the same manner.
- Attach each of the strips to a corner of the triangle.
- Create a flat pentagonal base and attach the tops of the strips to it.
- Let it dry, turn it over, and place the pencils inside the upper triangle.
7. Ring Holder
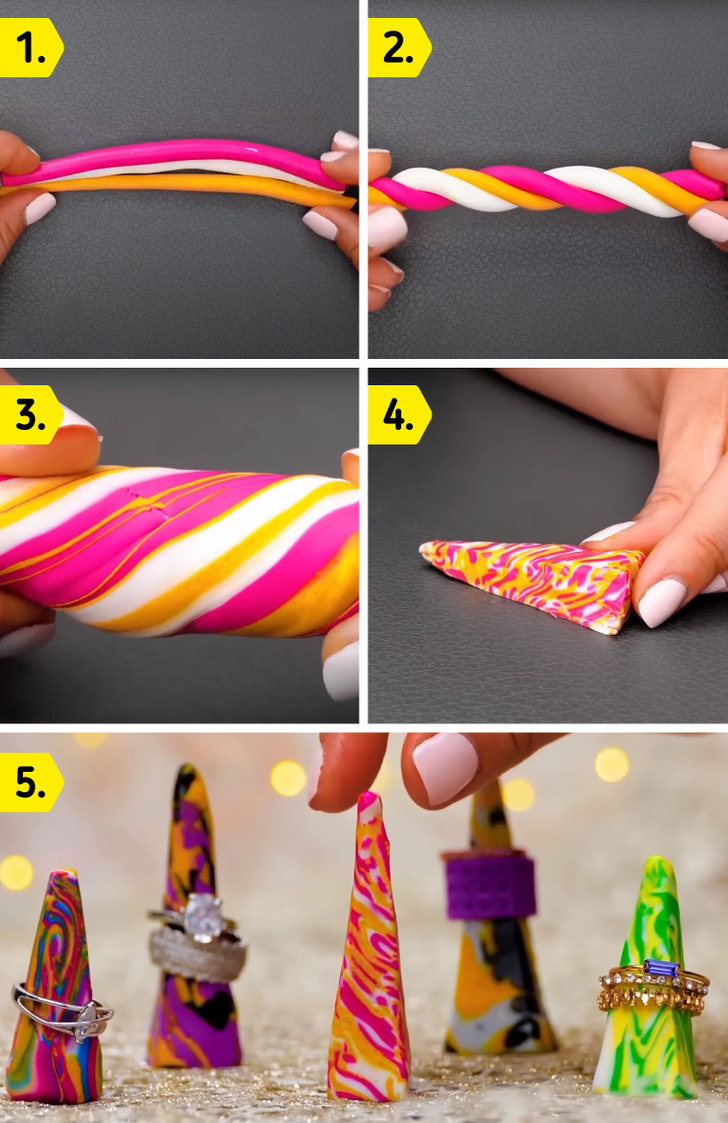
You will need:
- Polymer Clay
How to do it:
- Gather several strips of colored polymer clay and roll them together.
- Knead them slightly to partially blend their colors, creating a marbled effect.
- Shape a three-dimensional triangle, like a pyramid, and let it dry.
8. Heart-shaped Box
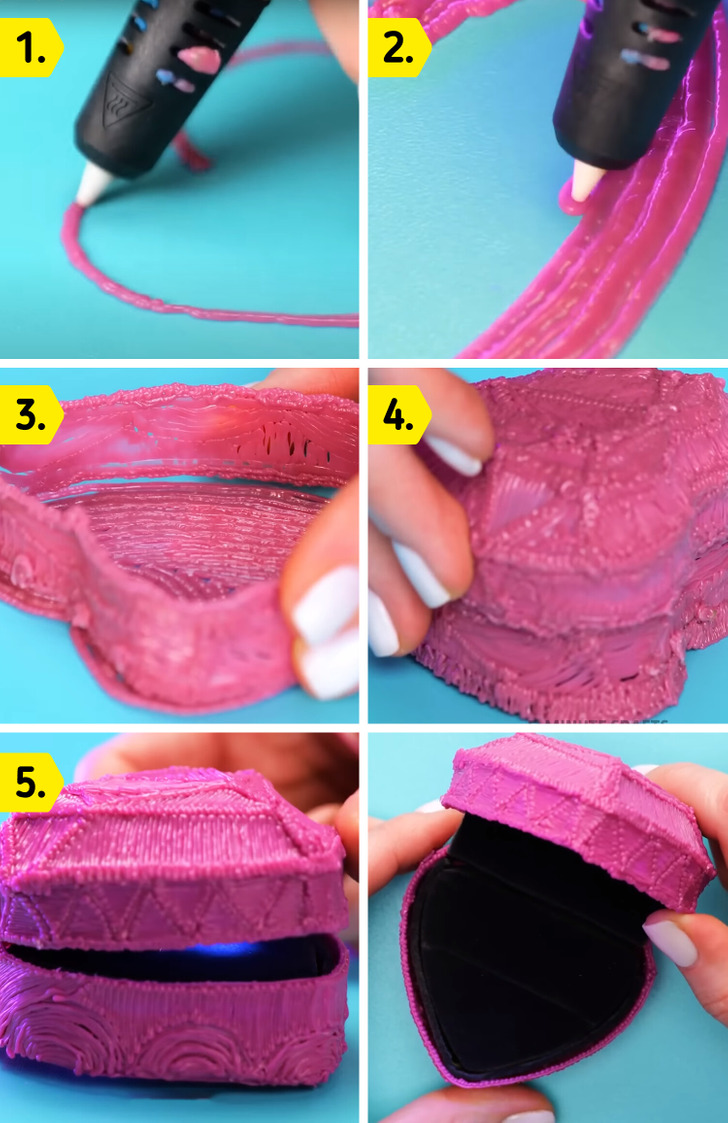
You will need:
- 3D Pen
How to do it:
- Start by drawing a heart and completely filling its interior.
- Then create the side walls and attach them to the base heart.
- In the same manner, but slightly enlarging the size of the heart, create the lid of the box.
9. Soda Tab Table
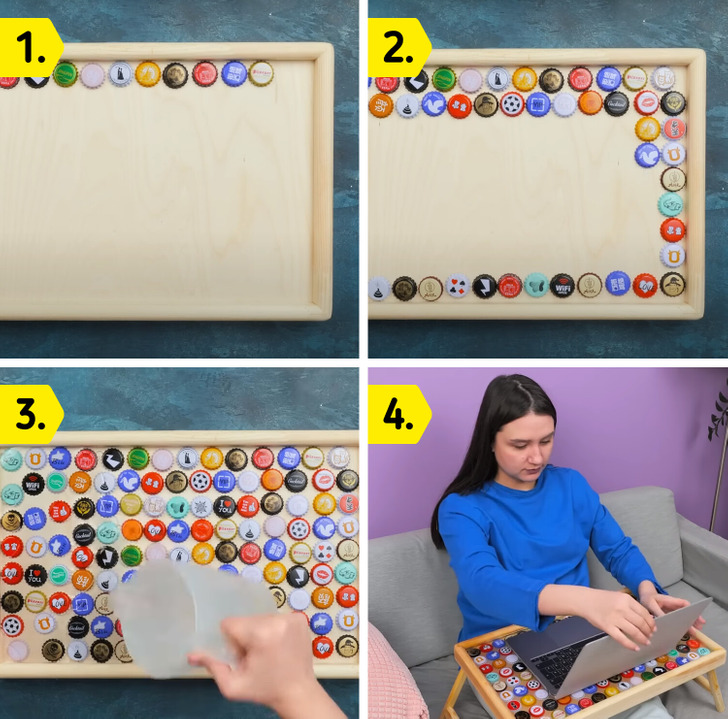
You will need:
- Tray
- Metal soda can tabs
- Epoxy Resin
How to do it:
- Place the metal soda can tabs side by side along the entire surface of the tray.
- Cover them with epoxy resin and let it dry.
10. Orange Coasters
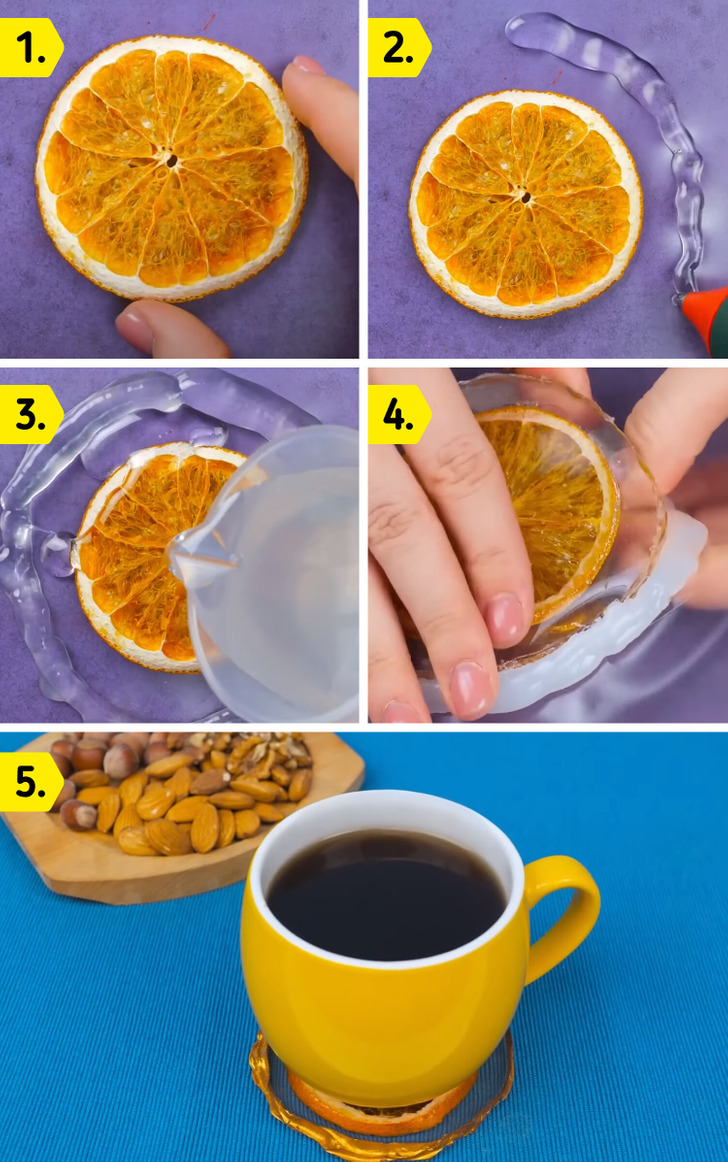
You will need:
- Orange slice
- Hot glue
- Epoxy resin
How to do it:
- Place an orange slice on a smooth surface and create a border around it using hot glue.
- Once the hot glue is dry, completely cover the orange slice with epoxy resin.
- After the resin has dried, carefully lift it, and repeat the process for as many coasters as you want to make.
Check out more amazing DIY ideas using polymer clay, epoxy resin, and a 3D pen
Share This Article