10 Creative School DIY Ideas For Smart Parents And Students
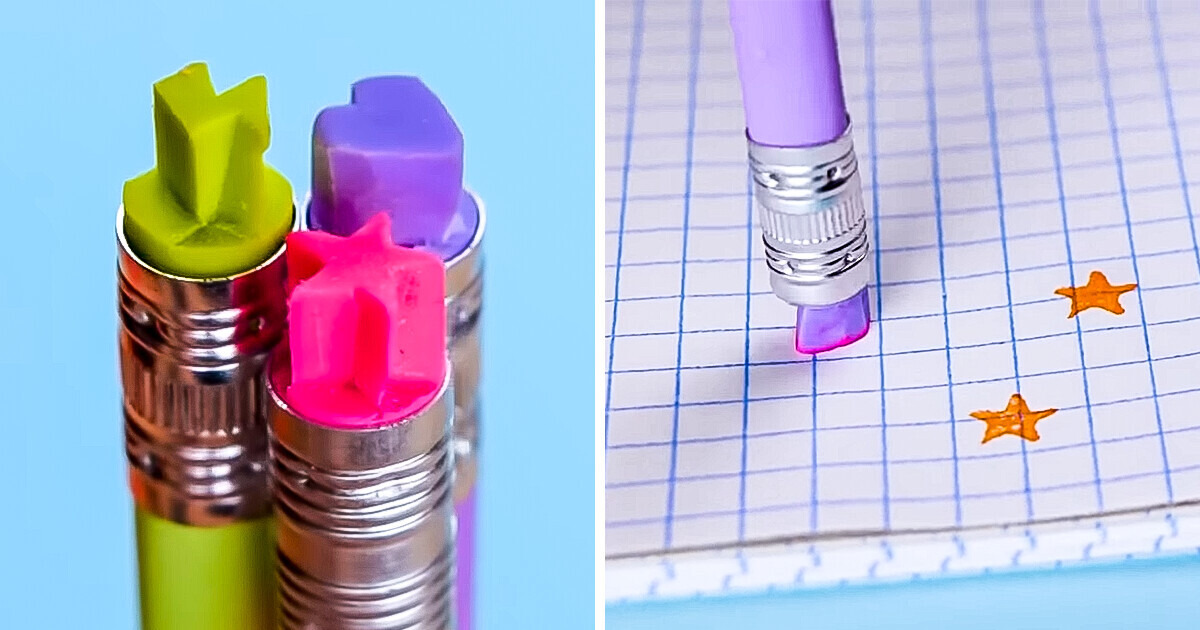
Today, we’re bringing you a collection of cool school tricks and hacks that will make the learning experience fun and exciting for both smart parents and students. Get ready to discover a world of creative and funny DIY ideas that will help you navigate through school with ease and style. From clever organization hacks to innovative study techniques, we’ve got you covered!
1. Stamps
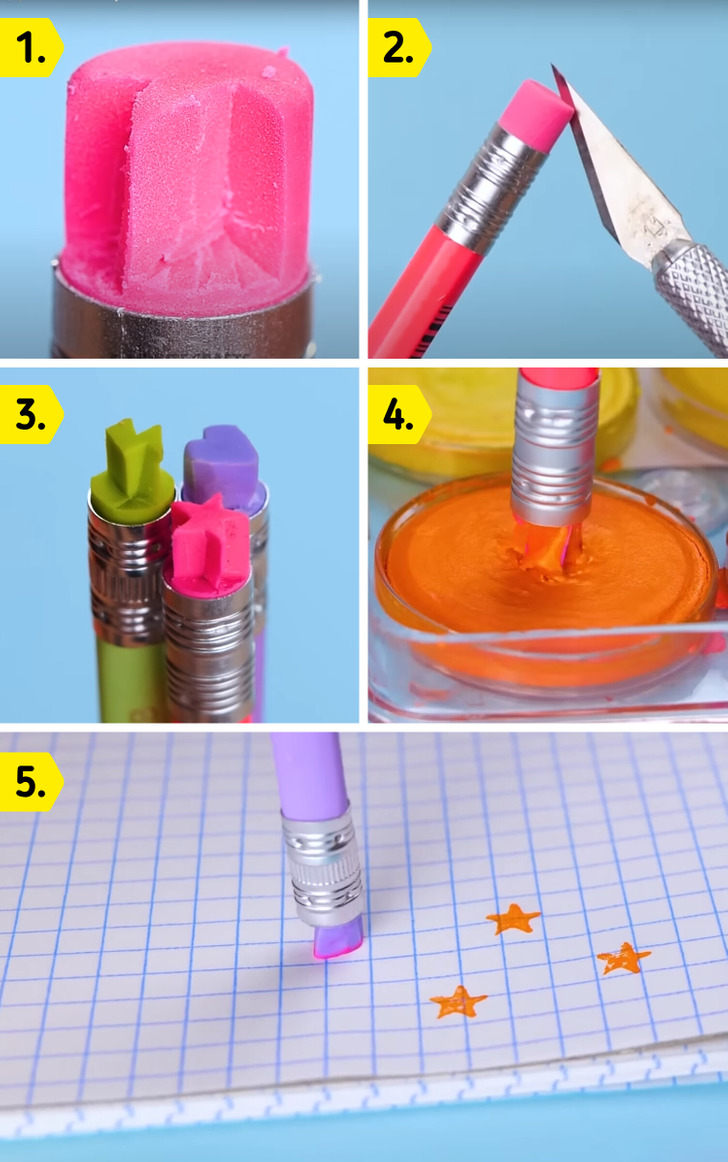
You will need:
- Pencils with erasers
- Cutter
- Paint
How to do it:
- Carve geometric shapes into the eraser with the cutter.
- Press the eraser onto the paint and stamp the geometric shape onto the paper.
2. Pom-Pom Pencil Case
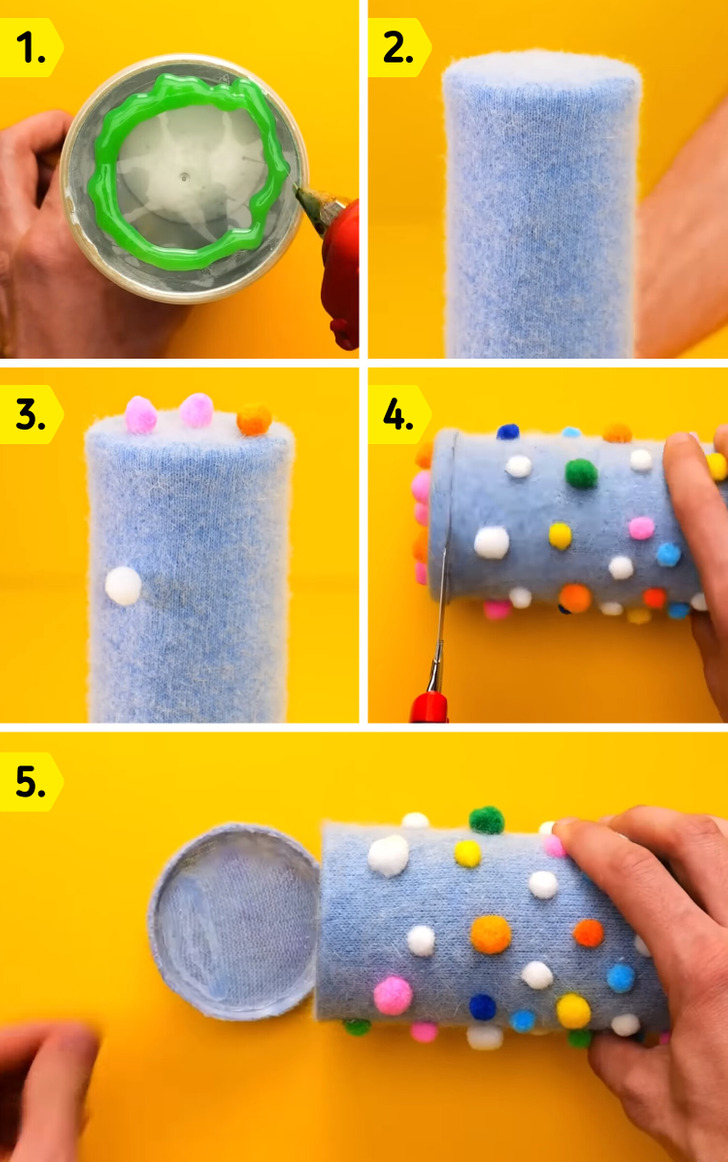
You will need:
- Snack can
- Sock
- Hot glue
- Pom-poms
How to do it:
- Apply hot glue to the can’s bottom and wrap it with the sock.
- Seal the sock with hot glue at the bottom.
- Attach pom-poms all over the surface.
- Cut the sock partially at the lid level for easy opening.
3. Cat Bag
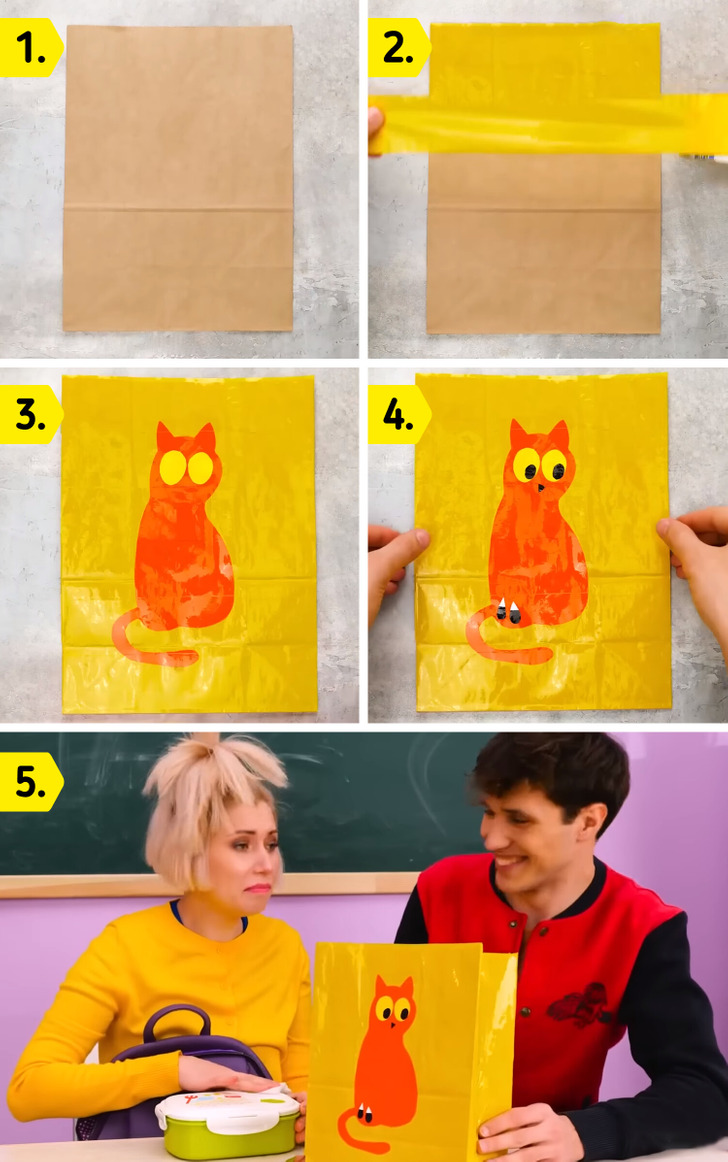
You will need:
- Paper bag
- Adhesive tape
- Paint
How to do it:
- Completely cover the backside of the paper bag with adhesive tape.
- Paint the desired design on the front side and let it dry.
- Also, cover the front side with adhesive tape.
4. Macaroon Earrings
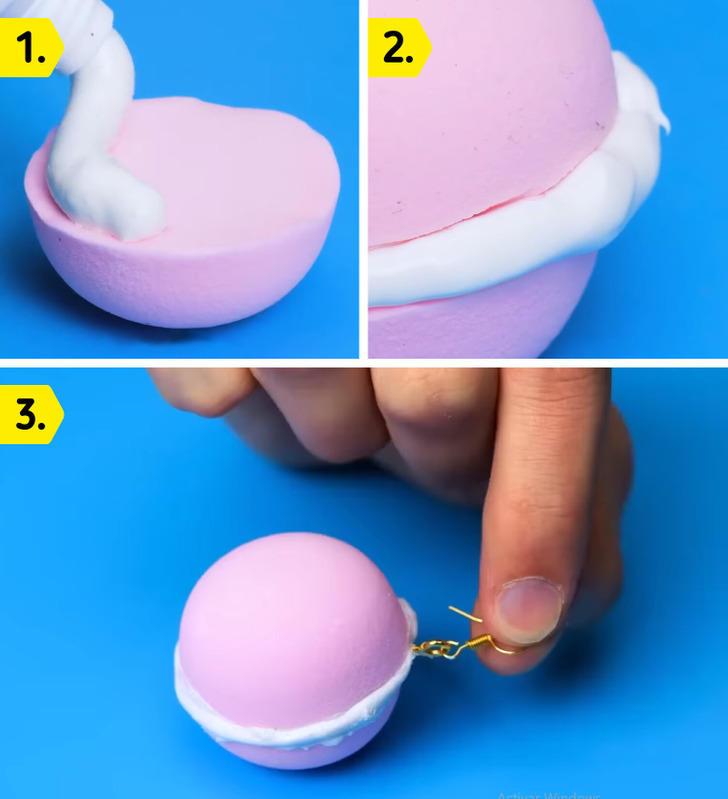
You will need:
- Plastic ball
- Polyurethane foam
- Earring hook
How to do it:
- Cut the plastic ball in half.
- Apply the polyurethane foam to the edge of one of the halves and cover it with the other half before it hardens.
- Attach the earring hook to one of its edges.
5. Temporary Tattoos
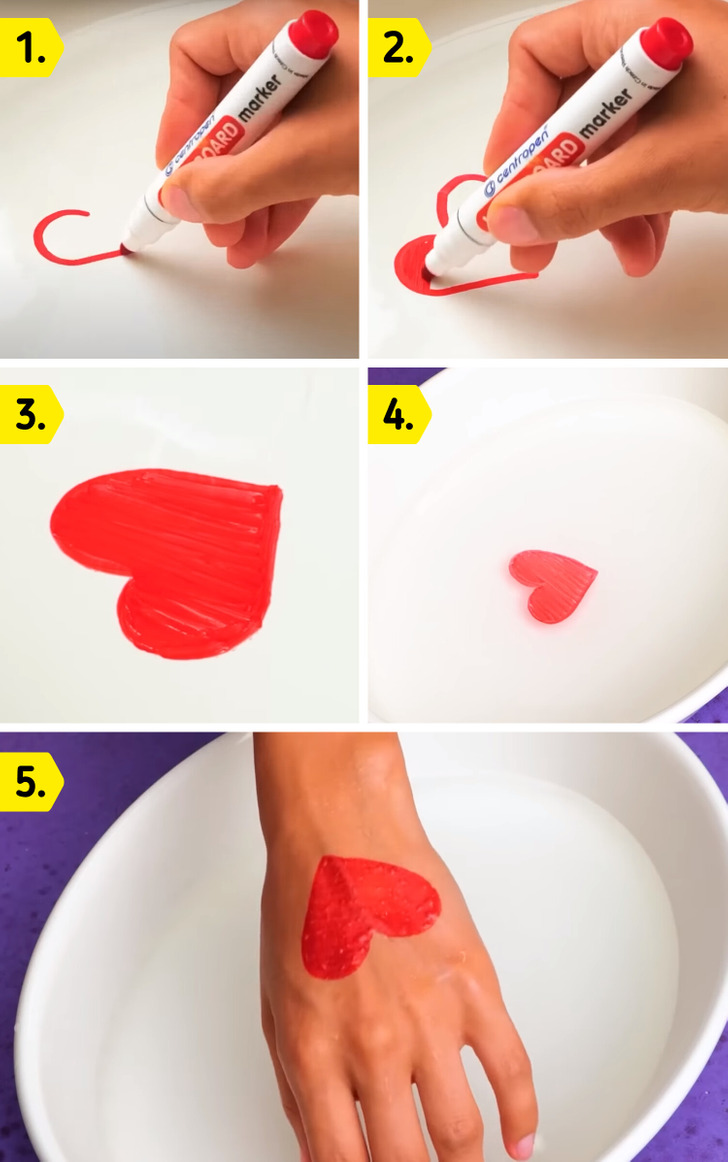
You will need:
- Deep plate
- Marker
- Water
How to do it:
- Draw directly on the plate with the marker.
- Add water to the plate until the ink detaches from it.
- Carefully pick up the ink and apply it to the skin where you want the tattoo.
6. Chalkboard Notebook
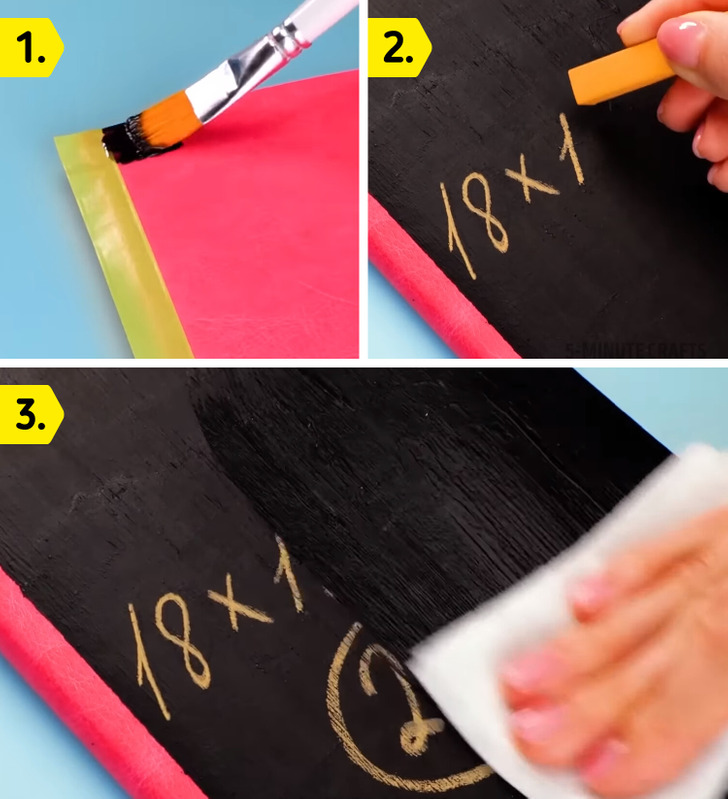
You will need:
- Notebook
- Chalkboard paint
- Chalk
How to do it:
- Paint the notebook cover with chalkboard paint.
- Allow it to dry thoroughly before writing with chalk.
- Erase using an eraser or cloth and rewrite as many times as you want.
7. Bookmark
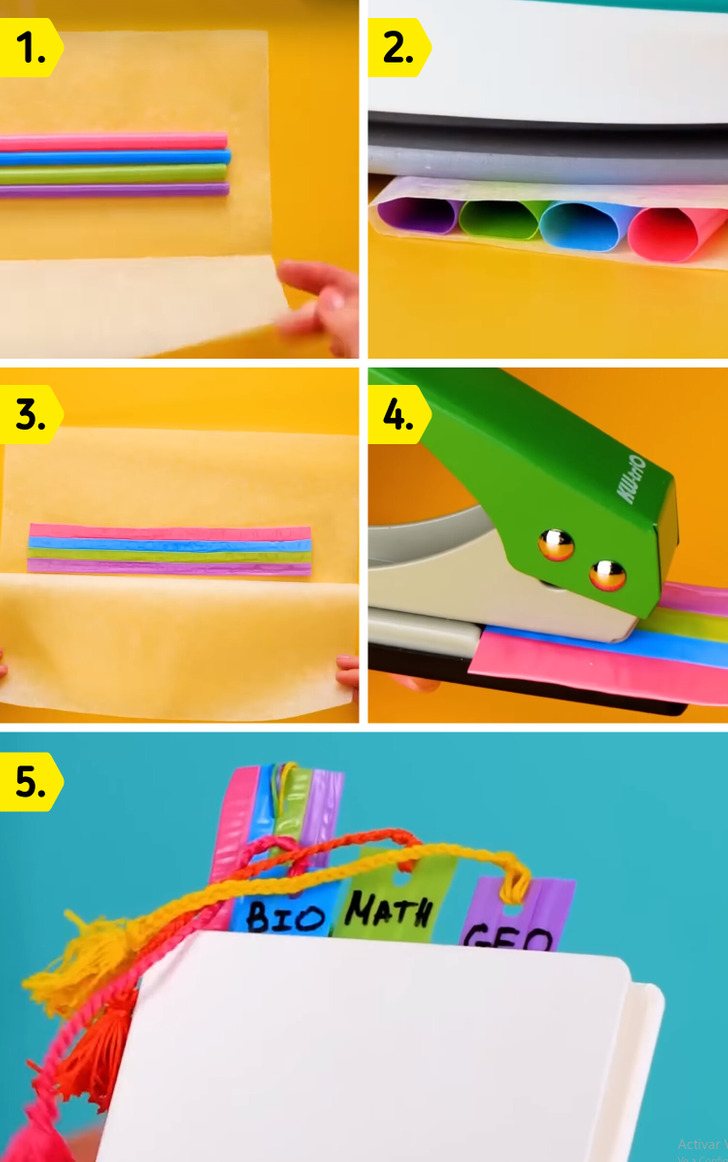
You will need:
- Colored straws
- Baking paper and iron
- Colored ribbons or strings
How to do it:
- Arrange the straws side by side, cover them with baking paper, and iron.
- Heat with the iron until the plastic of the straws melts and they stick together.
- Make a hole at one end of the straws and decorate with ribbons and strings as desired.
8. Giant Pen
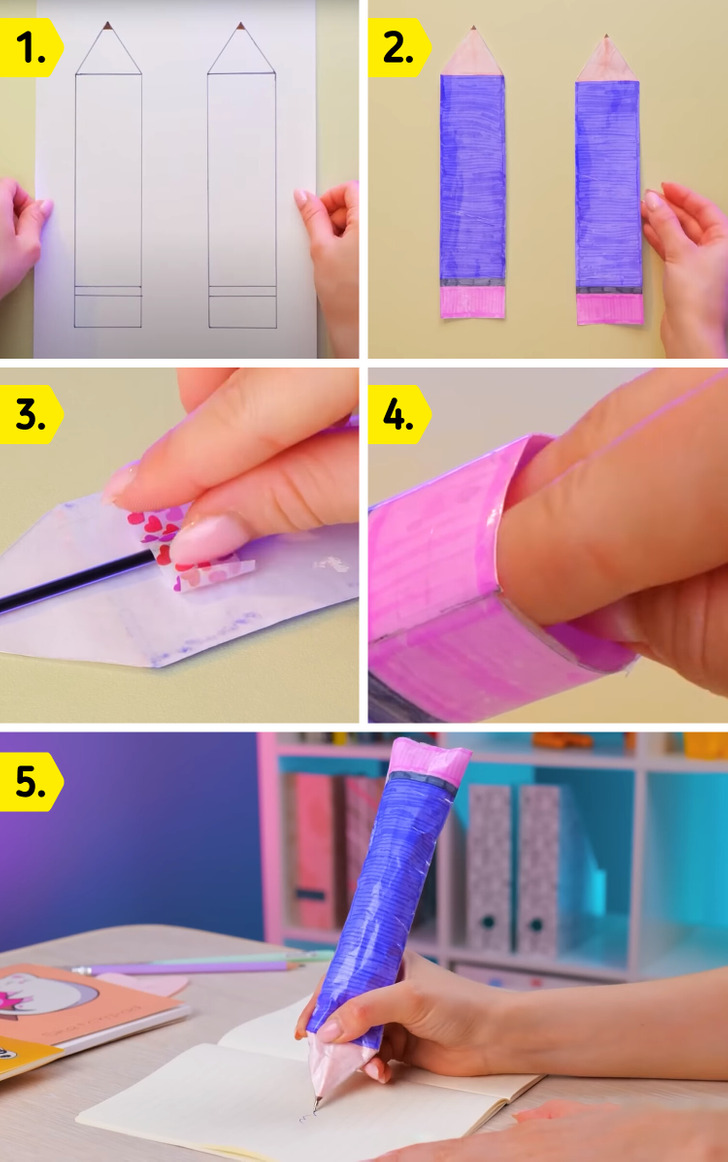
You will need:
- Pen
- Paper
- Colored pencils
- Adhesive tape
How to do it:
- Draw and color two large pencils on the paper.
- Cut them out and attach the pen to the back of one of them.
- Attach the other pencil on the top and completely cover it with adhesive tape.
- Blow into it to inflate the pen and seal the top with adhesive tape.
9. Nail Polish Pen
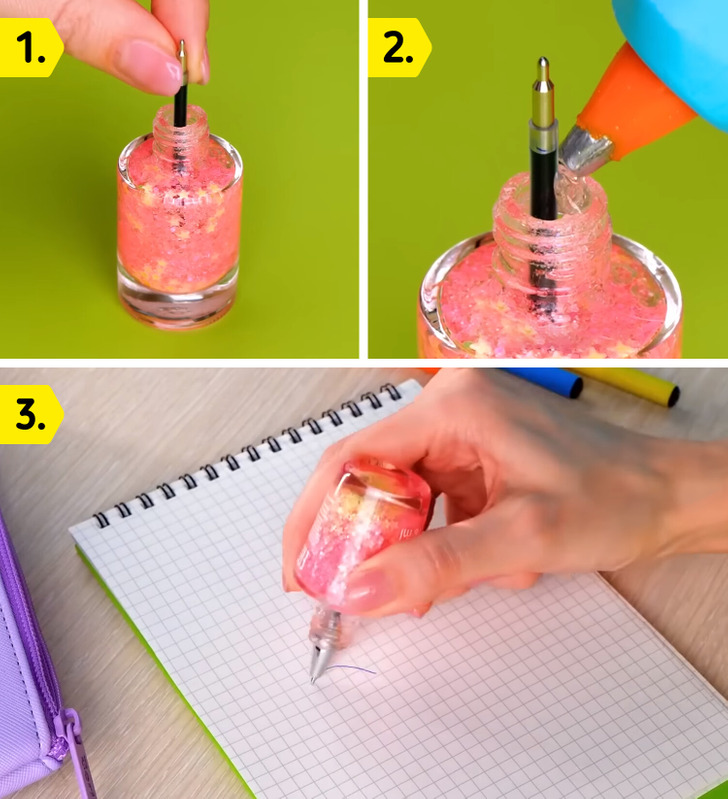
You will need:
- Pen
- Nail polish
- Hot glue
How to do it:
- Disassemble the pen and trim the ink cartridge to match the bottle’s opening, so its tip aligns with the bottle’s mouth.
- Seal the bottle’s mouth with hot glue and let it dry thoroughly before using.
10. Paper Organizer
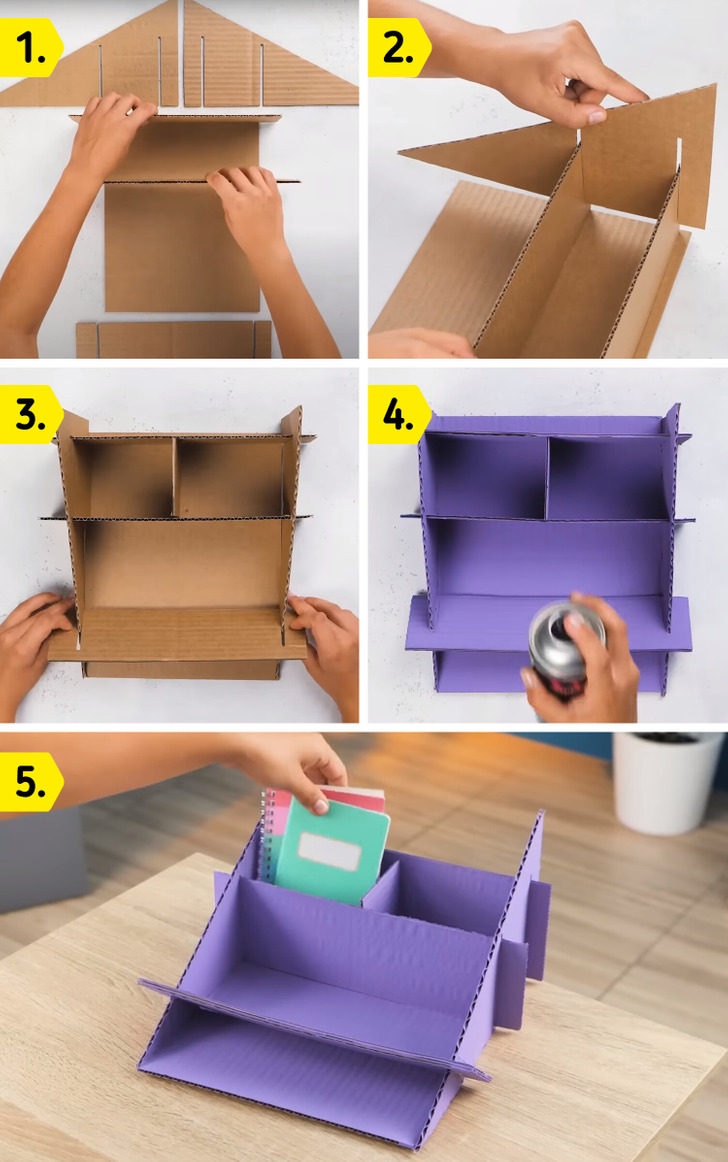
You will need:
- Cardboard
- Paint
- Hot glue
How to do it:
- Cut two cardboard triangles for the sides and create three slots on each one from the base to a few centimeters before the upper edge.
- Cut three rectangles and assemble them into triangular pieces by inserting them into the slots.
- Glue everything to a square cardboard base and paint it.
Check out all these cool school tricks and hacks for students
Share This Article