10 Easy DIY Jewelry Ideas and the Cutest Mini Crafts
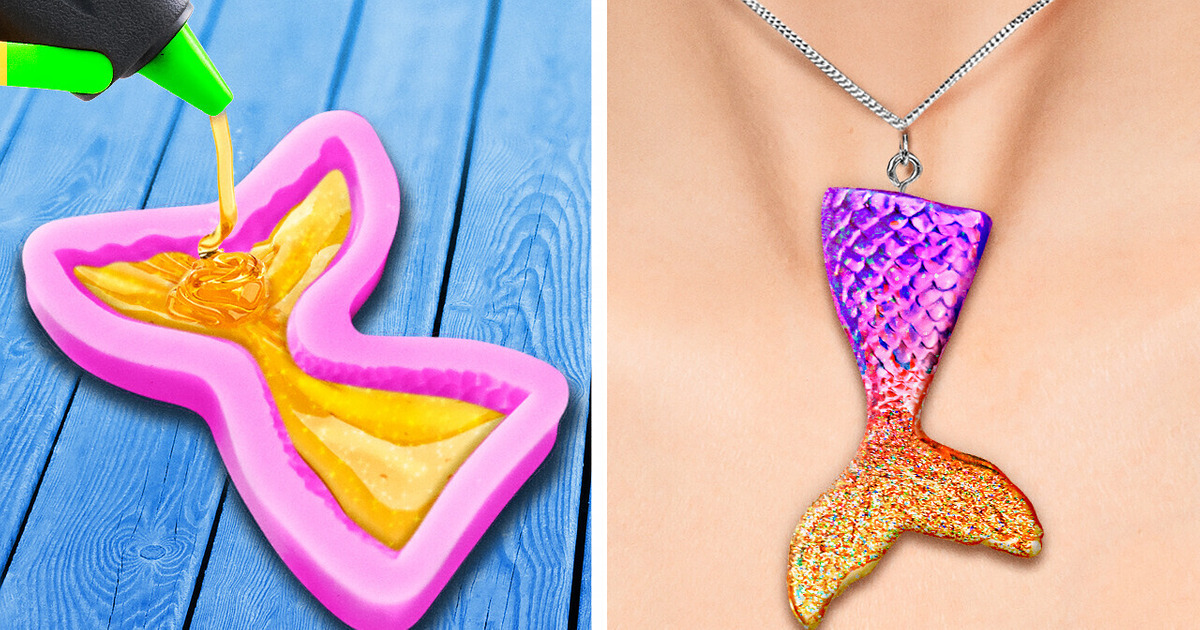
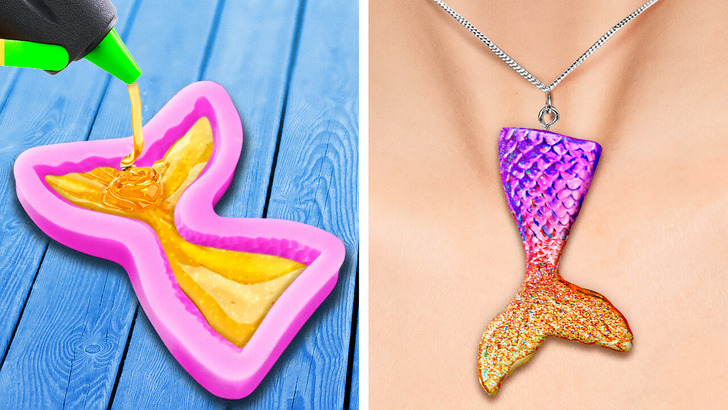
Are you ready for a fresh batch of fantastic craft ideas that will not only spark your creativity but also save you money? We’re here to guide you through creating beautiful new jewelry and accessories. For instance, you can craft a dazzling ring using a hot glue gun and some glitter. It’s remarkably easy! What’s even better is that all these crafts can double as wonderful gifts for your friends!
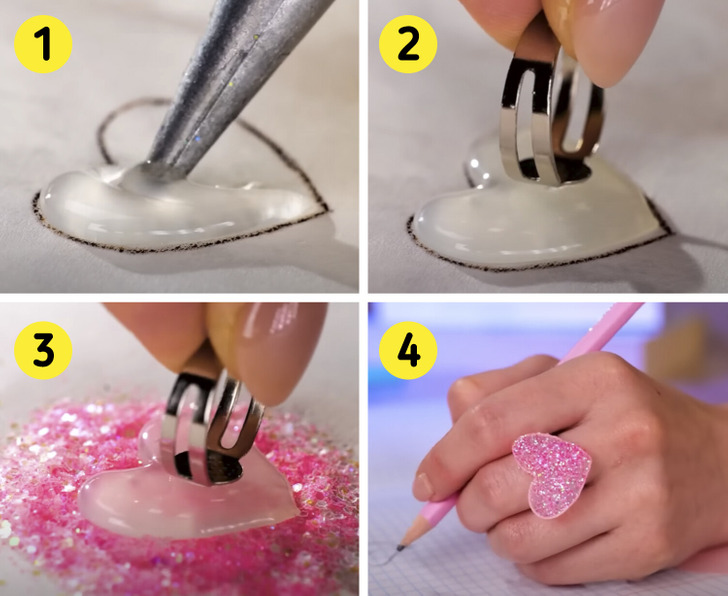
1. Heart Glue Ring
You will need:
- Hot glue gun
- Ring base
- Glitter
How to do it:
- Draw the desired shape for your ring using the hot glue gun.
- While it’s still dry, attach the ring base and let it dry.
- Apply a bit more hot glue on the top and press it onto the glitter.
- Once again, allow it to dry thoroughly before using.
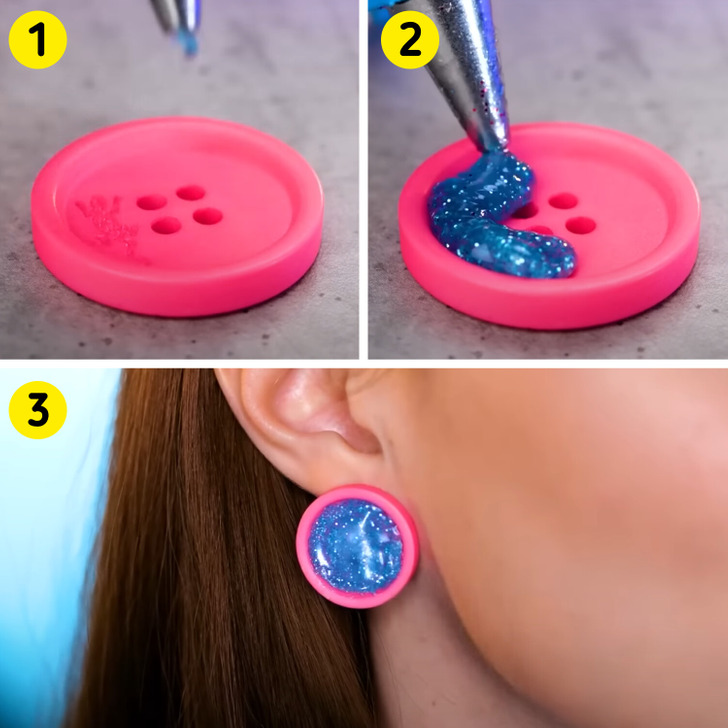
2. Button Earrings
You will need:
- Button
- Hot glue gun
- Earring base.
How to do it:
- Fill the button with glittery hot glue.
- Let it dry thoroughly and attach the earring base to the back.
- Allow it to dry completely before using.
3. Candy Bracelet
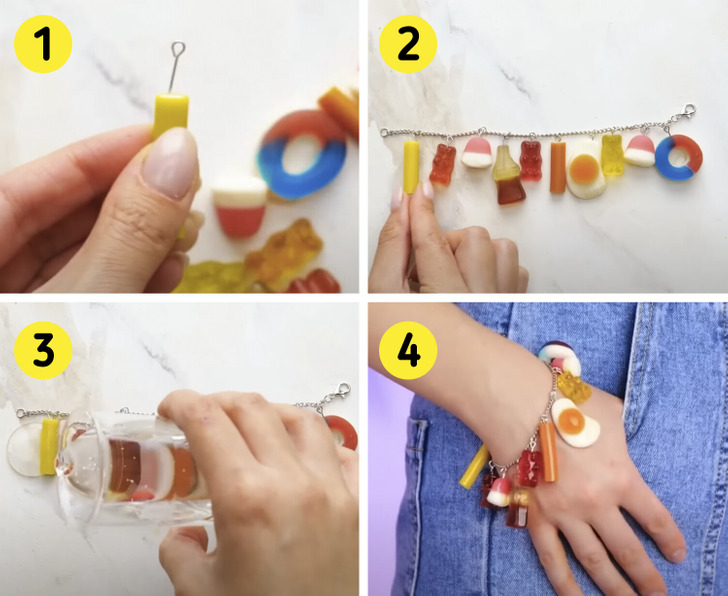
You will need:
- Gummy candies
- Thin wire
- Chain
- Resin
How to do it:
- Insert a small piece of curved wire into the top of each gummy candy.
- Attach all the gummy candies to the chain.
- Coat all the gummy candies with resin and let them dry for several hours before using.
4. Silicone Keychain
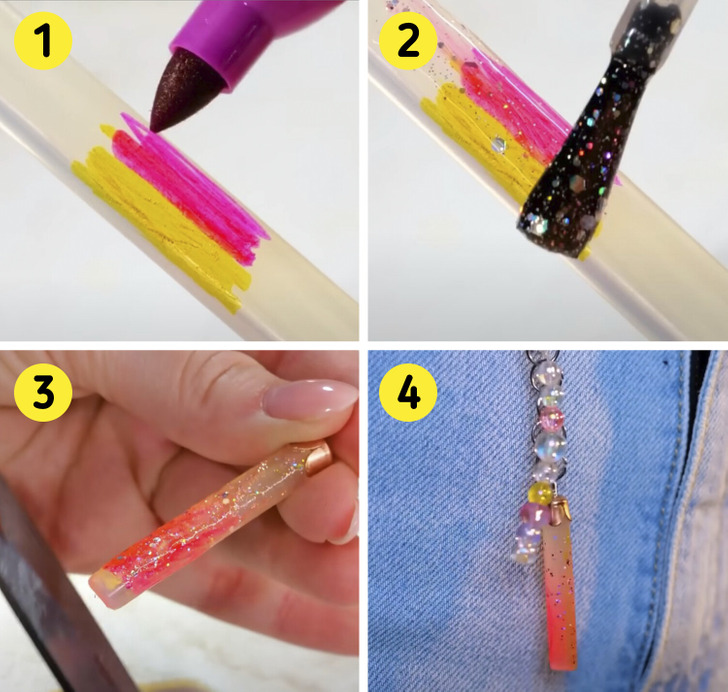
You will need:
- Hot glue stick
- Colored markers
- Glitter nail polish
- Eye screw
How to do it:
- Take a hot silicone stick and color one of its ends with the markers.
- Apply glitter nail polish over the colored area, adding sparkles and trying to blend the colors slightly.
- Cut to the desired length and add the eye screw to the top for attachment.
5. Pixel Hair Clip
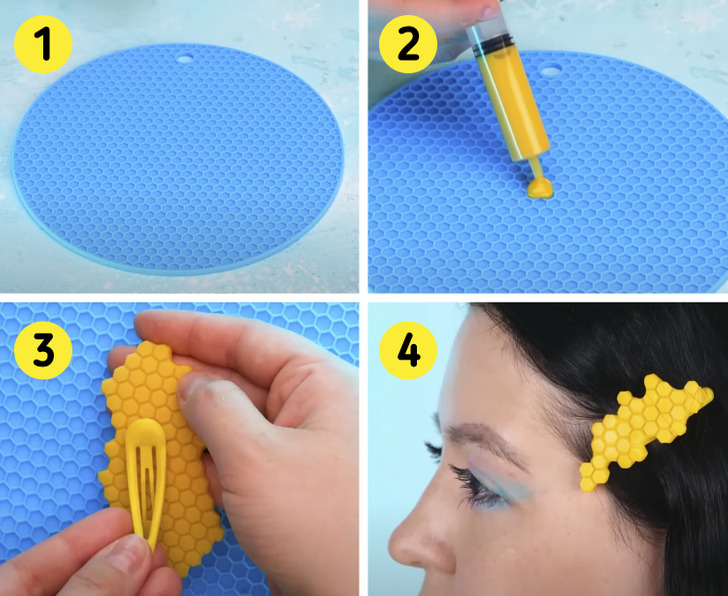
You will need:
- Resin
- Silicone patterned sheet
- Hair clip
How to do it:
- Pour resin onto the silicone patterned sheet and let it dry thoroughly.
- Remove from the mold and cut to the desired size.
- Attach the hair clip to the back of the resin piece and let it dry well before using.
6. Epoxy Earrings
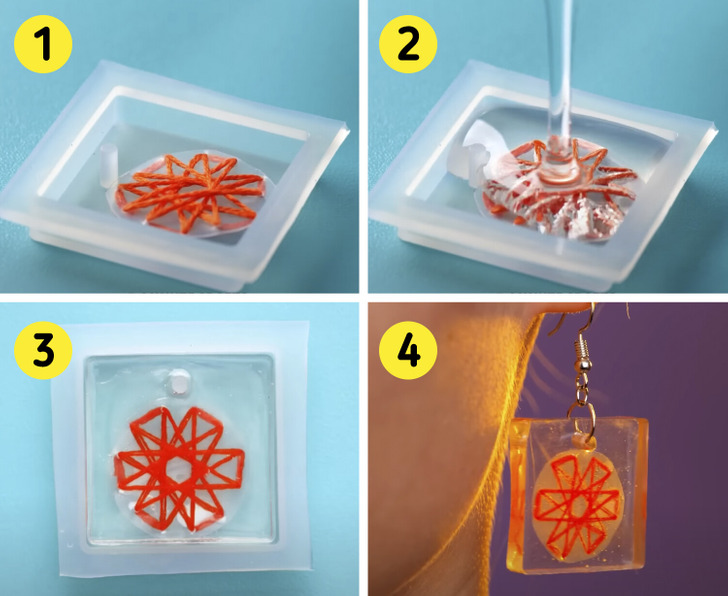
You will need:
- Resin
- Mold
- Earring hook
How to do it:
- Place whatever you like in the mold — glitter, beads, dried flowers, any small object you prefer and fits — it can be anything.
- Cover it entirely with resin and let it dry well.
- Carefully drill a hole for the earring hook and attach it.
7. Sneaker Pin
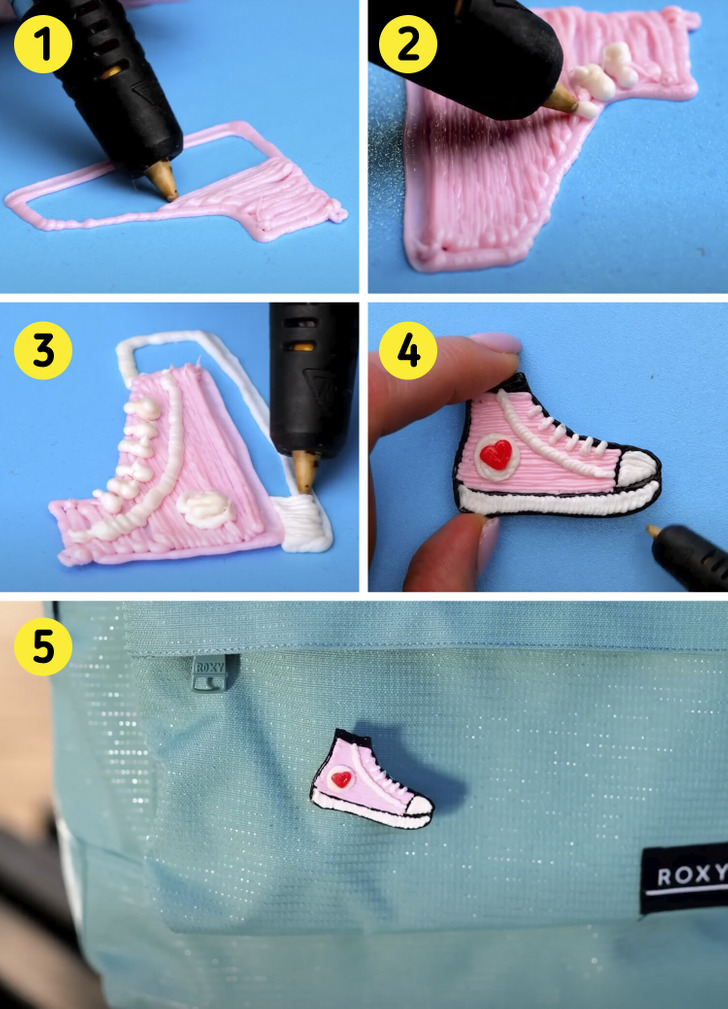
You will need:
- 3D Pen
- Safety pin or pin base
How to do it:
- Draw the base of the sneaker with the 3D pen.
- Once the base is dry, add the details.
- Let it dry completely before lifting and attaching to the pin base or hook earring.
8. Butterfly Earrings
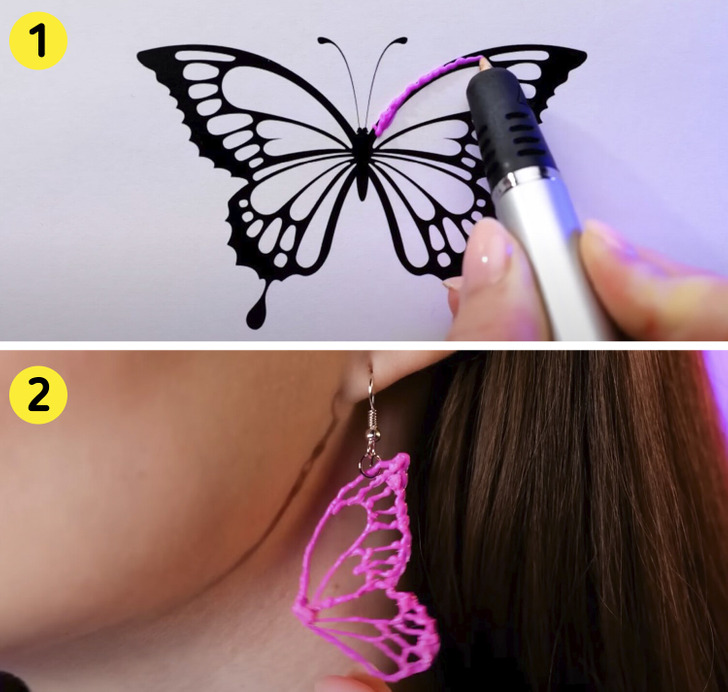
You will need:
- 3D Pen
- Printed butterfly pattern
- Earring hook
How to do it:
- Follow the lines of the image until it’s fully completed.
- Once the plastic is completely dry, peel it off the paper.
- Finally, attach the earring hook.
9. Bear Earrings
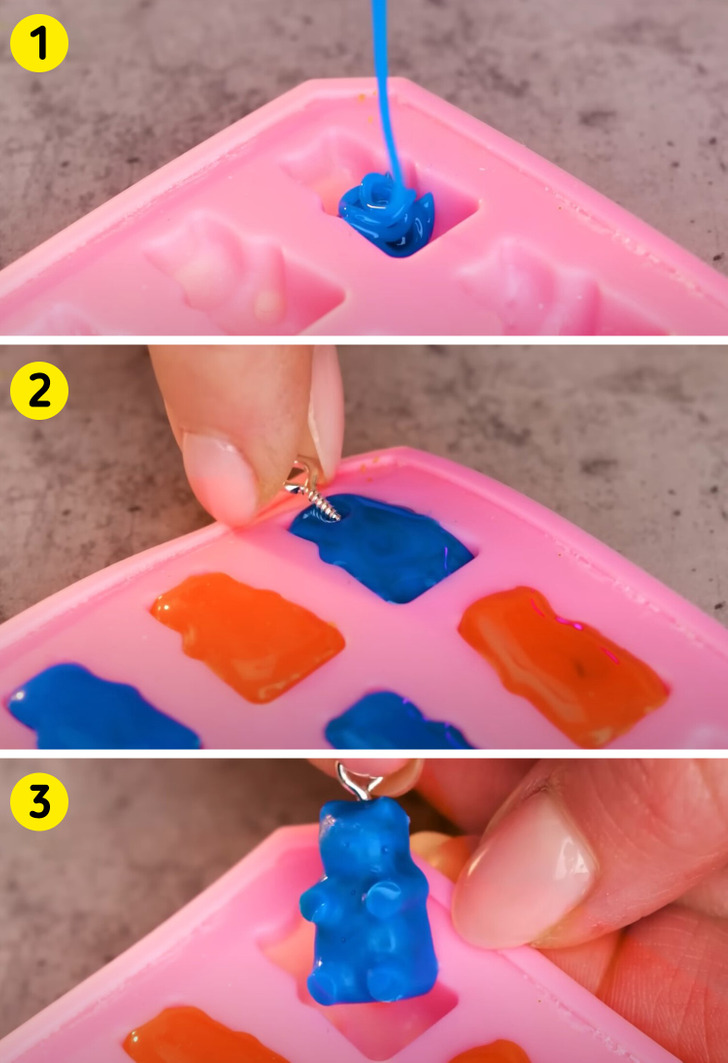
You will need:
- Colored hot glue
- Silicone molds
- Eye screw
How to do it:
- Fill each compartment of the ice tray with hot silicone.
- While the silicone is still soft, add the eye screw.
- Allow it to dry thoroughly before removing from the mold.
10. Fashion Ring
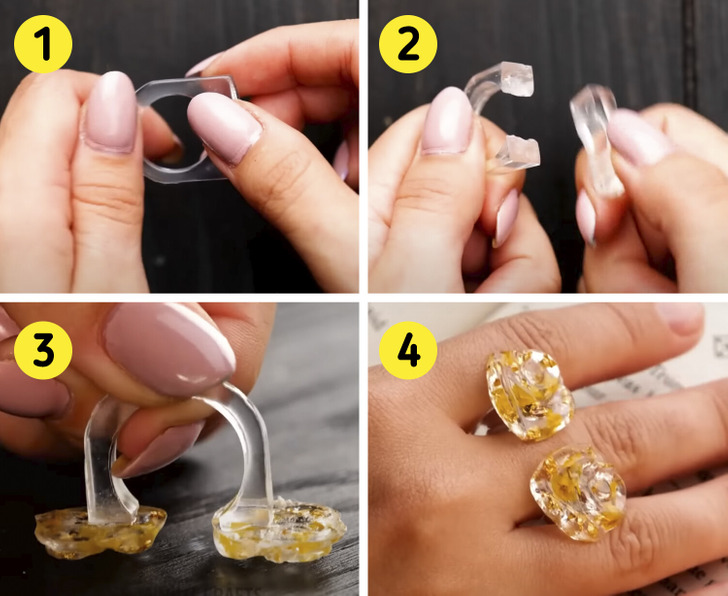
You will need:
- Plastic ring
- Flat beads or rhinestones
- Hot glue
How to do it:
- Break the top part of the plastic ring.
- Put a little hot glue on each side and attach a bead or rhinestone to each one.
- Let it dry well before using.
Check out more mini crafts and easy DIY jewelry ideas
Share This Article