10 Fantastic and Easy Epoxy Resin Crafts for Beginners
Today, we’ll take you on a journey through the world of epoxy resin art, unveiling stunning creations that we believe you will love. From home decor to jewelry, we’ve curated a selection of unique pieces that will transform your living space and your style into works of art.
1. Bookmarks
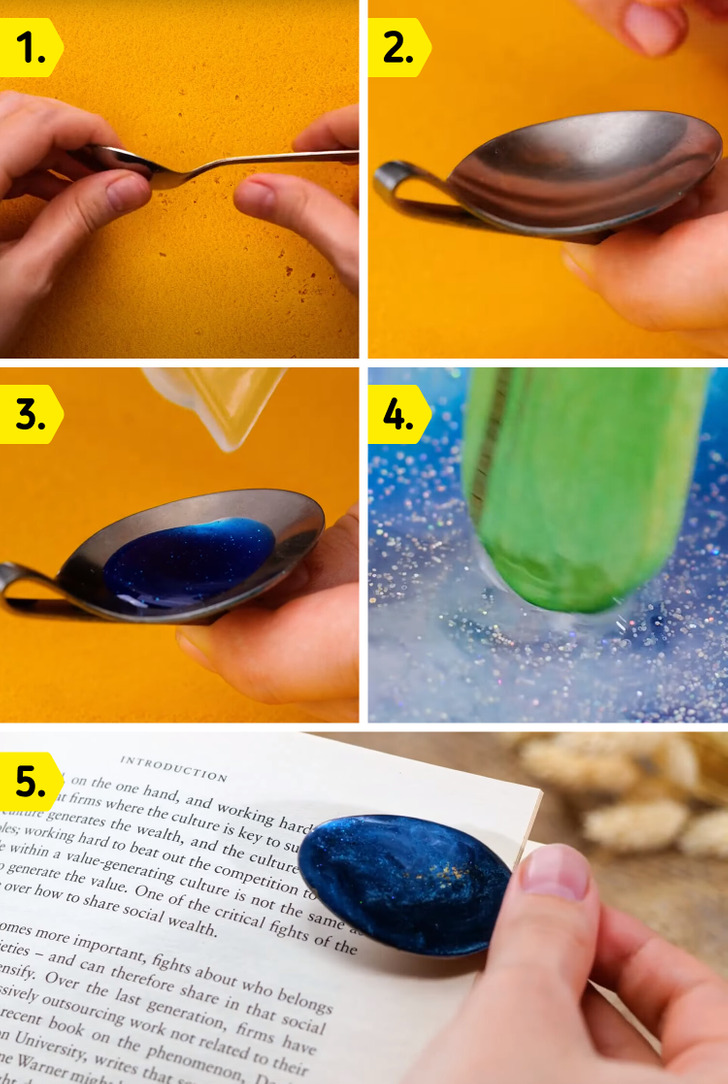
You will need:
- Spoon
- Epoxy resin
- Glitter
How to do it:
- Bend the handle of the spoon backward.
- Add epoxy resin to the spoon and sprinkle in some glitter.
- Mix thoroughly with a stick.
- Before using, ensure it’s dry.
2. Ring holder

You will need:
- Cubical vase or container
- Gloves
- Dried flowers
- Epoxy resin
How to do it:
- Use the cubical vase or container to hold the open end of the glove, making it easier to fill.
- Place dried flowers inside the glove and fill it to the top with epoxy resin.
- Before using, make sure it’s fully dry and solid.
3. Butterfly brooch
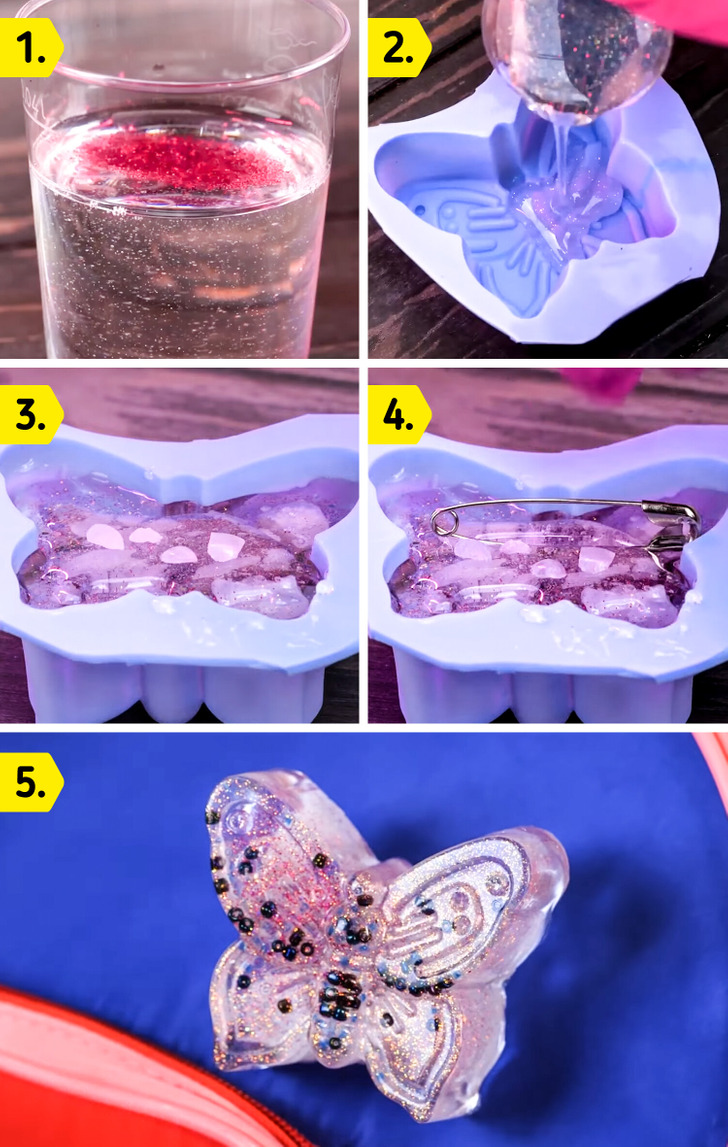
You will need:
- Epoxy resin
- Glitter
- Mold
- Hook pin
How to do it:
- Mix a bit of epoxy resin with glitter and pour it into a mold.
- Before it completely solidifies, place the hook pin horizontally on the epoxy resin’s surface.
- Once it’s dry, remove it from the mold.
4. Colorful keyboard
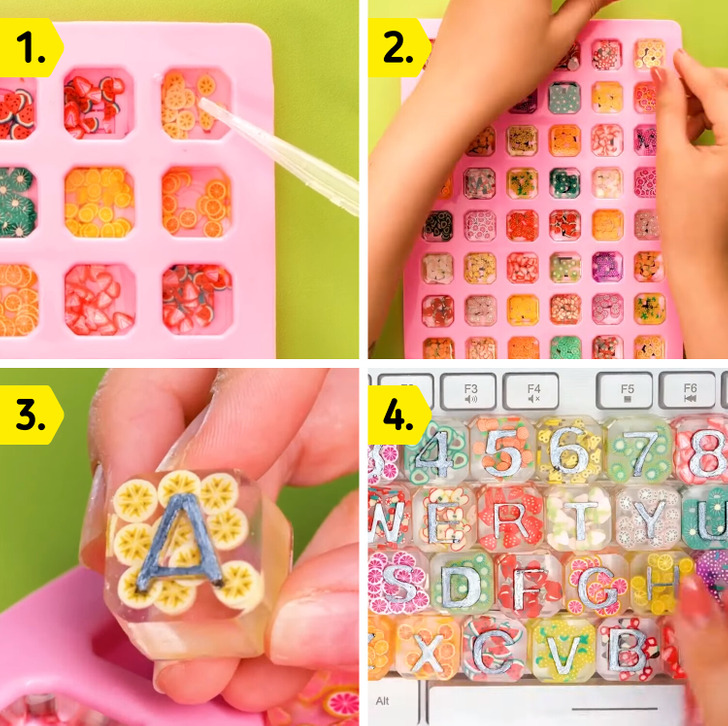
You will need:
- Epoxy resin
- Keyboard key mold
- Small decorations of your choice
How to do it:
- Place small decorative pieces in each mold and cover them with epoxy resin.
- Once the epoxy resin on the keys is dry, remove them from the molds and place them back on your keyboard.
5. Decorative pepper
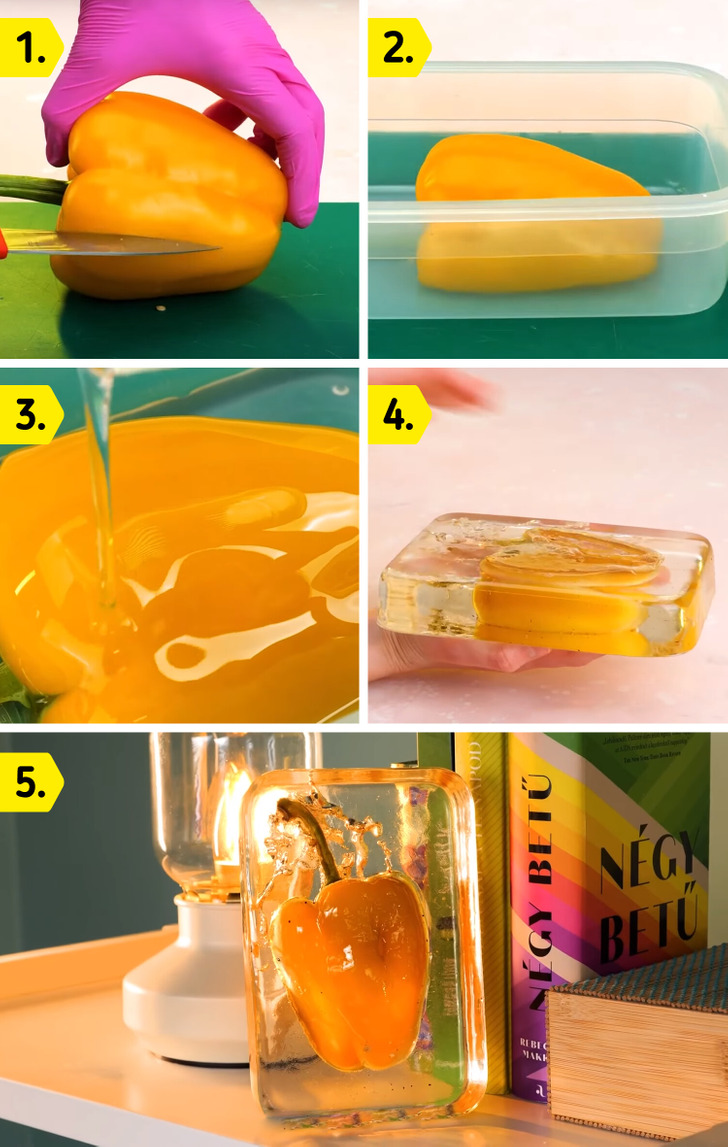
You will need:
- Pepper
- Mold
- Epoxy resin
How to do it:
- Cut the pepper in half.
- Place it in the mold and cover it with epoxy resin.
- Once dry, remove it from the mold.
6. Dog collar
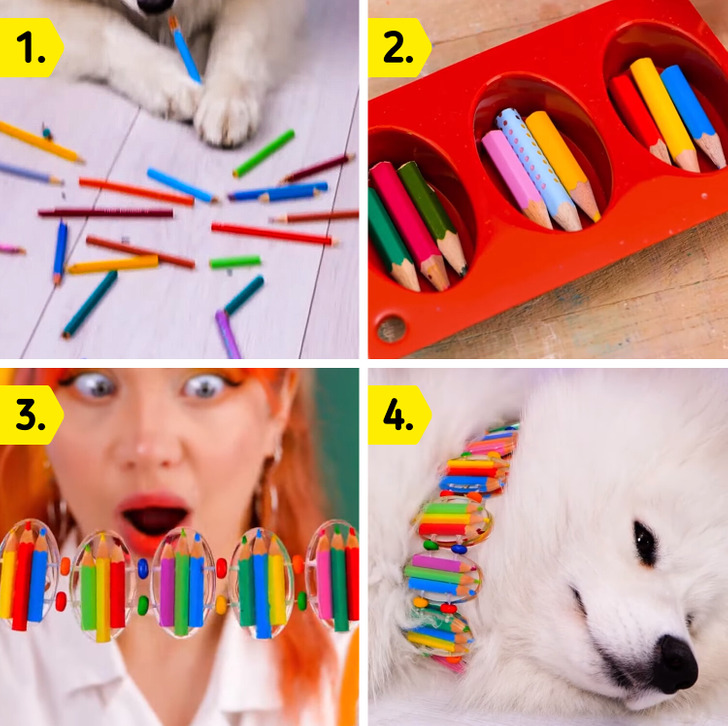
You will need:
- Epoxy resin
- Pencils
- Mold
- Elastic band
How to do it:
- Insert the pencils into the molds and cover them with epoxy resin.
- Once dry, remove them from the molds and connect them together with an elastic band.
7. Deluxe toilet lid
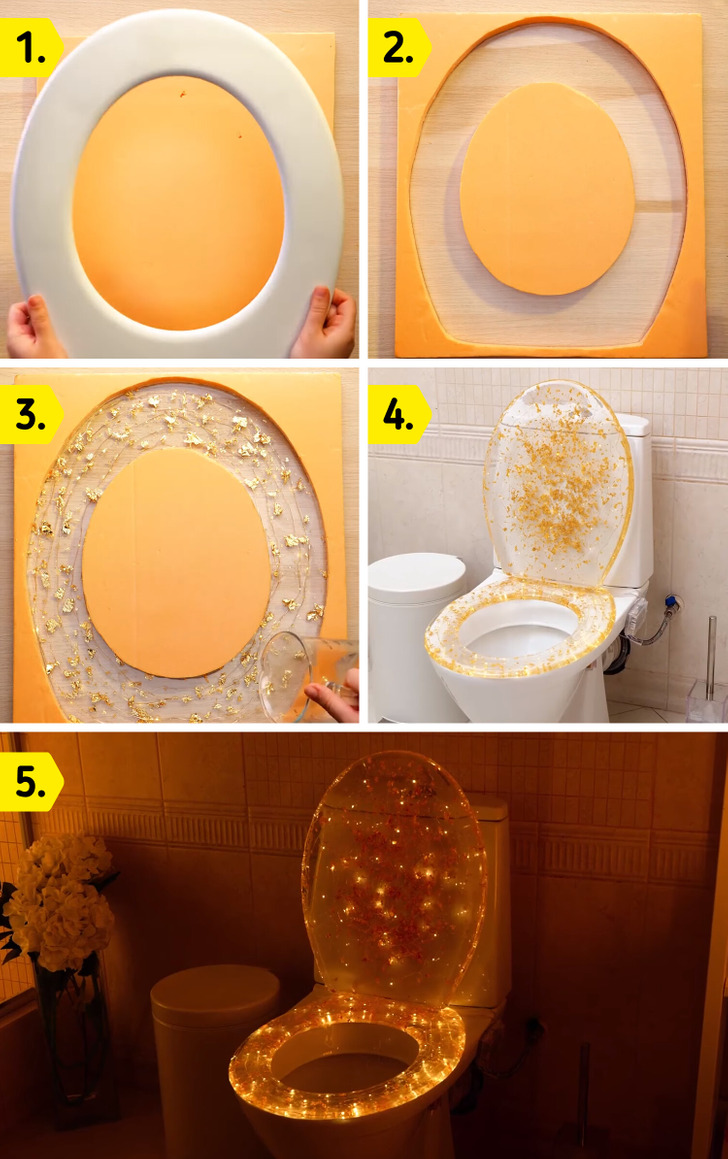
You will need:
- Toilet lid
- Sponge
- Lights
- Fold foil
- Epoxy resin
How to do it:
- Place the toilet lid on the sponge and trace and cut out its silhouette to create a mold.
- Place the lights and gold foil in the mold and cover them with epoxy resin.
- Repeat the same process for the top lid.
- Allow both lids to dry thoroughly and then place them on the WC.
8. Pearl hanger
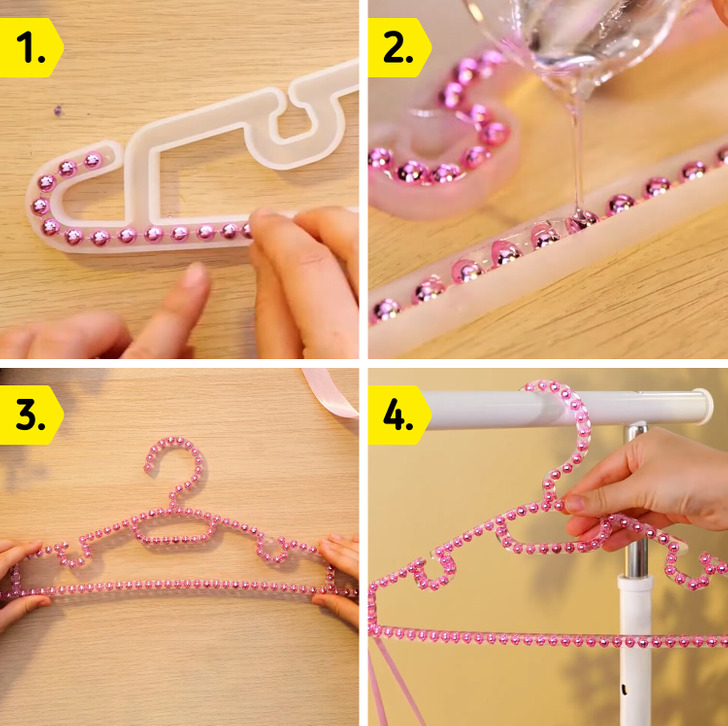
You will need:
- Epoxy resin
- Hanger mold
- Pearls
How to do it:
- Fill the hanger mold with pearls.
- Cover the pearls with epoxy resin.
- Let it dry and then remove it from the mold once it’s set.
9. Memo keychain
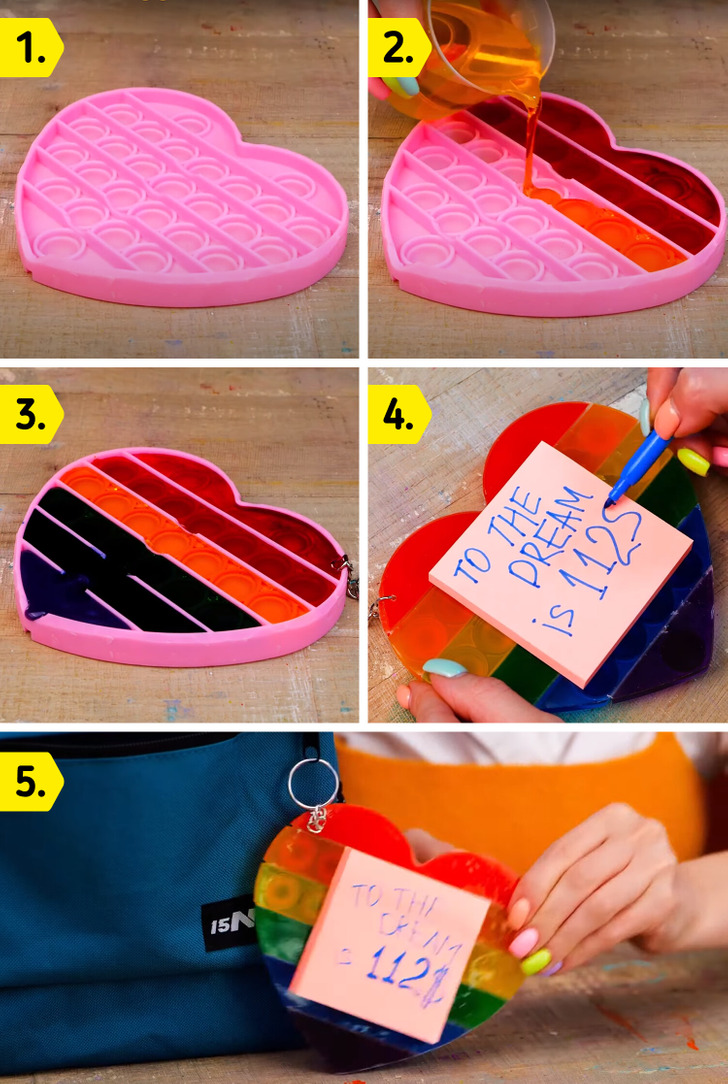
You will need:
- Pop-it
- Epoxy resin
- Notepad
- Keyring hook
How to do it:
- Fill the compartments of the Pop-it with epoxy resin.
- Leave a small portion of the keyring hook submerged in the epoxy resin at the top.
- Remove it from the mold when it solidifies and attach the notepad to the back of the Pop-it.
- Hang it wherever you like.
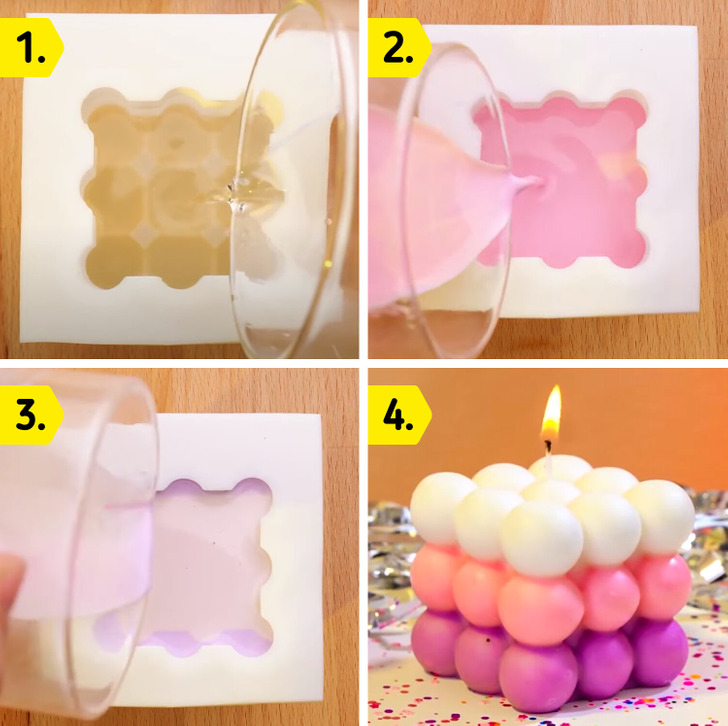
10. Tricolor candle
You will need:
- Colored candle wax
- Wick
- Mold
How to do it:
- Insert the wick into the mold.
- Melt the crayons and pour them into the mold one color at a time.
- Allow them to cool and carefully remove them from the mold.
Check out all these fantastic epoxy and hot glue crafts
Share This Article