10 Fantastic DIY Jewelry and Mini Crafts with Epoxy Resin, Hot Glue, and Polymer Clay
Today, we’ll take you on a journey through the world of epoxy resin art, unveiling stunning creations that will leave you in awe. We’ve curated a selection of unique pieces that will transform your home into a work of art. Get ready to be inspired and amazed by these incredible epoxy resin creations that will elevate your home decor to new heights.
1. Rainbow Pen
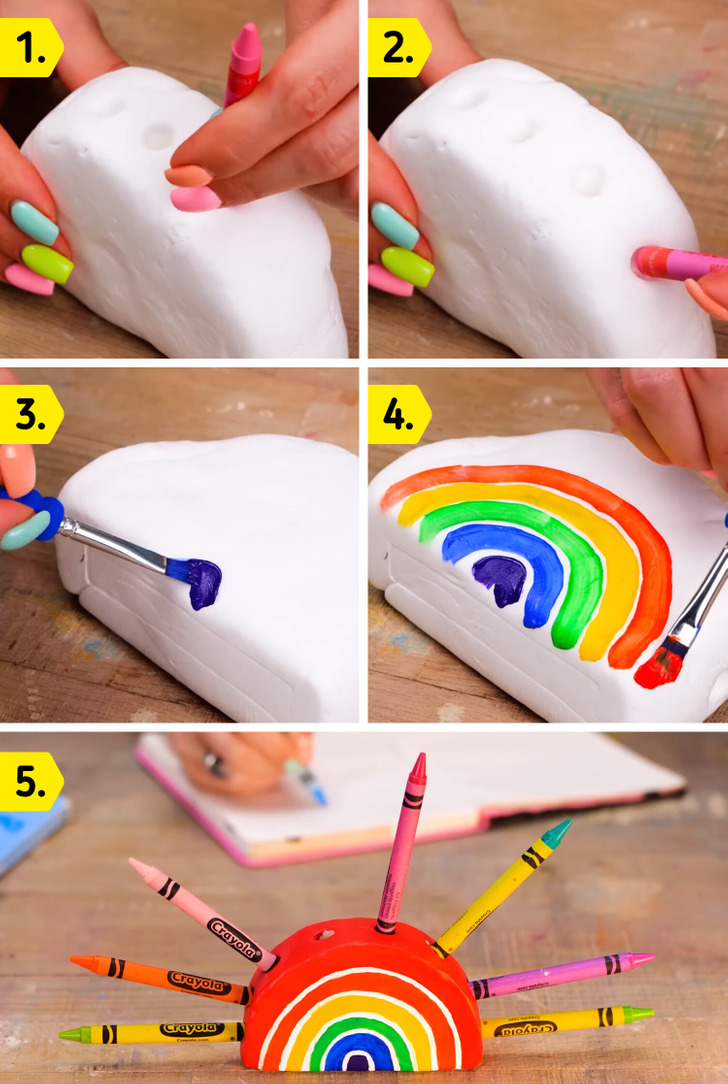
You will need:
- Polymer clay
- Paint
- Crayons or pencils
How to do it:
- Mold a semicircle with the polymer clay.
- While it is still fresh, insert the crayons or pencils through its edge to create holes.
- Let it dry, and once dry, paint a rainbow on its front and back surfaces.
2. Funny Ring
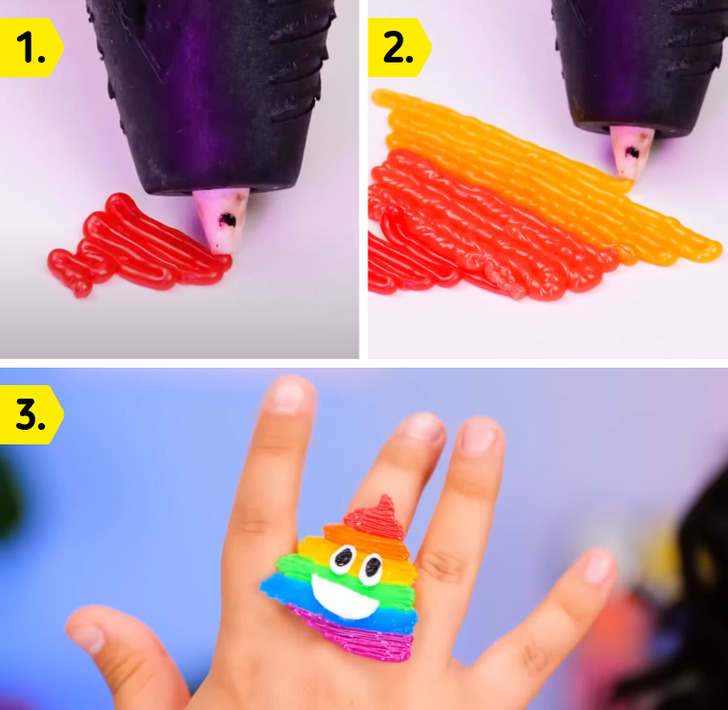
You will need:
- Colored hot glue
- Ring base
How to do it:
- Draw lines with the colored hot glue from smaller to larger.
- Let it dry and add details as desired.
- Add a drop of glue to the back and attach it to the ring base.
3. Headphone Bracelet
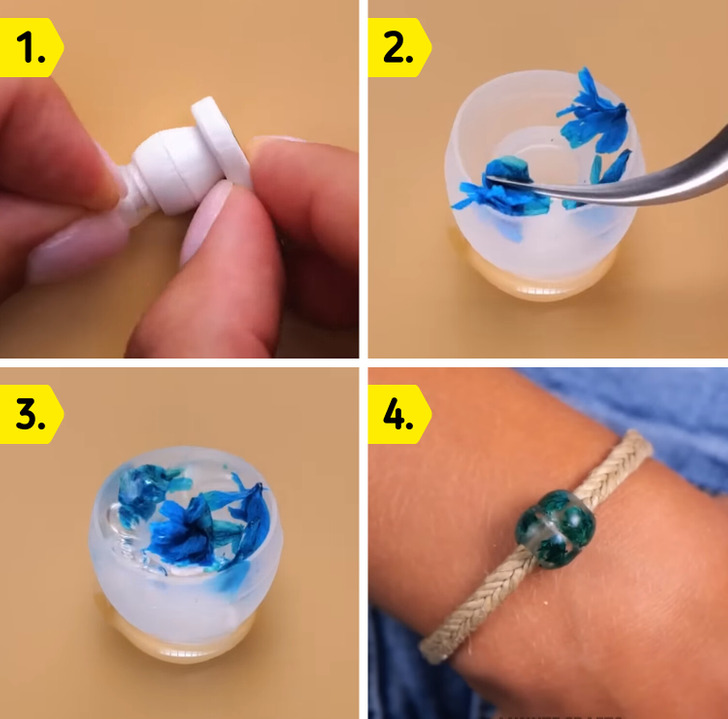
You will need:
- Headphones
- Dried flowers
- Epoxy resin
- Cord
How to do it:
- Remove the protective plastic from the headphones.
- Place the dried flowers inside and coat them with epoxy resin.
- Let it dry and insert it into a braided cord.
4. Colorful Glass
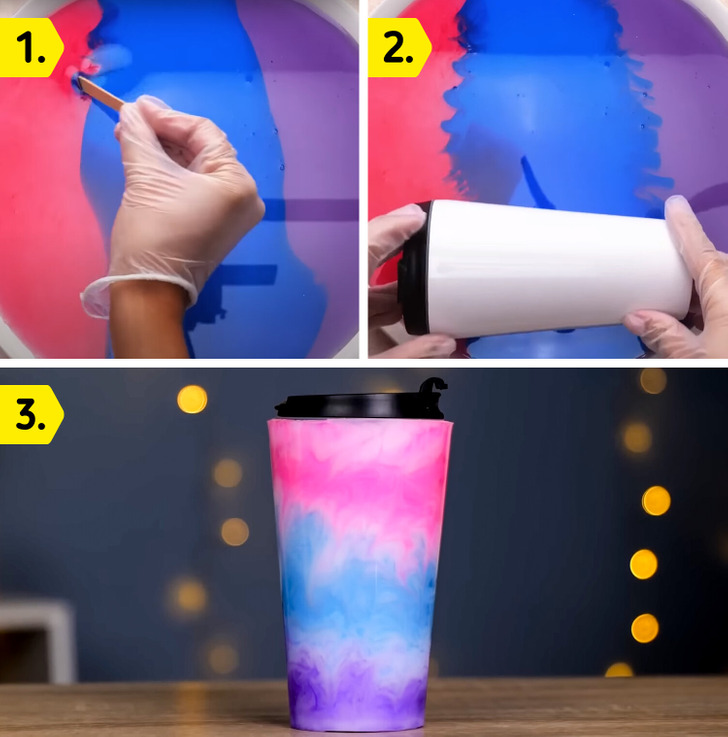
You will need:
- Plate or tray
- Paints
- Popsicle stick
- Glass
How to do it:
- Place the desired paint colors on the plate or tray.
- Use the popsicle stick to blend the dividing lines between the colors.
- Carefully place the glass on the paint, rotating it to cover its entire surface with paint.
- Let it dry, and optionally, apply a clear varnish to protect the color.
5. DIY Chopsticks
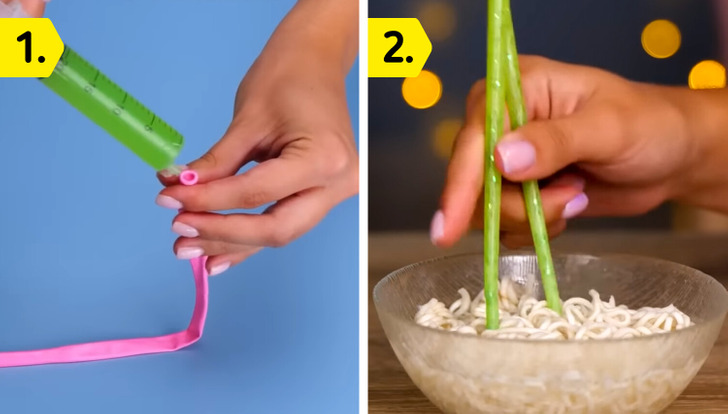
You will need:
- Epoxy resin
- Dye
- Balloons
- Syringe
How to do it:
- Color the epoxy resin with the desired color.
- Fill the syringe with epoxy resin and carefully insert it into the balloon.
- Let it dry, and once dry, remove it from the balloon.
6. Rainbow Earring
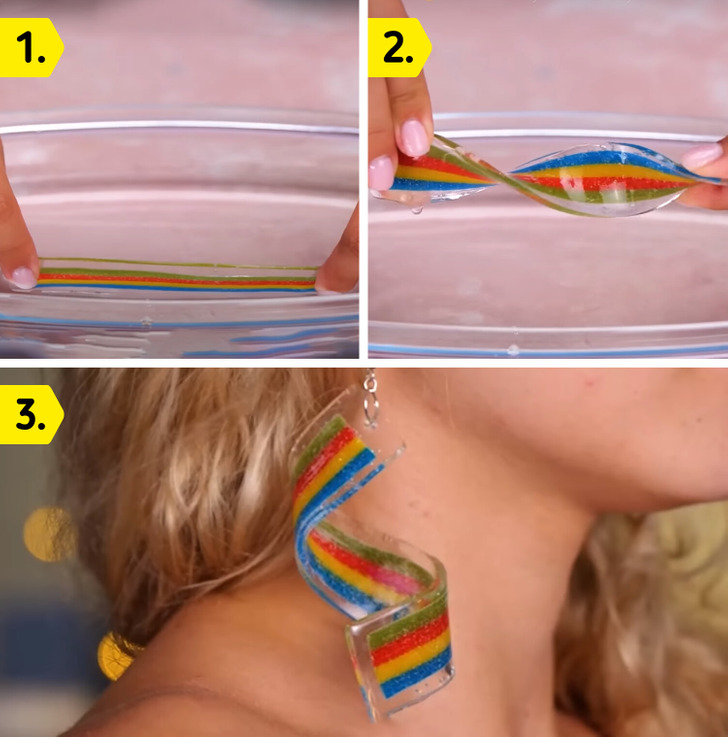
You will need:
- Gummy strip
- Epoxy resin
- Earring hook
How to do it:
- Dip the gummy strip in epoxy resin.
- While it is still soft, twist its ends in different directions to give it a spiral shape.
- Let it dry and attach the earring hook to one of the ends.
7. Flowery Pen
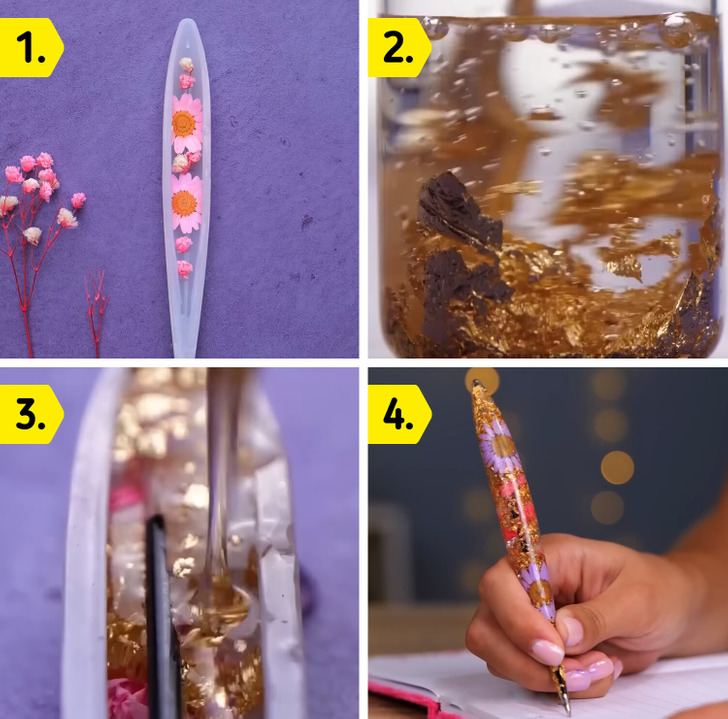
You will need:
- Mold
- Pen barrel
- Dried flowers and gold leaf paper
- Epoxy resin
How to do it:
- Place the dried flowers in the mold.
- Mix the epoxy resin with the gold leaf paper and stir well.
- Fill the mold halfway with epoxy resin.
- Insert the pen barrel and cover it completely with epoxy resin.
- Let it dry and then remove it from the mold.
8. Cheese Earring
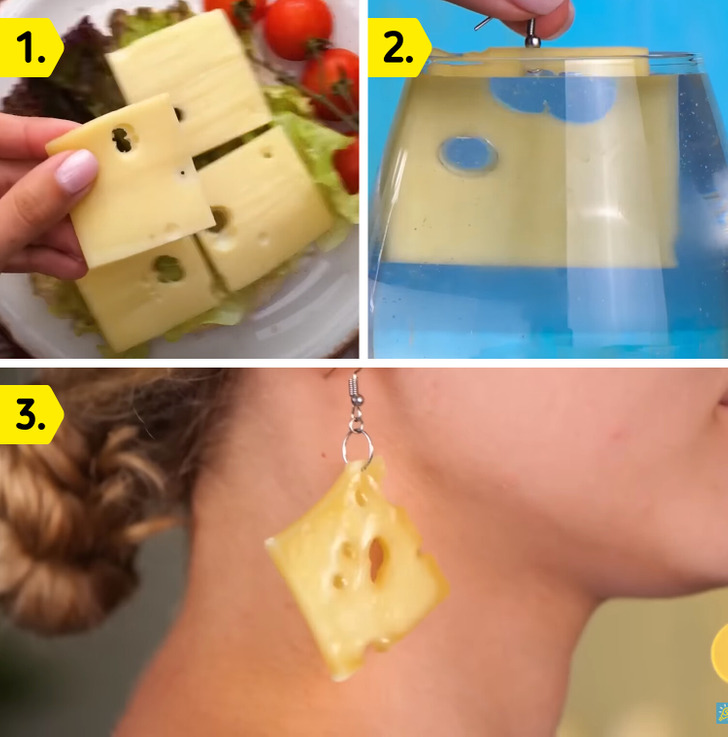
You will need:
- Sliced cheese
- Epoxy resin
- Earring hook
How to do it:
- Dip a piece of sliced cheese in epoxy resin.
- Let it dry and attach the earring hook to one of its sides.
9. Dinosaur Hugger
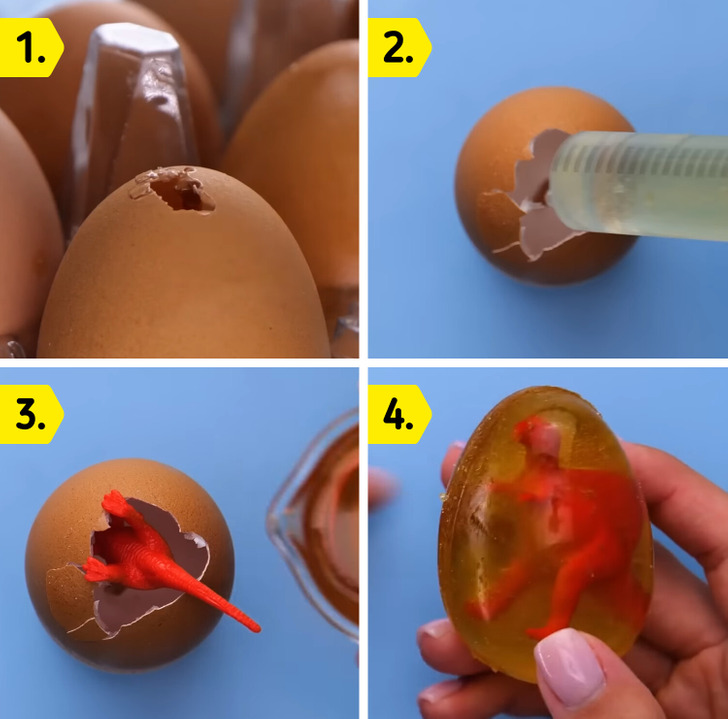
You will need:
- Eggshell
- Syringe
- Small toy dinosaurs
- Epoxy resin
How to do it:
- Use the syringe to inject some epoxy resin into the eggshell.
- Carefully place the small toy dinosaur inside the egg, being careful not to break the shell.
- Finish filling the egg with epoxy resin.
- Once it’s dry, break the shell to remove the mold.
10. Pop It Notepad
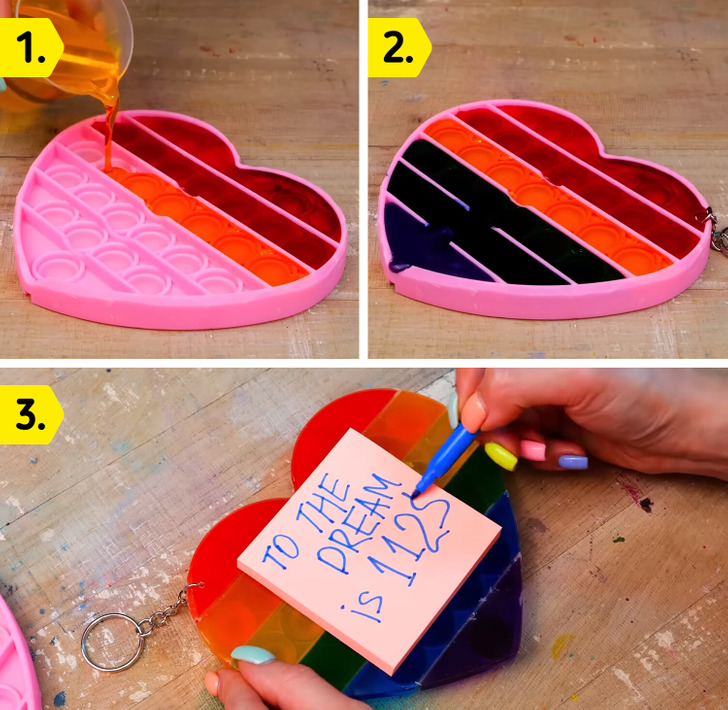
You will need:
- Pop-it
- Epoxy resin
- Notepad
- Keyring hook
How to do it:
- Fill the compartments of the Pop-it with epoxy resin.
- Leave a small portion of the keyring hook submerged in the epoxy resin at the top.
- Remove it from the mold when it solidifies and attach the notepad to the back of the Pop-it.
- Hang it wherever you like.
Check out all these cool DIY epoxy resin projects
Share This Article