10 Mini Crafts from Polymer Clay for Creating Funny but Cute Jewelry
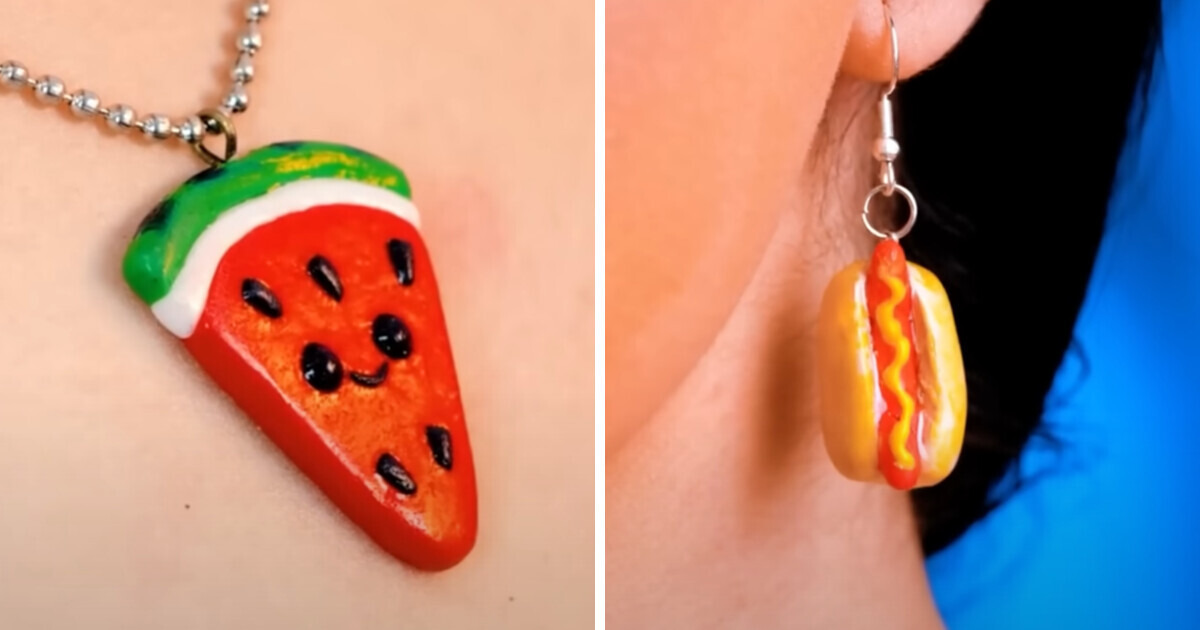
We are here to share with you insanely cool mini crafts, with polymer clay. Check out wonderful ideas for new jewelry. You will find out how to make new unique earrings, pendants, and bracelets. These crafts may be a great gift for your friends. Thanks to polymer clay, you can make so many appetizing foods for your dolls o funny jewelry, such as pizza, hot dogs, cookies, donuts, ice cream, or various fruits.
1. Croissant
You will need:
- Polymer clay
- Ruler
- Cutter
How to do it:
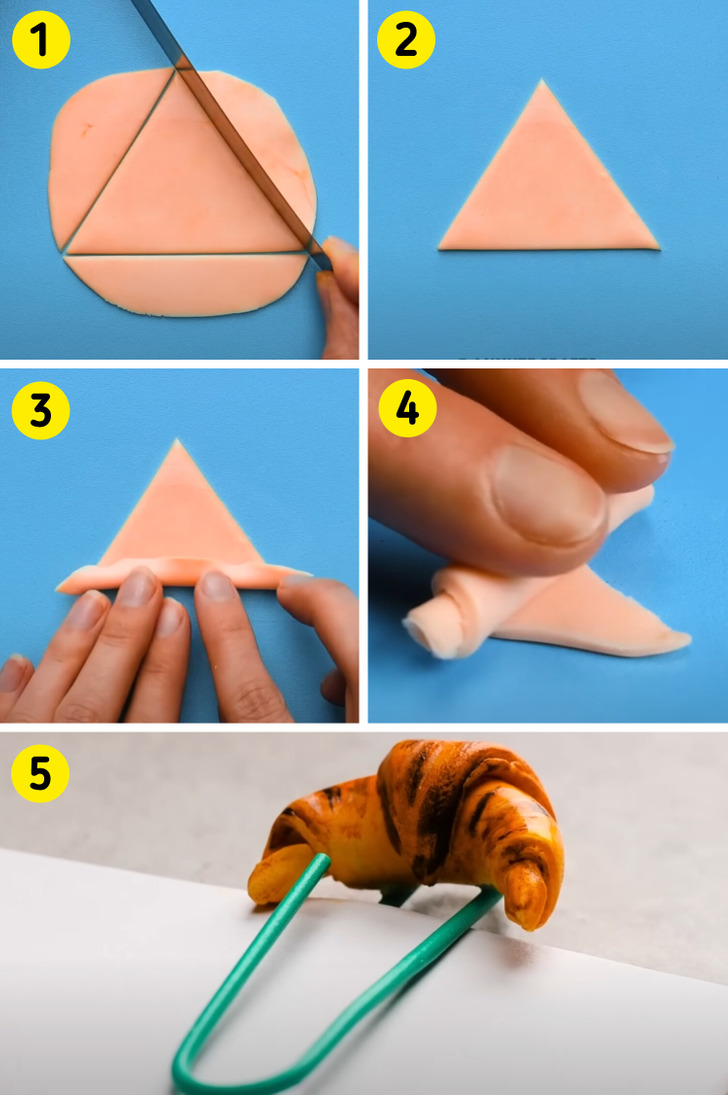
- Flatten a piece of polymer clay and trace a rectangle on it.
- Cut out the triangle and remove the excess polymer clay.
- Roll the base of the triangle onto itself and continue rolling until you reach the top point of the triangle.
- Curve the ends of the croissant and let it dry.
- If desired, once it’s dry, add some shadows and highlights with paint to make it more realistic.
2. Cookie
You will need:
- Polymer clay
- Toothbrush
- Straw
- Craft knife
How to do it:
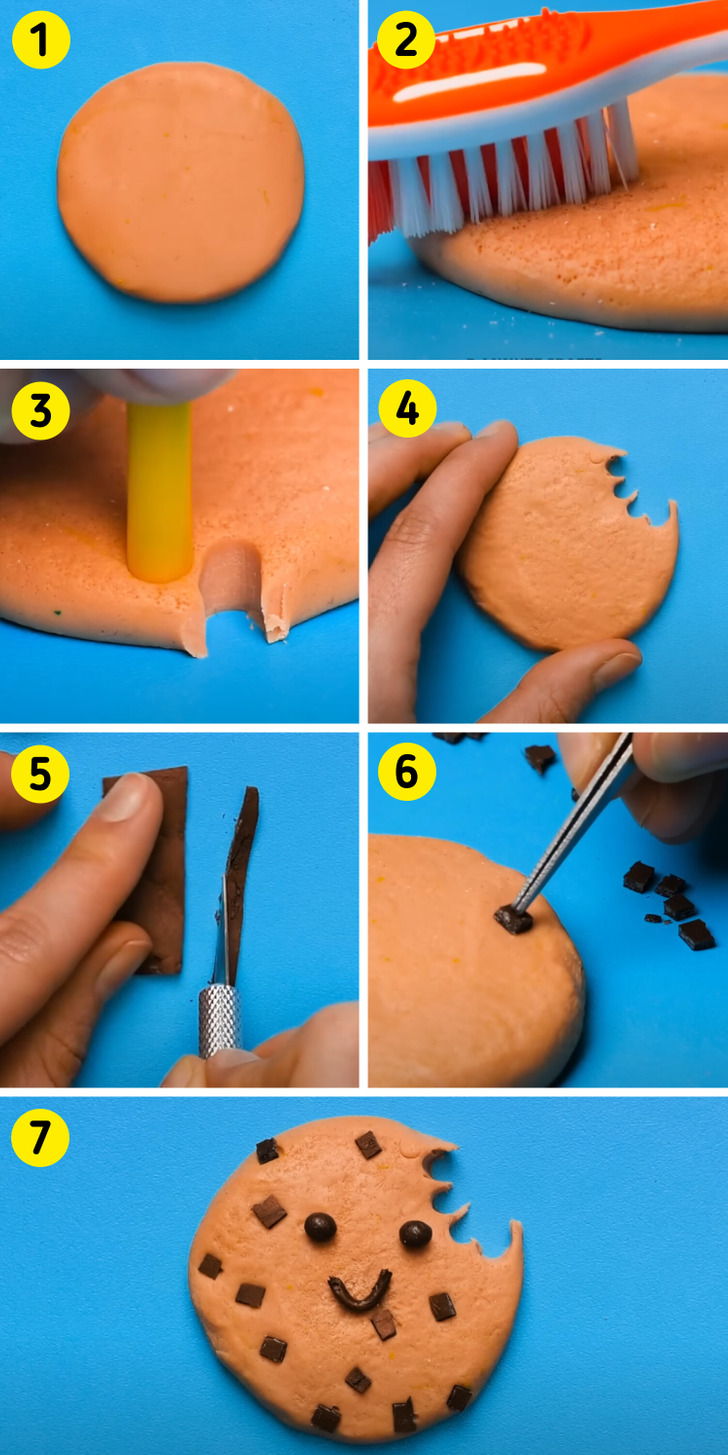
- Flatten a ball of polymer clay.
- Give it texture by pressing a toothbrush against it several times.
- Use a straw to remove some circular pieces from the cookie’s edge to create a bite shape.
- Cut small brown pieces and distribute them throughout the cookie to represent chocolate chips.
- Add a pair of eyes and a playful smile.
3. Cheese
You will need:
- Polymer clay
- Craft knife
- Straws
How to do it:
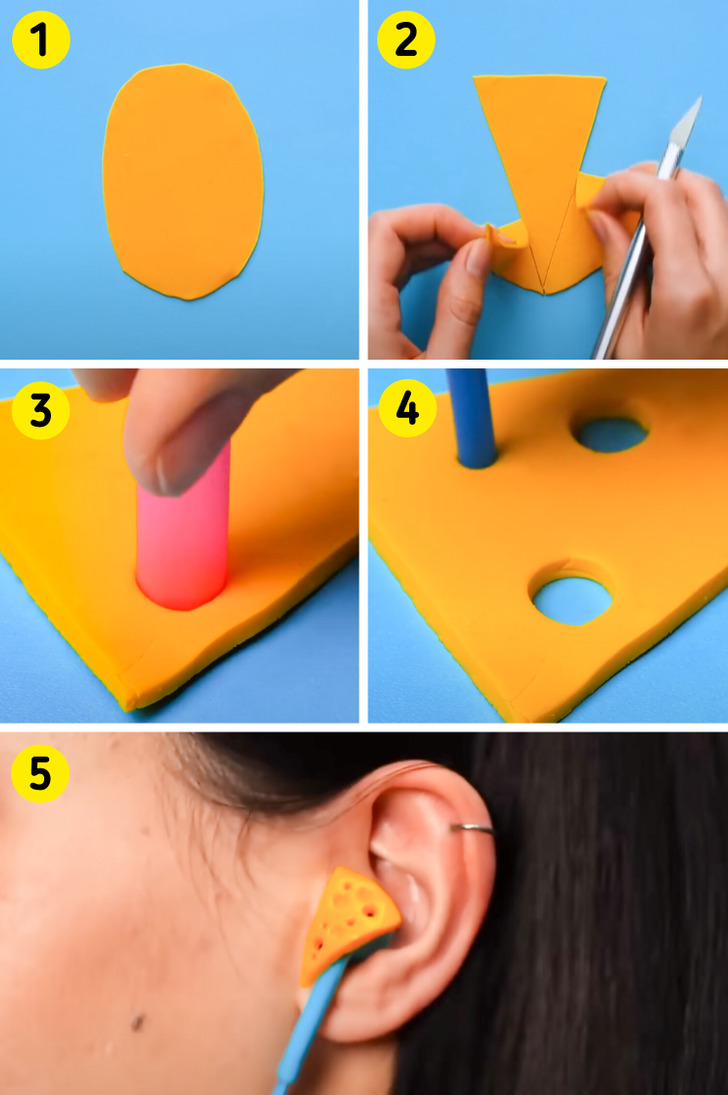
- Flatten a piece of polymer clay, trace a triangle on it, and remove the excess polymer clay.
- Using straws of different sizes, remove circles along the entire triangular piece.
- Let it dry, and if desired, add highlights and shadows for added realism.
4. Donut
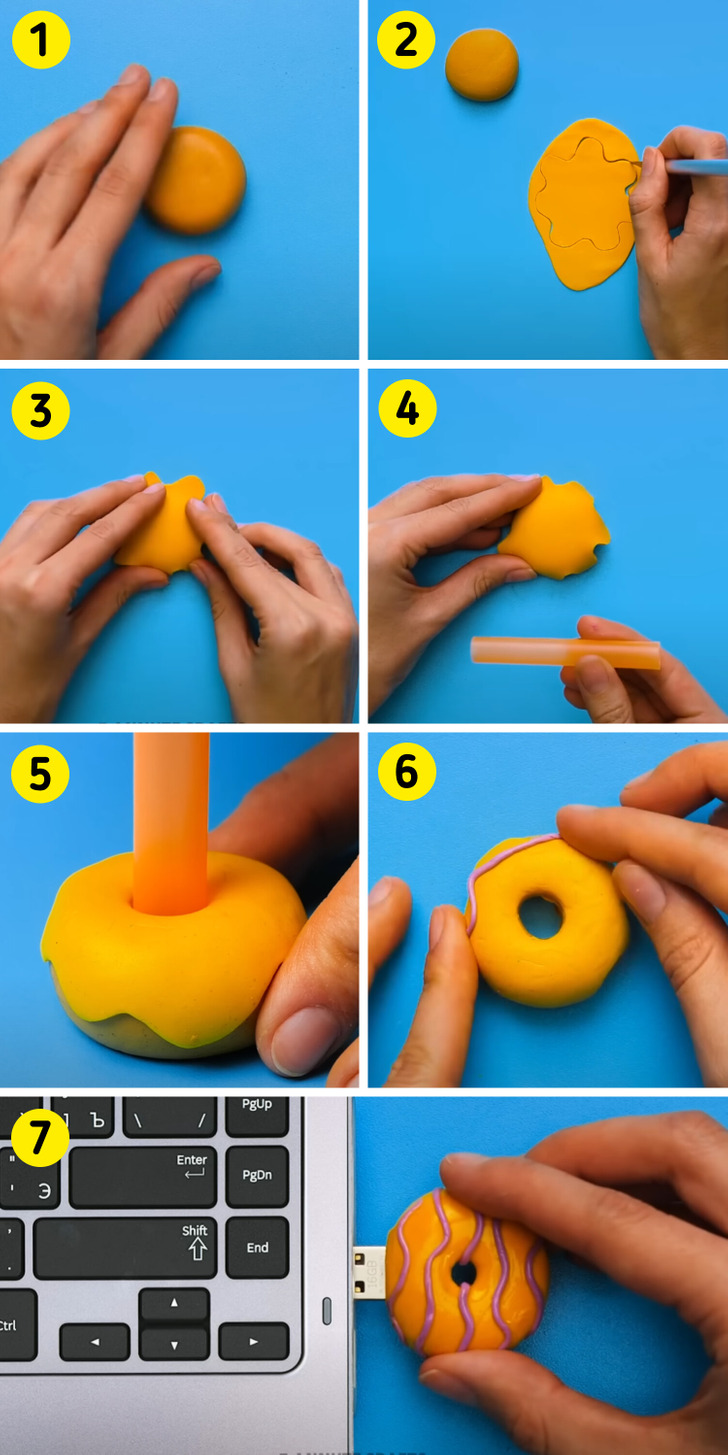
You will need:
- Polymer clay
- Straws
How to do it:
- Create a ball of polymer clay and partially flatten it, only on its bottom part.
- Flatten another piece completely flat and cut out a circle with wavy edges to create the icing for the donut.
- Using a wide straw, hollow out the center of the donut.
- Finally, create thin strips of polymer clay and place them as decorations on the donut.
5. Carrot
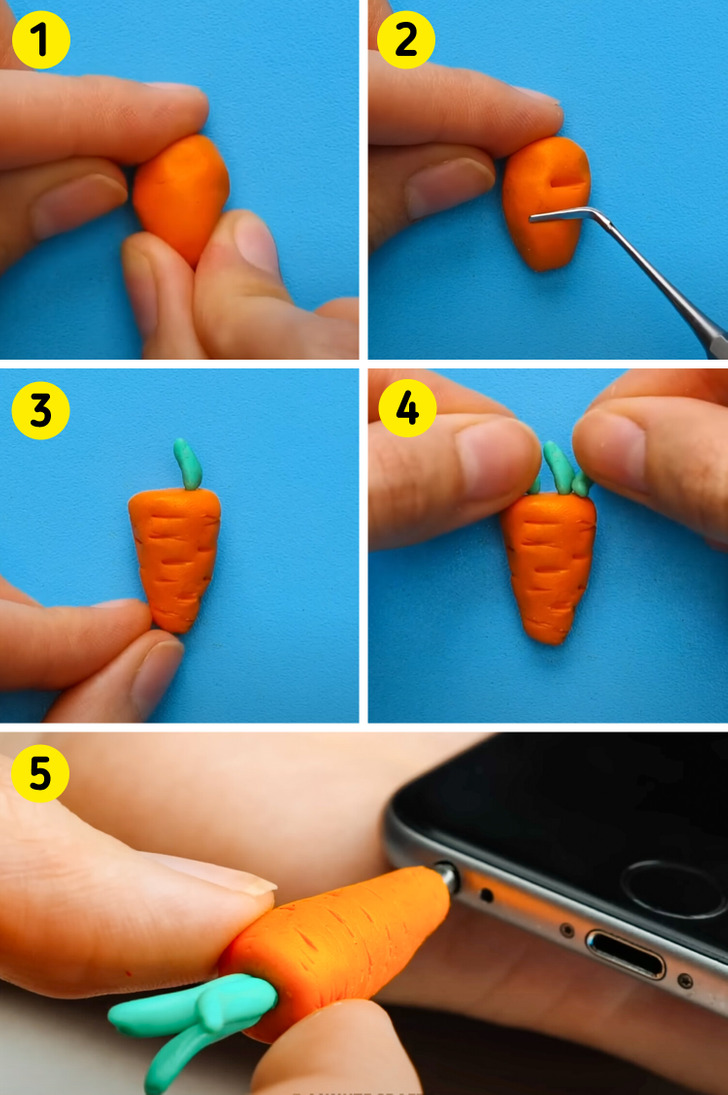
You will need:
- Polymer clay
- Toothpick or flat tool
How to do it:
- Shape a small ball with your hands and pinch one corner with your fingers to give it a conical shape.
- Use a tool or a toothpick to create small lines on the carrot to add texture.
- Add some small polymer clay leaves to the top of it and let it dry.
6. Pizza
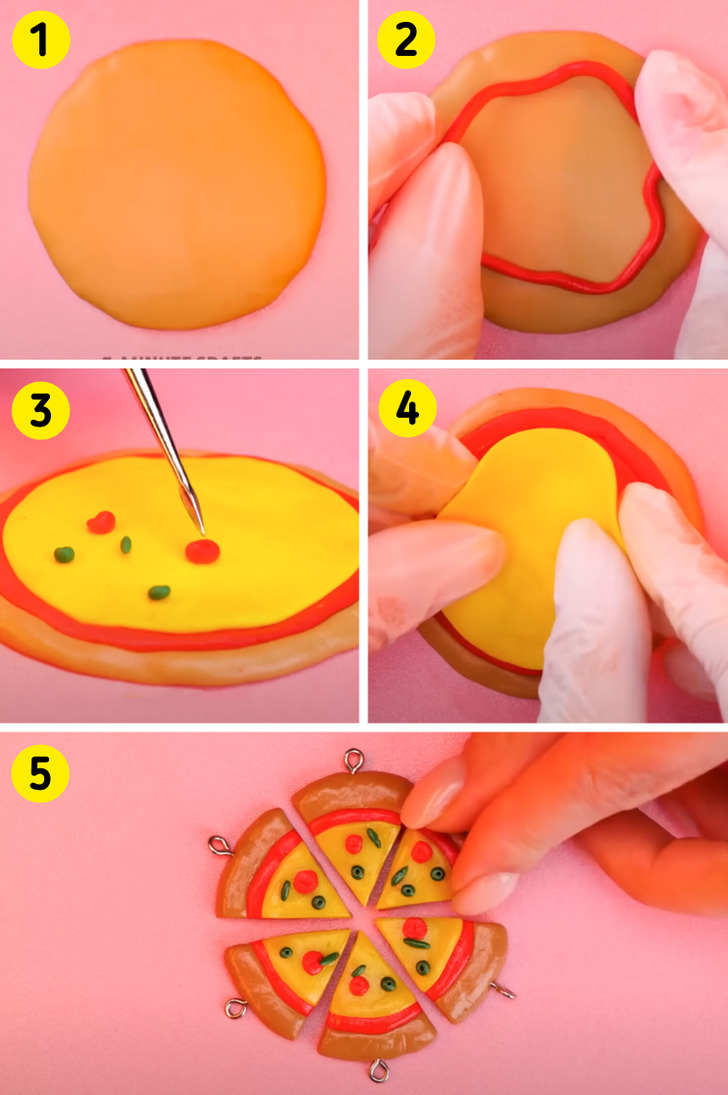
You will need:
- Polymer clay
- Toothpick or flat tool
How to do it:
- Flatten a ball of polymer clay.
- Add a strip of red polymer clay a few millimeters from the edge, completing the circumference.
- Place a flat, circular piece of yellow clay on top and use your fingers to smooth the seams between the three colors.
- Cut small pieces of polymer clay to imitate chopped vegetables and place them as desired all over the surface of the pizza.
7. Marshmallow
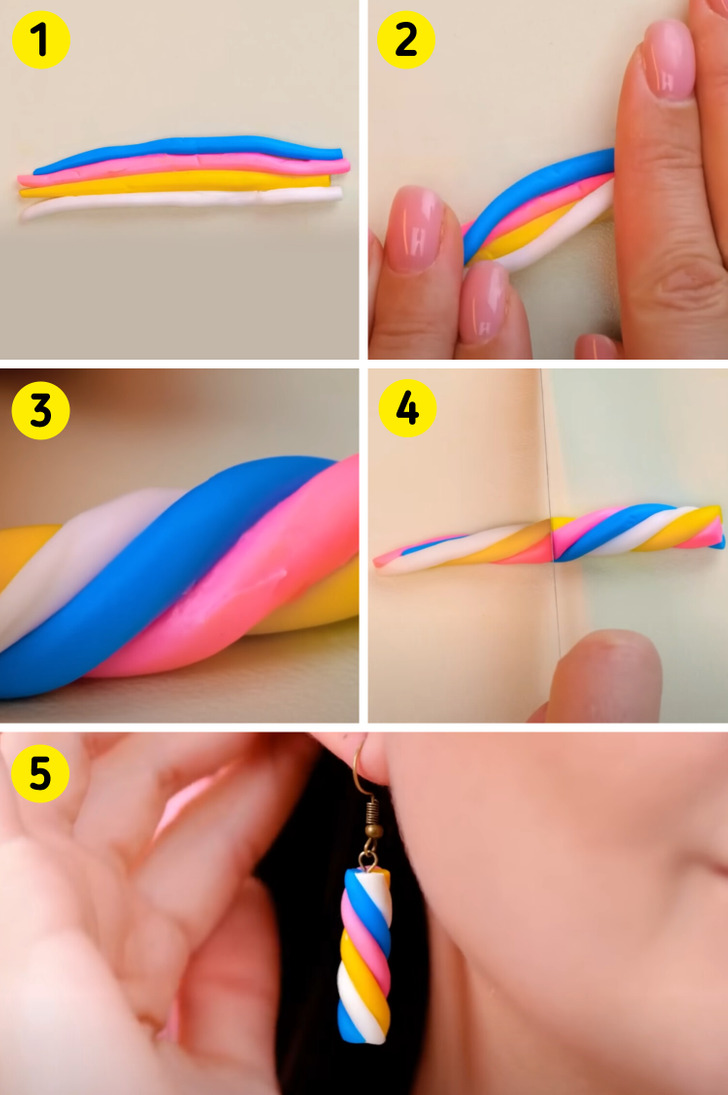
You will need:
- Polymer clay
How to do it:
- Cut strips of different colors and place them side by side.
- Using your hands, but without pressing too hard, twist all the strips in opposite directions at each corner so that they curl up on themselves.
- If the ends become too flattened, trim them and use only the central part.
8. Hot dog
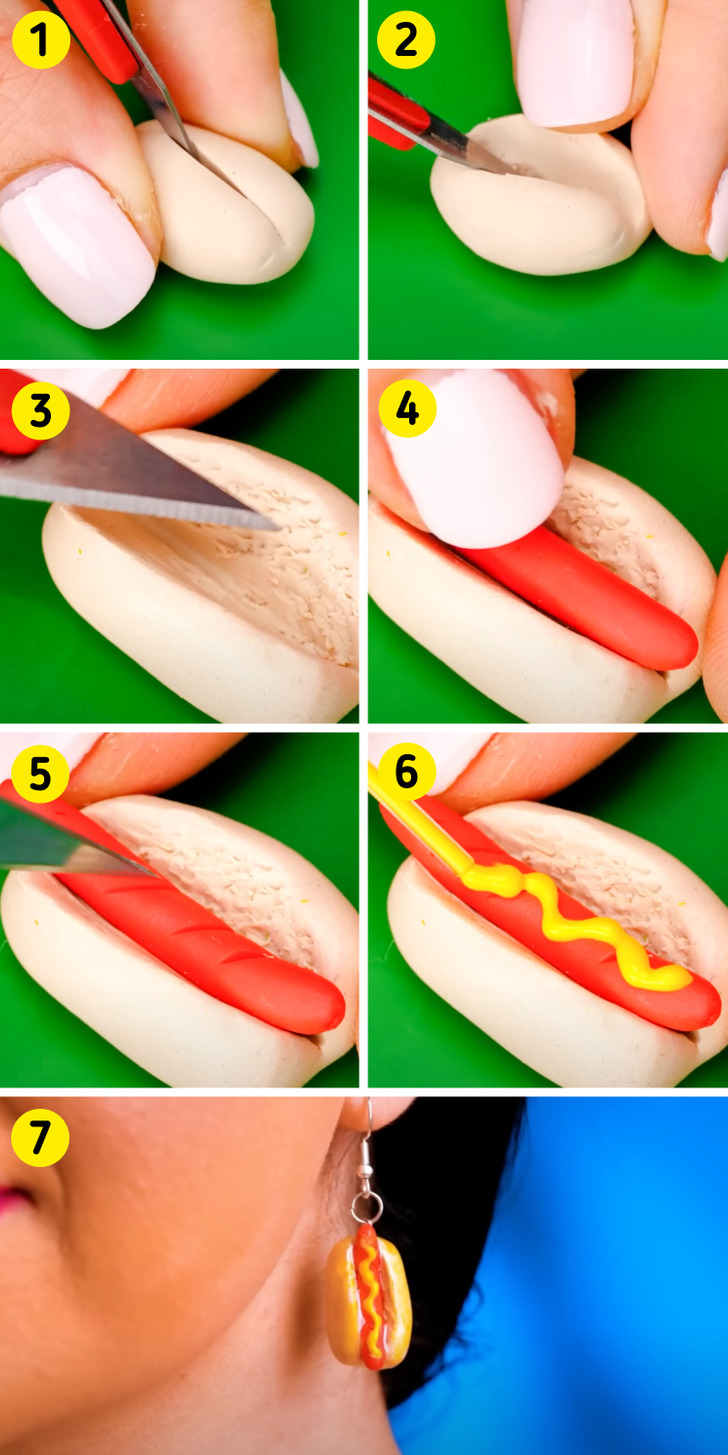
You will need:
- Polymer clay
- Craft knife
- Nail polish
How to do it:
- Create a small oval and use a cutter to cut it in half.
- Using the same cutter, make small cuts on the outer walls of the central cut to add texture.
- Create a small strip, cut it to the desired size for the sausages, and round its ends.
- Place the sausage on the bread, and using a yellow nail polish, add mustard.
9. Macarons
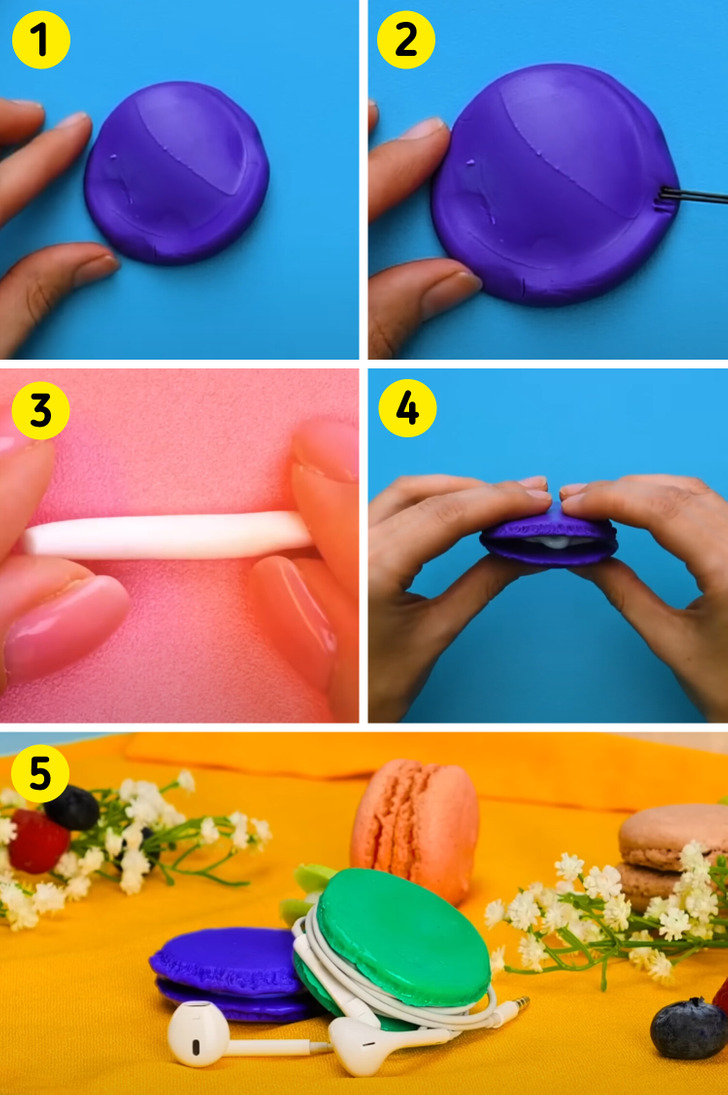
You will need:
- Polymer clay
- Hairpin
How to do it:
- Flatten two circles of the same size.
- Use a hairpin to texture the edge of both pieces.
- Create a strip of white clay and place it in a circular shape around the edge of one of the two pieces created earlier.
- Place the remaining piece on top, as a lid, and press lightly.
10. Watermelon slice
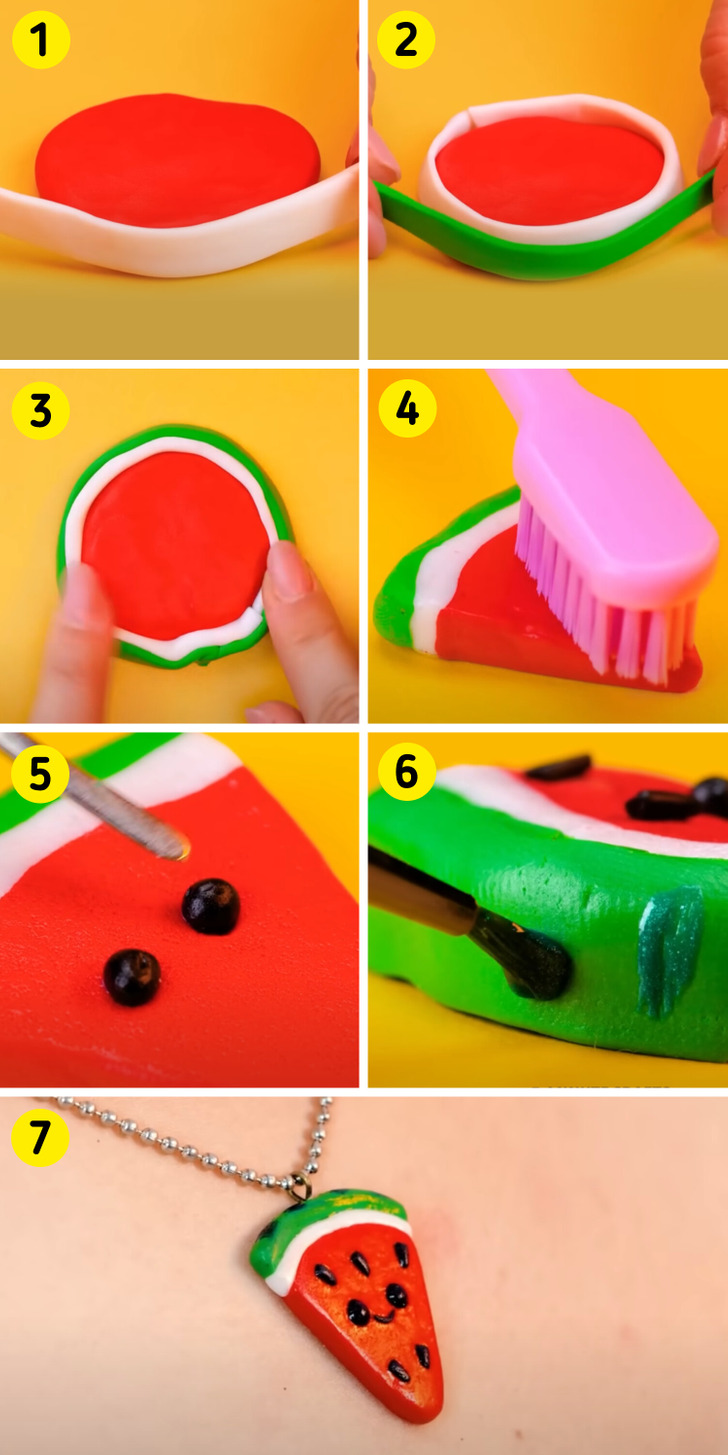
You will need:
- Polymer clay
- Toothbrush
- Nail polish
How to do it:
- Flatten a ball of polymer clay.
- Surround it with a flat strip of white clay.
- Then, encircle it with a strip of green clay.
- Smooth out the seams between the colors by gently pressing with your fingers.
- Cut the piece into portions.
- Add seeds and a cute face, then let it dry.
- Once dry, add color details using nail polish.
Check out more cute mini crafts made from polymer clay and epoxy
Share This Article