10 Spooky Halloween DIY Ideas You Can Use to Jazz Up Your Home and Table
It’s no secret that one of the best ways to get into the Halloween mood is by putting up some decorations. However, while you might love the spookiness, ideas for decorations can be hard to come up with and store-bought ones can make your house look like everyone else’s.
5-Minute Crafts compiled 10 DIY pieces to help you decorate your house for the upcoming festivities.
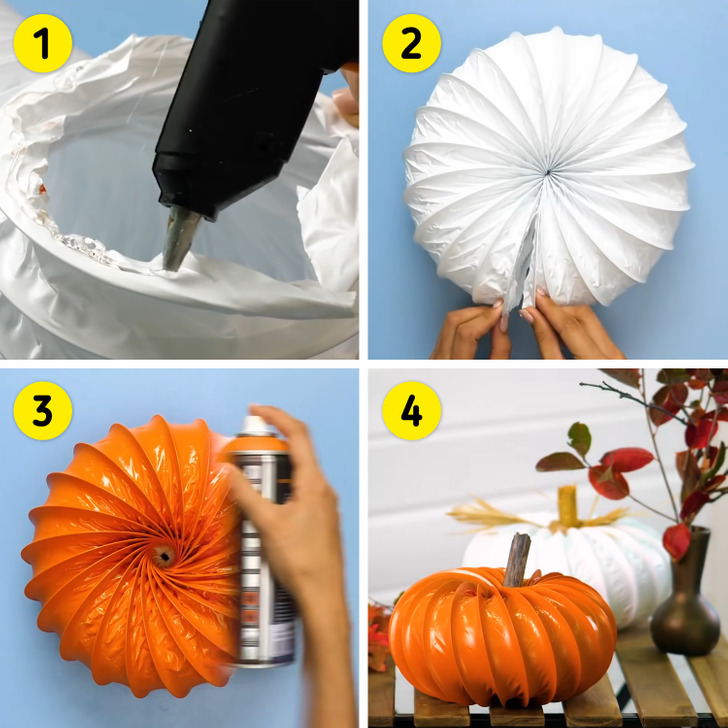
1. Low-maintenance “pumpkin” decoration
What you’ll need:
- A dryer vent hose
- Hot glue
- Orange spray paint
- A stick
- Cut the hose to the desired size and place hot glue on each end.
- Join together the 2 ends of the hose. Let it dry.
- Spray orange paint to get the basic orange pumpkin silhouette.
- Place a stick in the middle, and you have your low-maintenance “pumpkin”
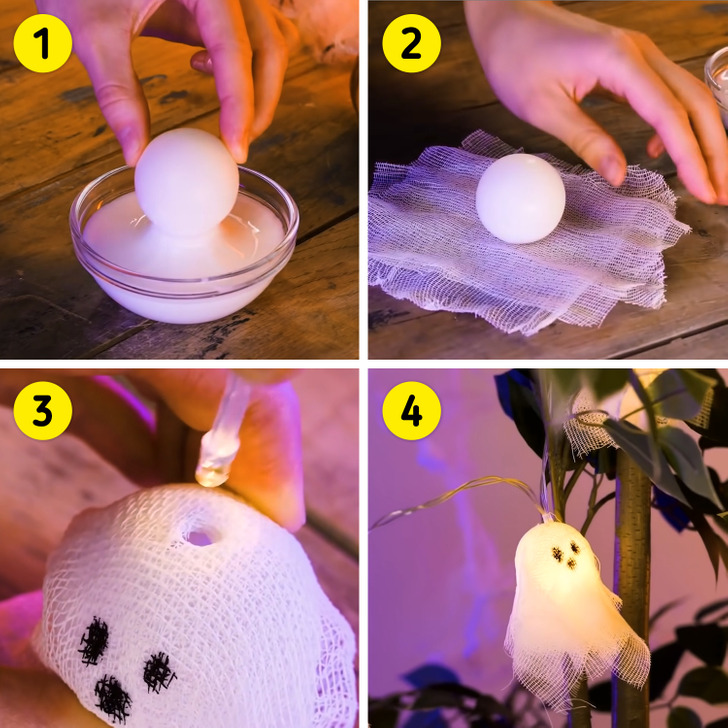
2. Ping-pong ball ghosts
What you’ll need:
- Ping-Pong balls
- Gauze
- White glue
- A black marker
- LED string lights
- A sharp pencil
- Fill a small bowl with white glue and dip the top of the ping-pong ball into the glue.
- Glue the ball to 2 sheets of gauze and let it dry. After it’s dry, draw a face on the little ghost with the black marker and poke a hole on top of the ball with a sharp pencil.
- Place the LED string light through the hole you poked.
- The ghost should be secured to the lights and they’re ready to hang.
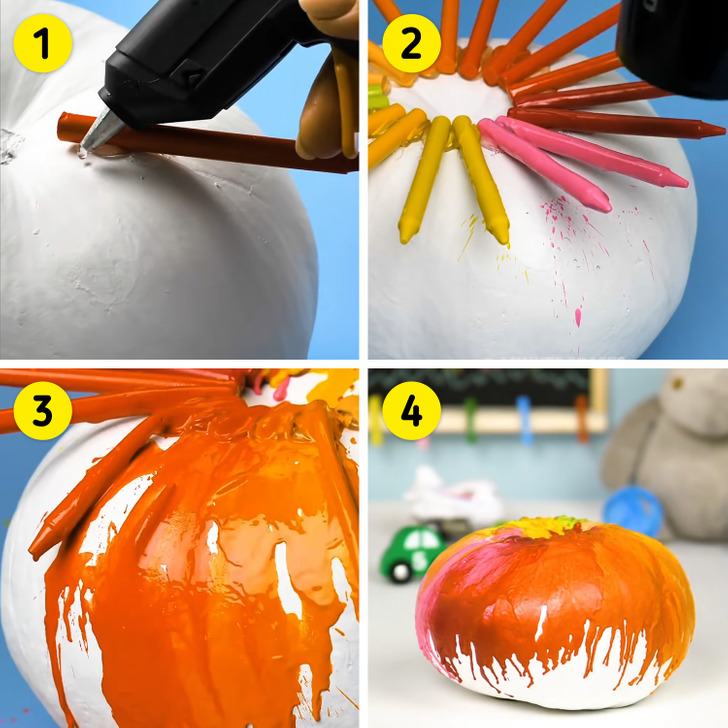
3. Color burst pumpkin
What you’ll need:
- A pumpkin
- White paint
- Crayons
- Hot glue
- Hairdryer
- Paint a pumpkin white and let it dry completely. Use the hot glue to stick a row of crayons across the top of the pumpkin.
- Glue only the end part of the crayons, leaving the rest hanging, as if the pumpkin had spikes.
- Use the hairdryer to make the crayons melt all over the pumpkin and spread their colors around.
- Let dry and you have a color burst pumpkin. You can use a black marker to draw a creative face on your pumpkin.
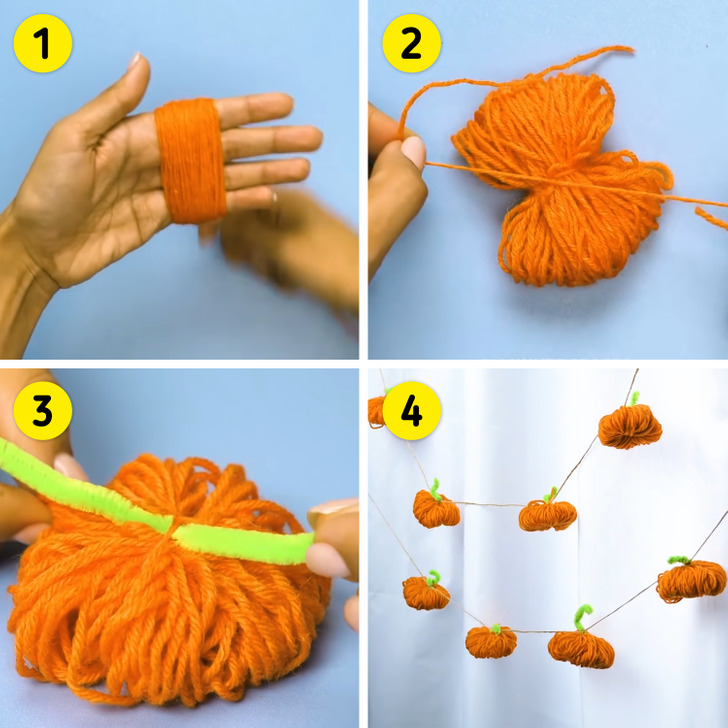
4. Wool pumpkin garland
What you’ll need:
- Orange yarn
- Fluffy green chenille stems or green yarn
- String for the garland
- Wrap a generous amount of orange yarn around your fingers, creating a wide roll.
- Remove it from your hand and tie a small piece of yarn around the middle, as if creating a bow.
- After the knot is tied, spread the yarn around, creating a circle. Use the fluffy green stem or green yarn to make a “pumpkin stem” on top of the orange roll. That will get you the small woolen pumpkins.
- Get the long string, and cut it to the desired size of the garland you’re creating. Spread the pumpkins evenly across the string and hang the garland wherever you want.
5. Evil pumpkin
What you’ll need:
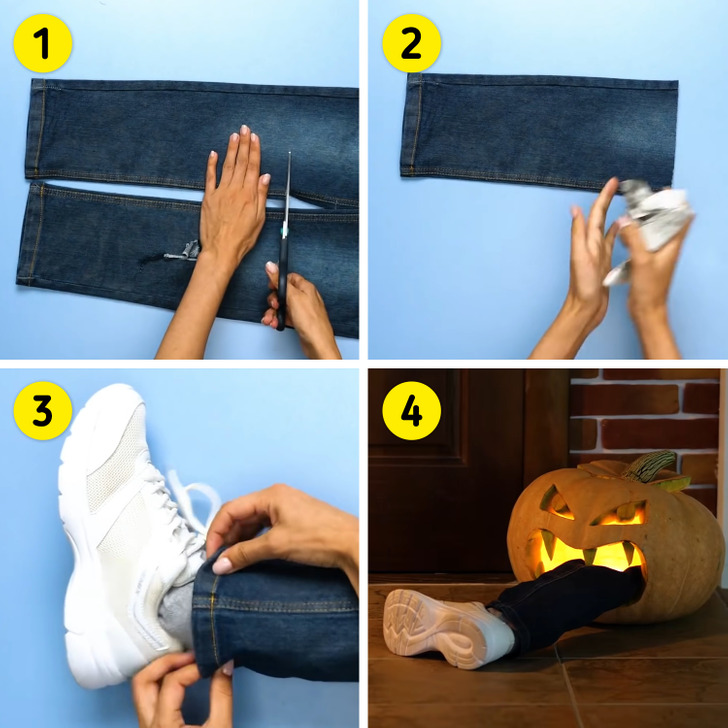
- A carved pumpkin
- Old jeans
- Newspaper
- A shoe and a sock
- Scissors
- Use the scissors to cut the lower leg of the old jeans.
- Crumble up several newspaper sheets and use them to fill the leg, shoe, and sock.
- Assemble it together as if it was a leg.
- Place the leg inside your carved pumpkin, and you’ll have the most evil-looking pumpkin.
6. Glow jars
What you’ll need:
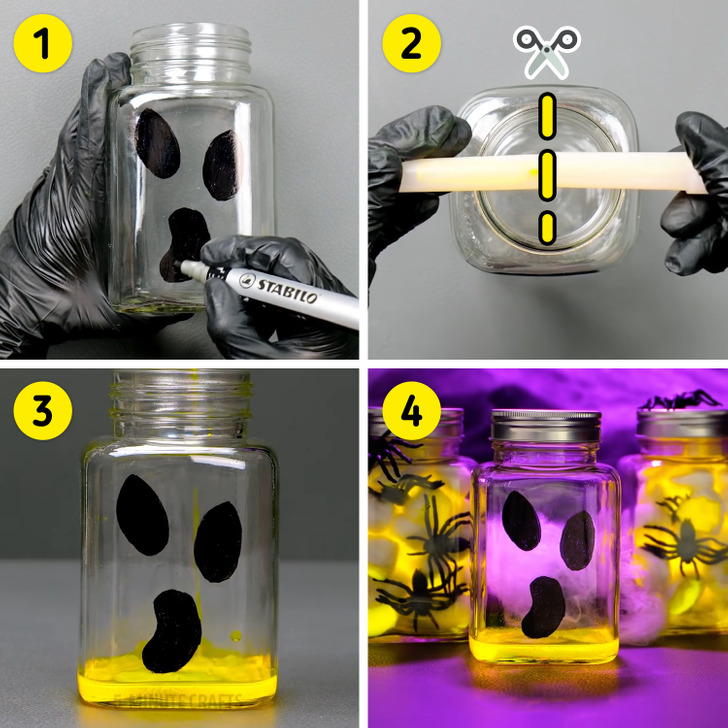
- Jars
- Black marker
- Glow sticks
- Gloves
- Use the marker to draw on the jars. These can be whatever you want, like a scary face or some spiders.
- Put on your gloves, crack the glow stick so it lights up, and cut it in half above the jar.
- Let the liquid fall into the jar.
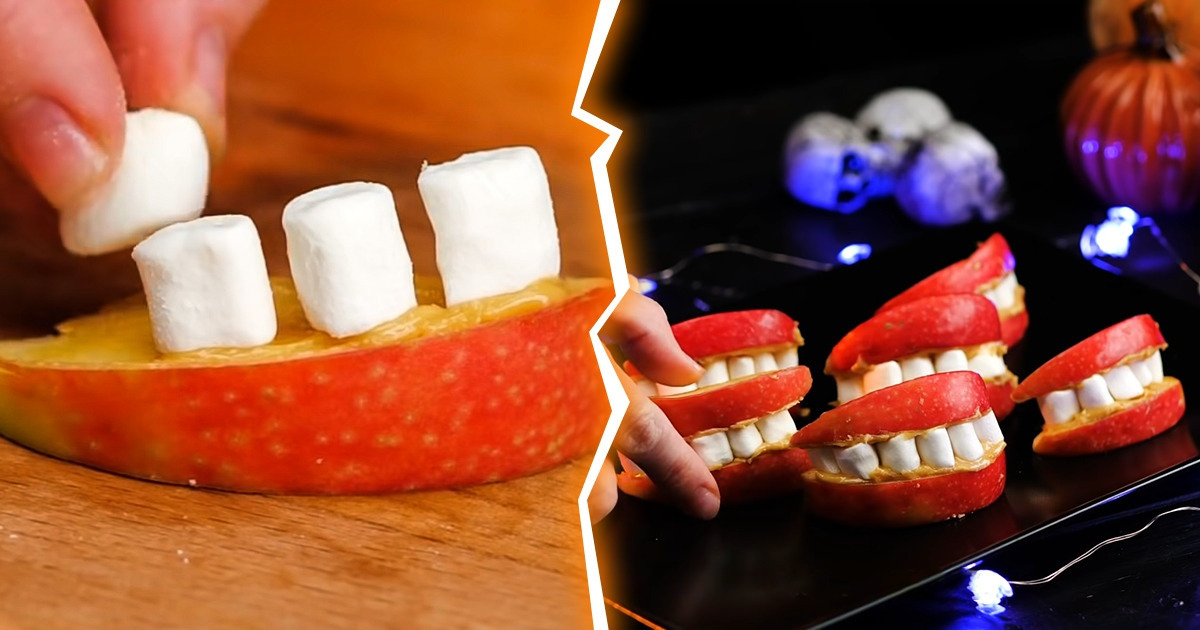
7. Edible denture snack
What you’ll need:
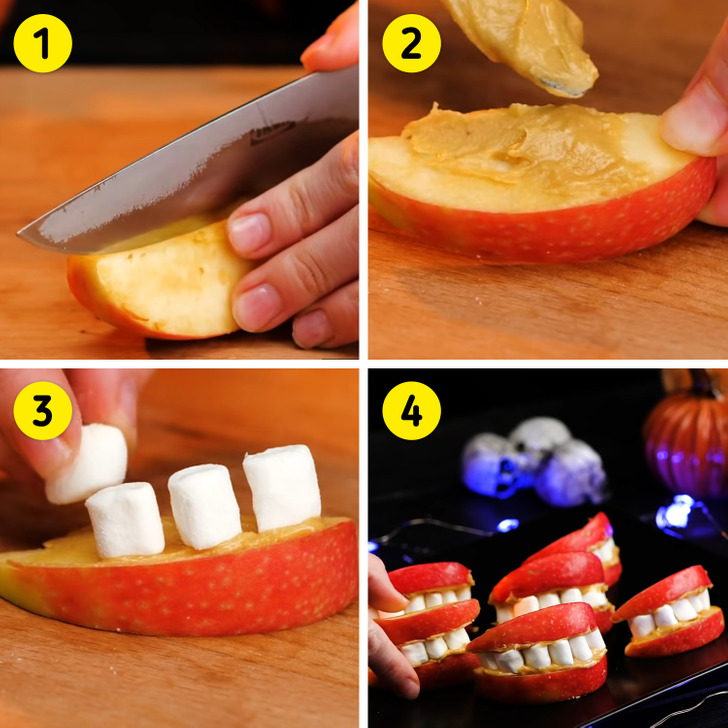
- Apples
- Peanut butter
- Small marshmallows
- Cut the apples into slices, these will be the lips.
- Spread peanut butter on one side of 2 the apple slices.
- Choose the bottom piece of apple, and place it with the peanut butter facing the top. Place the marshmallows on top of the peanut butter.
- Finish by topping it off with another apple slice.
8. Watermelon brain
What you’ll need:
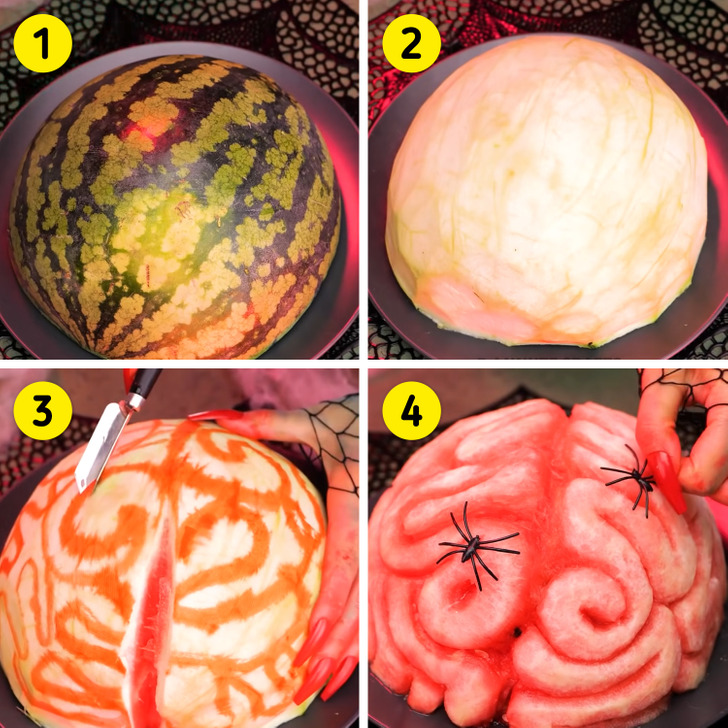
- Watermelon
- Knife or carving knife
- Red food die
- Cotton swab
- Cut your watermelon in half and place it peel-up on a plate.
- Remove the peel, keeping the watermelon whole.
- Use the cotton swab dipped into red food dye to draw a brain design on the watermelon. Then, follow the lines you created with the knife or carver, gradually removing the watermelon flesh until you have the desired shape.
- Decorate your creation with some fake spiders for an extra scary look.
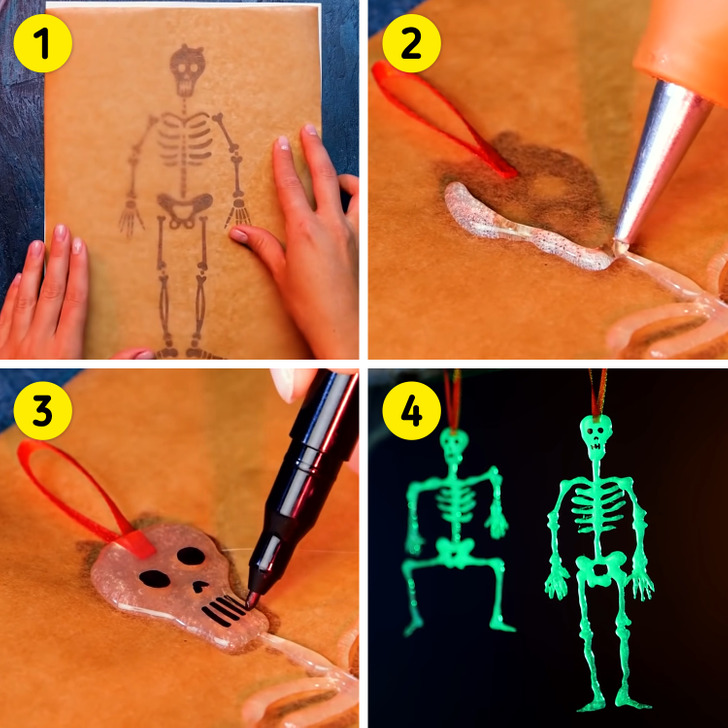
9. Glue skeleton
What you’ll need:
- Hot glue
- An image of a skeleton
- Parchment paper
- Black marker
- String or ribbon
- Place the parchment paper over the printed skeleton image.
- Trace the image with hot glue. Before going over the head, place a folded string of ribbon that will serve to hang the finished ornament.
- Let the glue dry completely. Draw your skeleton friend a face.
- Hang it by the ribbon.
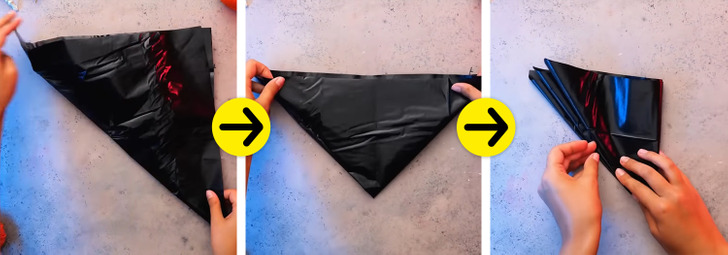
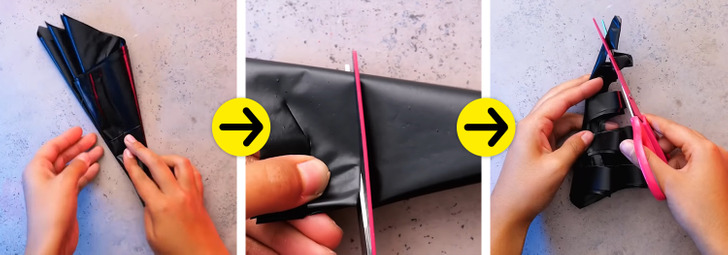
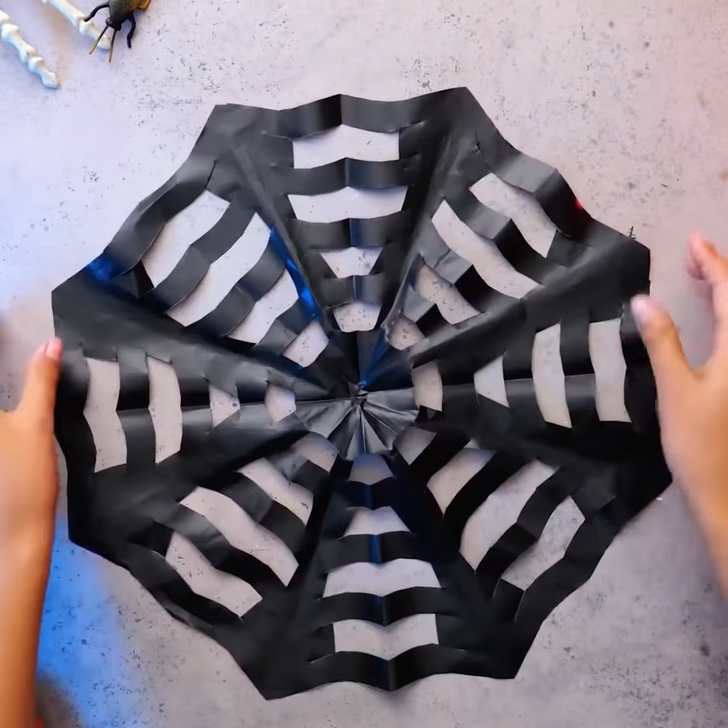
10. Easy cobwebs
What you’ll need:
- A plastic bag
- Scissors
Check out the video for more scary ideas
Preview photo credit 5-Minute Crafts FAMILY / YouTube
Share This Article
