12 Amazing DIY Jewelry Pieces Made with Unusual Materials Found in Almost Every Home
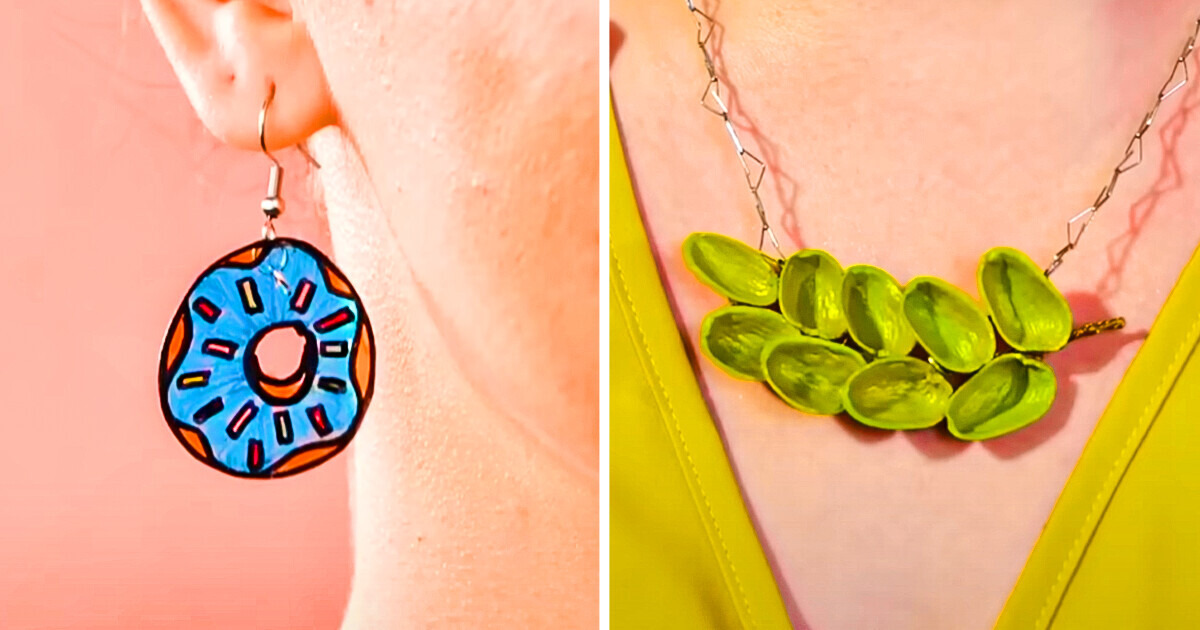
Agree that it is so nice to complement the image with new jewelry? But they are so expensive. Today, we will show you cool ideas that will help you save a lot of money. We have collected so many step-by-step tutorials on how to create cute earrings, nice rings, and colorful bracelets. Keep reading, and we will show you great DIY accessories and jewelry that make perfect gifts.
1. Hot Silicone Bracelet
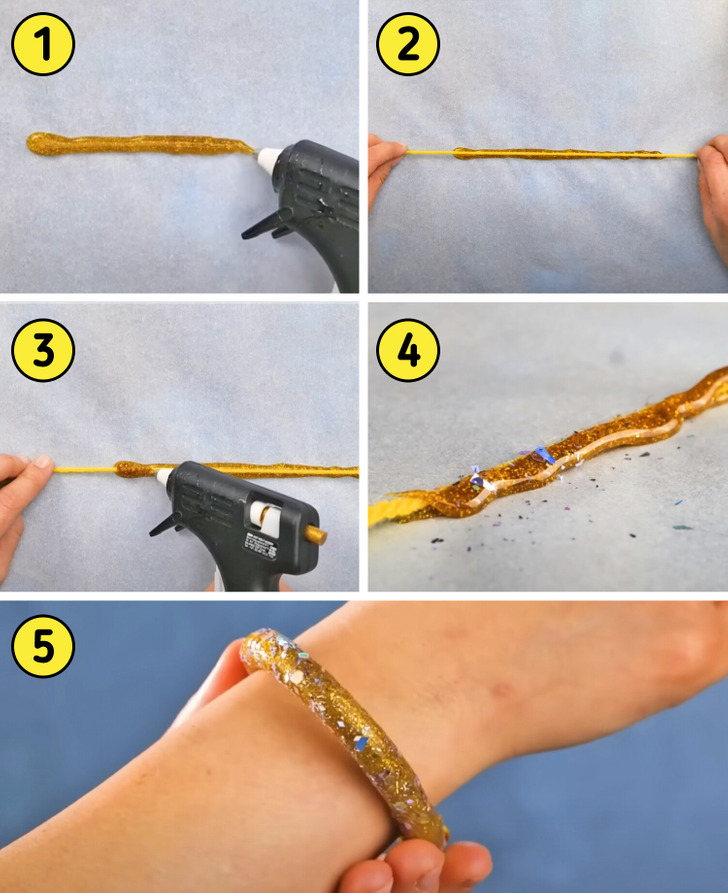
You will need:
- Hot glue
- String
- Glitter
How to do it:
- Trace a line along the length of the wrist with hot glue.
- While it’s still soft, place a string slightly longer on top of it.
- Apply more hot glue over the string and sprinkle glitter on top.
- Allow it to cool, lift it off the working surface, and tie it around the wrist.
2. Plastic Earrings
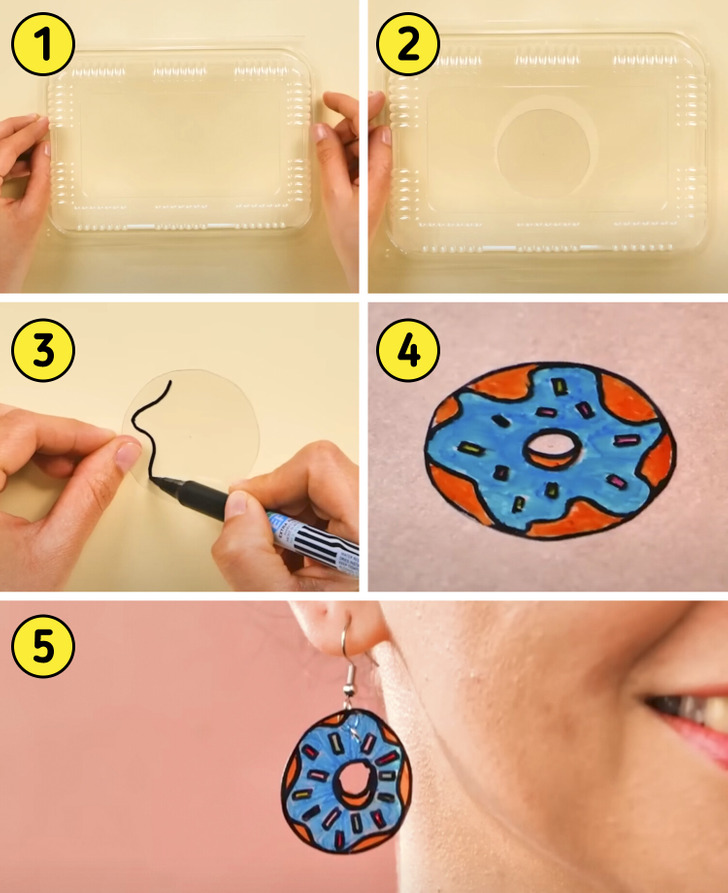
You will need:
- Plastic box
- Markers
- Earring hooks
How to do it:
- Cut a piece of plastic from the tray.
- Use markers to draw the chosen design, making it twice the size of the desired final result.
- Microwave it for a few minutes.
- Let it cool and attach the earring hooks.
3. Cement Ring
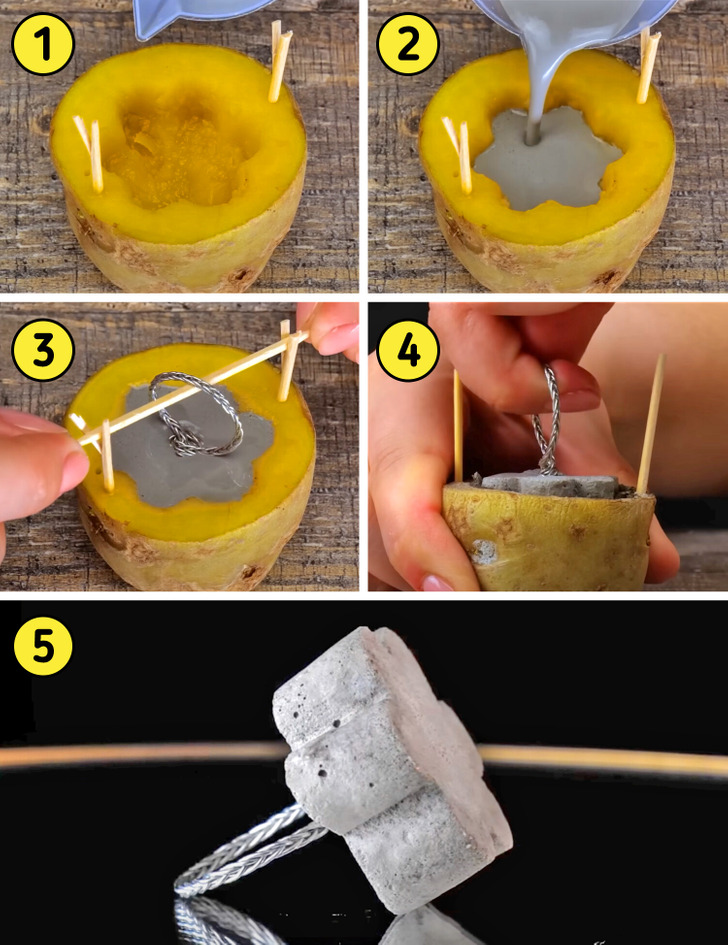
You will need:
- Potato
- Skewer sticks
- Cement
- Ring base
How to do it:
- Carve the desired ring shape into the potato, such as a circle, square, heart, flower, etc.
- Fill the potato cavity with the prepared cement.
- Insert two sticks vertically into the potato and a third one perpendicular to those two to support the ring base, slightly submerged in the cement.
- Demold and use (optional: you can also paint it).
4. PET Bottle Earring
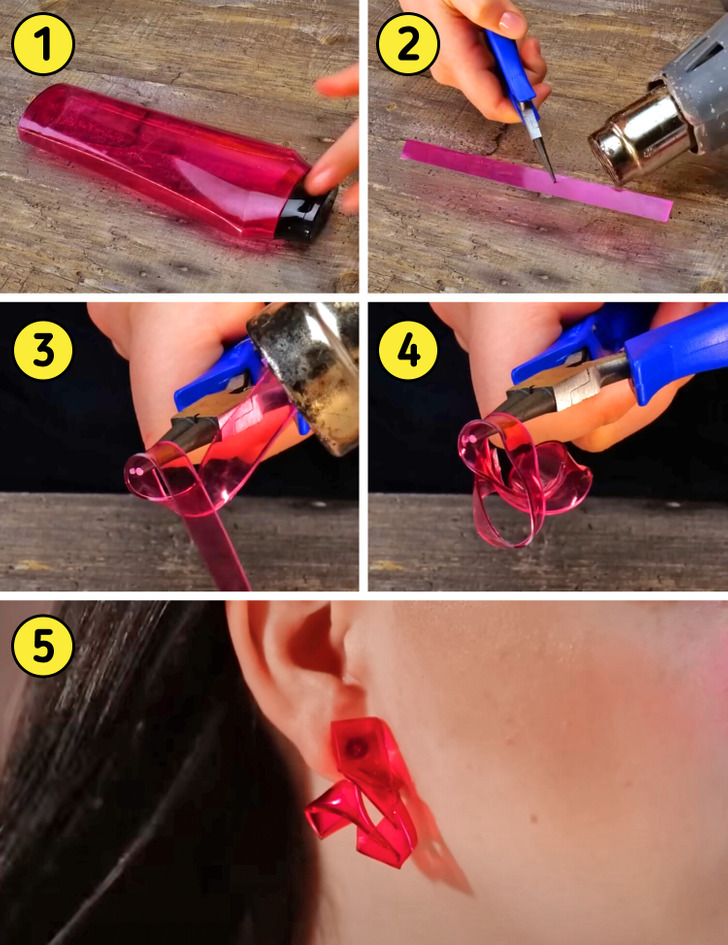
You will need:
- PET plastic bottle
- Heat
- Earring hook
How to do it:
- Cut a strip from the PET plastic bottle.
- Take it by the center and apply direct heat to the ends until they start folding over themselves.
- Once you’ve achieved the desired shape, let it cool and attach the earring hook.
5. Lego Ring
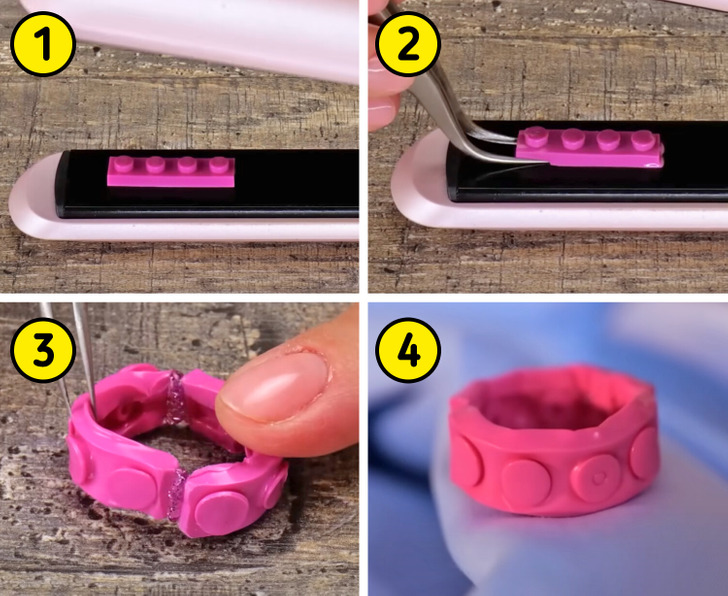
You will need:
- Flat Lego piece
- Hot glue
- Regular or hair straightening iron
How to do it:
- Place the Lego piece on the iron, but not for too long, just enough to soften it slightly and make it flexible.
- Repeat the same process with another piece.
- Once both pieces are curved and cool, attach them to each other at their ends using hot glue.
6. Pistachio Shell Pendant
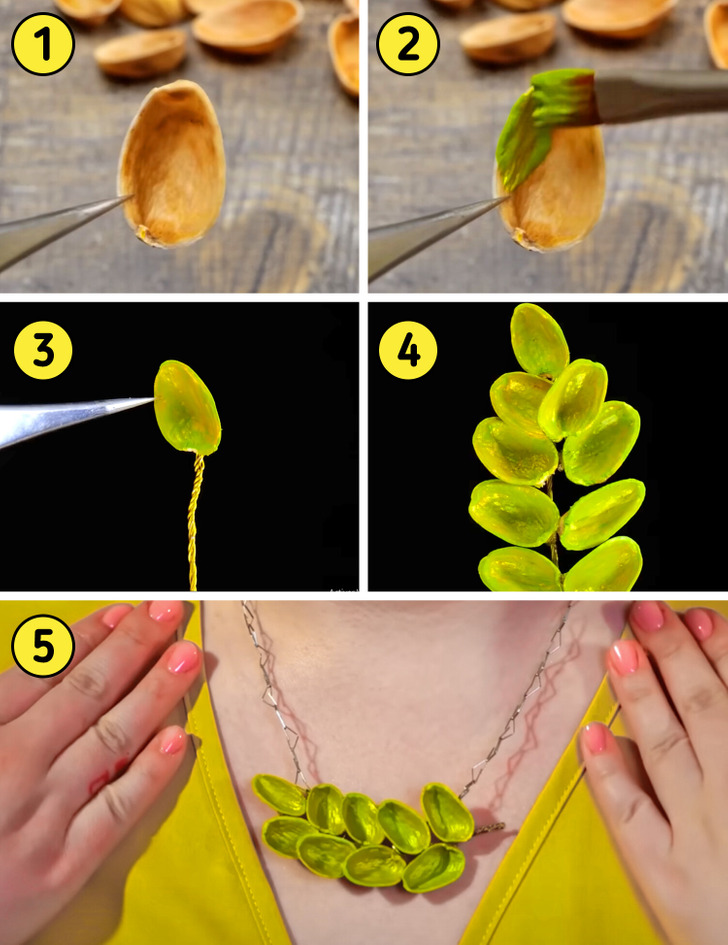
You will need:
- Pistachio shells
- Paint
- Wire
- Hot glue
How to do it:
- Paint the pistachio shells.
- Begin attaching them to both sides of the wire until you reach the desired size.
- Attach it to a string or chain to wear it around your neck.
7. Scissors Earrings
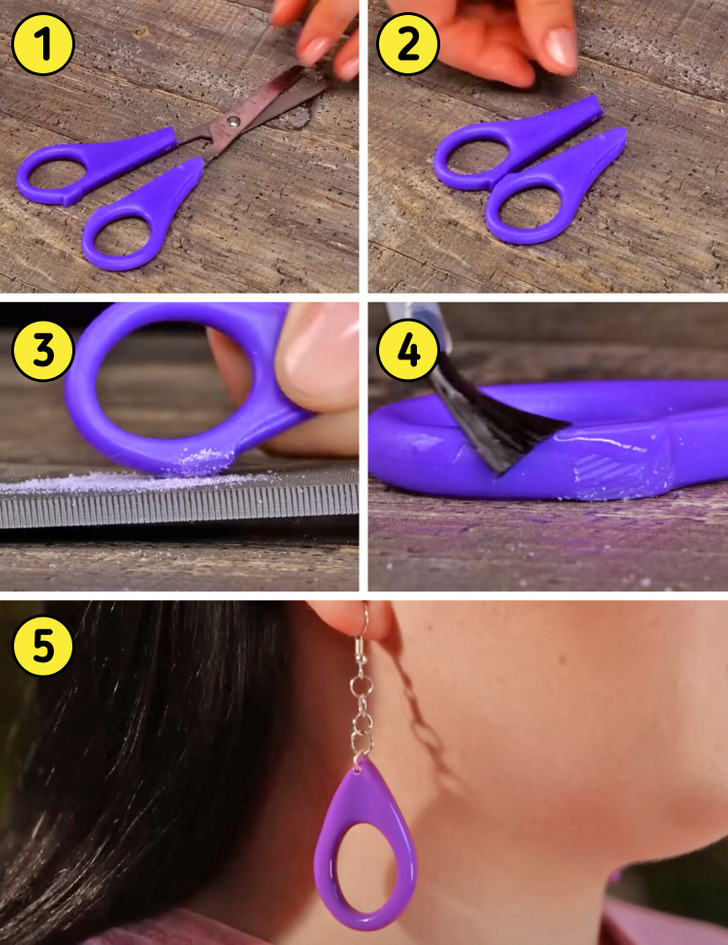
You will need:
- Scissors
- Sander
- Clear nail polish
- Earring hook
How to do it:
- Remove both plastic handles from the scissors.
- If they are not symmetrical, use sandpaper to sand them until their shape is smooth and symmetrical.
- Cover them with clear nail polish to give a glossy finish.
- Attach earring hooks to the thinner end.
8. Hot Silicone Ring
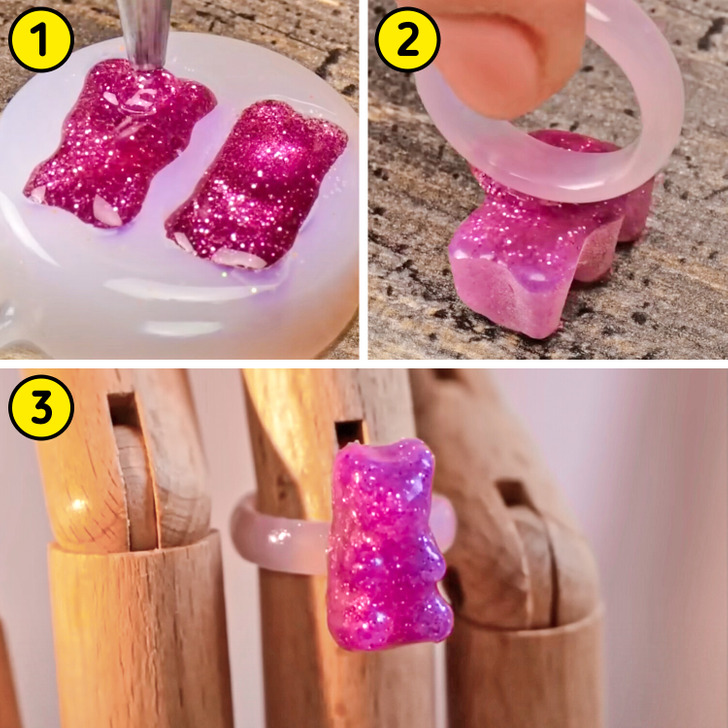
You will need:
- Hot glue
- Mold
- Ring base
How to do it:
- Fill each mold with hot glue up to the edge.
- While the hot glue is still soft, place a ring base on top of it.
- Allow it to cool completely before demolding.
9. Thread Earrings
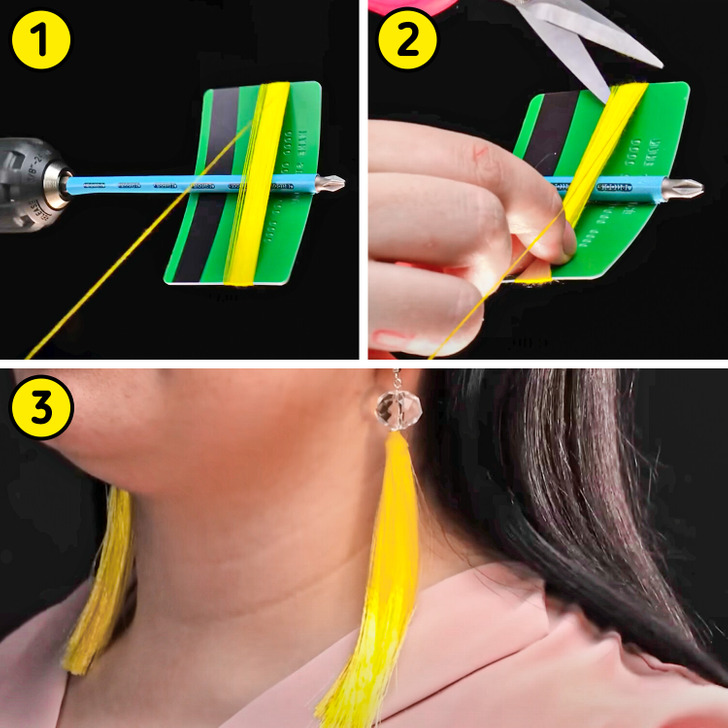
You will need:
- Thread
- Card.
- Bead
- Earring hooks
How to do it:
- Wrap the thread along the length of the card, making several passes.
- Once you’ve reached the desired thickness, cut the thread along one of the sides.
- Fold the thread piece in half and secure it with several wraps of another thread to finish with a knot.
- Thread the knotted end through the bead and the earring hook.
- Tie the thread securely to ensure everything stays connected.
10. Hot Silicone Choker
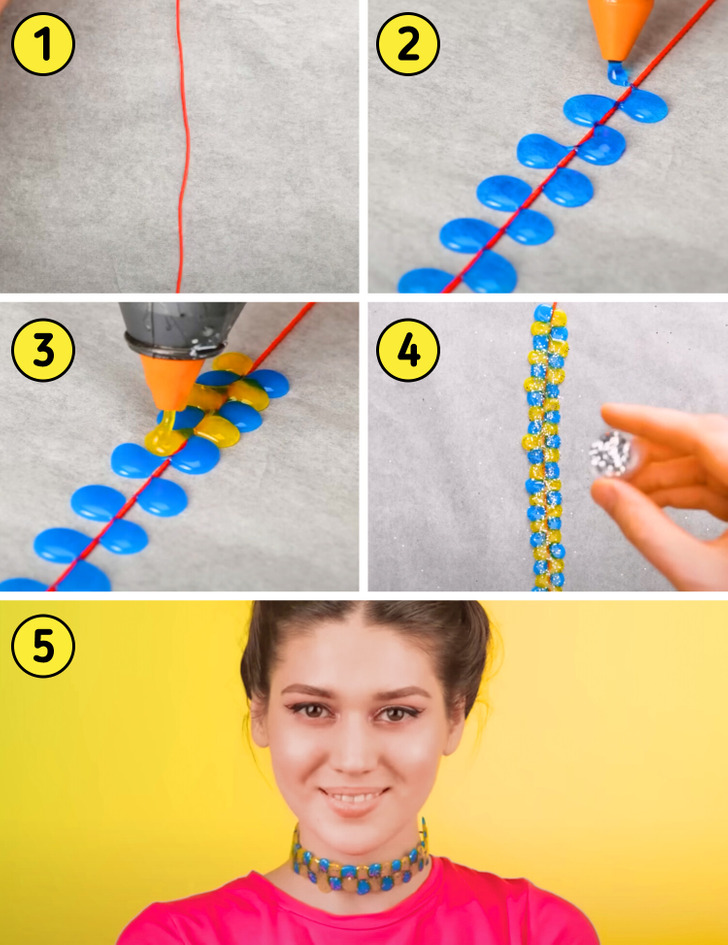
You will need:
- String
- Hot glue
How to do it:
- Place the rope as straight as possible, and if necessary, secure each of its ends to the work surface with adhesive tape.
- Apply drops of hot glue in a zigzag pattern from one side of the rope to the other.
- Once the entire rope is covered, repeat the process, this time applying the glue in the gaps left by the previous pass.
- Sprinkle glitter while the glue is still fresh, and let it dry thoroughly.
11. Vinyl Glue Ring
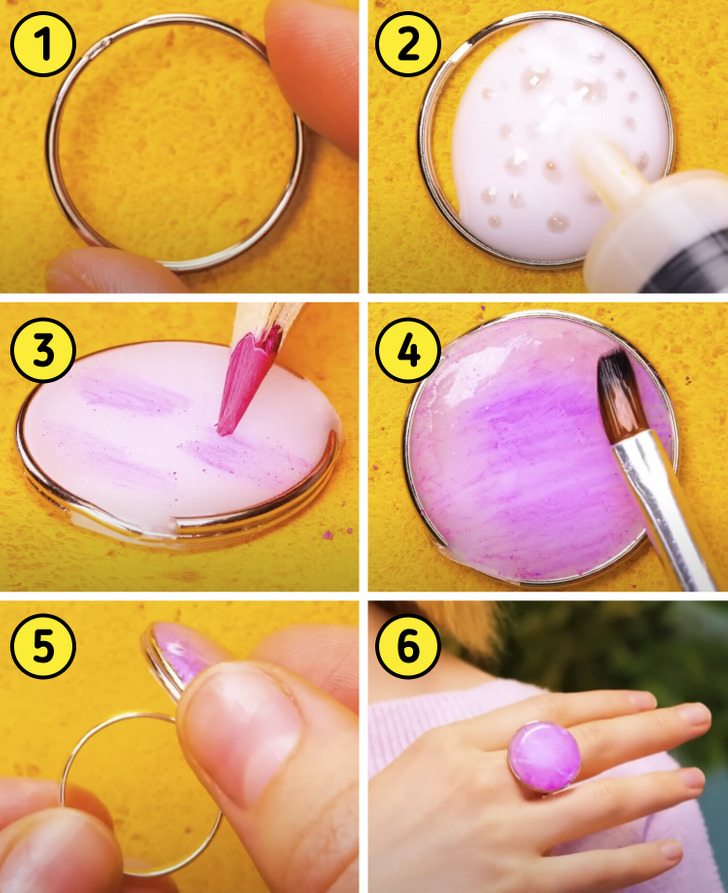
You will need:
- Keyring
- White glue
- Color pencils
- Water
- Brush
How to do it:
- Place the keyring hoop on a flat surface and fill it with white glue.
- Let it dry completely before starting to color it with colored pencils.
- After each layer of color, blend the pencil strokes with a slightly damp brush and allow it to dry.
- Use as many colors as you like, always letting each layer dry before applying the next.
- To finish, glue the ring base on the back.
12. Vinyl Glue Comb
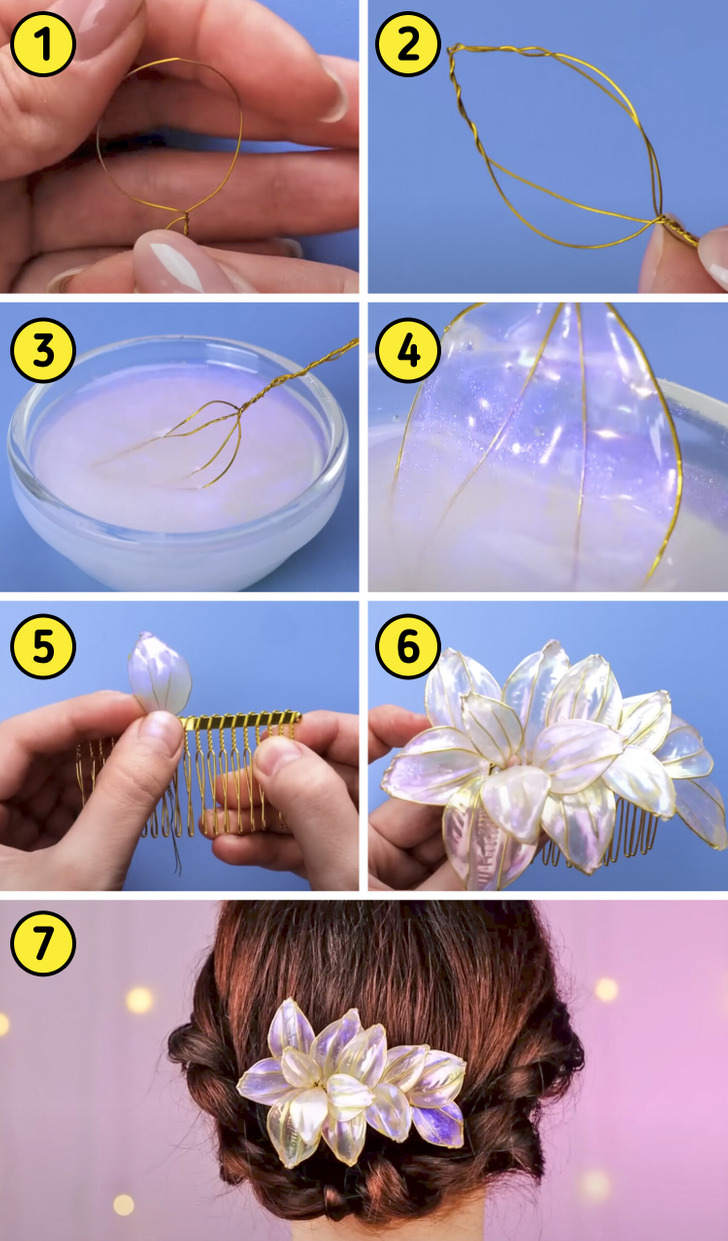
You will need:
- Wire
- Fine glitter
- White glue
- Comb
How to do it:
- Bend a wire to create the shape of a leaf.
- In a container, mix white glue with glitter and dip the wire-shaped leaf into the mixture.
- Remove the wire from the glue and place it upright somewhere to dry completely.
- Create as many leaves as you desire by repeating the same process.
- Once you have all the desired leaves, attach them one by one to the comb.
Check out more amazing DIY jewelry that you can make at home
5-Minute Crafts/Crafts/12 Amazing DIY Jewelry Pieces Made with Unusual Materials Found in Almost Every Home
Share This Article