12 Super Easy Crafts to Create Unique Accessories for Your Dolls
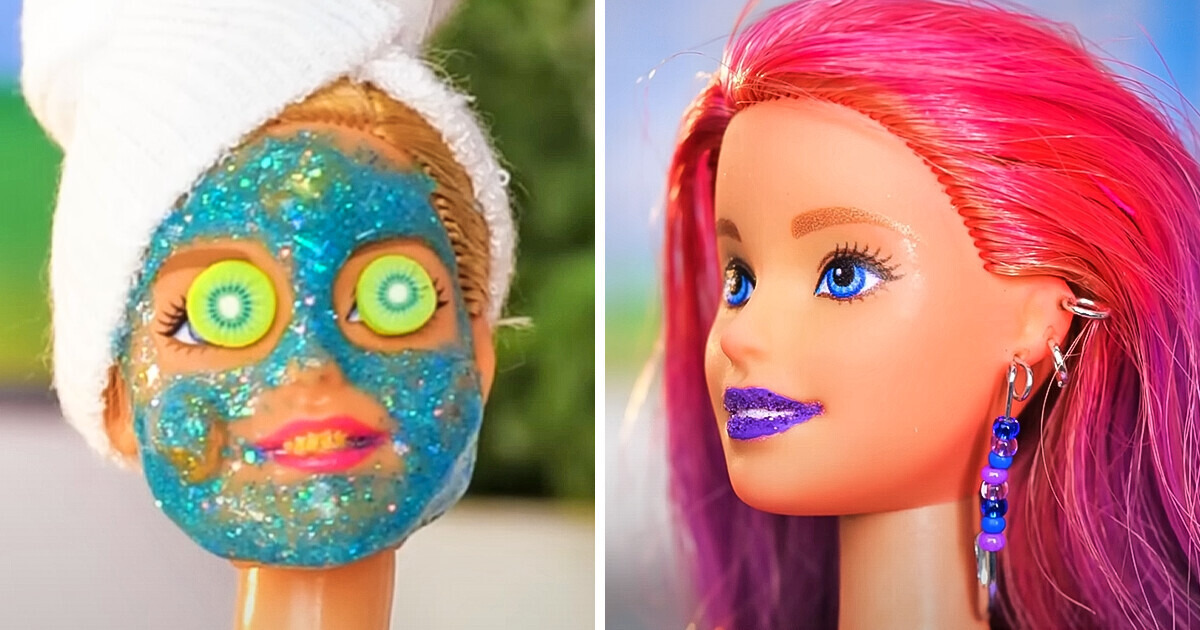
Today, we’re excited to welcome you to the enchanting realm of miniature crafts for dolls. We’ll guide you through creating DIY miniatures that exude royal elegance, yet remain wonderfully budget-friendly for everyone. Whether you’re an experienced crafter or just embarking on this creative journey, we have something special in store for you. So, set up your workspace and let’s get started!
1. Dreadlocks
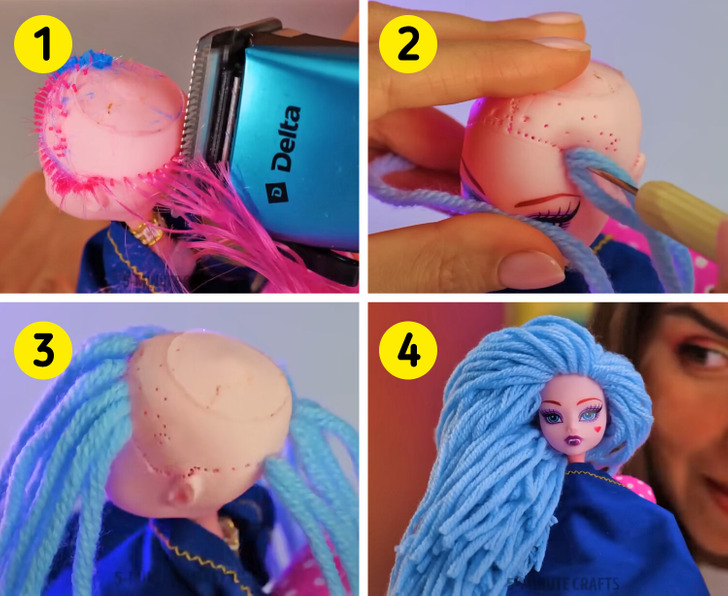
You will need:
- Yarn
- Needle
How to do it:
- Cut or remove the doll’s original hair.
- Cut yarn strips to the desired hair length and, with the help of the needle, insert them one by one into the doll’s head.
- Continue until the entire head is covered.
2. Headphones
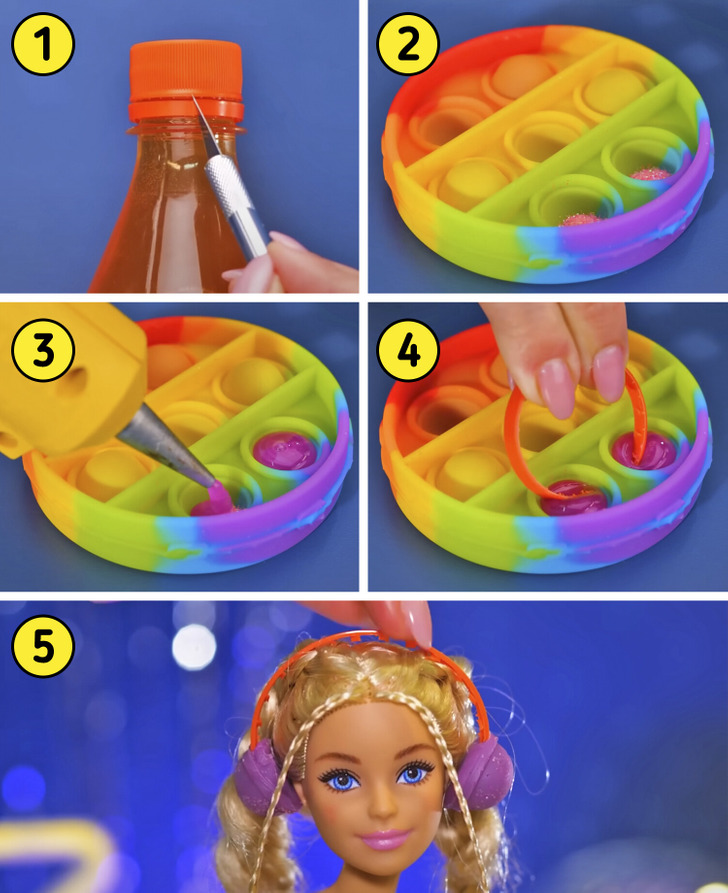
You will need:
- Bottle cap ring
- Hot glue
- Glitter
- Pop-it or similar circular mold
How to do it:
- In the circular mold, start by adding a bit of glitter and then fill it up with hot glue.
- Before it dries, insert each end of the bottle cap ring into the hot glue, then let it dry.
- Once it’s dry, carefully remove from the mold.
3. Skis
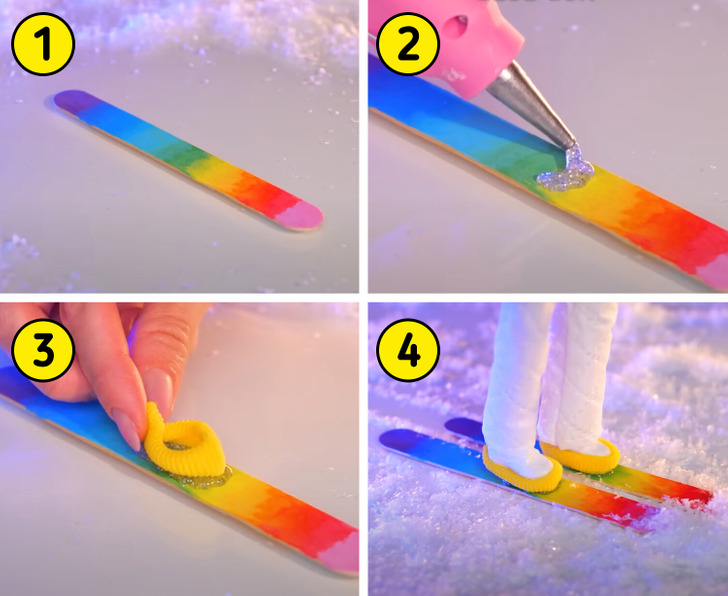
You will need:
- Popsicle sticks
- Hairband
- Hot glue
- Paints
How to do it:
- First, we will paint the popsicle sticks in the colors and patterns we like.
- Then, in the center of each popsicle stick, apply a small oval of hot glue and attach the hairband to the stick.
- Allow it to dry thoroughly before using.
4. Sunglasses
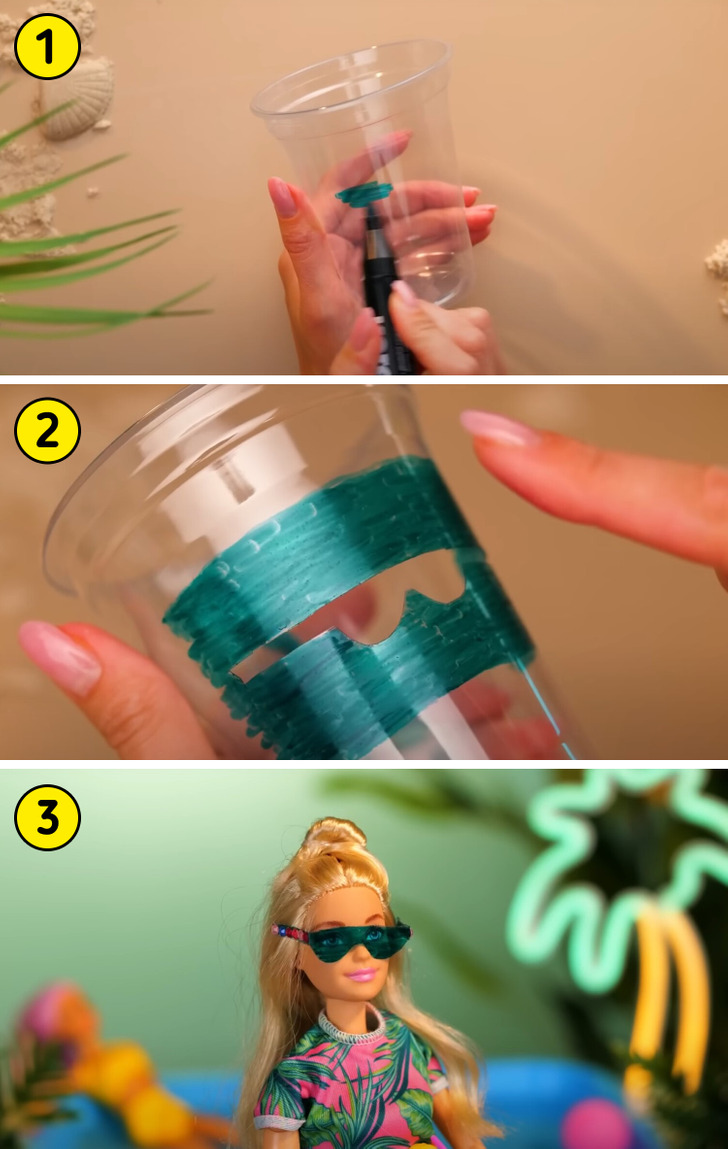
You will need:
- Disposable cup
- Black marker
- Scissors
How to do it:
- Use the marker to draw the part of the cup that you’ll use to create the sunglasses.
- Once the color has dried, cut out the sunglasses shape.
- Decorate the sunglass arms to your liking.
5. False Nails
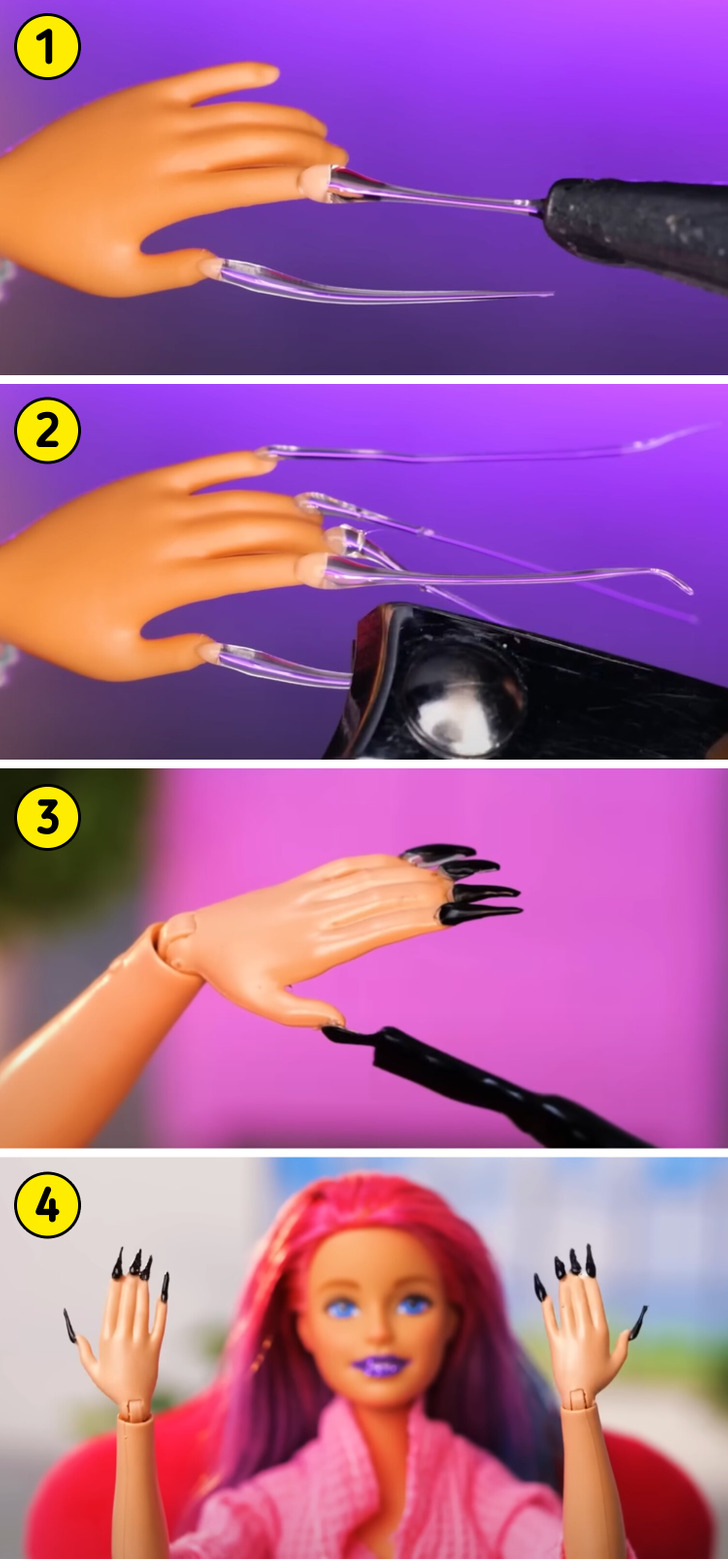
You will need:
- Hot glue gun
- Nail clippers or scissors
- Nail polish
How to do it:
- Place a drop of hot glue on the doll’s finger and stretch it to create the nail shape.
- Trim them to your desired length.
- Paint them with your preferred nail polish color.
6. Ice Skates
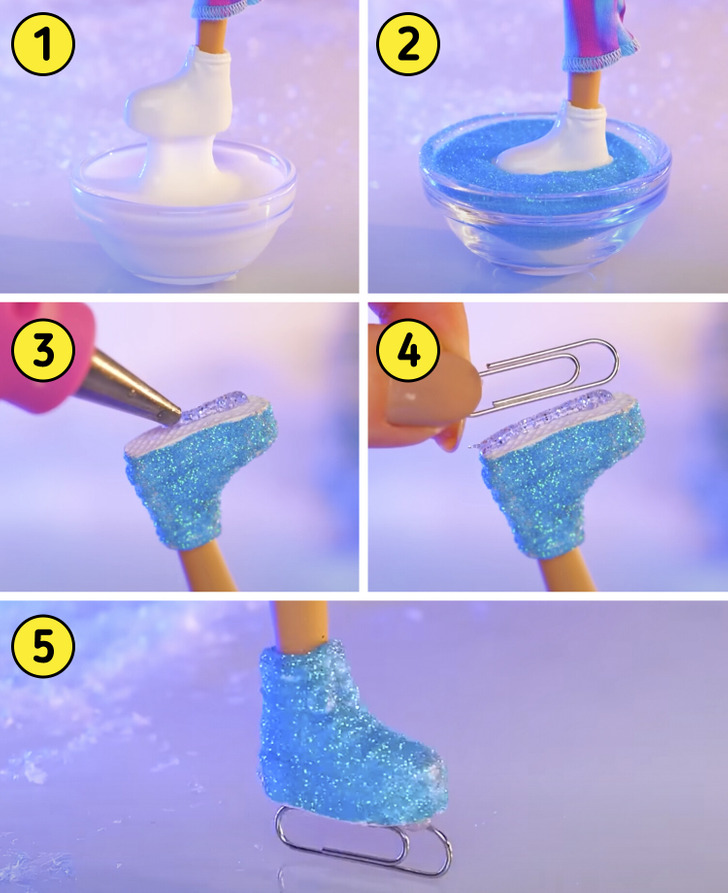
You will need:
- Doll boots
- Glitter
- White glue and hot glue
- Paperclip
How to do it:
- Dip the doll boots into white glue and then roll them in glitter.
- Allow them to dry completely before moving on to the next step, which involves applying hot glue to the sole of the boot and attaching the paperclip.
- Once again, let it dry thoroughly before using.
7. Peel-off Mask
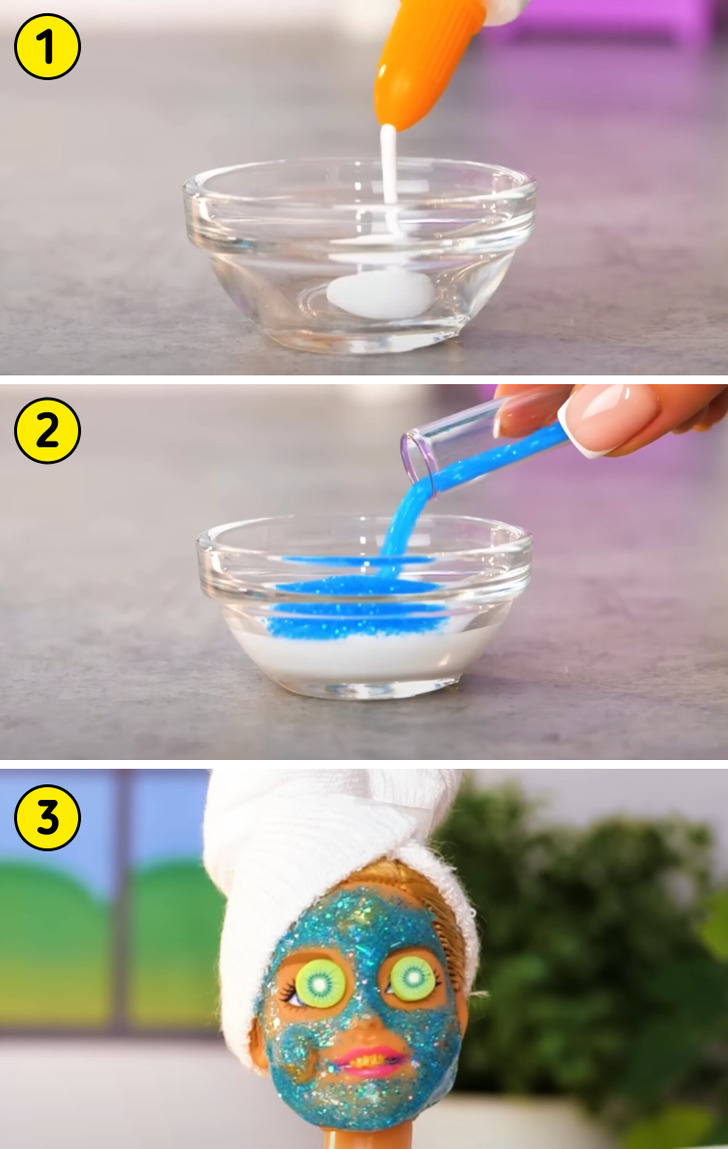
You will need:
- White glue
- Glitter
How to do it:
- Mix a small amount of white glue with a bit of glitter.
- Once the mixture has a consistent appearance, apply it to the doll’s face using a brush.
- Let it dry for a few minutes; once dry, it will be ready to be removed from the doll’s face.
8. Earrings
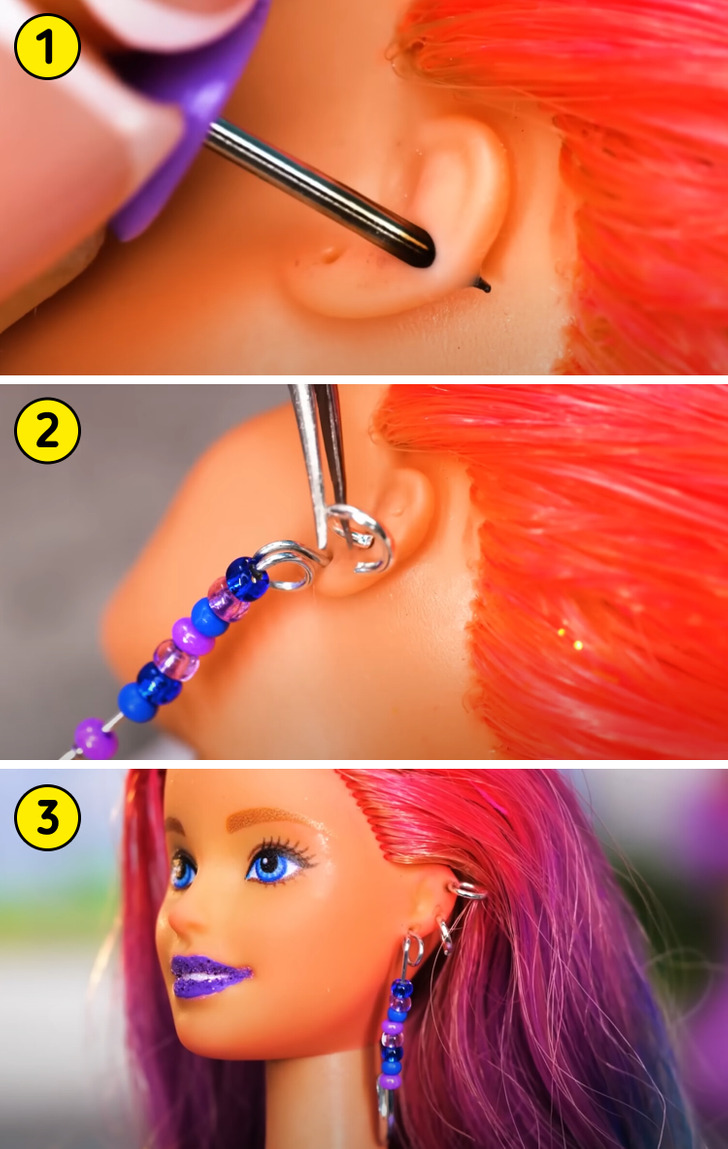
You will need:
- Thin wire
- Beads
How to do it:
- To make a hanging earring, create a loop in the wire.
- If you want the earring to be a small hoop, cut both ends.
- If you want them to be long, cut only one end and decorate the other with beads and stones.
9. Flip-flops
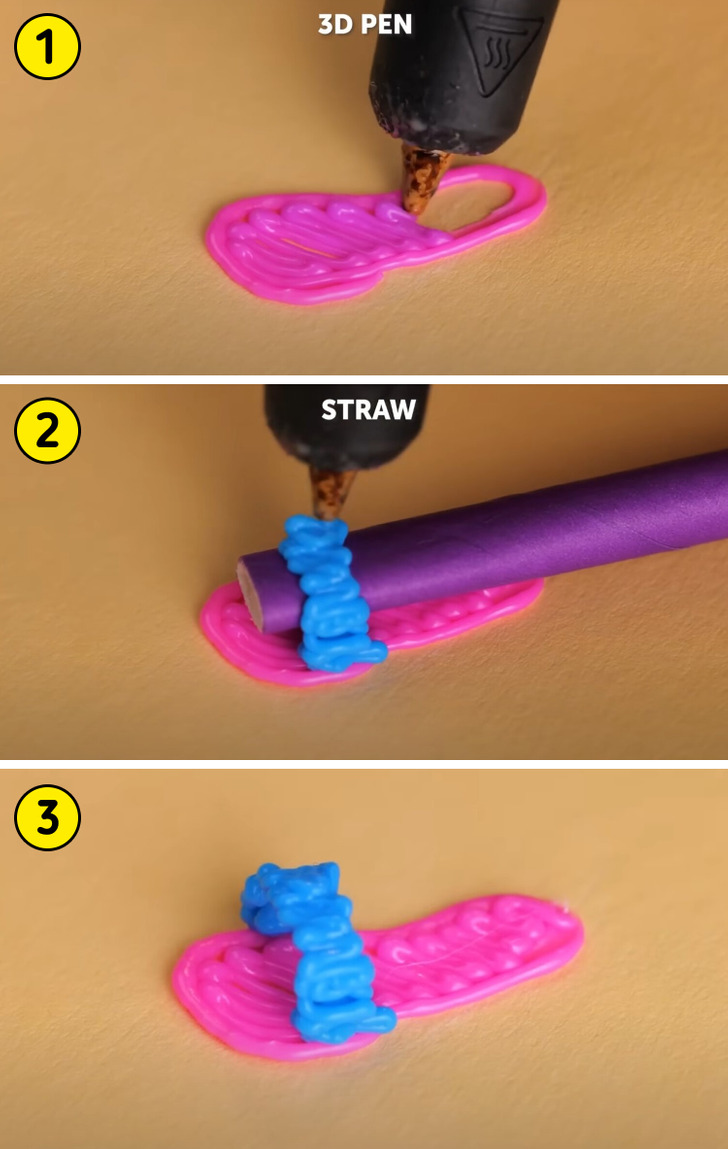
You will need:
- 3D or hot glue gun
- Straw or pen
How to do it:
- Use the glue gun to create the base of the flip-flop.
- Once it’s dry, place the straw on it to help you create the top part of the flip-flop.
10. Temporary Hair Dye
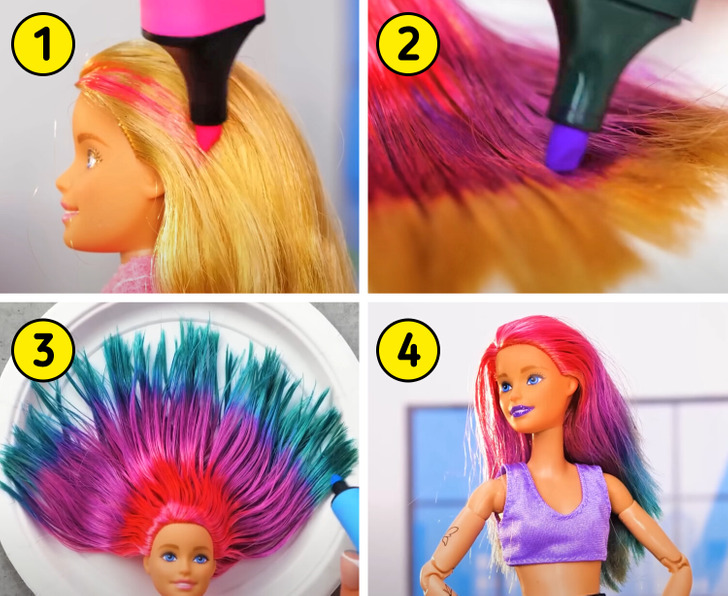
You will need:
- Water
- Colored highlighter markers
How to do it:
- Dampen the doll’s hair slightly and comb it to remove any tangles.
- Starting from the roots and moving towards the tips, begin coloring the hair using the highlighter markers.
- You can color it with a single color or blend more than one to create fun and trendy designs.
Check out more crafts and miniature DIY for your doll
Share This Article