6 Creative Ways to Wrap Your Gifts This Year
Finding the perfect gift is only the first challenge when it comes to Christmas and New Year’s gifts. If you’ve found something great, then wrapping it in a cool way can make it even better. If on the other hand, the gift you chose isn’t all that impressive, maybe a nice wrap job can do the trick. 5-Minute Crafts shows you how to wrap your gifts creatively for both cases, so that family and friends will be really surprised when receiving them.
Design 1
Step-by-step instructions
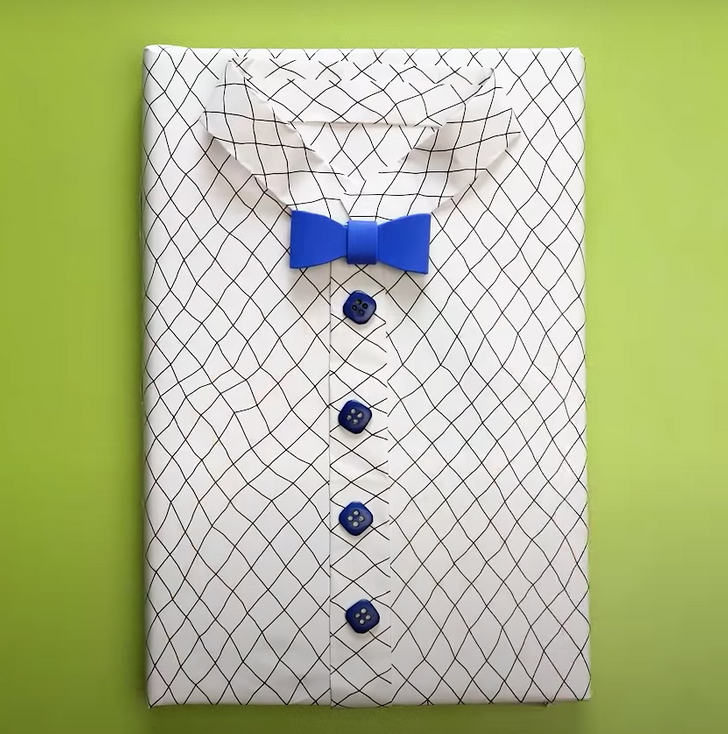
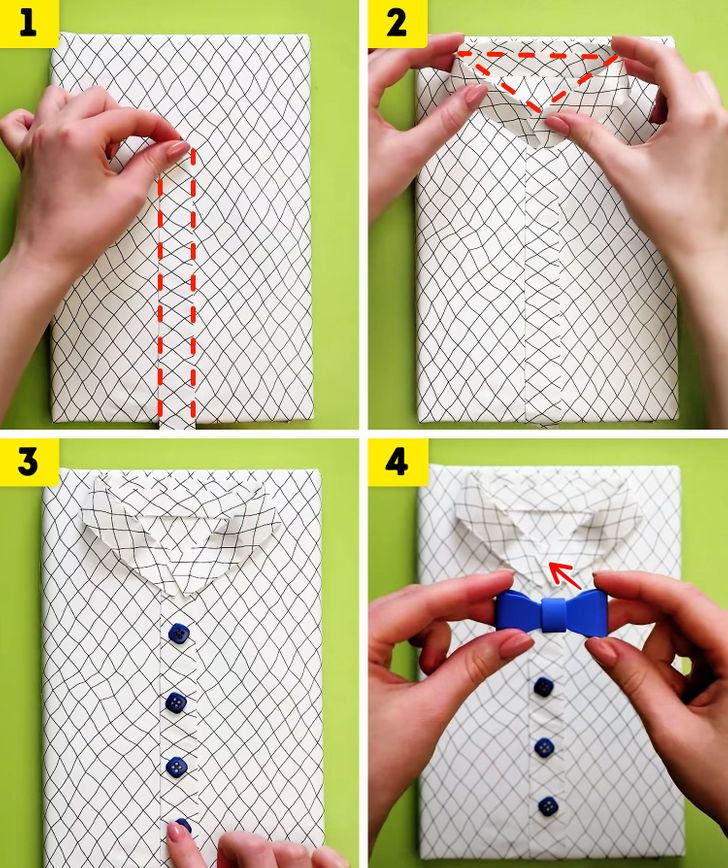
- Wrap the gift. Right in the middle of the front part, place a thin piece of paper, lengthwise. You can also use a colored ribbon. This will be the front placket of the shirt.
- Make the collar of the shirt by folding a strip of paper into 3 equal parts. In this case, you can also use a colored ribbon. Join the ends in a triangular shape. Glue it to the top of the wrapped box.
- Attach colored buttons to the front placket.
- Make a bow tie. You can use colored paper, a ribbon, fabric, or EVA rubber. Glue the tie in the middle of the shirt’s collar.
Design 2
Step-by-step instructions
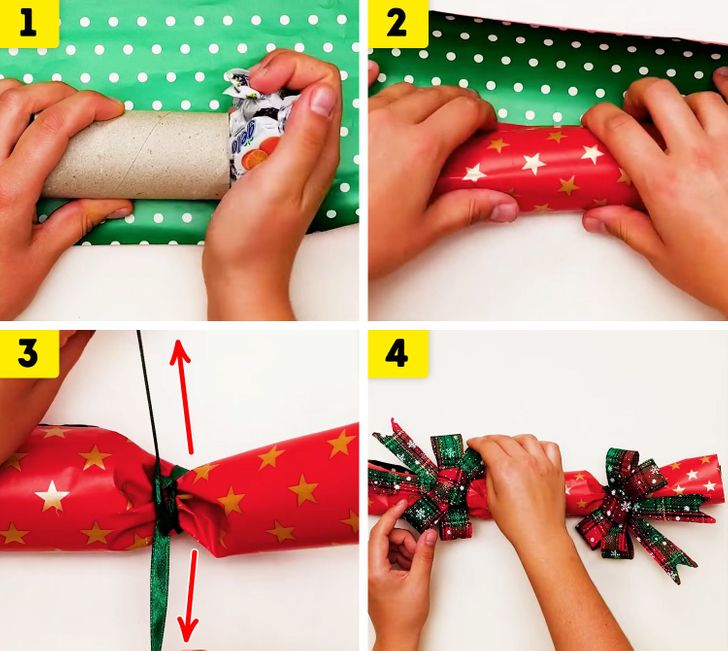
- Fill a cardboard roll with candy or any other nice treats that you like.
- Use wrapping paper printed on both sides. Place the cardboard roll full of sweets in the center and roll it up.
- Twist both ends and tie a knot with a colored ribbon on each side.
- Use 2 ribbons to decorate each end of the package.
Design 3
Step-by-step instructions
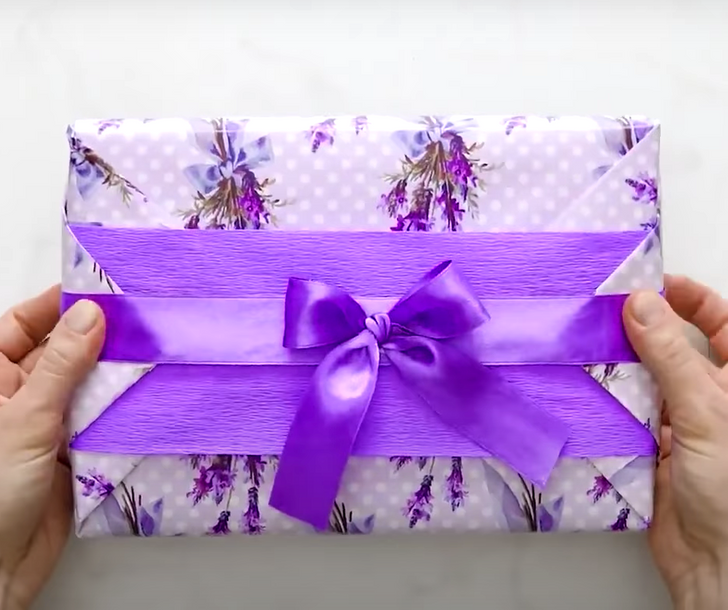
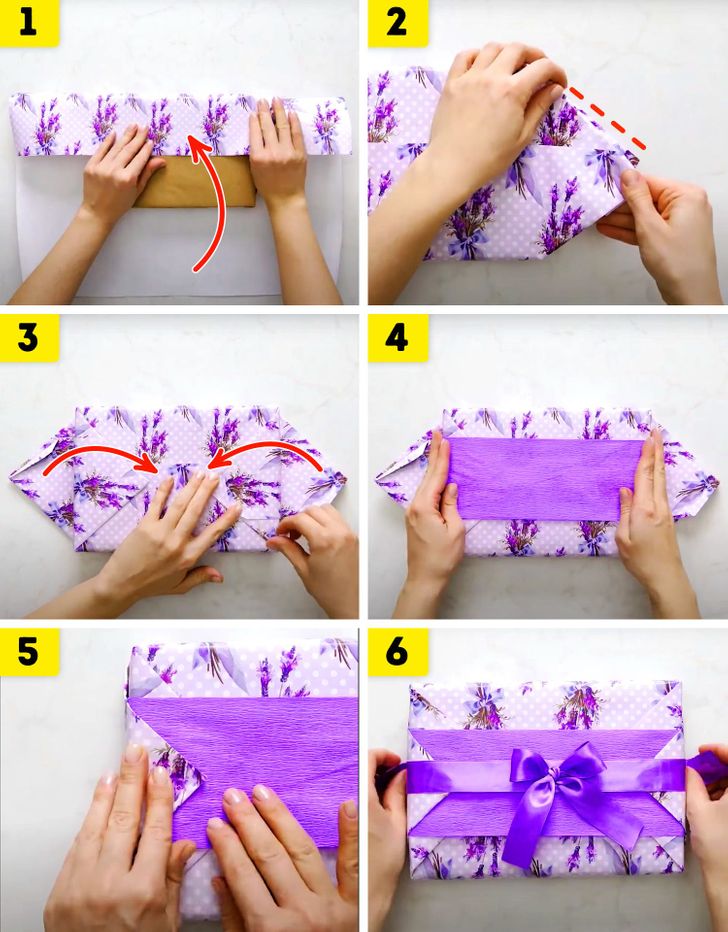
- Place the package in the center of the wrapping paper. Fold both sides lengthwise into the center of the package. Stick them together using adhesive tape.
- Press the corners of the paper that are left on the sides of the box. Fold them diagonally to obtain a triangular shape.
- Fold the longer triangular edges toward the center of the gift. Glue them or stick adhesive tape to secure them.
- Stick a thick colored band over the corners that you previously fixed. You can also just make your own band with a different colored paper so that it stands out.
- Fold the remaining triangular edges toward the center of the gift. Glue them or stick adhesive tape to secure them.
- Glue or tape a ribbon on to the package to hide the points of the triangle.
Design 4
Step-by-step instructions
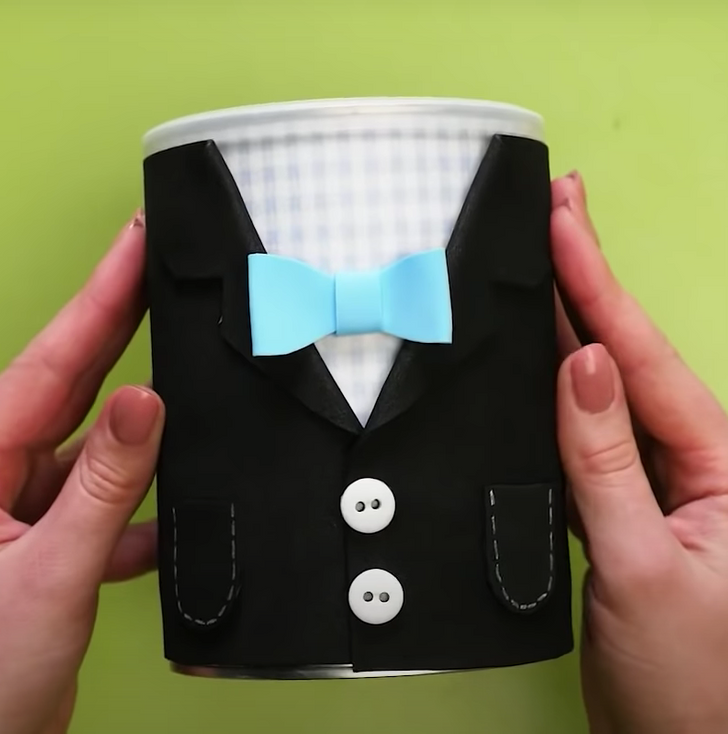
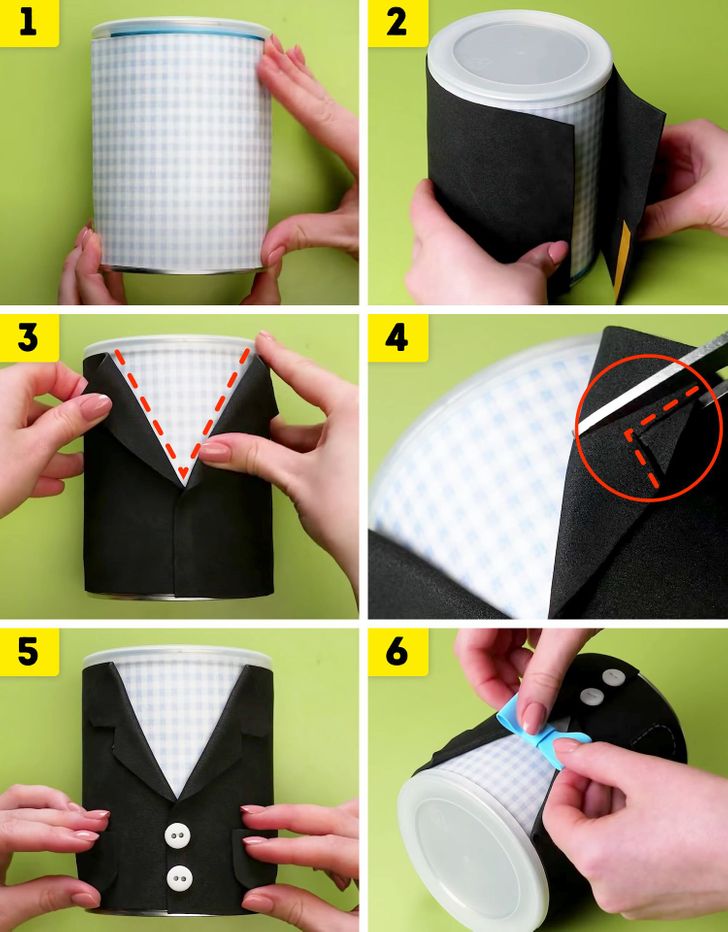
- Take a cylindrical package (you can use, for instance, an empty milk can) and cover its surface with checkered or white paper.
- Attach black paper or EVA rubber around the cylinder. Use adhesive tape to stick the underside of the EVA rubber paper.
- Fold the upper halves of the paper that was left loose to form the neck of the tuxedo jacket. Attach them to the wrapping.
- Cut a triangle to create 2 neck flaps.
- Use liquid glue to adhere buttons to the center of the tuxedo jacket. And on the sides, glue small paper pieces shaped like pockets. Use a white marker to draw the outline of each pocket.
- Stick a bow on the collar, so that it looks like a bow tie. You can make the bow tie with EVA rubber or fabric ribbons. You can also just make a regular tie.
Design 5
Step-by-step instructions
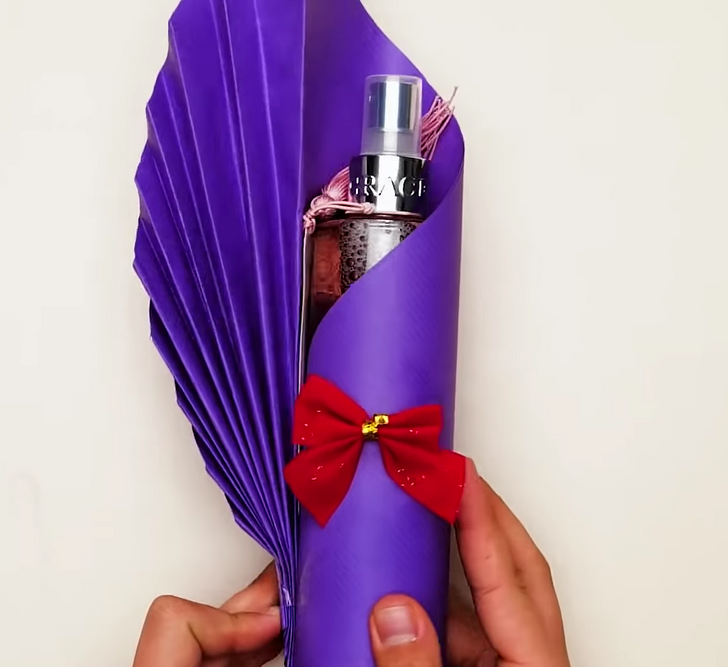
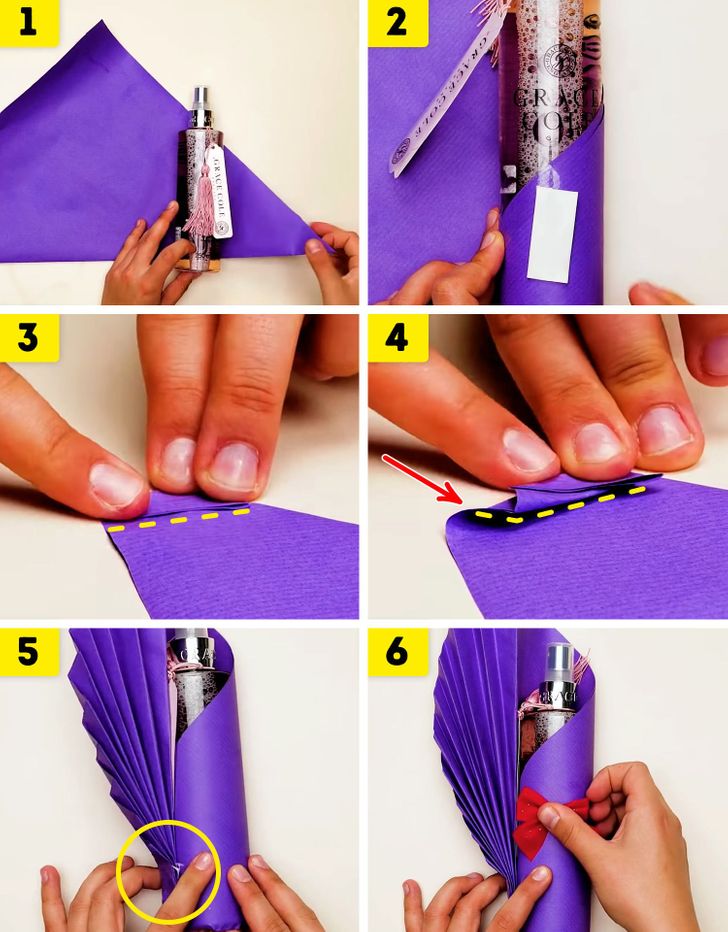
- Place the bottle on the edge of the wrapping paper. Make sure the top part (like, the bottle’s atomizer if you’re wrapping a perfume) is left out of the wrapping paper.
- Tape the paper to the bottle. Use double-sided tape to stick both sides of the paper to each other.
- Fold the tip of the paper, that wasn’t taped to the bottle, into a triangular shape.
- Make another fold over the previous fold. Continue making folds each one on top of the other.
- The folds should be finished until there is no more paper left and you can close the wrapper. Secure it with adhesive tape.
- Decorate the outside of the package with a ribbon.
Design 6
Step-by-step instructions
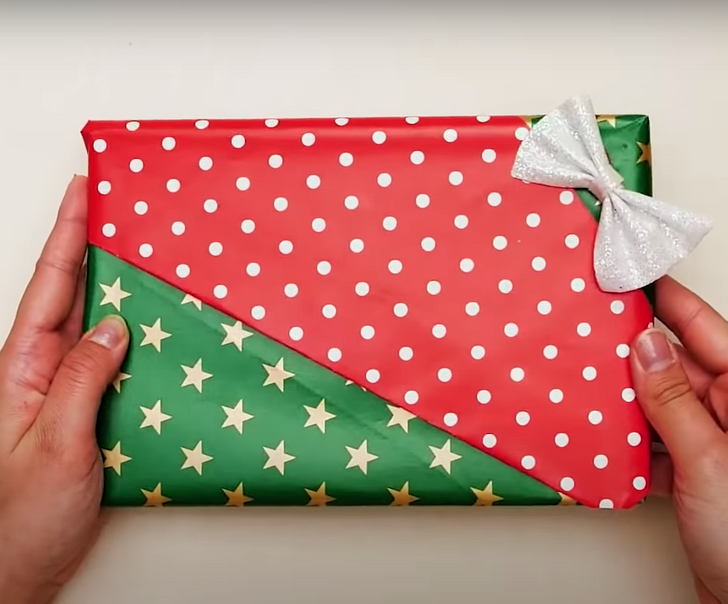
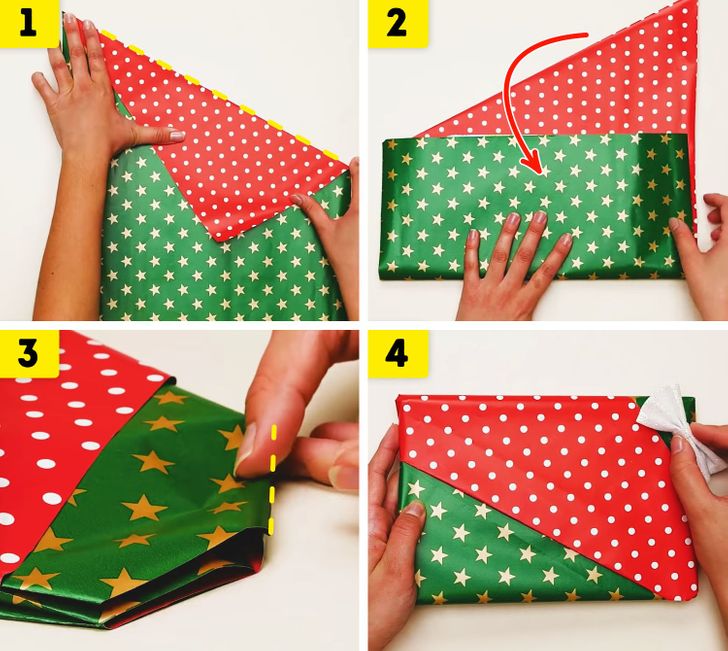
- Take a whole piece of wrapping paper that is printed on both sides. Place it lengthwise, like you would normally with an A4 sheet of paper and fold the upper right corner diagonally.
- Place your present in the center. Start by wrapping it with the part of the wrapping paper that wasn’t folded in step 1. Then proceed to do the same, but with the triangular fold resulting from the previous step.
- Press the tips of each side to create new triangular folds. Then, fold both resulting sides to really wrap up the gift.
- Decorate with a bow in the corner or in the center, or in any other place you’d like.
Check out these miniature crafts, perfect for creating amazing handmade presents
Share This Article
