7 Cardboard Crafts for Your Home
Cardboard can be recycled and you can take it to special centers, if it’s customary in your region to sort your trash. But there is one more way to take care of nature — give cardboard a second life and make useful things from it.
5-Minute Crafts collected 7 ideas for cardboard crafts that will decorate your home. We will show you how to make a cozy house for kids, table hockey, a tablet case, and something else.
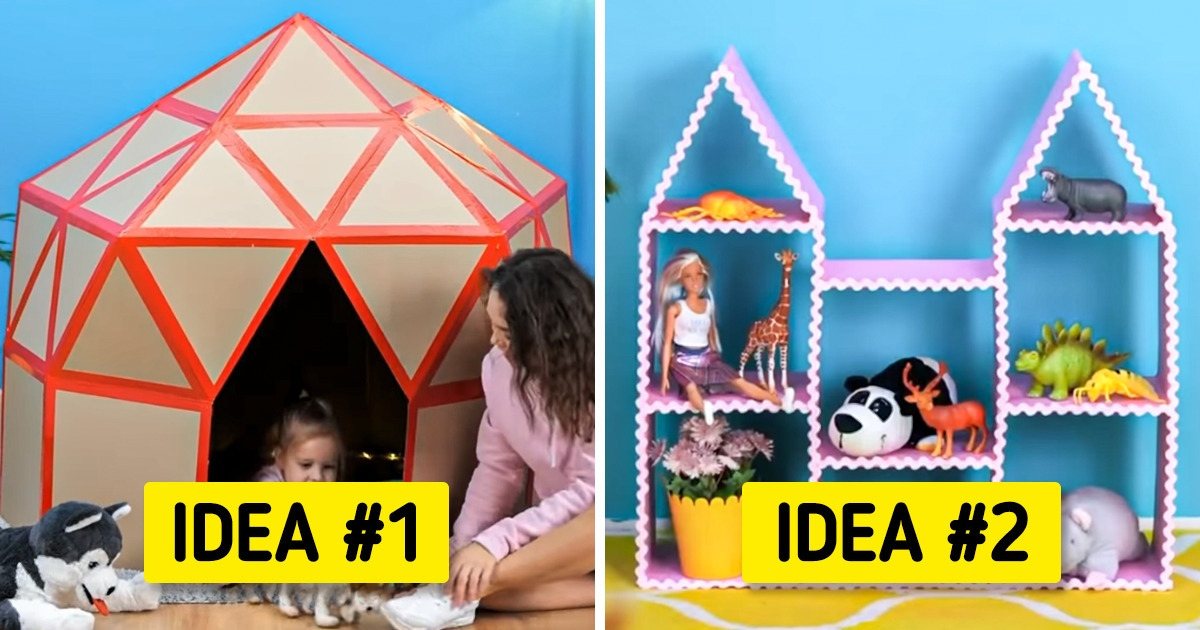
1. House for kids
-
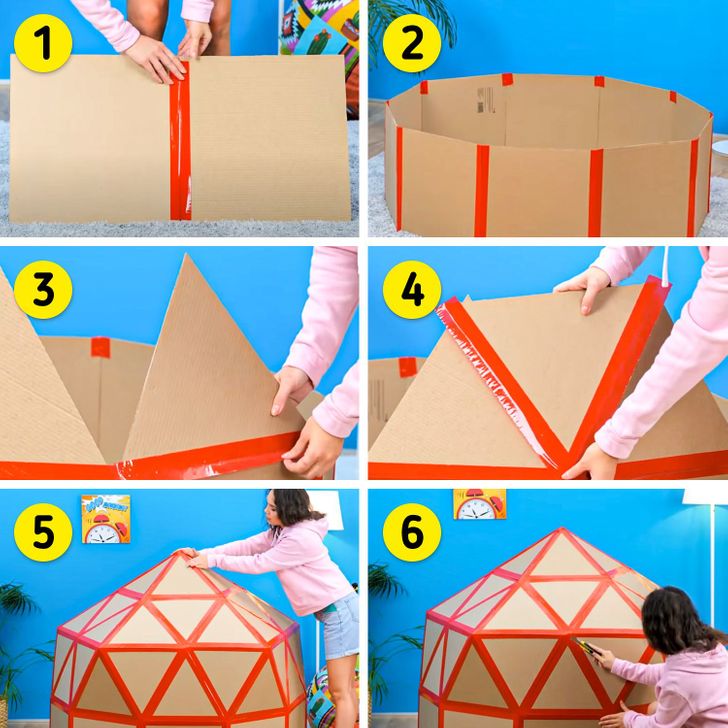
Take 2 square 15×15 in pieces of cardboard, put them next to each other, and fasten the edges together with wide adhesive tape.
-
One by one, glue 8 more pieces of cardboard that are the same size (15×15 in) to the previous piece of cardboard. Eventually, you’ll get a circle from these 10 square sheets secured together.
-
Fasten triangle pieces (each side of which also equals 15 in) of the cardboard to the upper edges of the square pieces.
-
Fill the space between the triangle sheets with cardboard fragments and secure them with each other, with the help of adhesive tape.
-
Repeat steps 3 and 4 and form another level of triangle sheets over the first one. Afterward, make the top of the house from 5 sequentially secured triangle sheets and secure it to the rest of the construction.
-
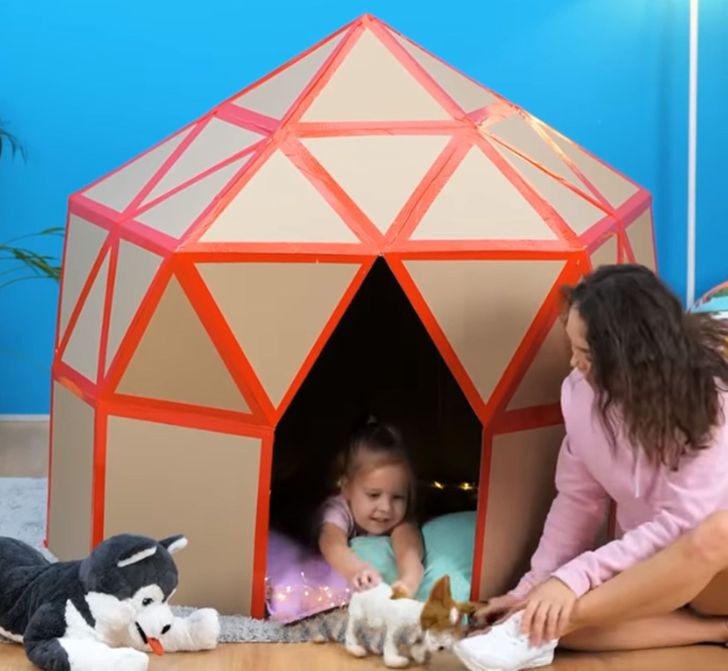
With the help of a stationary knife, cut one square from the bottom level and a triangle from the middle, so that you get the door of the house. Place a cozy blanket and toys inside.
2. Toy rack
-
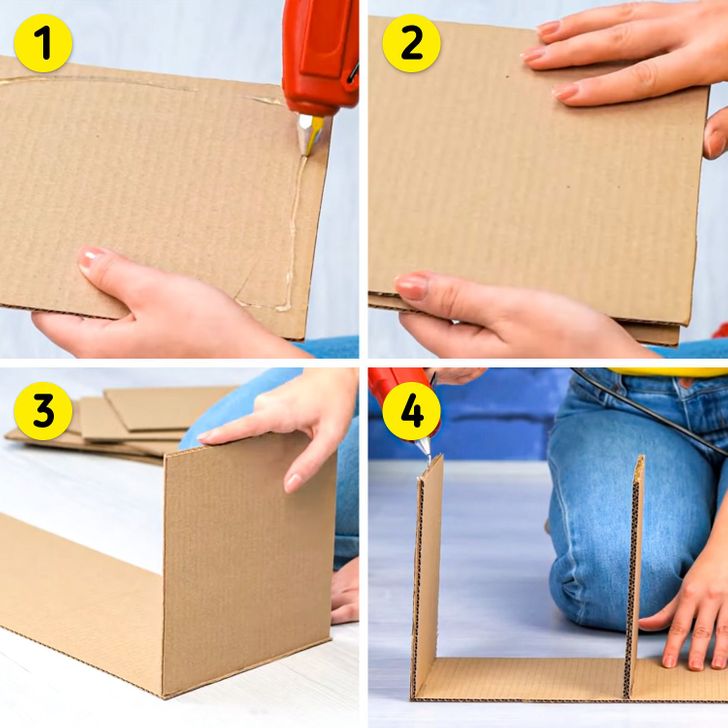
Take 2 8×8 in cardboard sheets. Apply glue on the edge of one of the sheets.
-
Glue 2 sheets together. Make 18 of these billets.
-
Glue one of them with an edge to the left edge of a rectangular piece of cardboard that is 8×24 in.
-
Glue 3 more square billets to the rectangular sheet at a distance of 8 inches from one another. Apply a thin layer of glue over the upper edges of each billet.
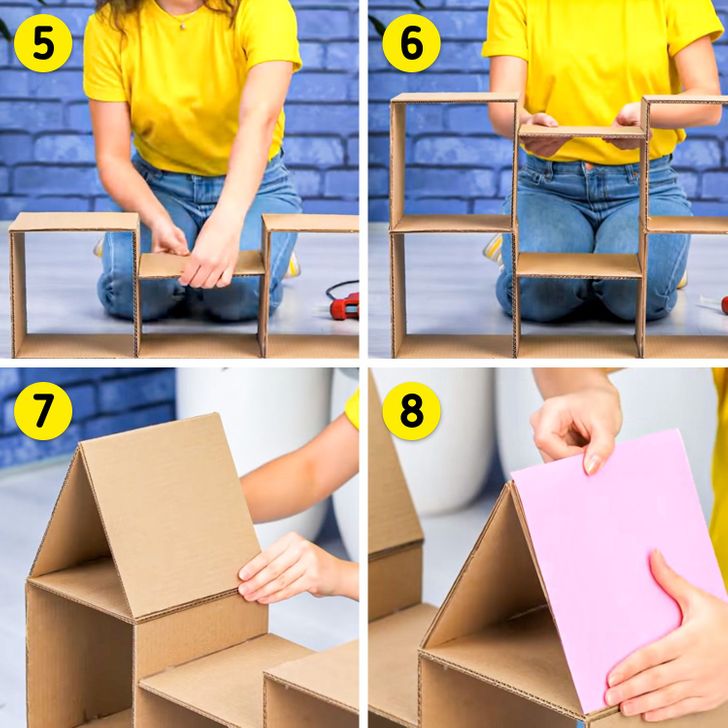
5. Form the crossbeams of the rack. Glue 2 square billets to the edges of the previous billets. Place one more billet between the bottom shelves of the rack, 4 inches lower than the upper crossbeams.
6. Repeat steps 4 and 5 and make the second level of the rack from 7 square billets.
7. Make triangle “roofs” from the 4 billets you have left. Glue their edges together and then glue them to the upper crossbeams of the shelves.
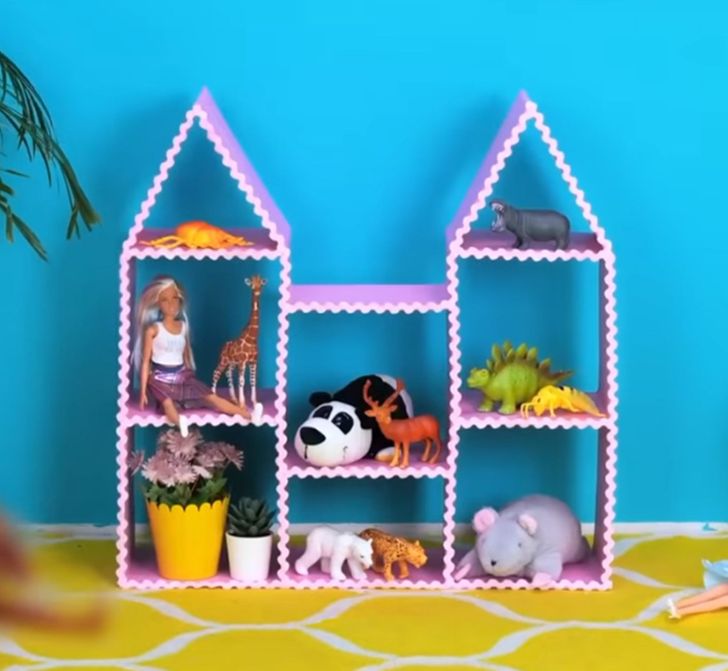
8. Cover the rack with colored paper inside and outside, and decorate the edges with adhesive wavy stripes. Place the rack against the wall and put the toys inside.
3. Shoe storage system
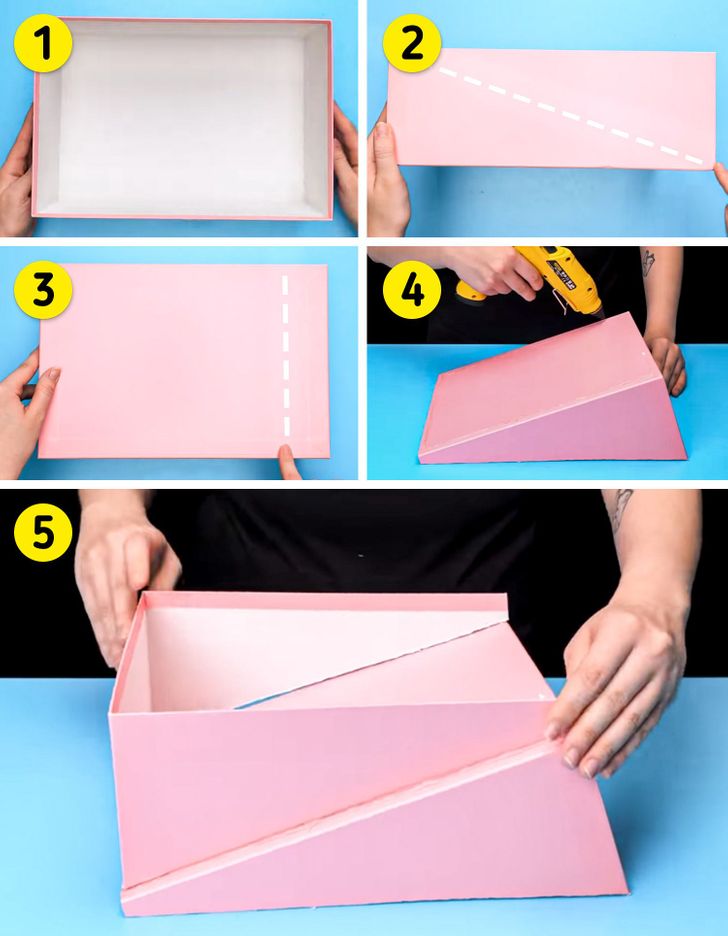
- Take a shoebox.
- Cut it diagonally from both wide sides.
- Make one more cut along the bottom of the box — on the right side, from bottom to top. Separate one part of the box from the other and cut off the edges of the triangular sides of the upper part.
- Take the part of the box with a full bottom and apply a thin strip of glue along its edges.
- Glue the second part of the box to the bottom of the first part so that you get inclined deepening inside.
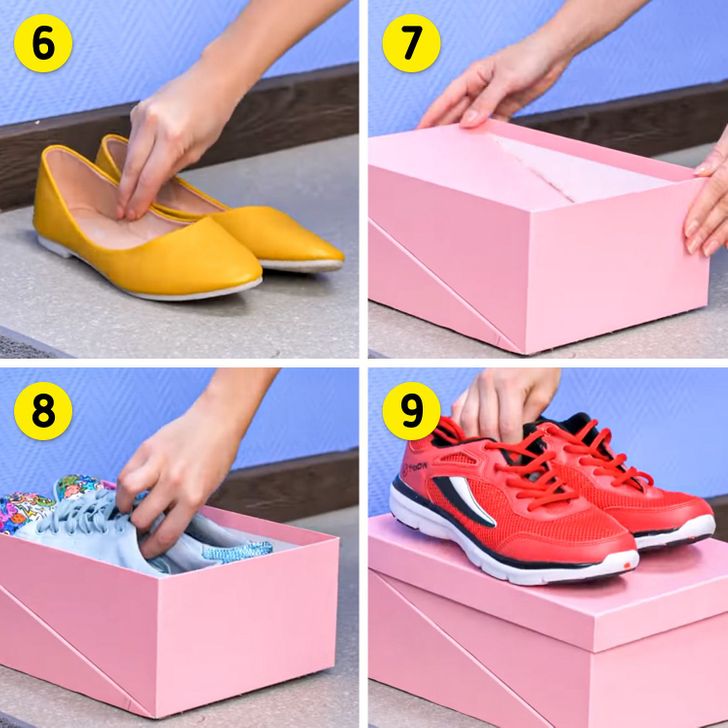
6. Organize the storage of your footwear. Place one pair on the floor in the entryway.
7. Cover it with the construction, so that the first pair of shoes are inside.
8. Place another pair of shoes in the upper deepening.
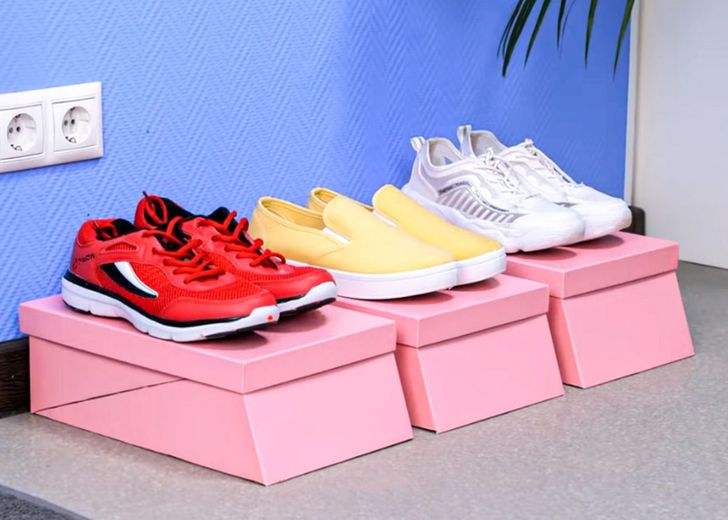
9. Cover the box with a lid and place the third pair of shoes on it.
4. Stationery stand
-
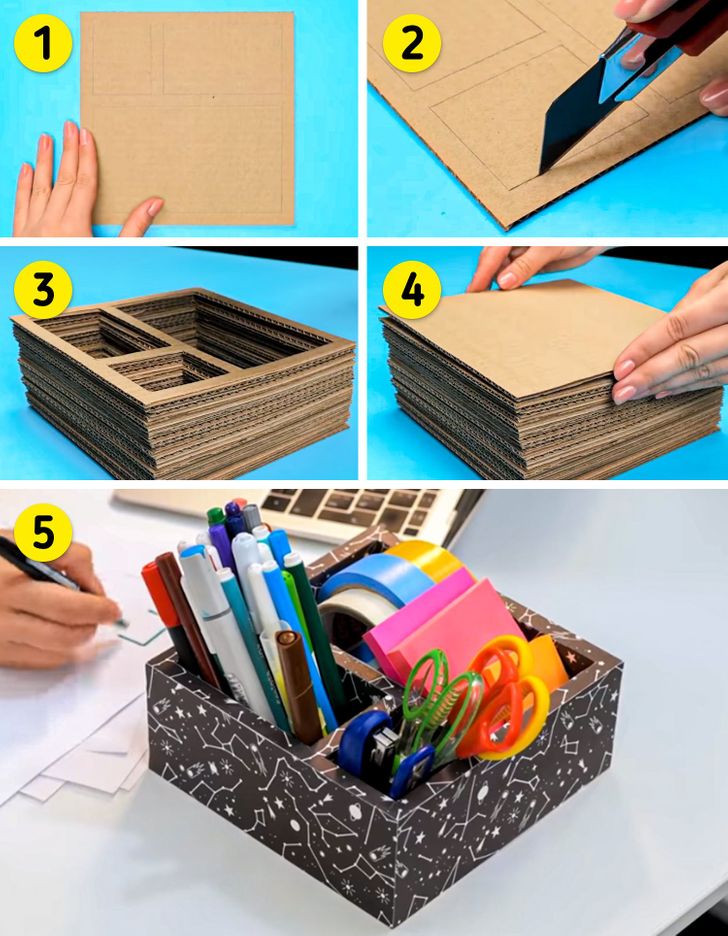
Take a square piece of cardboard (6×6 inches). Draw 3 triangles with the sizes 2×1.6 inches, 2×3.1 inches, and 2.7×5.1 inches. Leave a small space of 0.5 inches from every edge and leave the same distance between the figures.
-
Cut out rectangles with a stationary knife leaving a sheet with 3 “windows.”
-
Make 20-25 more of these billets, place them over each other, and glue their edges together.
-
Glue a solid square piece of cardboard (6×6 in) over them.
-
Turn the stand upside down, decorate with adhesive colored paper on all sides, and place it on your desktop.
5. Creative lamp
-
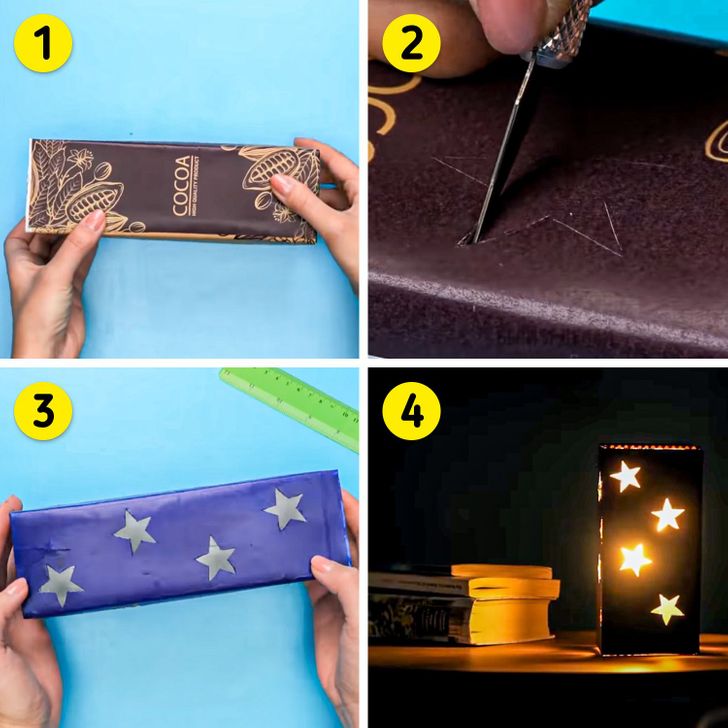
Take a beverage package and cut off the top with the lid.
-
Cut out 4-5 stars on each side.
-
Decorate the box with adhesive-colored tape on all sides and cut out the excess paper where the stars are located.
-
Place the box on top of an LED light so that it covers all sides of the light. Please note that the lamp shouldn’t be touching the sides of the box after installation.
6. Table hockey
-
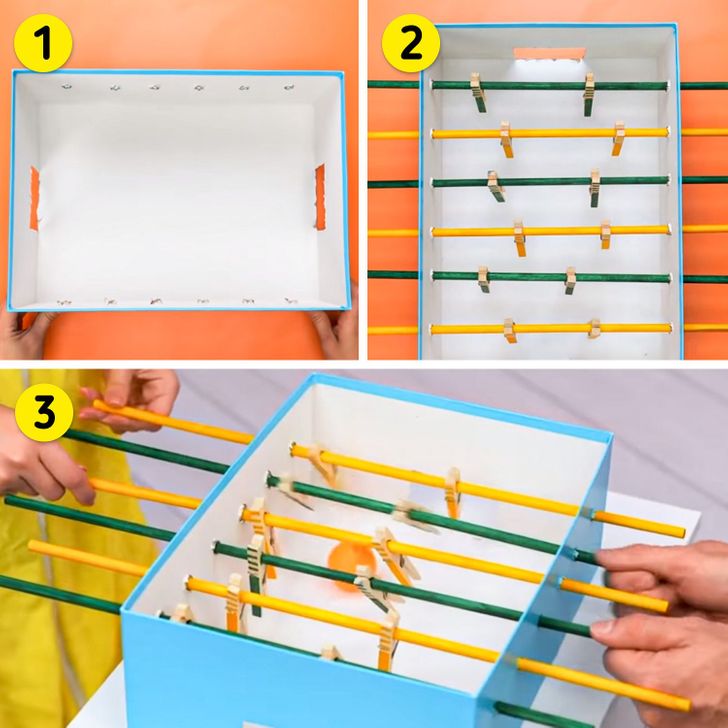
Take a shoebox. Remove its lid. Make 6 round holes on the wide sides of the box (in its middle part), and make rectangular holes in the middle of each narrow side of the box.
-
Take 6 long sticks. Paint half of them in yellow and half of them in green. Put each stick through round holes. They should go through the entire box and protrude 4 inches from each side. Secure 2 clothespins colored yellow and green on each stick inside the box.
-
Throw a small ball into the box and start the game.
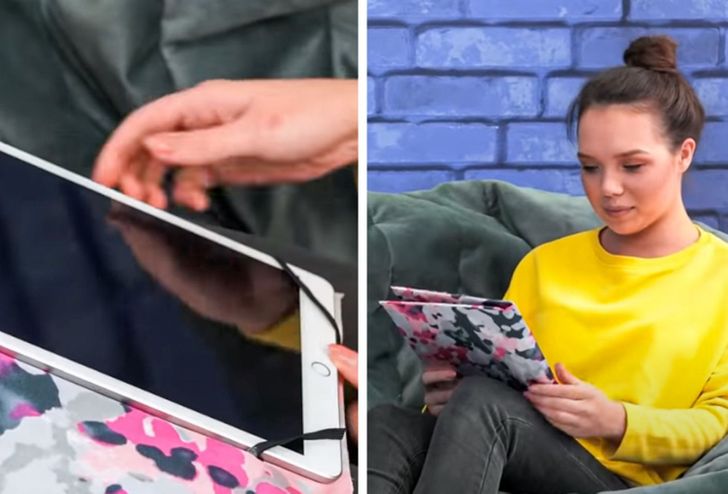
7. Tablet case
-
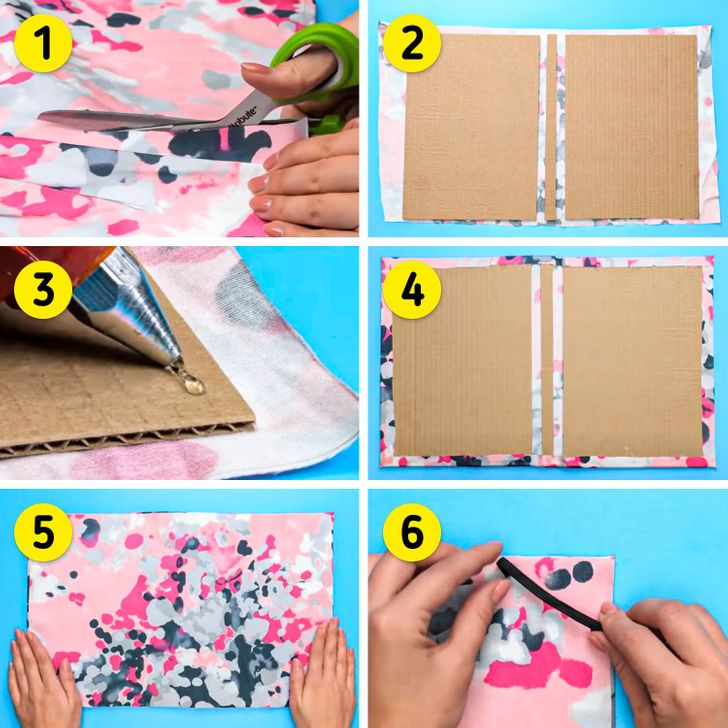
Measure the width and the length of your tablet. Prepare pieces of cloth, each of which corresponds to the length of the tablet + 1 inch. The width of the cloth should equal the width of the tablet multiplied by 2 + 2.5-3 inches.
-
Cut out 2 rectangular pieces of the cardboard, the length and width of which corresponds to the parameters of the tablet. And a separate sheet corresponding to the length and thickness of the device. Spread them out on the wrong side of the fabric. Leave a margin of 0.4-0.5 inches from each edge and mark the same distance between the sheets.
-
Apply glue to the edges of the cardboard sheets that are closer to the edge of the cloth.
-
Fold up the edges of the cloth and glue them to the cardboard sheets.
-
Cut out another piece of cloth that is the same size as the billet and glue it right side out.
-
Take 4 pieces of an elastic band that is 2-2.5 inches and make loops in each corner of the right side of the tablet with the help of glue.
