7 DIYs With Toilet Paper Tubes
Biodegradable tubes are still rare. So far, this useless piece of cardboard increases the huge amount of garbage on our planet. Unusual DIYs with toilet paper tubes are an excellent way to upcycle them.
5-Minute Crafts found 7 wonderful DIYs that you can make with toilet paper tubes. We will show you how to make a bird feeder, a gift package, and different organizers.
1. A bird feeder
-
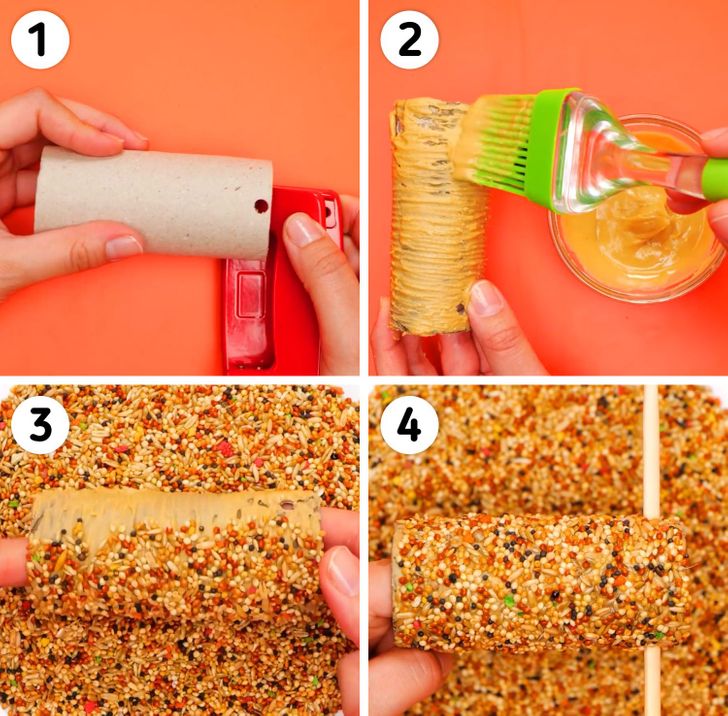
Punch 2 holes on each end of the tube.
-
Cover the tube well with peanut butter.
-
Dip the tube into a feed mix for birds.
-
Pass a rope through the upper holes to hang the feeder, and a stick through the lower holes. It will work as a perch for the birds.
2. A bobbin for yarn
-
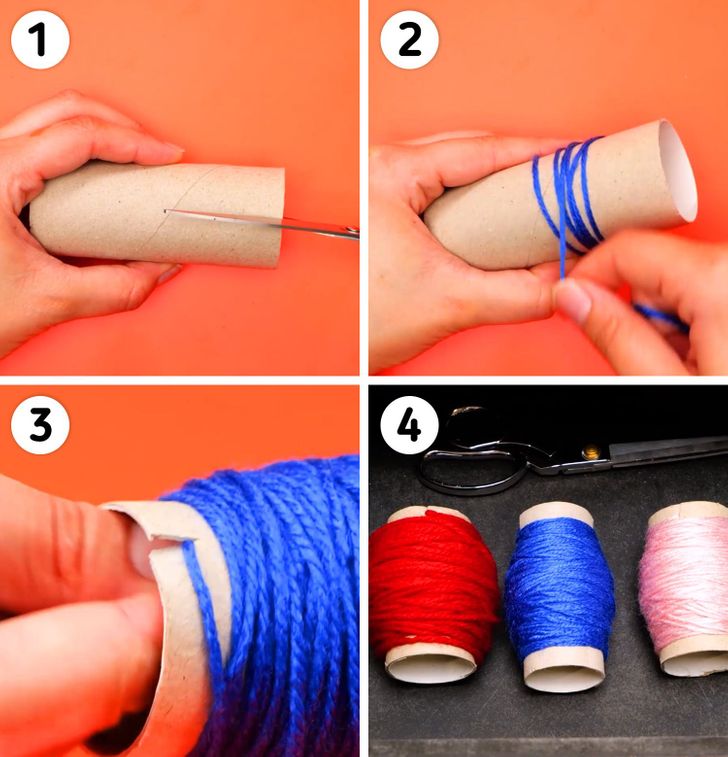
Take the necessary quantity of tubes and make a small cut on each one’s end.
-
Coil the yarn around the tube.
-
Insert the end of the thread into the cut.
-
Put the bobbins of yarn into a box.
3. An organizer for little things
-
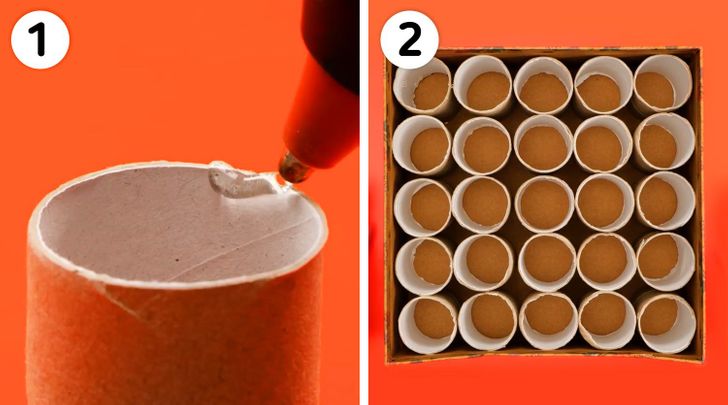
Take the necessary quantity of tubes and apply glue to the entire lower circumference of each of them.
-
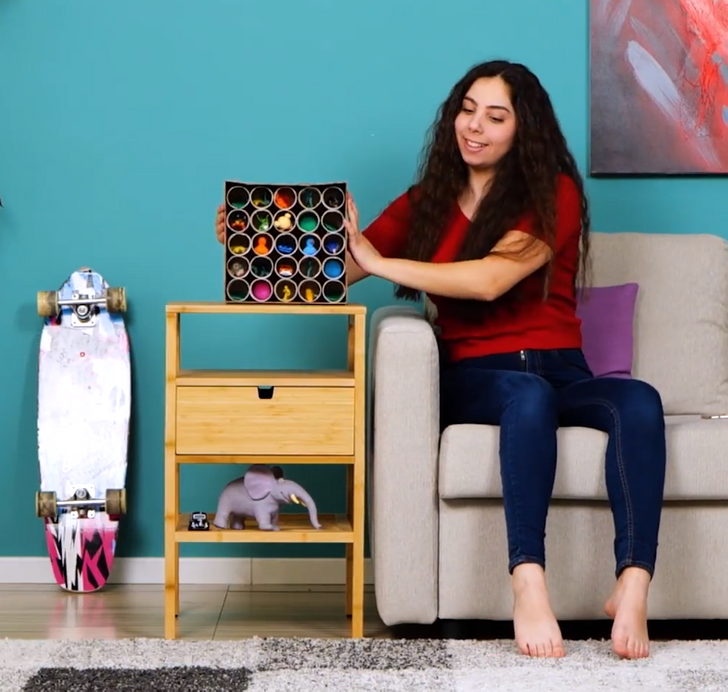
Take a cardboard box and organize the tubes in it with the ends covered in glue facing down. Press them down slightly and let the glue dry. Put your little things inside the tubes.
4. An organizer for makeup products
-
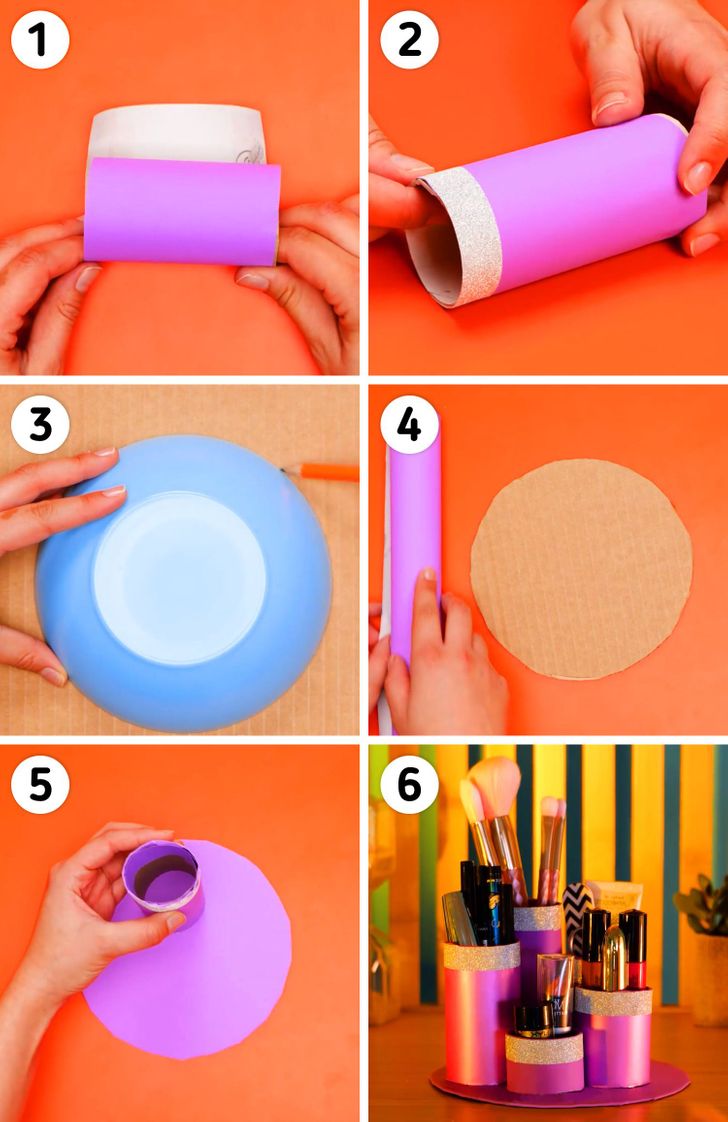
Take 5 tubes. Leave the original size of the first one and cut the remaining tubes to make them different in height. Using glue, cover them with colorful sticky paper.
-
Using glue, cover the upper ends of the tubes with a decorative ribbon.
-
Take a piece of thick cardboard, put a cup on it with its brim down, circle it with a pencil, and cut the resulting circle out.
-
Using glue, cover the surface of the circle with colorful sticky paper.
-
Apply glue to the lower ends of the tubes and glue them to the circle.
-
Let the organizer dry and distribute your makeup products among the units.
5. Napkin rings
-
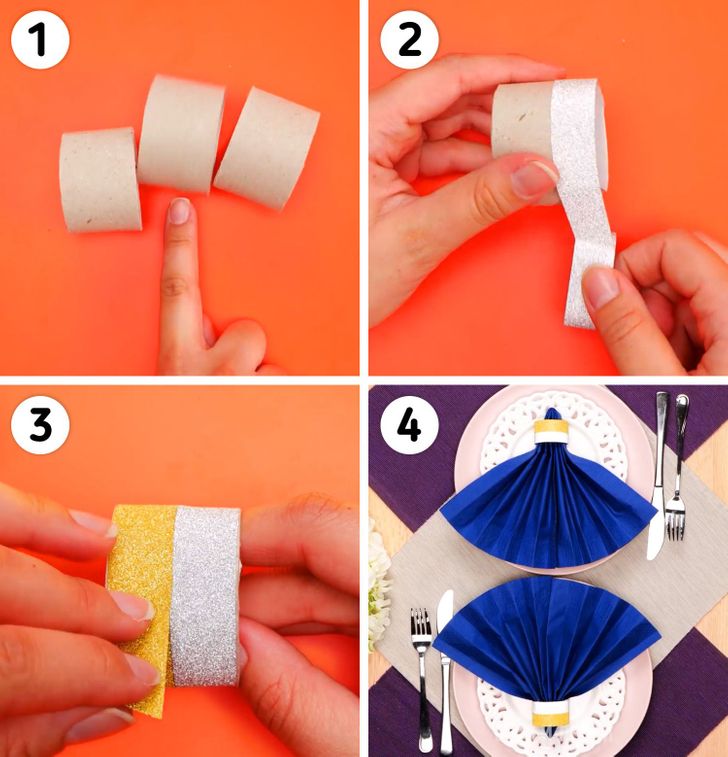
Cut a tube into 3 equal parts.
-
Using glue, cover each of them with a decorative ribbon.
-
Use ribbons of 2 different colors to make the design more interesting.
-
Pass the napkins through the rings and put them on plates.
6. An eyeglasses case
-
Take 2 tubes, flatten them slightly, and cut them vertically from one side.
-
Take a piece of decorative fabric, cover it well with glue from the back side and put the tubes a bit to the right from the middle. The cut part of the tubes should be at the edge of the fabric.
-
Wrap the tubes with the fabric, folding its edges into the tubes.
-
Fold the excess fabric behind the upper and lower ends of the tubes.
-
Secure the right and lower ends of the future case with binder clips. Leave them for a couple of days until the glue dries and the fabric sticks to the tubes properly.
-
Put your glasses inside the new case.
7. A package for a child’s present
-
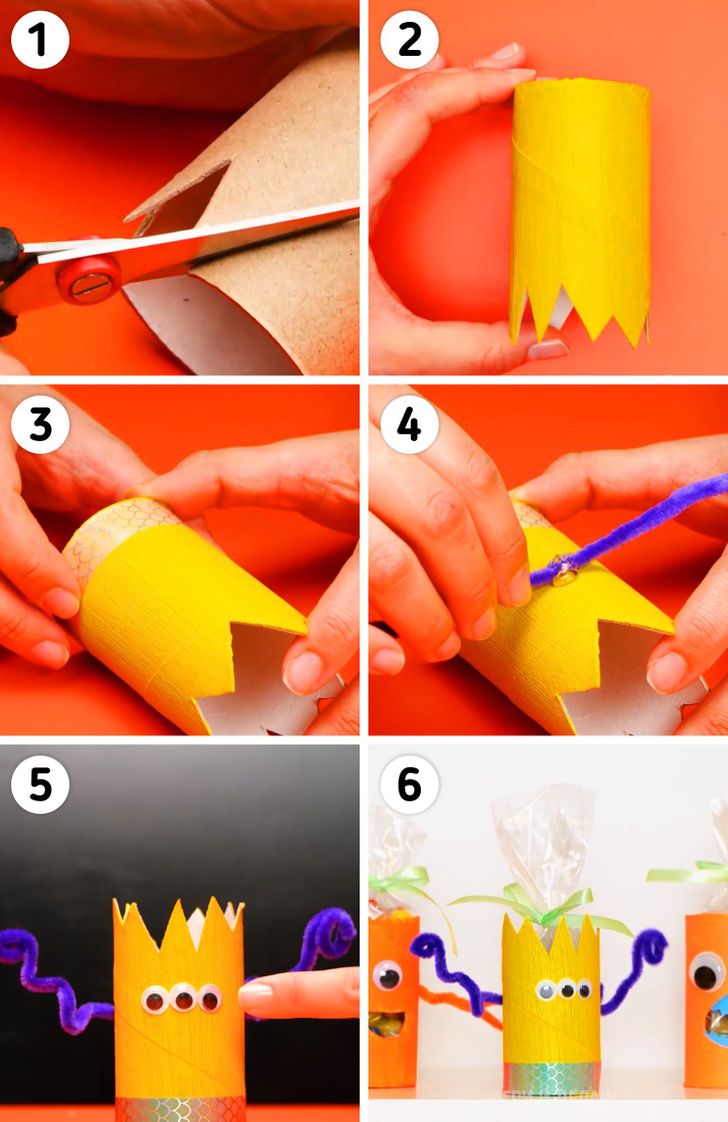
Cut out triangles on the top of the tube.
-
Paint the tube yellow.
-
Using glue, cover the bottom of the tube with decorative ribbon.
-
Drop some glue on the middle part of the tube and attach a piece of decorative wire to it. Try to choose wire wrapped in fabric.
-
Glue 2 to 3 decorative eyes to the opposite side of the tube. Curl the ends of the wire.
-
Put a small bag of candy inside the tube.
