7 Things You Can do With Metal Bottle Caps
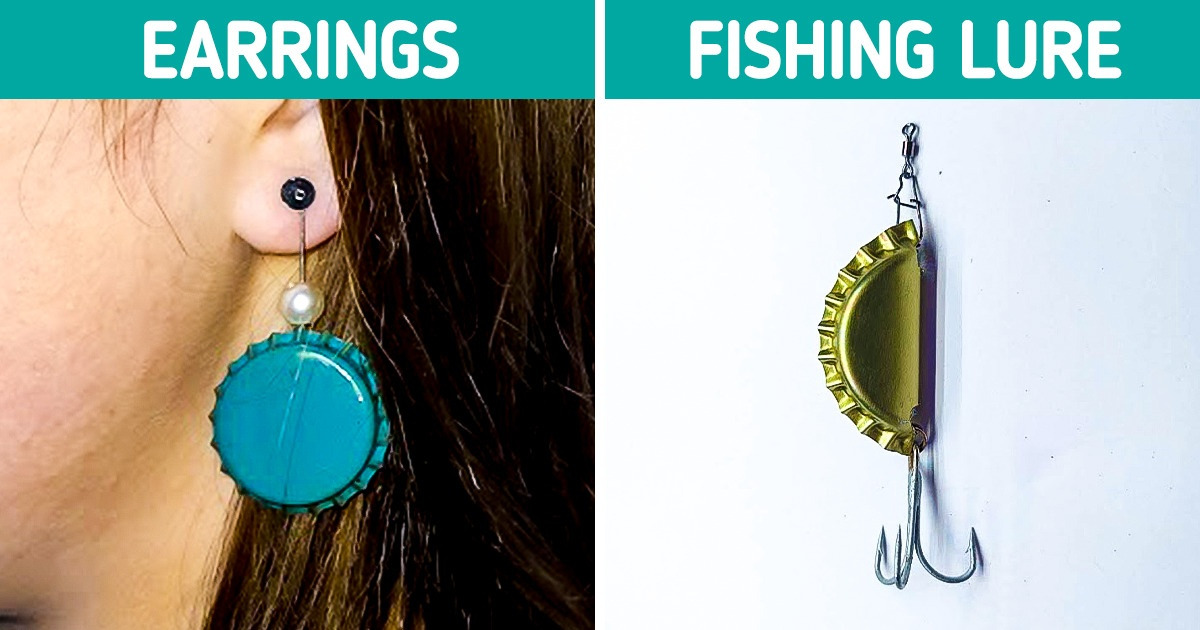
Summer is just around the corner, and those hot days won’t be bearable without a cold drink in hand. Every time we open a glass bottle, we always throw a hidden treasure away with it. When we say treasure, we think of the metal caps that can easily be transformed into useful items. They will spice up your room and sometimes your look too.
Instead of throwing them away, 5-Minute Crafts has listed some upcycling ideas to make fun things out of metal bottle caps.
1. Earrings
What you’ll need:
- Metal bottle caps
- Head pins
- Eye pins
- Nail polish
- Hot glue
- Pearls
- Butterfly earring backs
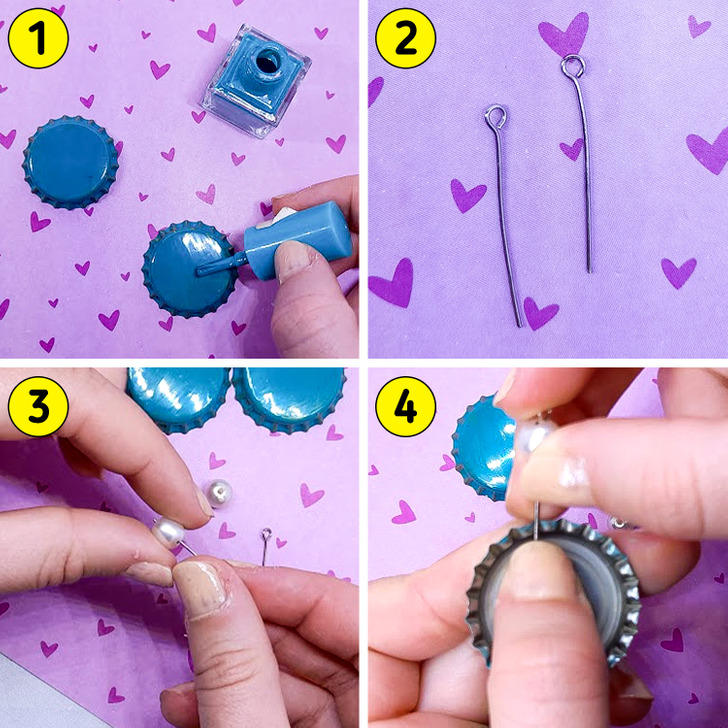
Step 1: Paint 2 metal bottle caps using the nail polish of your choice.
Step 2: Take 2 eye pins out from the package.
Step 3: Put a pearl on the eye pins.
Step 4: Using your hands, press the pins in one of the ridges around the edge of a metal bottle cap.
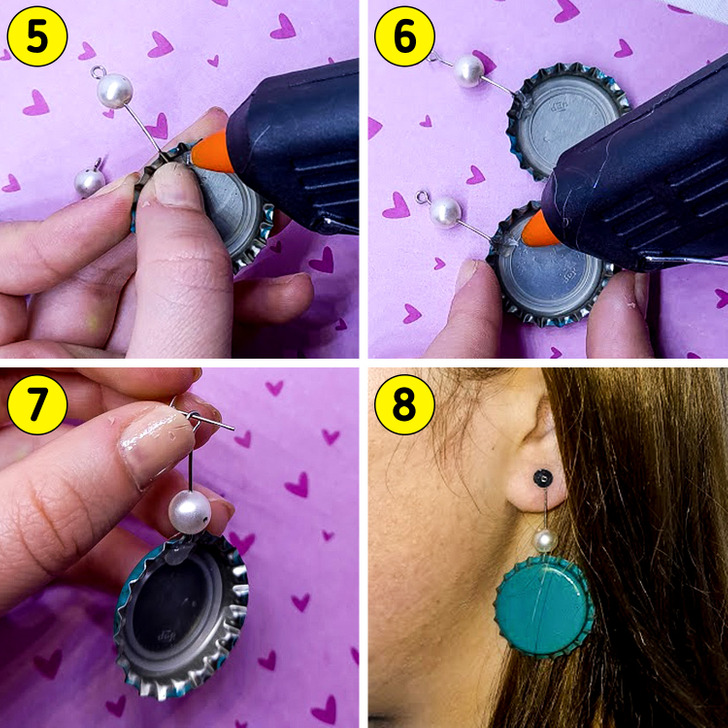
Step 5: Glue the eye pins in the ridges.
Step 6: Add another layer to secure it in place.
Step 7: Put a head pin inside the hole and secure it with a butterfly back.
Step 8: The earrings are done!
2. Frame
What you’ll need:
- Metal bottle caps
- An old frame
- A black marker
- Hot glue
- A ruler
- Scissors
- A velvet pipe cleaner
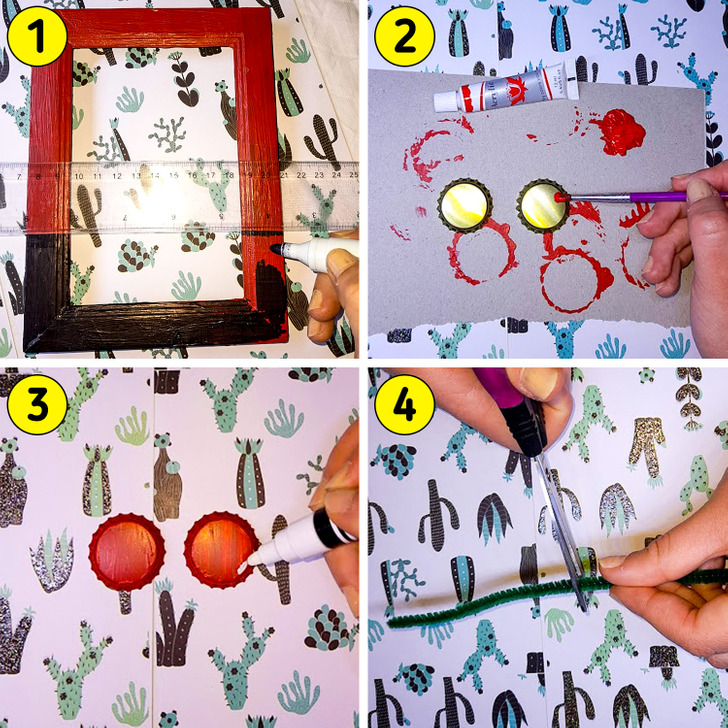
Step 1: Measure with a ruler about 2 inches from the bottom of the frame and paint it with a black marker.
Step 2: Take 2 metal bottle caps and color them with red acrylic paint.
Step 3: Once they are dry, add small lines at the end of the cap using a white marker.
Step 4: Cut the velvet pipe cleaner in half.
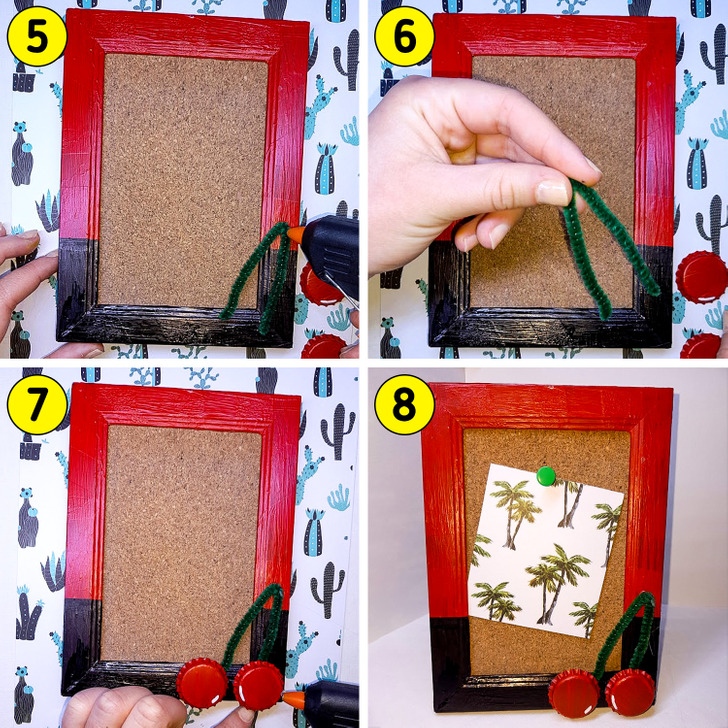
Step 5: Fold the velvet pipe cleaner in half and glue it on the frame.
Step 6: Glue one bottle cap to one of the ends of the velvet pipe cleaner.
Step 7: Glue the second bottle cap to the other end.
Step 8: The frame is ready!
3. Fishing lure
What you’ll need:
- Metal bottle caps
- A fishing hook
- A swivel
- A power drill
- Pliers
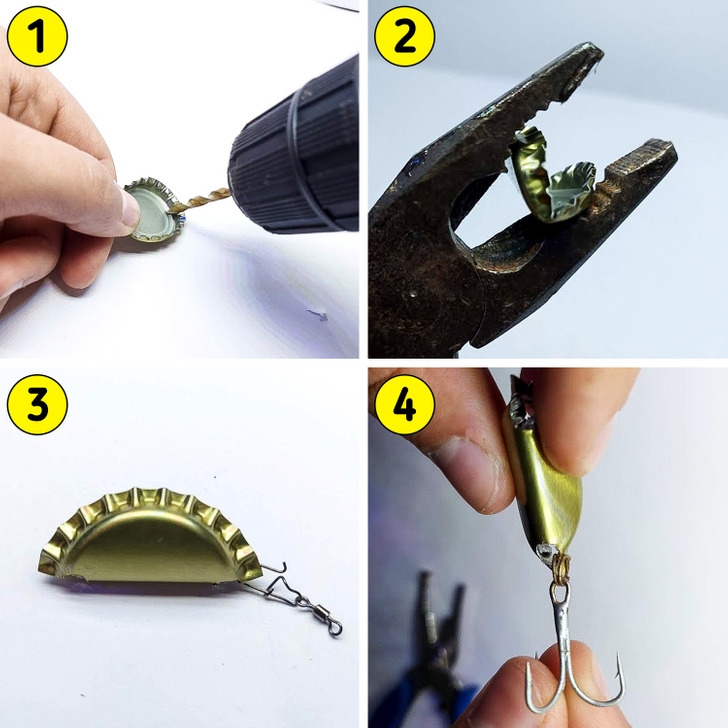
Step 1: Make 2 holes at each end of the cap using a drill.
Step 2: Fold the cap with the pliers.
Step 3: Add a swivel to one end.
Step 4: At the other end, add a fishing hook.
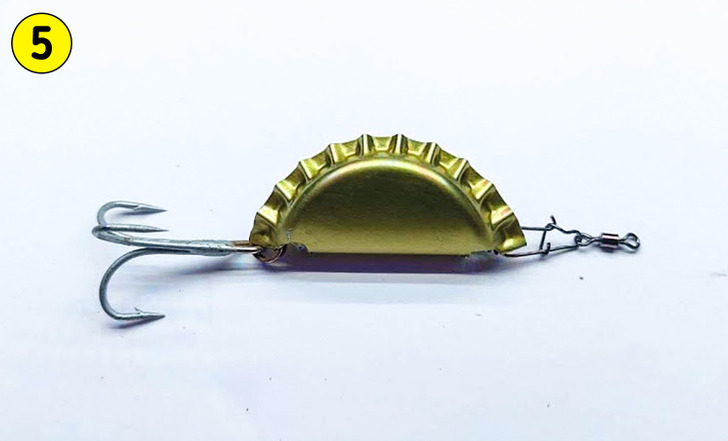
Step 5: The lure is finished.
4. Coaster
What you’ll need:
- Metal bottle caps
- Hot glue
- Cardboard paper
- Nail polish
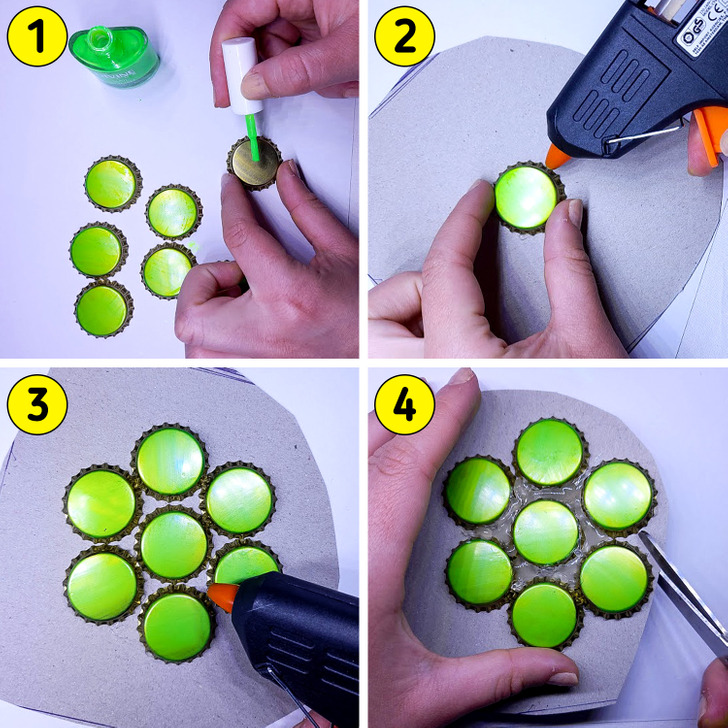
Step 1: Color the metal bottle caps with different colors of nail polish.
Step 2: Glue one metal bottle cap on some cardboard paper.
Step 3: Make a hexagon shape around it, using more caps. Glue the metal bottle caps to the cardboard and to each other.
Step 4: Cut the cardboard paper.
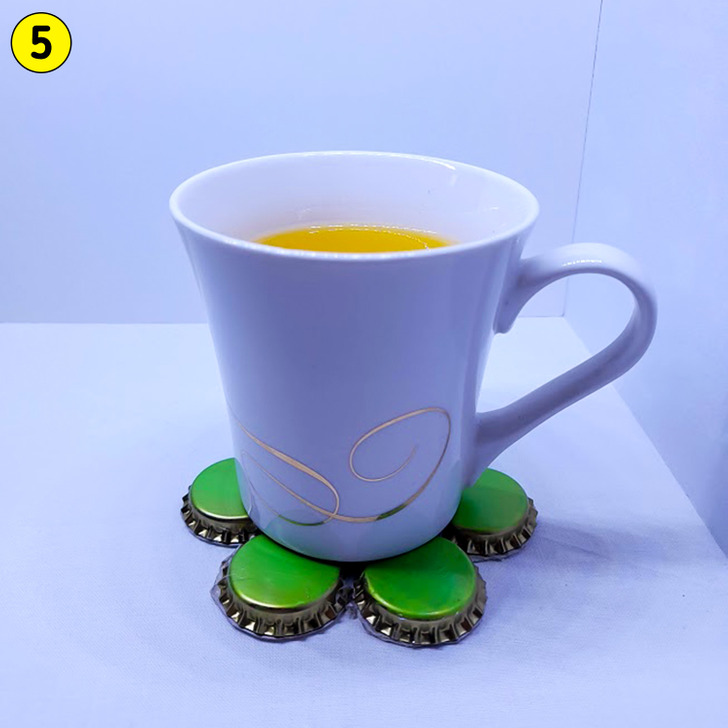
Step 5: The coaster is ready.
5. Badges
What you’ll need:
- Metal bottle caps
- Yellow nail polish
- A black marker
- Pins
- Hot glue
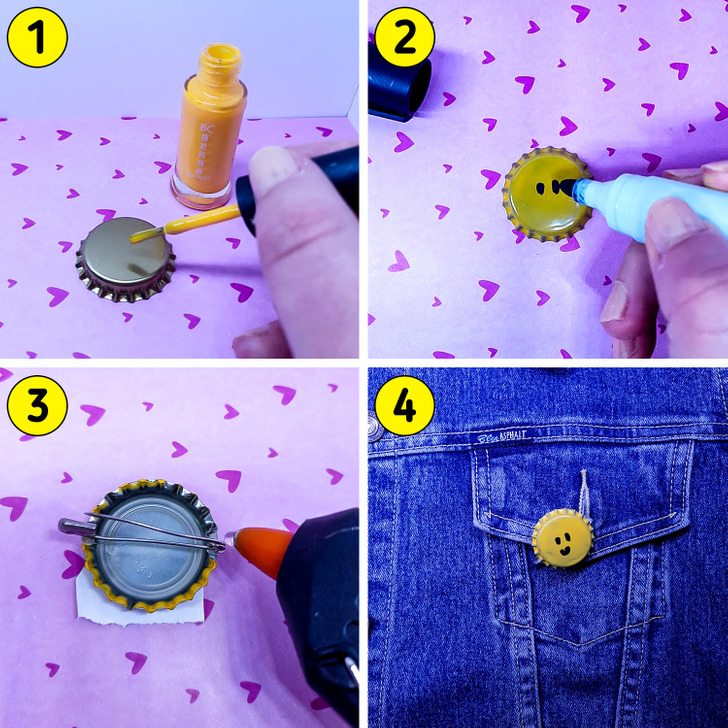
Step 1: Take one metal bottle cap and apply a coat of yellow nail polish.
Step 2: Once it’s dry, using a marker, start drawing emoji faces.
Step 3: Place a pin at the back of the metal bottle cap and glue it with hot glue.
Step 4: Wait for them to dry, and the badge is ready. Don’t limit yourself to just one emoji design, draw whatever one you like the most!
6. Magnets
What you’ll need:
- Metal bottle caps
- Nail polish
- Hot glue
- A magnet
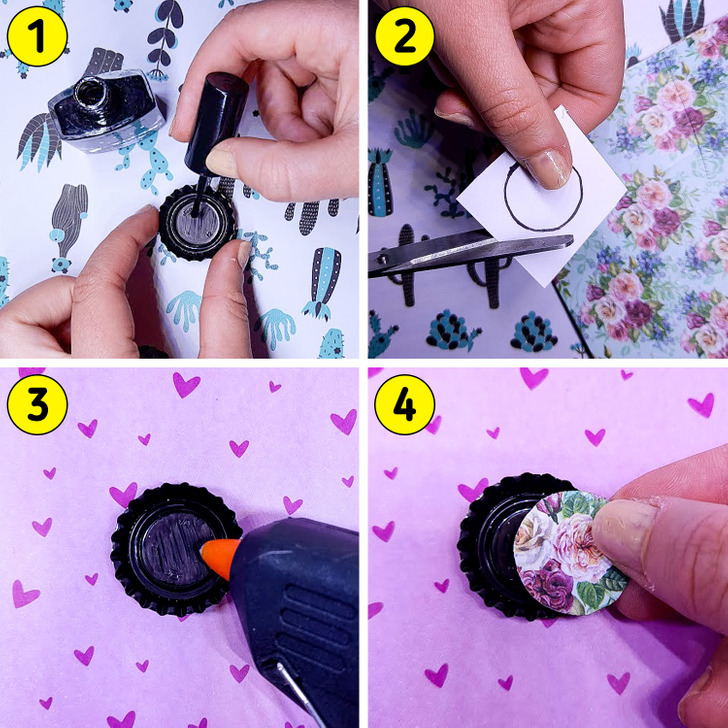
Step 1: Take one metal bottle cap and color it with black nail polish on both sides.
Step 2: Cut a circle from the patterned paper.
Step 3: Apply glue to the inside of the cap.
Step 4: Put the colored paper in it.
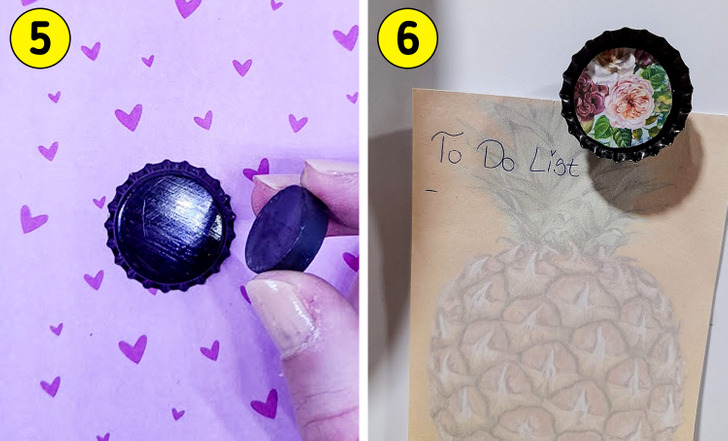
Step 5: Once it’s dry, attach a magnet to the back of the bottle cap.
Step 6: The magnet is ready.
7. Tic-tac-toe
What you’ll need:
- Metal bottle caps
- Acrylic paint
- A black marker
- Colored paper
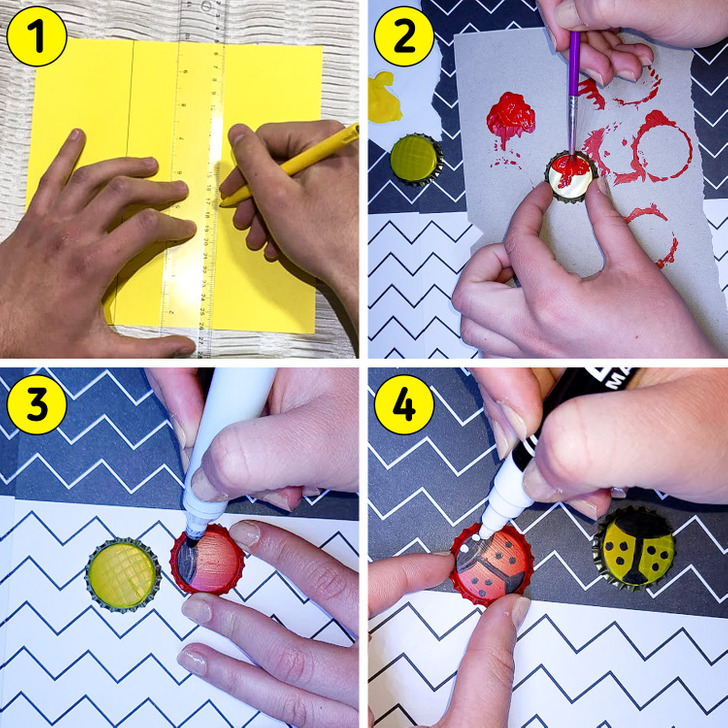
Step 1: Take colored paper (8 in x 8 in) and draw 2 lines. Rotate the cardboard paper and draw another 2 lines to form 9 identical squares.
Step 2: Paint 5 metal bottle caps in red using acrylic paint and another 5 in yellow.
Step 3: Leave them to dry. Using a black marker, start drawing ladybug shapes on the red ones.
Step 4: On the yellow caps, draw bee shapes.
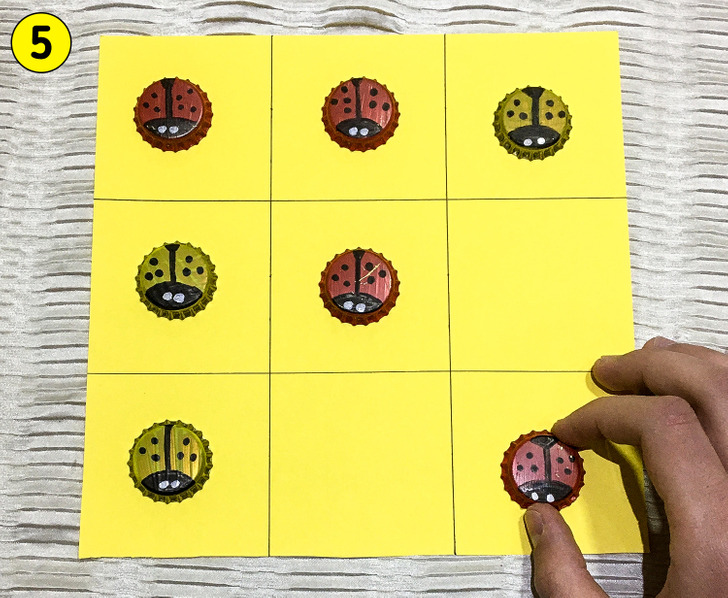
Step 5: Once they’re completely dry, you can enjoy the game.