7 Ways to Make Candles at Home
Candles can add a special and unique touch to your surroundings, especially if you add some nice details to them or if they have an interesting shape that matches your personality.
5-Minute Crafts compiled 7 ways to make your own candles with objects that are easy to find or that you might even already have at home. And if you don’t have all the necessary components at home, we’ve got you covered — there is a little surprise waiting for you at the end of the article.
1. Tricolor candle
What you’ll need:
- Candle wax
- 3 crayons of different colors
- Candle wicks with a holder
- 4 small glass cups
- An empty egg carton
Instructions:
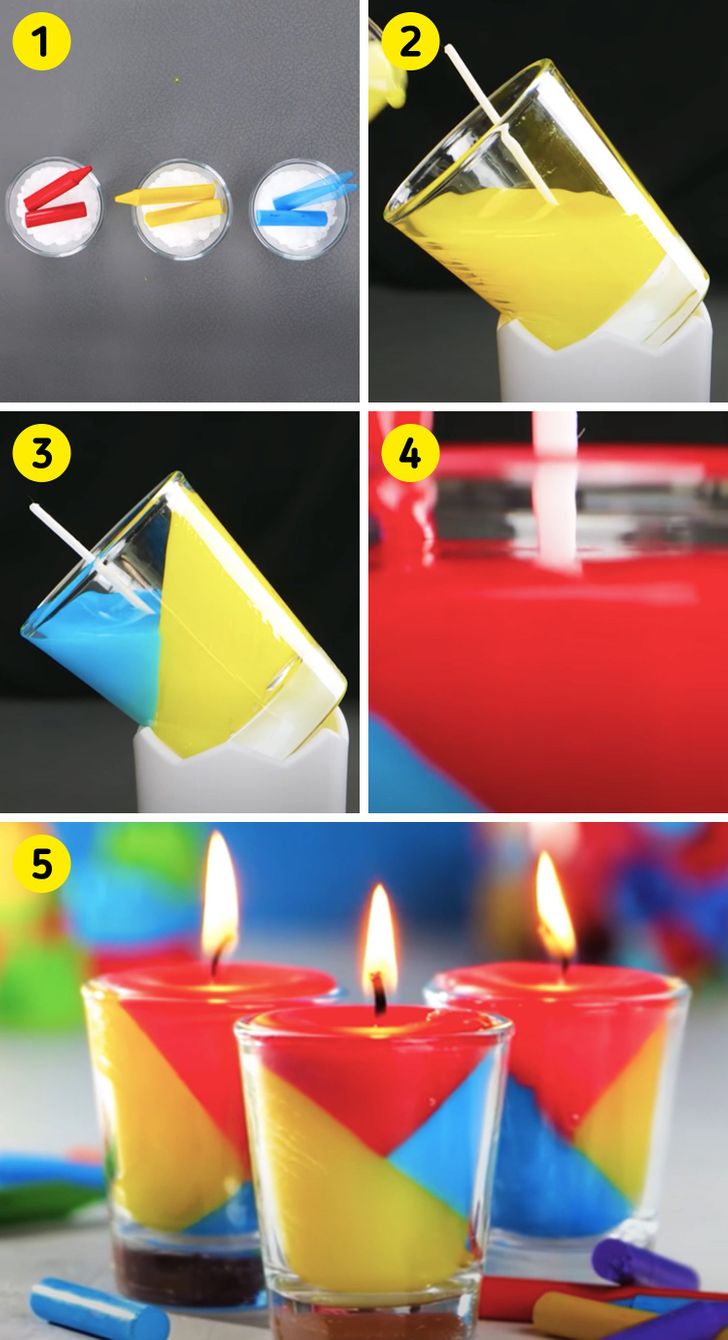
- Place the wax in 3 glass cups. Then break the crayons in half and place them on the wax, one color per glass. Put the glasses in the microwave for a few seconds until both the wax and crayons melt. Stir to combine.
- Place the candle wick in the fourth cup and use the egg carton to hold it at an angle. Pour one of the colored waxes over the rim and wait for it to dry.
- Place the cup back into the egg carton with the first color up and pour in a different wax color by repeating the previous step.
- With the cup in the normal position, fill it with the last color. Wait until it’s completely dry before using it.
2. Natural herbal candle
What you’ll need:
- Candle wax
- Transparent glue
- Medium glass bottles
- Rosemary sprigs or any other aromatic herbs you like
- Candlewick
- Clothespins
Instructions:
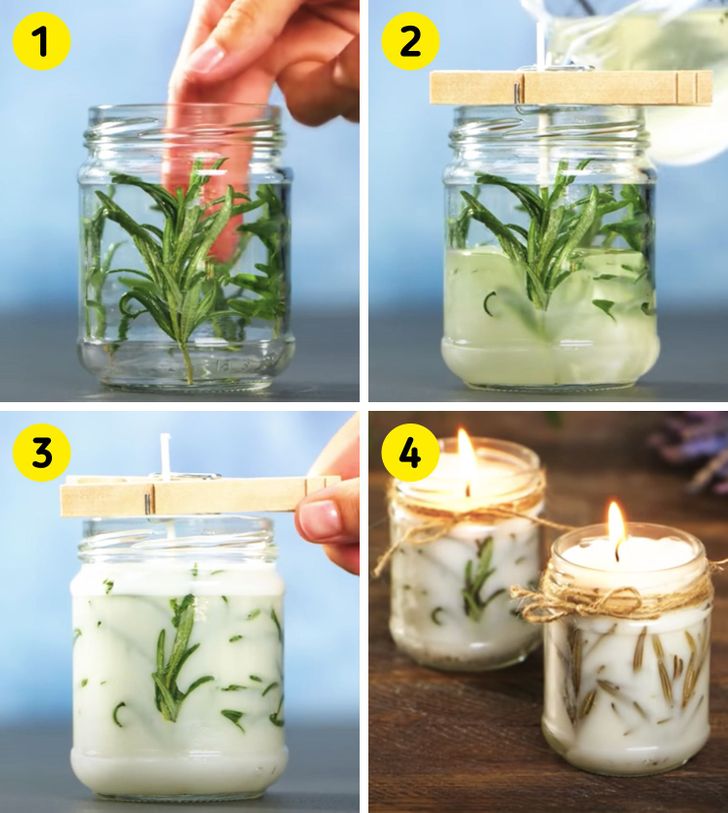
- Stick the twigs or leaves inside the glass jar and wait for the glue to dry.
- Using the clothespin, hold the wick in the center of the jar and pour in the hot wax until the glass is full.
- Wait for the wax to dry and remove the clothespin.
- Decorate the jar using a piece of hemp rope or other rustic-looking material to complete it.
3. Vegetable candle
What you’ll need:
- Vegetable butter
- 3 crayons of the same color
- 1 medium glass
- 1 candlewick
- 1 nut bolt
- 1 wooden stick or pencil
Instructions:
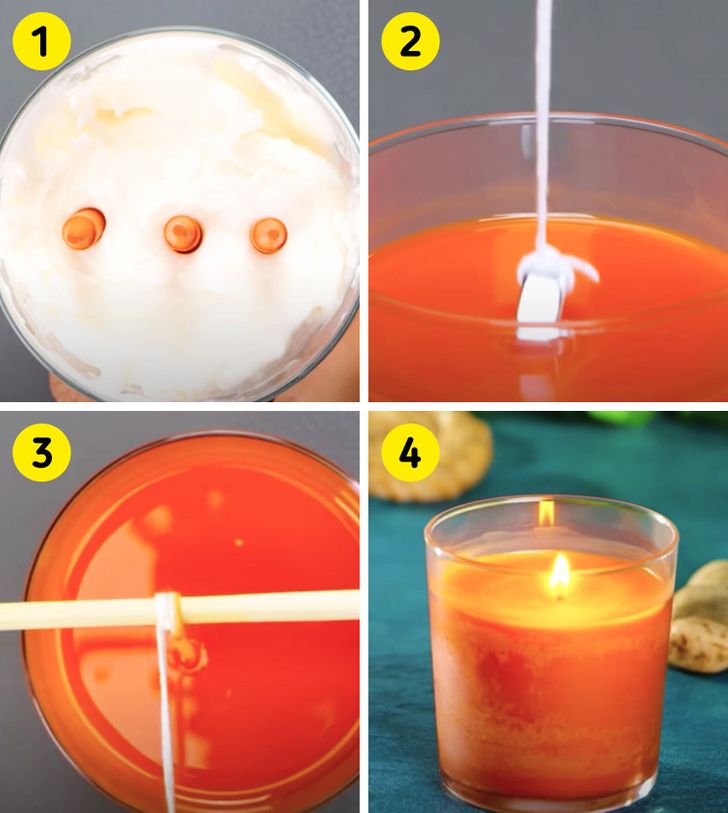
- Place the butter in the glass without filling it and insert the 3 crayons separately. Put them in the microwave for a few seconds until the crayons melt and stir to combine if needed.
- Tie the candle wick to the nut bolt and dip it right into the center of the mixture.
- Use the stick or pencil to keep the wick in the center and not move.
- Put the glass in the freezer and let it sit so that the mixture of vegetable butter and crayons hardens. Once that’s done, you’ll have your candle made of vegetable wax.
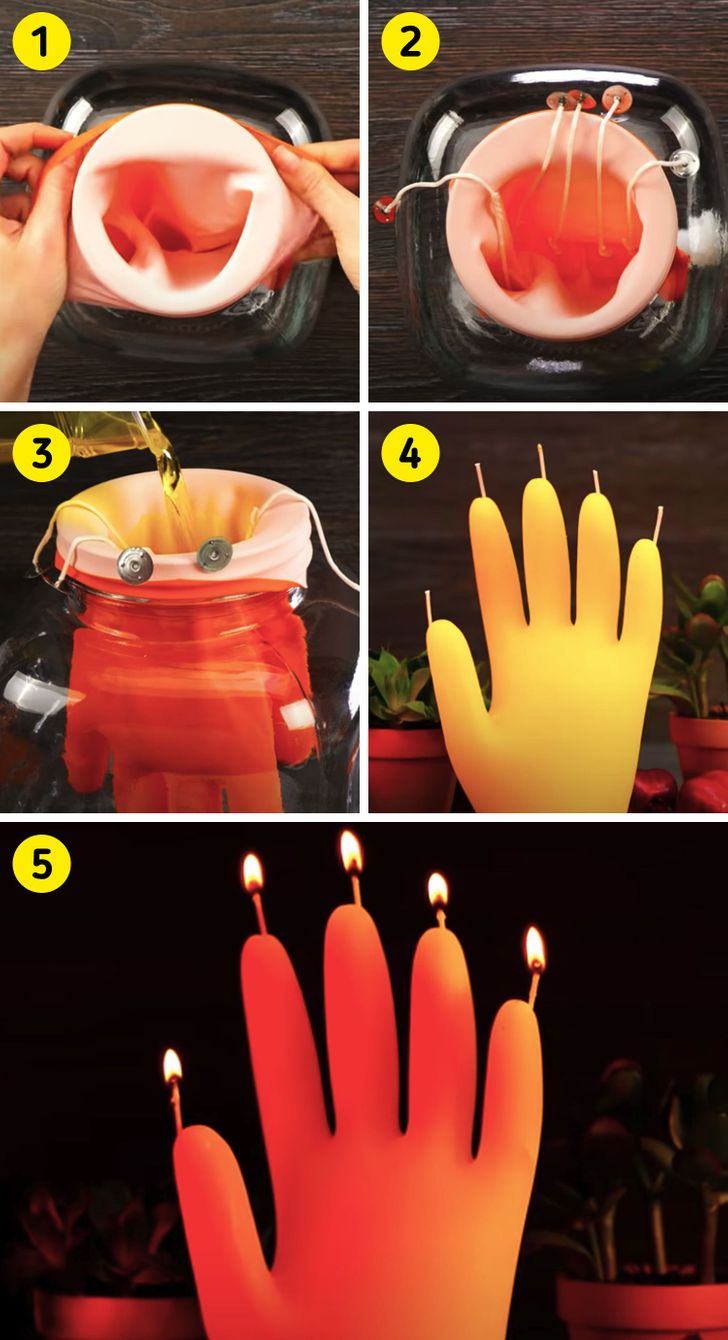
4. Hand-shaped candle
What you’ll need:
- Melted candle wax
- 1 large bottle
- 1 rubber glove
- 5 candlewicks
Instructions:
- Place the glove on the glass jar and hold it open by attaching it to the edge of the jar. Make sure the jar is big enough to avoid problems in the last step when it’s time to take the glove off.
- Tie the upper ends of the candlewicks together and insert one into each finger of the glove.
- Pour the melted wax into the glove, making sure that all the fingers are filled. Wait for it to dry completely.
- Remove the glove from the jar and carefully remove the candle from the jar. Finally, straighten out the wicks on each finger.
- The candle is ready!
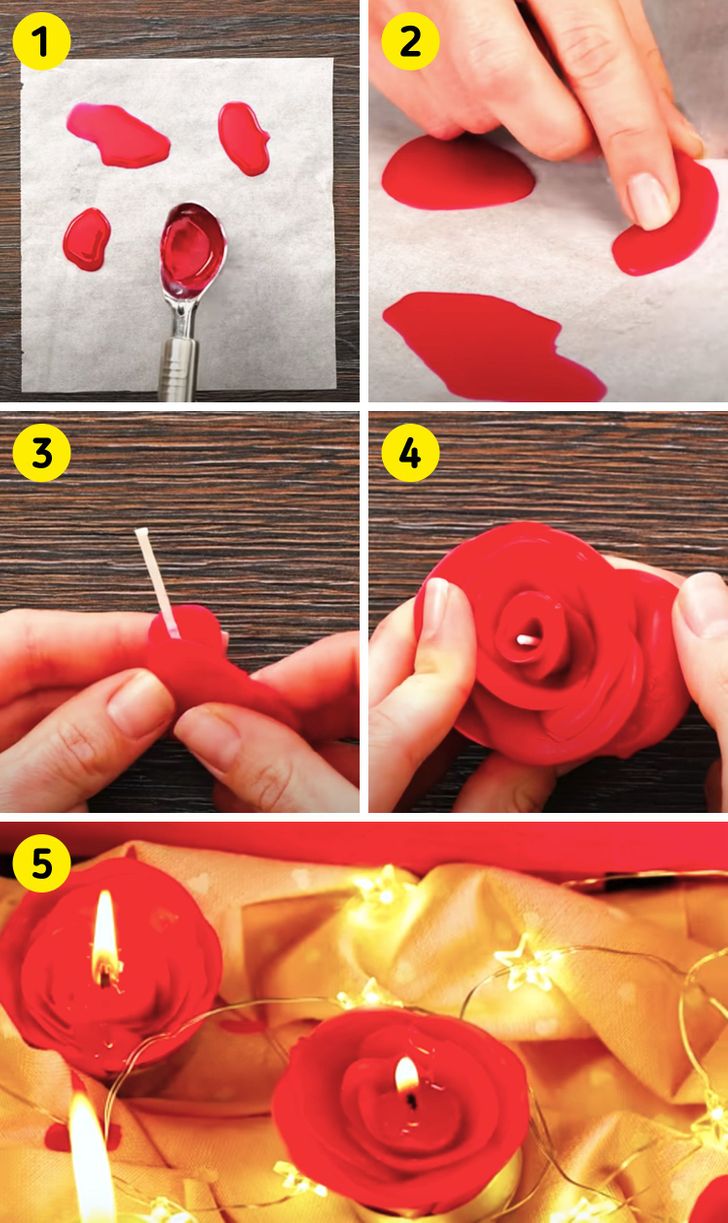
5. Candle in the shape of a rose
What you’ll need:
- Red candle wax
- Baking paper
- Candlewick
- A metal spoon
Instructions:
- Pour small amounts of the melted wax onto the baking paper with the help of a metal spoon.
- Carefully peel off the sheets before they dry completely. These will be the petals of the rose.
- Wrap the wick with 2 of the wax sheets.
- Put together the rest of the wax petals by folding them outward until the rose is complete. You may need to repeat steps 1 and 2 to get more petals if needed.
- Light the candle up and enjoy!
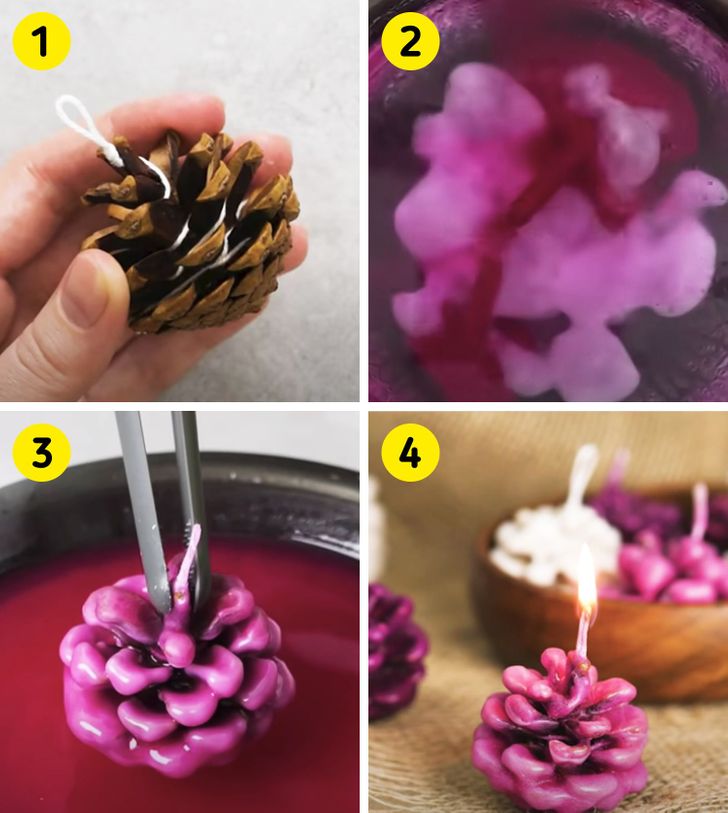
6. Pine cone-shaped candles
What you’ll need:
- Paraffin wax
- Crayons
- Natural pine cones
- Candlewick
- A glass container
- Steel clamps
Instructions:
- Tie the candlewick to the pine cone, leaving a bent tip at the end where you will eventually light the candle. Set it aside for later use.
- Place the paraffin wax and crayons in the glass container and warm them up au bain-marie until they melt. Stir the mixture, if needed, to incorporate all the ingredients.
- Using a couple of tweezers, dip the pine cone into the mixture a few times until enough wax has stuck to it. Remember to dip the pine cone with the wick facing upward.
- Let the wax dry completely before using your new candle.
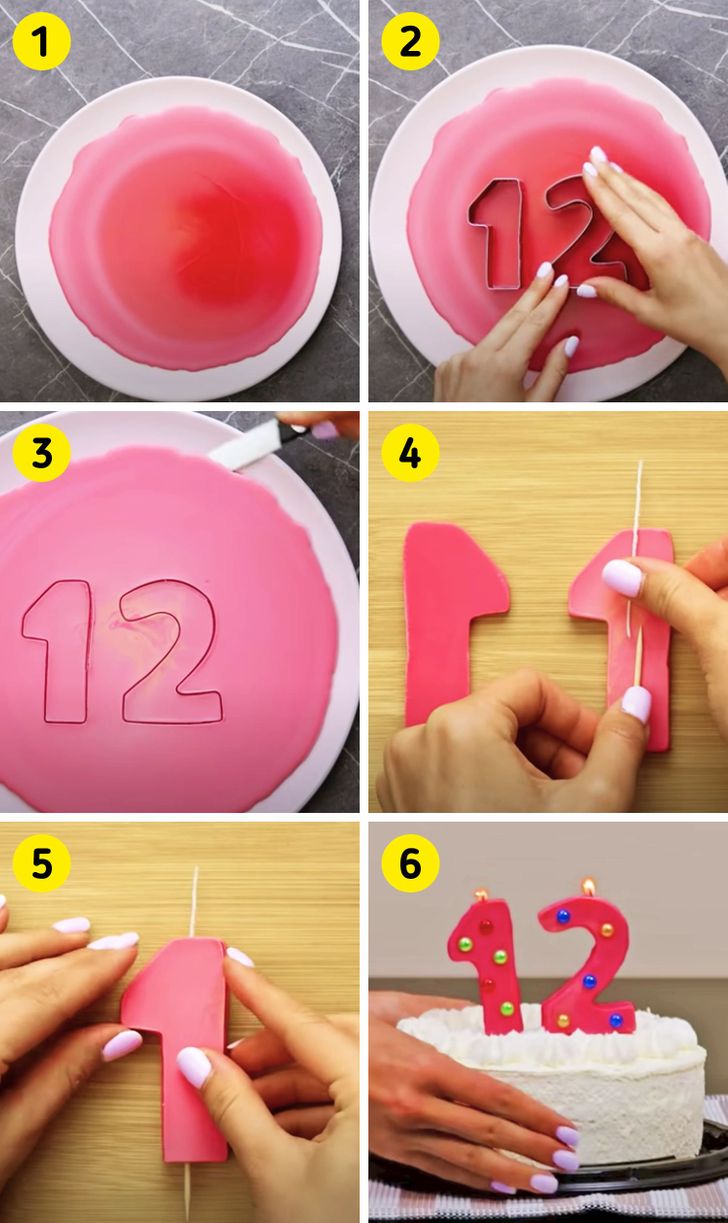
7. Birthday candles
What you’ll need:
- Melted candle wax
- Cookie molds
- Candlewicks
- Toothpicks
- A knife or spatula
- A hairdryer
- A smooth base plate
- Pearls or colored drops (optional)
Instructions:
- Pour the melted candle wax on the plate, creating a thick film. Wait for it to cool down but don’t let it cool off completely or it will be too hard to work with.
- Press the cookie cutters onto the warm wax and wait for it to dry.
- Remove the molds and excess wax from around the figures with the help of a knife or spatula. Repeat steps 1, 2, and 3 to obtain 2 equal figures from each mold.
- Place the wick down, letting it stick out toward the top of the numbers, and put the toothpick toward the bottom.
- Melt the wax on one side of the number with a hairdryer and stick it over the wick and the toothpick.
- If you want to decorate your candles, melt them again with the hairdryer and stick on the pearls, colored drops, or any other decorations that you like.
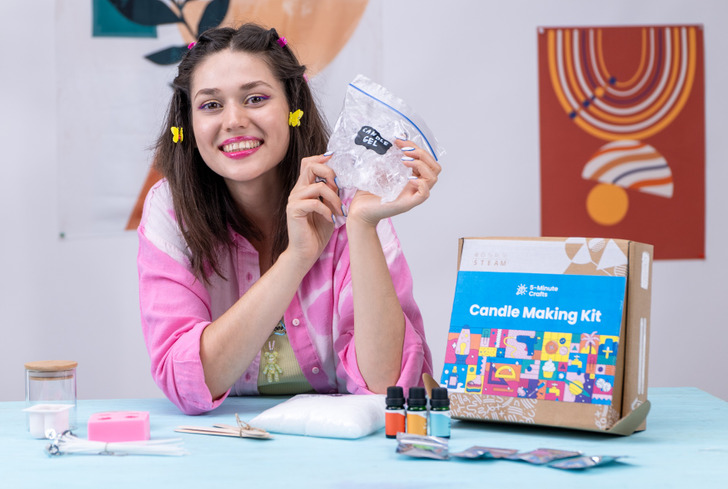
Bonus: a candle-making kit designed exclusively by 5-Minute Crafts
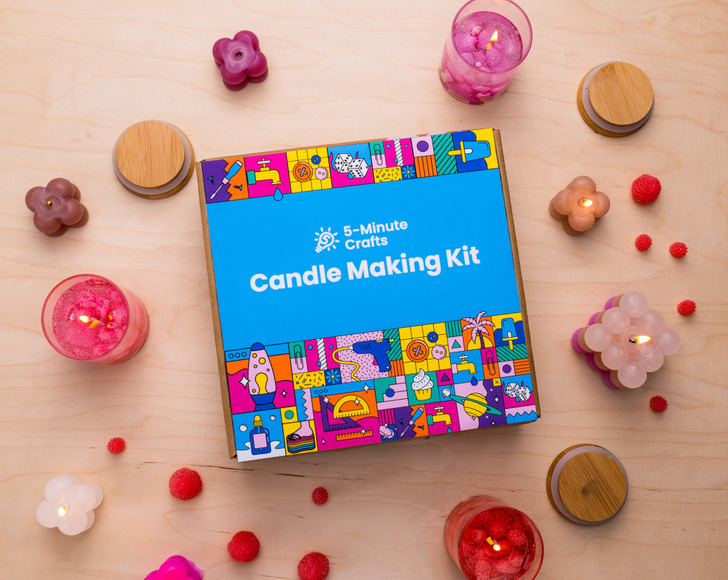
There are many ideas here, but it’s so hard to choose the one you want to try first, right? We’ve made it easier for you and designed this cute box that contains everything you need to start your candle-making journey.
All the ingredients have already been weighed and measured, and, even more importantly, they’ve all been dermatologically tested and deemed safe for child use. Also, we included simple step-by-step illustrated instructions.
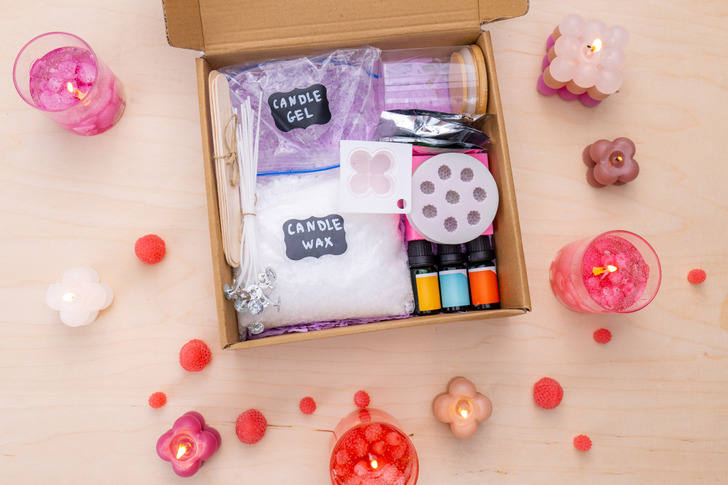
Here’s what you’ll find in the box:
- Candle wax (150 g or 0.35 lb)
- Candle gel (150 g or 0.35 lb)
- 5 colorants for the candle wax (red, yellow, blue, green, and orange)
- 2 silicone molds to form candle wax
- 3 essential oil aromas for the candle gel (green tea, cinnamon, and strawberry)
- Wicks/fuses for candles
- 4 wooden sticks for mixing the candle wax and gel when they melt
- 3 candle glasses to house all this candle magic
- You have the unique opportunity to get the first Hobby Box in 5-Minute Crafts history with a 50% discount.
- As a pre-order bonus, you will receive a letter from the 5-Minute Crafts team telling you how we came up with the idea for the Hobby Box product line and how we designed it.
- Also, you will receive a special digital bonus — a behind-the-scenes peek at how we film our ads.
🎁 Buy the 5-Minute Crafts Hobby Box here now.
Dimensions and delivery
- 2.2 lb (1 kg)
- 9.1″ x 9.1″ x 2.6″ (23 cm x 23 cm x 6.5 cm)
- We deliver across the USA and EU, pre-order with delivery before Christmas.
