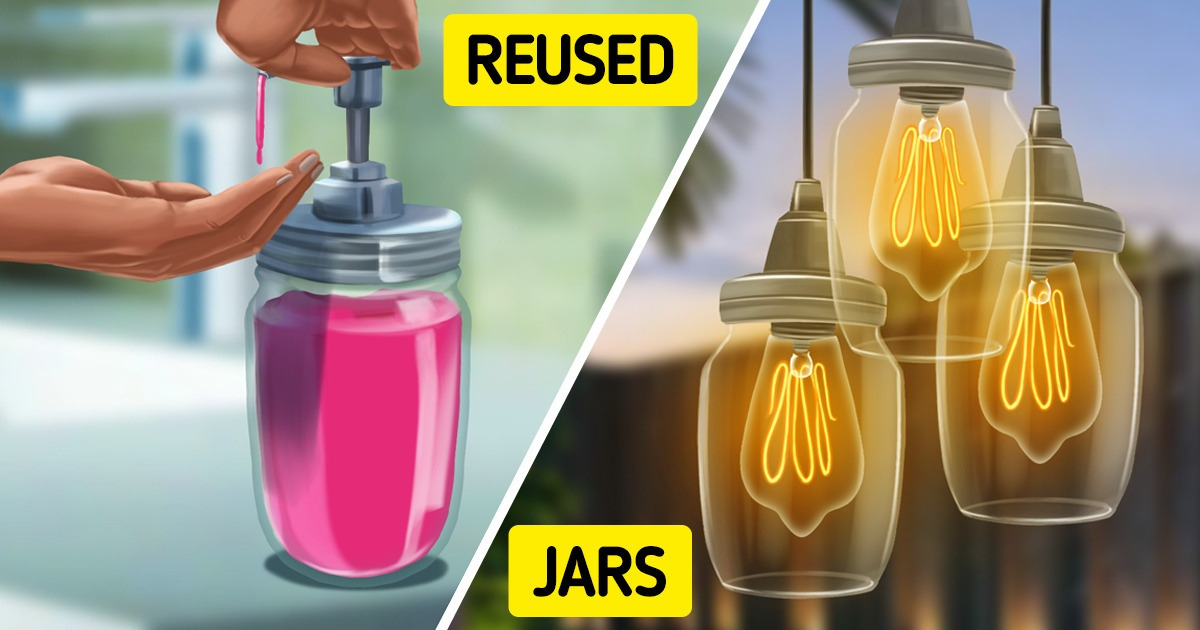
7 Ways to Reuse a Glass Jar

Almost every product we buy at the store comes in a jar, bottle, or plastic wrapping. Glass jars are the perfect way to store seasonings, homemade pickles, or jams, but aside from canning, there are more creative and useful things you can do with them.
5-Minute Crafts gathered some ways to reuse empty glass jars.
1. Jar chandelier
Materials:
- A jar
- A marker
- Wire
- A power drill/screwdriver
- Pliers
- Hex nuts
- A metal nipple
- A keyless socket holder
- A light bulb
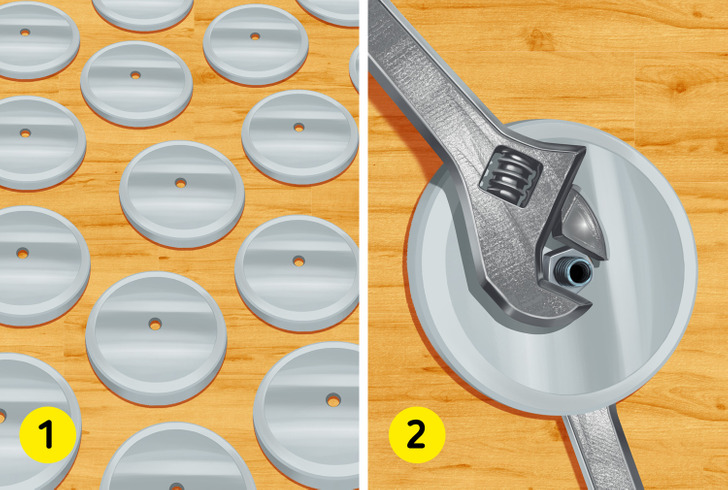
Step 1: Draw a hole on the lid with a marker and use a drill or screwdriver to punch a hole in it. Measure the cut according to the metal nipple. Measure how much you will need and cut off the metal lid.
Step 2: Place the metal nipple inside the hole on the lid, leaving equal length on each side of the lid, and secure it with hex nuts on both sides.
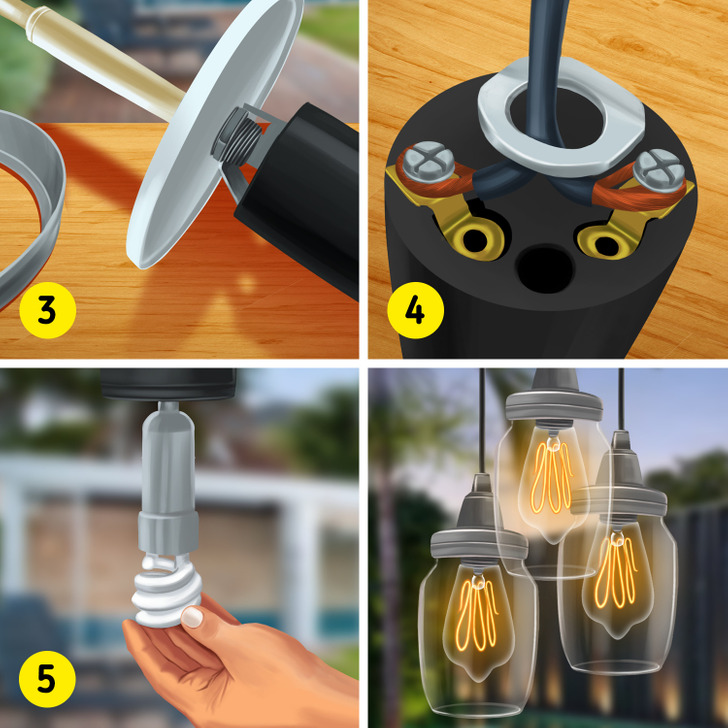
Step 3: Put the cable inside the metal nipple and wire the keyless socket. Strip the wire covering with the wire cutters and wire the 2 screws on the socket.
Step 4: Screw the keyless light socket onto the side of the metal nipple that goes into the jar.
Step 5: Screw a bulb into the socket and then screw the jar back to the lid.
It’s up to you whether and how you can decorate the rest of it. You can hang them in the kitchen or make a couple of them screwed into a piece of wood, and, with help of a professional, install them on the ceiling.
2. Candle jars
Materials:
- A small jar
- Glue
- A wick
- A wooden stick
- Old candles/wax
- 2 containers
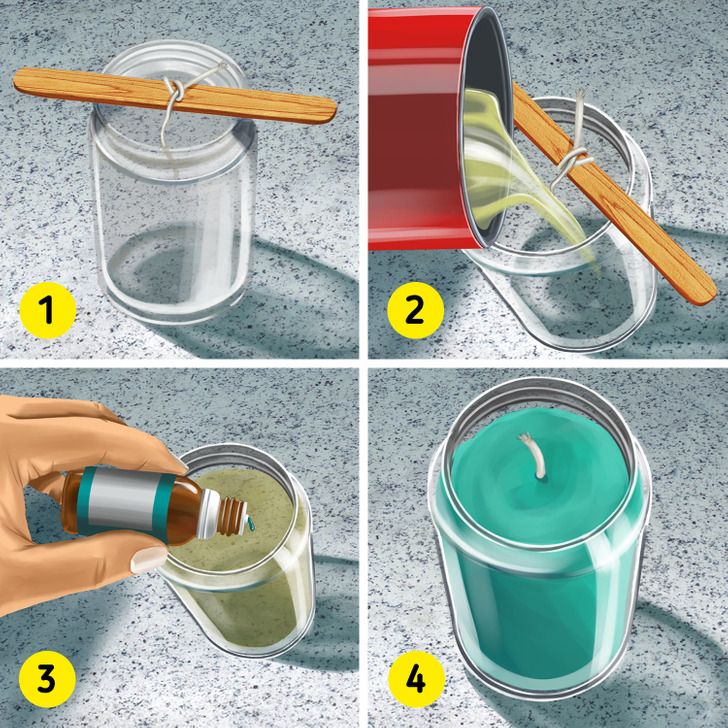
Step 1: Grab a jar and glue one wick in it. Wrap the top of the wick around a wooden stick.
Step 2: Put the wax into a container and place it in boiling water. Stir it and pour a few drops of essential oil to add aroma.
Step 3: Once the wax is melted, pour it into the glass jar.
Step 4: Let the wax harden before cutting the excess wick.
3. Vase
Materials:
- Masking tape
- Salt crystals
- White glue
- An empty glass jar
- Clear gloss spray
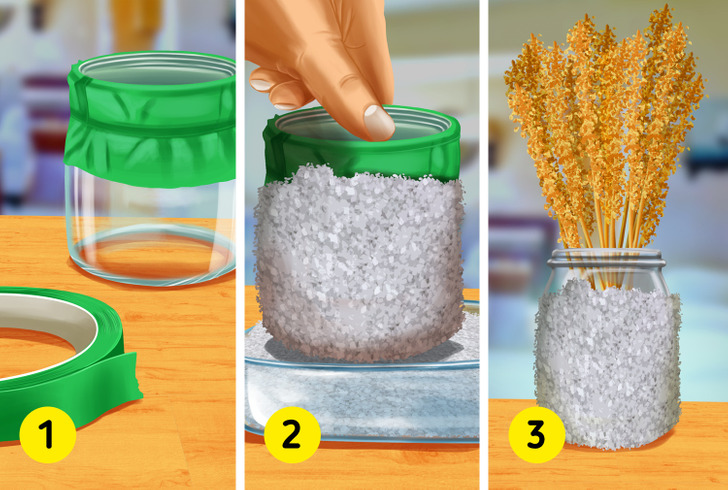
Step 1: Take an empty glass jar and clean it. Once it’s dry, put masking tape to cover the opening of the jar and apply white glue to the unmarked area.
Step 2: Fill a container with salt crystals and roll the jar in it until it’s fully covered.
Step 3: Once it’s dried, remove the masking tape and fill the jar with flowers.
Bonus: You can use smaller jars to make candle holders.
4. Soap dispensers
Materials:
- A drill/screwdriver
- A Mason jar
- A soap pump
- Hot glue
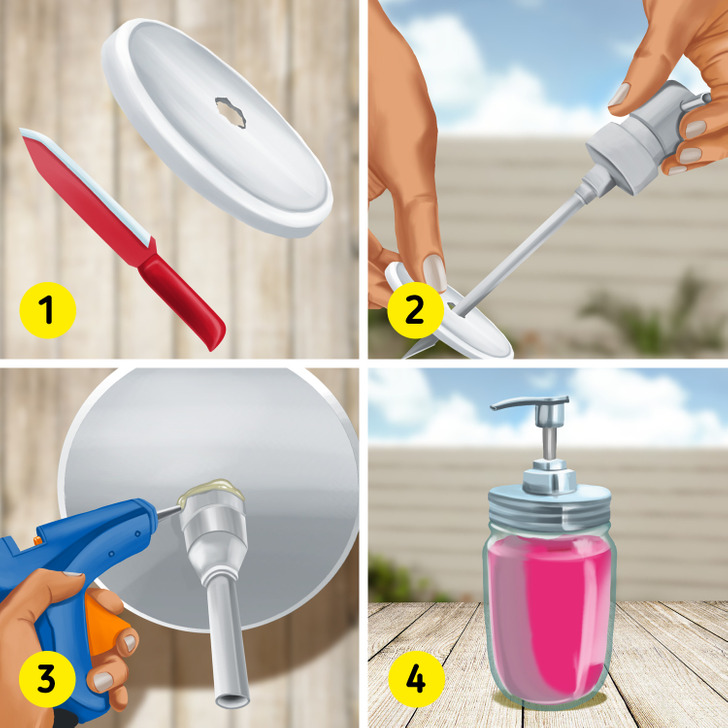
Step 1: Use the large drill bit to punch a hole in the top of the lid, or try it by using a screwdriver. Measure how much you will need to cut off the metal lid according to the pump size. Cut off the edges very carefully.
Step 2: Make sure that the hole you made is big enough to fit the soap pump but small enough so that the actual pump stays on the top.
Step 3: Use silicone or hot glue to secure the pump and then add the metal ring to it.
Step 4: Fill the jar with soap, then the soap dispenser is ready.
5. Jar terrarium
Materials:
- A glass jar
- Gravel/small rocks
- Active charcoal
- Moss
- Plants
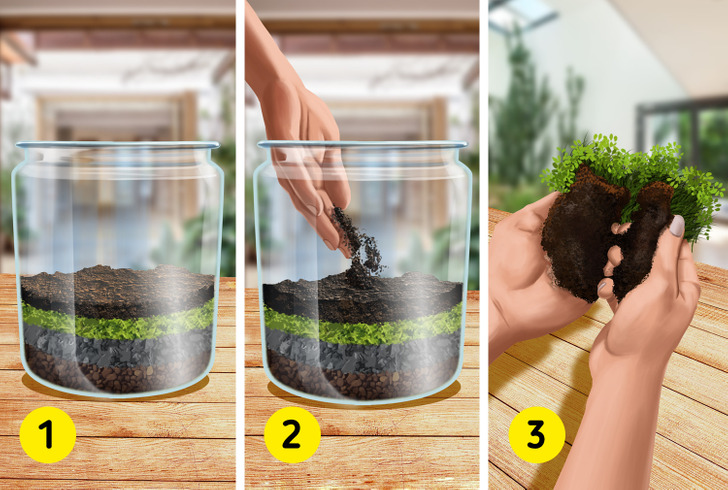
Step 1: Put gravel or small rocks at the bottom of the jar, which will represent the drainage layer. This will keep the water away from plant roots. The second layer should be with active charcoal. The third layer will be moss, and this will keep the soil from mixing with the previous 2 layers.
Step 2: Add soil to the jar.
Step 3: Pick terrarium plants. Shake the soil from the plants and use a spoon or your fingers to dig a hole into the soil. Place the plants in their holes and pat the soil to avoid air pockets. Use a spray bottle to water terrarium plants.
6. Photo magnets
Materials:
- A glass jar lid
- Photo
- Scissors
- Glue
- Magnet
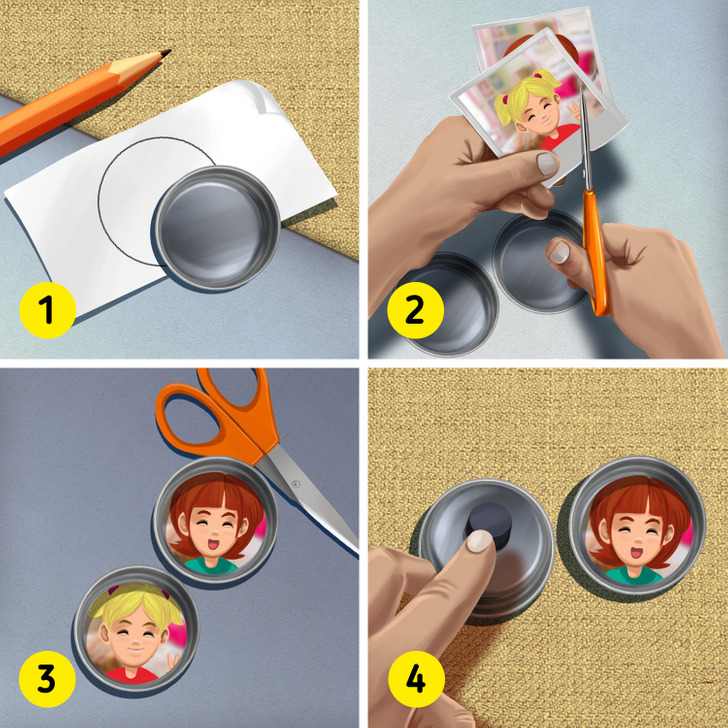
Step 1: Take a glass jar lid and trace it on the backside of the photo.
Step 2: Cut out the circle using scissors.
Step 3: Glue the picture on the inside of the lid using glue.
Step 4: Attach a magnet to the backside of the lid.
7. Bird feeder
Materials:
- A Mason Jar
- Twine
- A small round chicken feeder
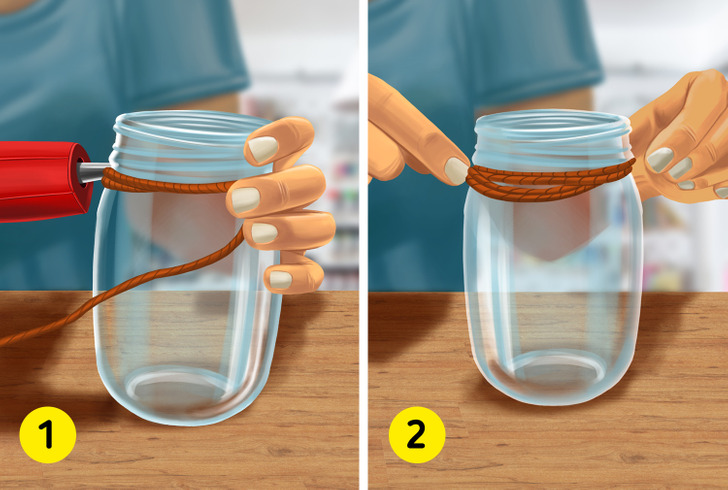
Step 1: Start with wrapping one layer of string under the rim and tying it off. Secure the layer with a hot glue gun.
Step 2: Tie another piece of twine around the middle in a few layers.
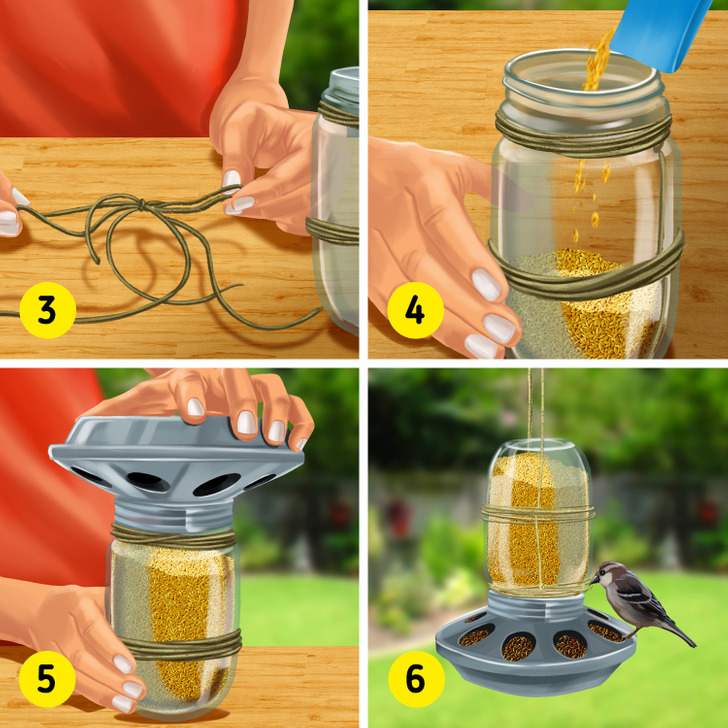
Step 3: Run the twine about halfway down the jar and repeat the first step.
Step 4: Fill the feeder with seeds.
Step 5: Screw the jar on.
Step 6: Place the bird feeder in the garden and enjoy it every time you get a chance to.
Are you planning to do some of these? Share your opinions below if you have other ideas aside from these.