8 Creative Ways to Repurpose Old Clothes
You may have clothes that you no longer wear because they’re very worn out, are riddled with stains, or simply have gone out of fashion. At 5-Minute Crafts, we’d like to help you give these items new life with very simple and original techniques. Choose the ones you want and you’ll notice how easily you can turn your old stuff into new designs.
1. Denim shorts with customized colorful designs
What you’ll need:
- Plain denim shorts
- Non-toxic fabric paint
- A roll of film
- A paintbrush
Instructions:
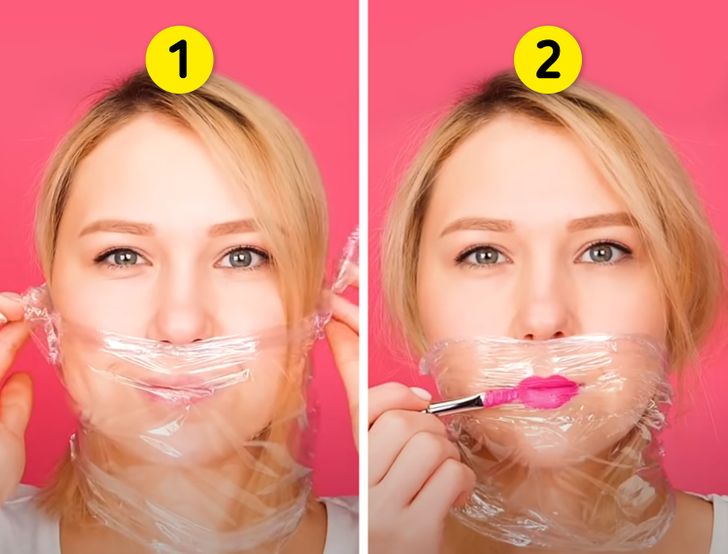
1. Cover your mouth with a piece of cling film. Wrap your mouth with it about 2 or 3 times and make sure that the layer you obtain is thick enough so that the paint you’ll be using doesn’t go through it.
2. Use a brush to pretend you’re painting your lips.
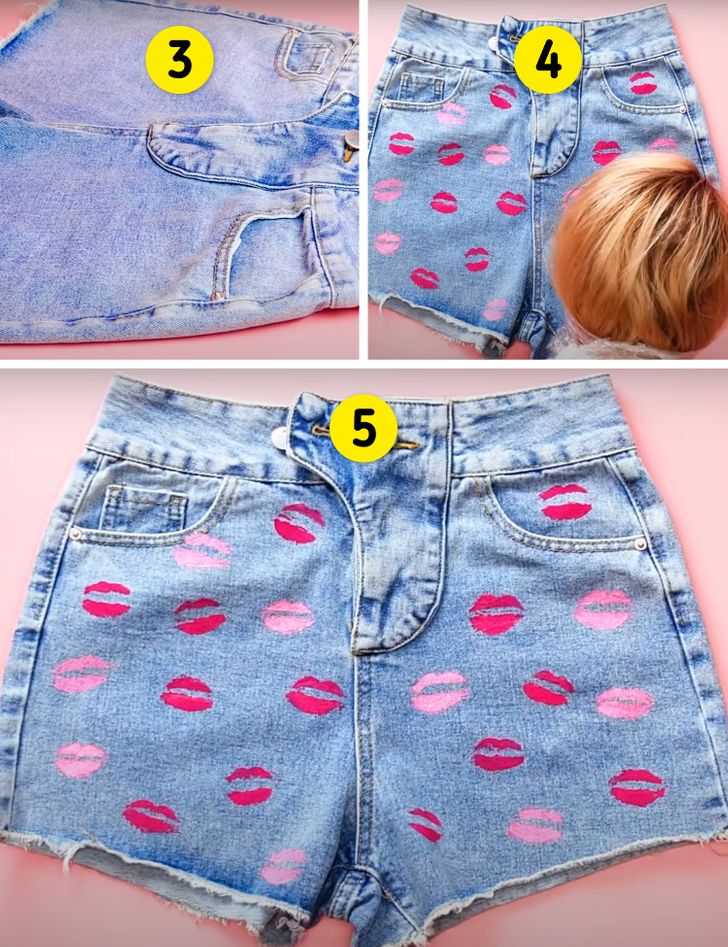
3. Spread your denim shorts on a flat surface where you feel comfortable working.
4. Press your lips with the cling film against the denim shorts on the different spots where you want the drawings to be printed.
5. Your new shorts are ready!
2. A T-shirt painted with a “bubble effect”
What you’ll need:
- A plain, light-colored T-shirt
- Bubble liquid
- A plastic bottle with a lid or a bubble blower
- Liquid artificial pigments
- Bubble rings of different diameters
Instructions:
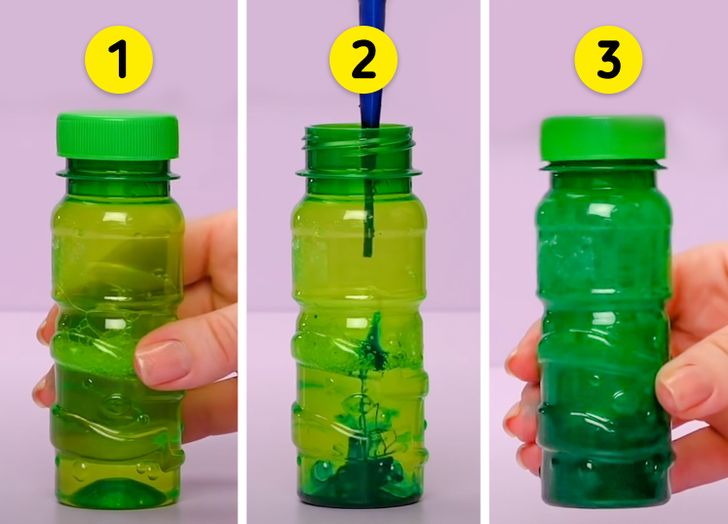
1. Place the bubble blower or plastic bottle on a table.
2. Add 4 to 5 drops of color pigment. You can add more or less depending on if you want a more intense color or if you prefer lighter shades.
3. Close the bubble blower or the bottle and shake it.
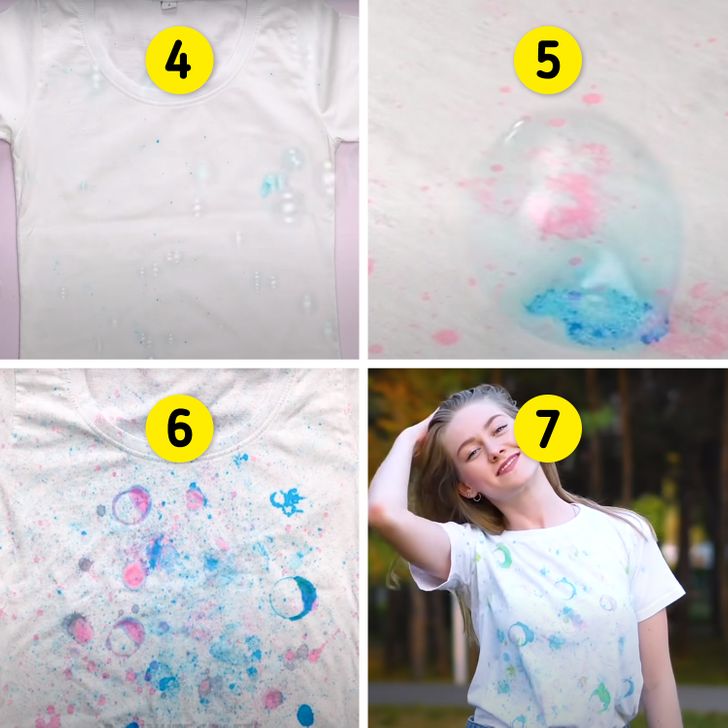
4. Place the T-shirt on a flat surface where you feel comfortable working. Remember, bubbles contain pigmentation, so make sure your workstation doesn’t have anything on it that you would want to get damaged by the paint. Use the bubble blower or rings and start blowing.
5. Wait for the bubbles to settle on the fabric.
6. Let it dry.
7. That’s it! Now you can wear your new T-shirt.
3. Checkered espadrilles
What you’ll need:
- A pair of white espadrilles
- A pair of fishnet stockings
- Red, purple, and yellow fabric paint
- Paper tape
- A container and a sponge-tip applicator
Instructions:
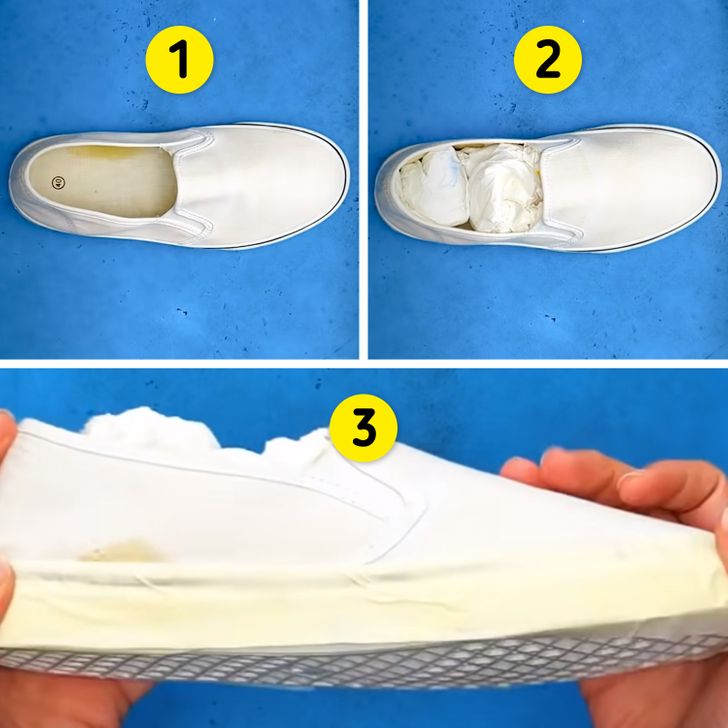
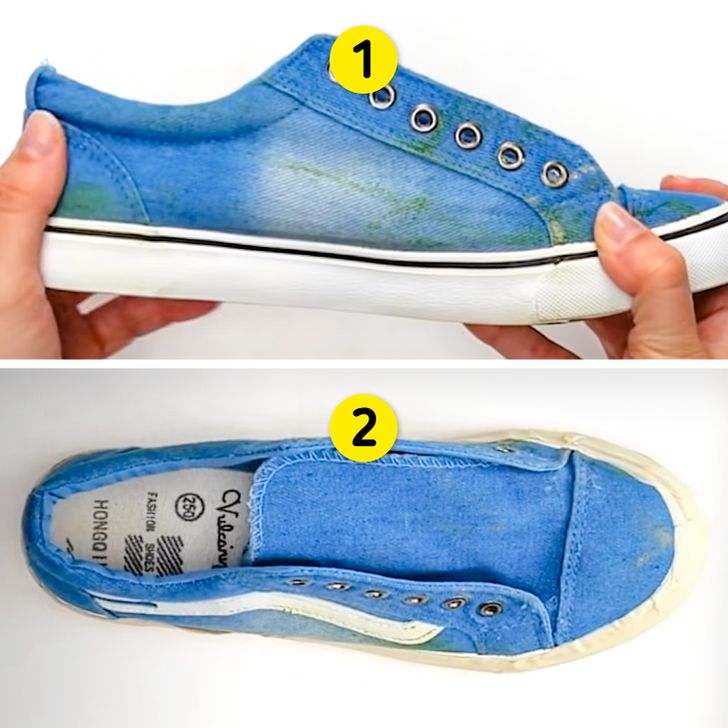
1. Pick any espadrilles you no longer use and place them on a smooth surface.
2. Fill the inside with paper balls made of old newspaper or discarded paper.
3. Cover the sides of the soles with paper tape.
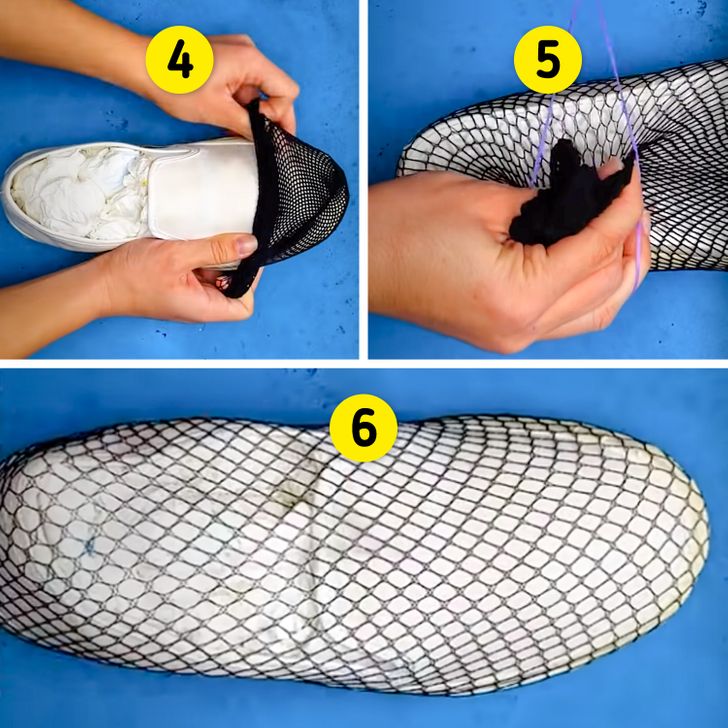
4. Wrap the espadrilles with the fishnet stocking.
5. Turn it around and close the stocking using a rubber band (make sure it’s attached to the fabric well).
6. Turn it right side up again.
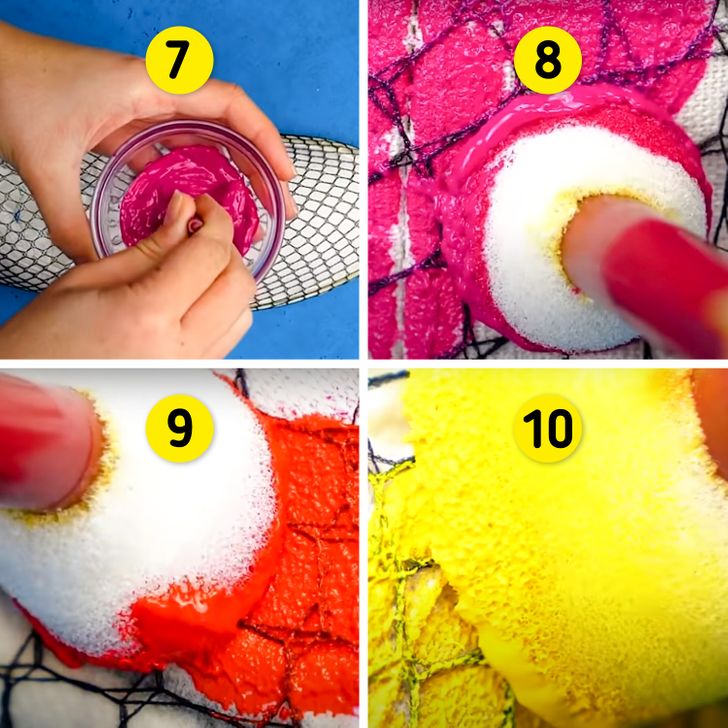
7. Carefully apply the paint from the top down.
8. Start by using the purple shade to paint the shoes by exerting some pressure with the applicator.
9. Once you’ve covered the top with purple paint, you can continue doing the same thing but with red paint.
10. Then do the same thing, but with yellow.
- Avoid smearing the applicator all over the parts you want to paint. It’s better to just press it lightly against the surface you’re trying to paint. Just lift and press again.
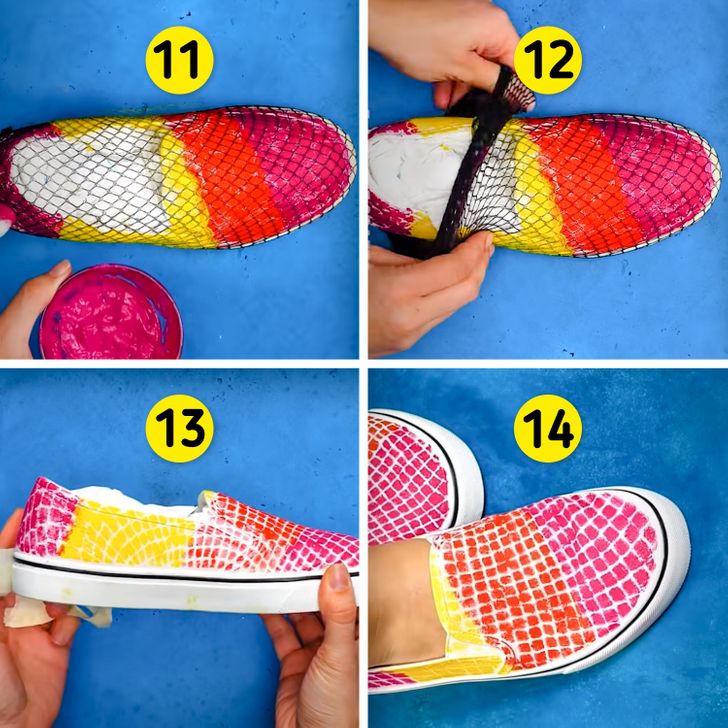
11. Wait for the paint to dry.
12. Remove the stocking.
13. Remove the paper tape.
14. Your new espadrilles are ready to be worn!
4. A denim vest or jacket with a printed back
What you’ll need:
- A denim vest or jacket with a plain back
- Sandpaper
- Colorful crayons
- Iron
Instructions:
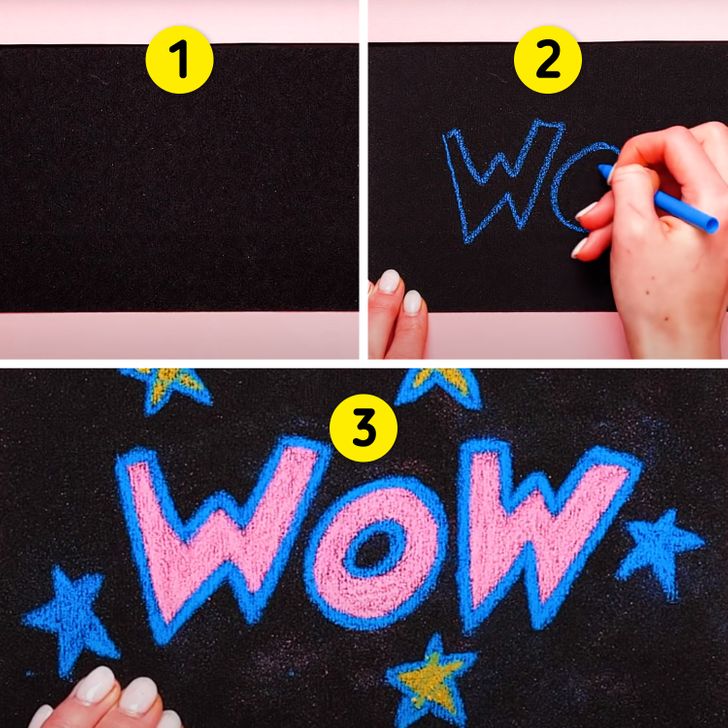
1. Cut the sandpaper into a rectangle.
2. Choose a crayon and draw any type of object, landscape, face, or anything you’d like. You can do whatever you prefer or whatever seems simpler to you, including lettering, which we will use in our example.
3. Add details with other colors, but don’t saturate the rectangle too much for it to still work in the following steps.
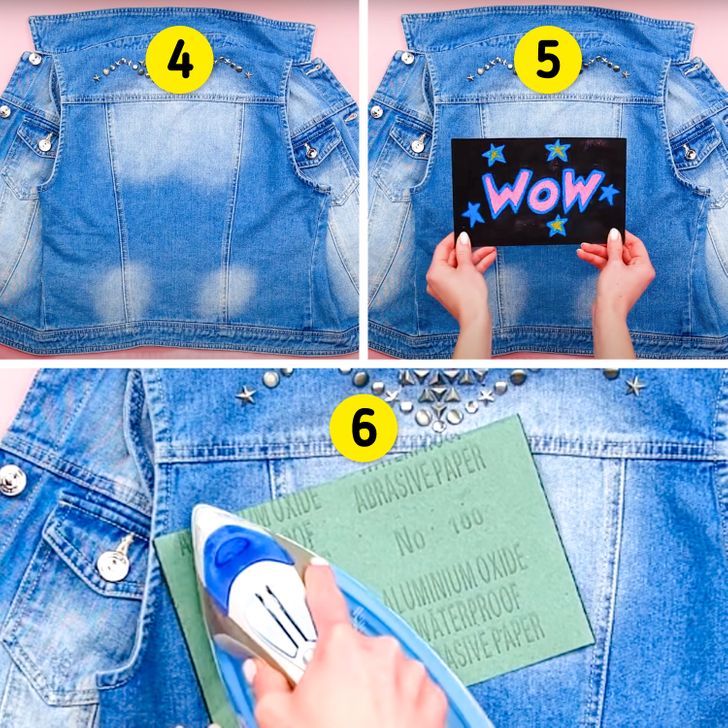
4. Lay the jacket on a smooth surface, such as a large table. Make sure the back of the jacket is facing upward.
5. Place the sandpaper on the jacket. The part that has the drawings on it should be facing down.
6. Iron over the sandpaper a couple of times for the drawings to really stick to the denim.
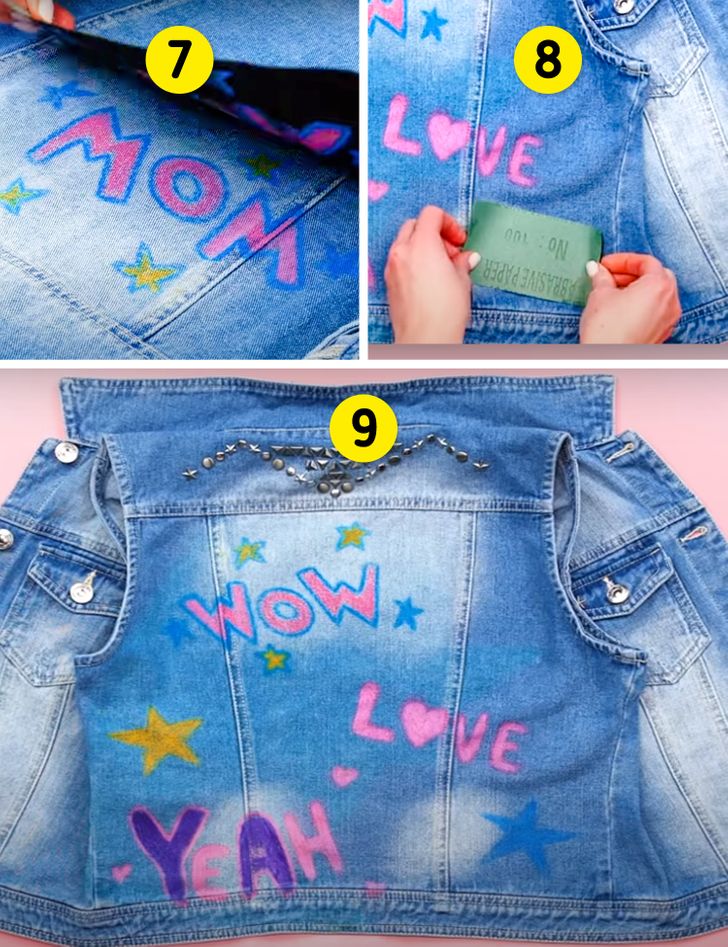
7. Lift the sandpaper.
8. You can use this technique with different patterns and colors all along the back of the vest as much as you want. Also, make sure you’ve placed it on a smooth surface. Also, be sure there are no folds, pockets, or zippers on the spot you’re ironing on.
9. Your jacket is ready!
5. Tennis shoes with glitter
What you’ll need:
- A pair of tennis shoes
- Paper tape
- Fabric glue
- A paintbrush
- Glitter
Instructions:
1. Get any pair of tennis shoes that you’re no longer using but that you still like.
2. Cover the rims of the shoes with paper tape.
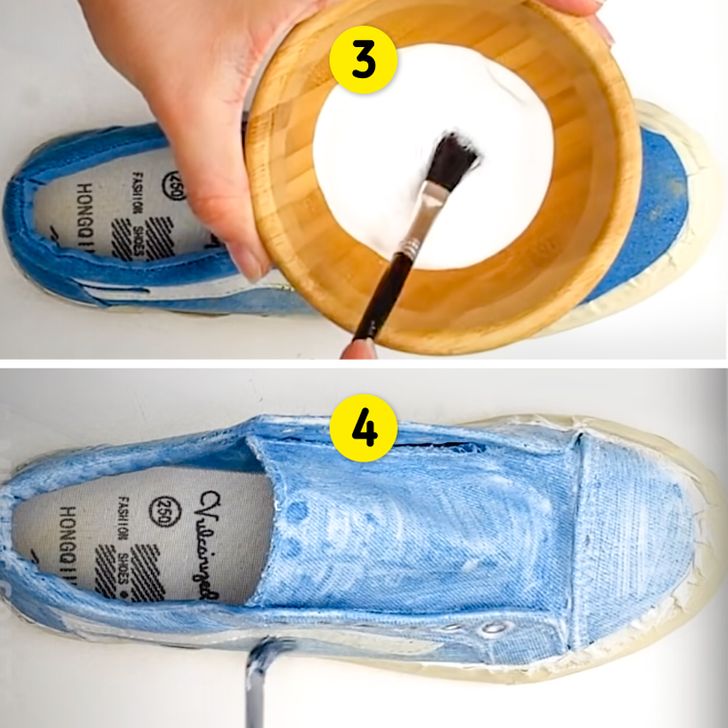
3. Get the container with glue and the brush.
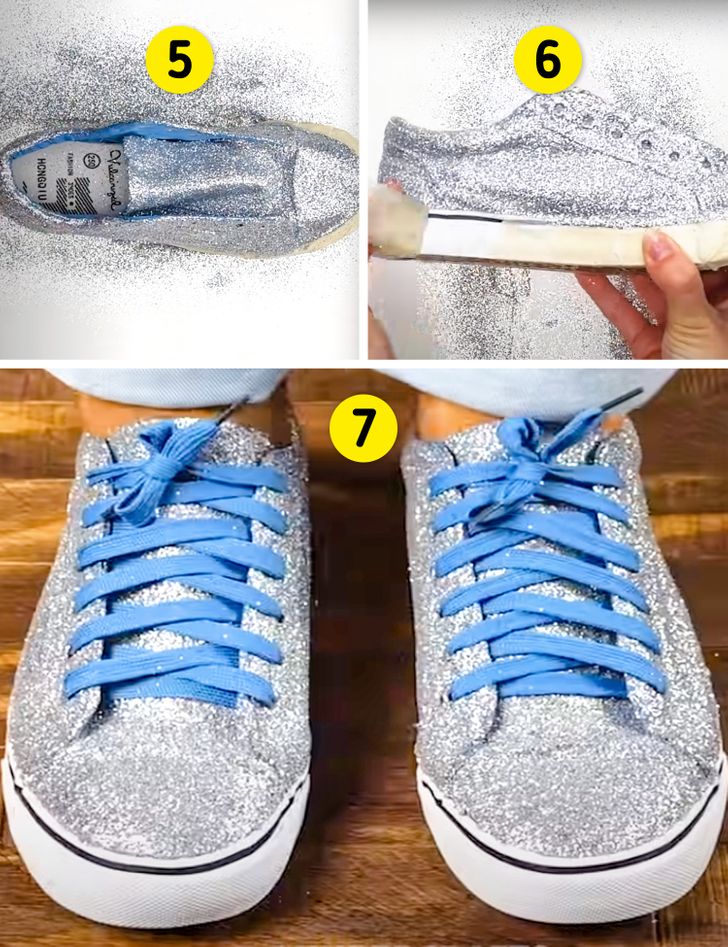
4. Cover the surface of the tennis shoes.
5. Pour the glitter directly from the bottle onto the shoes. The only thing you have to take off is what falls off evenly.
6. Let it dry, and once that happens, remove the paper tape.
7. Put your new shoes on and enjoy!
6. Denim pants with a crossover design
What you’ll need:
- Denim pants
- Paper tape
- Violet, orange, turquoise, and yellow fabric paint
- A sponge
Instructions:
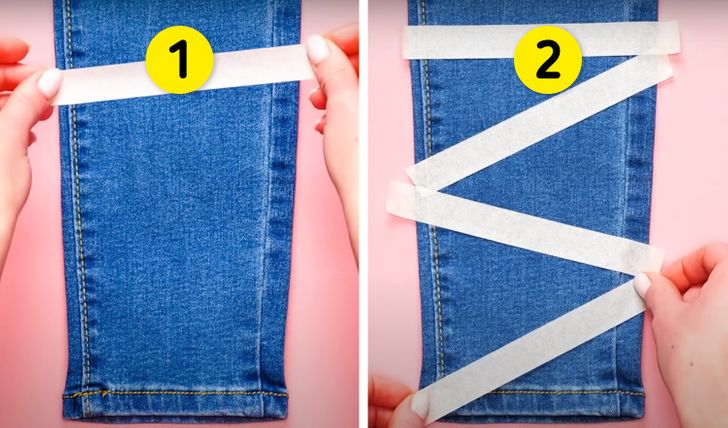
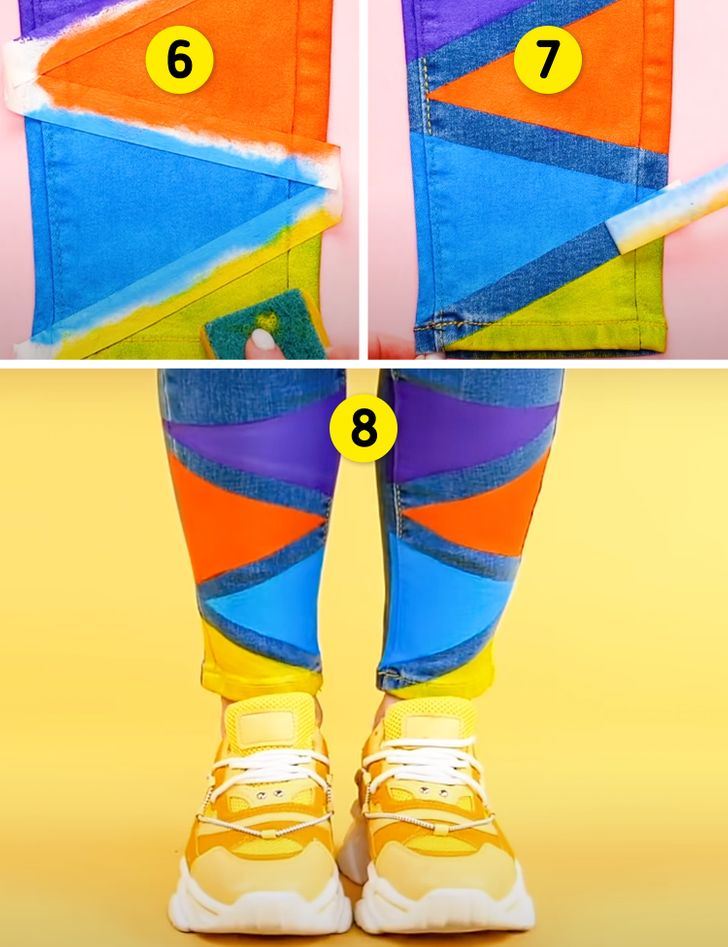
1. Get some paper tape and tape it in a zigzag pattern that starts right under the knee.
2. Keep sticking the tape in a zigzag pattern up to the leg’s cuff.
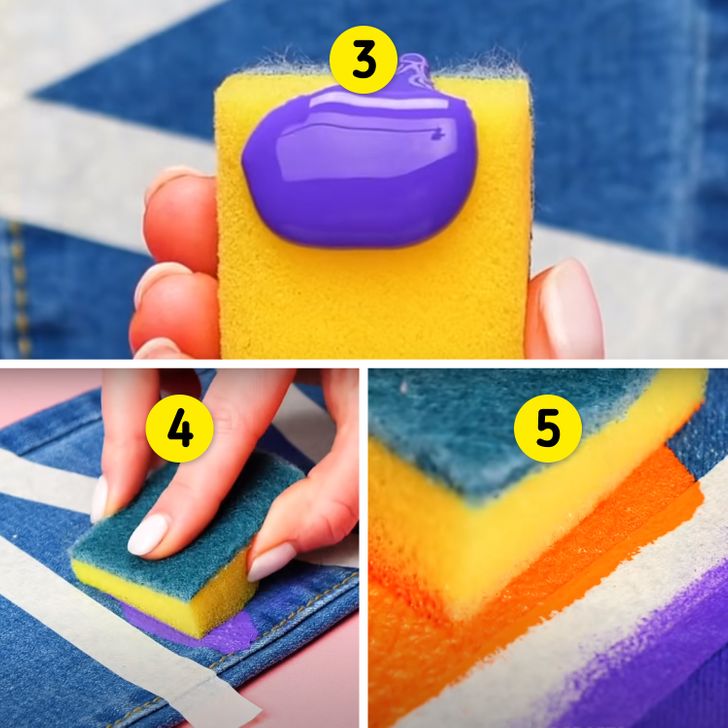
3. Pour a good amount of violet paint on the sponge.
4. Rub it on one of the triangles that were made by the tape that divided the sections with a zigzag pattern.
5. Each time you change the triangle, change the color as well.
6. Once you’ve painted all the triangles, let them dry.
7. Remove the tape.
8. Your new colored pants are ready to use!
7. A T-shirt with a printed phrase
What you’ll need:
- A plain white T-shirt
- A thick black marker
- A sheet of paper
- A bottle of perfume
Instructions:
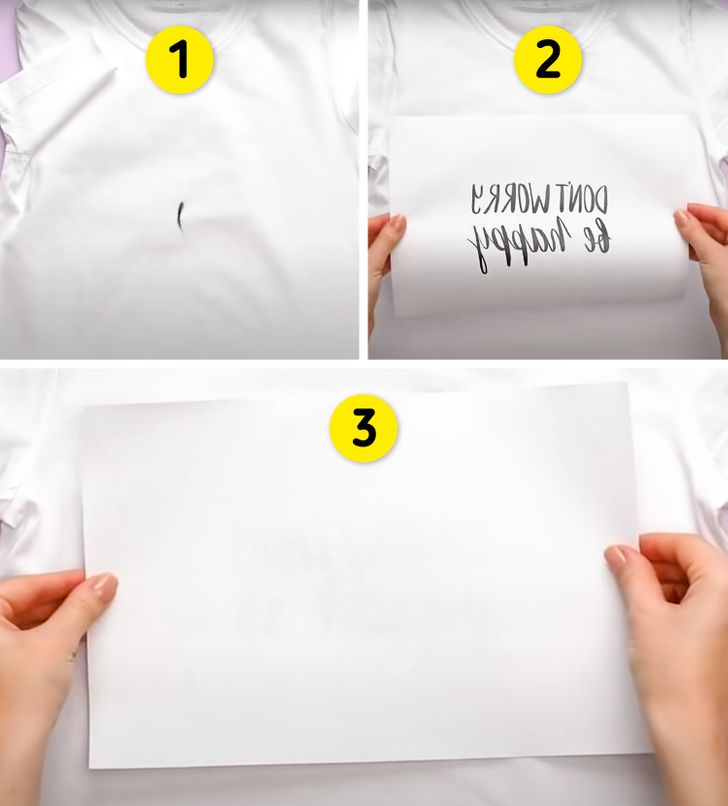
1. Place the T-shirt on a sturdy, smooth surface.
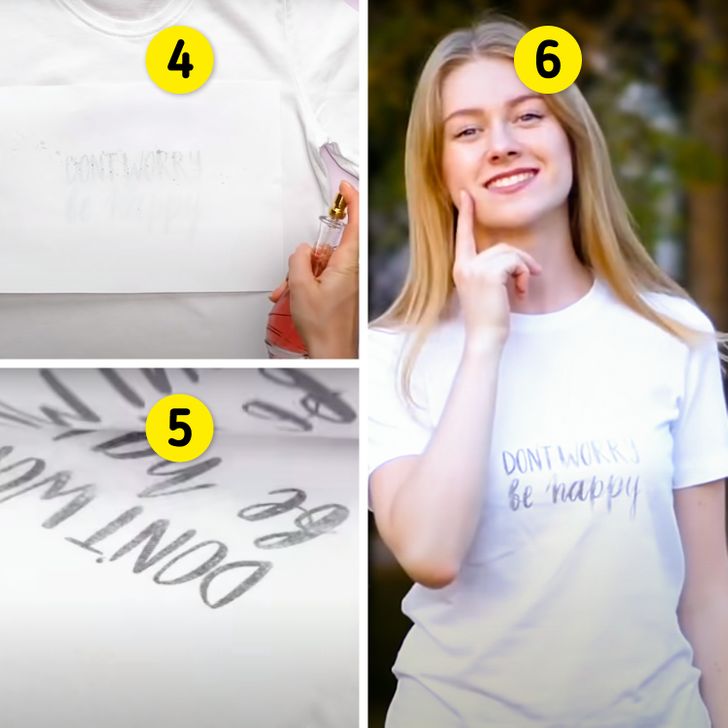
2. Take a rectangular sheet of paper and write the phrase that you want to be printed on the shirt, keeping in mind that it must be written backward. You can even do some lettering art if you want to.
3. Turn the sheet of paper over and place it on the T-shirt.
4. Spray some perfume over the area that you want the phrase to be printed on. Make sure to spray it over the entire surface where the paper will be printed.
5. Lift the paper without sliding it to avoid any color bleeding.
6. Wait for it to dry, and now you can wear your new T-shirt!
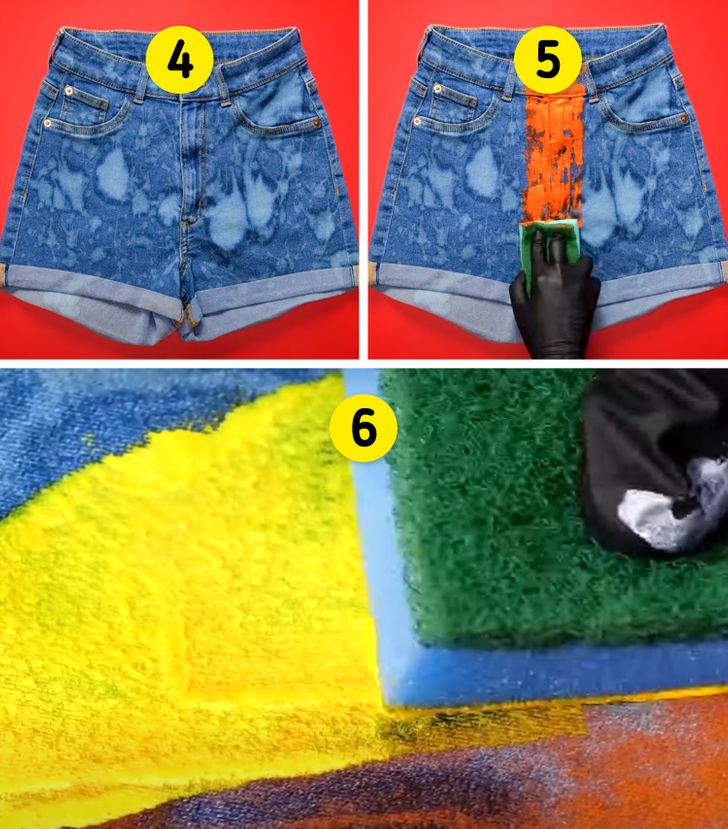
8. 2-tone denim shorts
What you’ll need:
- Plain denim shorts
- Bleach
- A pair of gloves
- A paintbrush
- Orange and yellow fabric paint
- A sponge
Instructions:
1. Stretch out the shorts over a smooth surface.
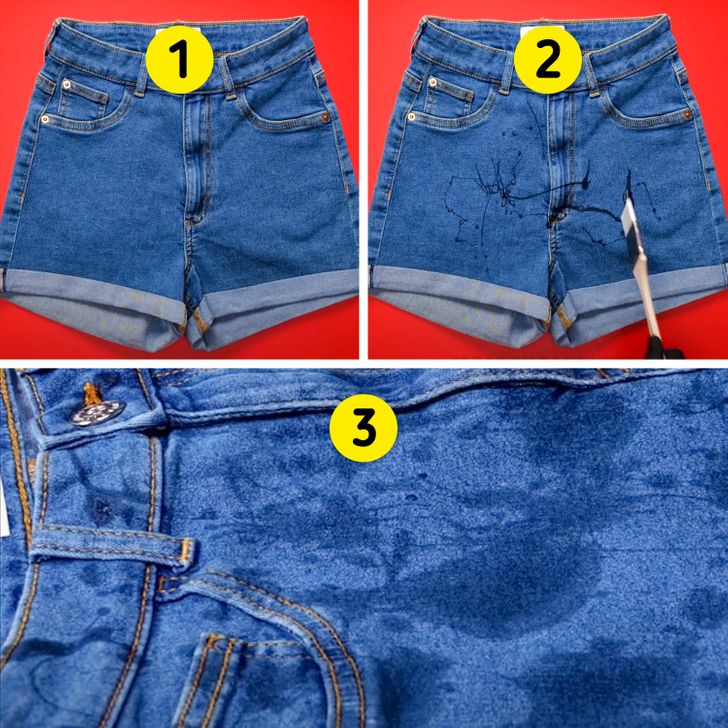
2. Dip the brush in the bleach and splash the liquid on the denim fabric.
3. Do this all over the surface that you want to decorate.
4. Wait for it to dry and for the stains to clear into a light shade of blue.
5. Take the sponge and start applying the orange paint down the center of the shorts in vertical lines from top to bottom.
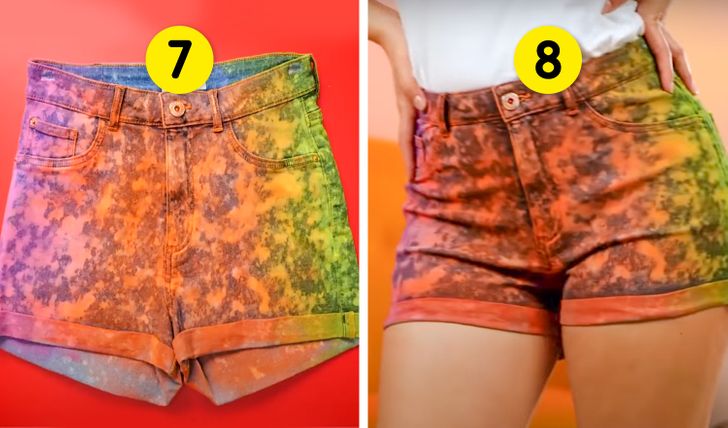
6. When you’re done, repeat the same technique with the yellow paint. Trace one stripe next to the other until the entire surface is covered.
7. Let them dry.
8. Your new shorts are ready!
5-Minute Crafts gets commissions for purchases made through links in this post.
