8 Ways to Upcycle Your Old Books Into Purposeful Pieces
Old and unused books or notebooks can really take up a lot of space in your room. If throwing them away is hard for you, the easiest way to get “rid” of them is to repurpose them.
In this article, 5-Minute Crafts has gathered some creative ways to transform old sheets of paper into pure art.
1. Bookmarks
What you will need:
- papers from an old book
- hole puncher
- string
- black marker or black pen
- white paper
- cardstock
- washi tape
- glue stick
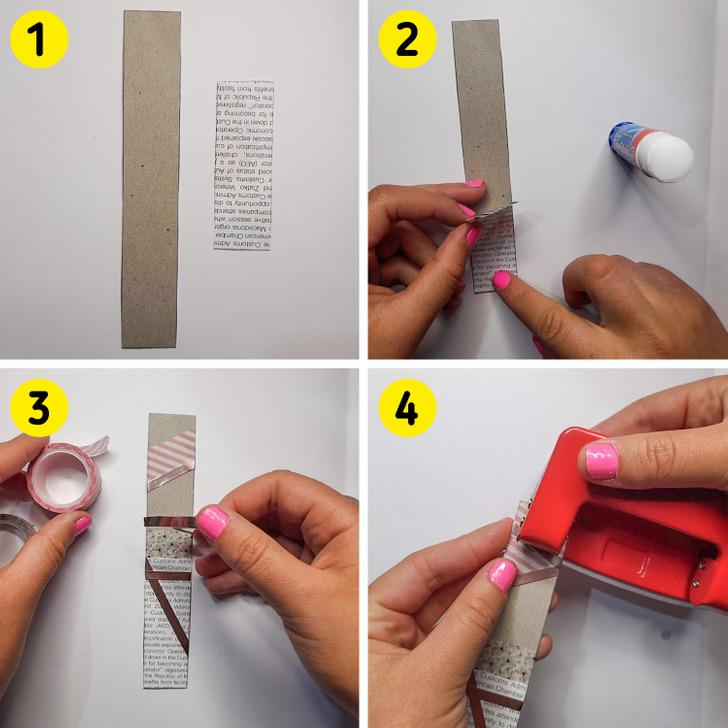
Step 1: Cut a piece of cardstock into a 1.2″ x 6″ rectangle and cut a 1.2″ x 3″ rectangle out of paper from an old book.
Step 2: Glue the paper onto the bottom edge of the cardstock.
Step 3: Add washi tapes of different colors to the cardstock, creating unique patterns. You can use a black marker if you want to as well.
Step 4: Punch a hole at the top of the rectangle using a paper hole puncher.
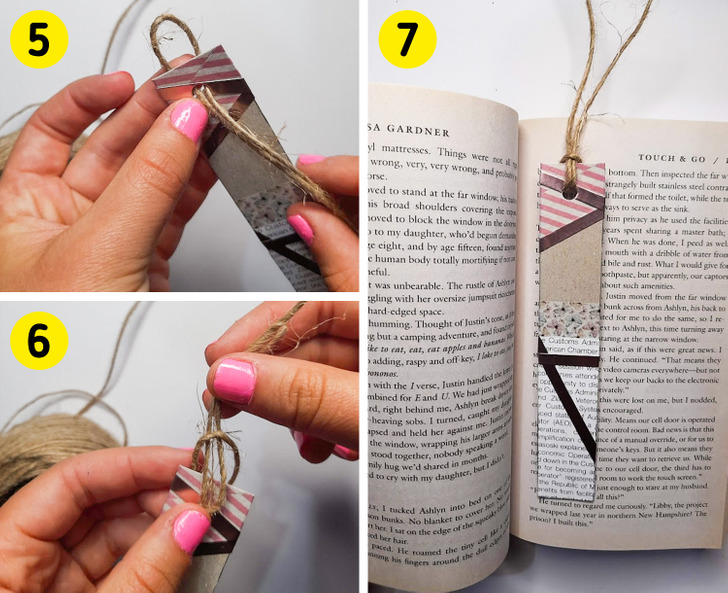
Step 5: Put the string into the hole as shown above.
Step 6: Tie the string.
Step 7: The bookmark is ready!
2. Secret storage book
What you will need:
- old book
- sandpaper
- utility knife
- ruler
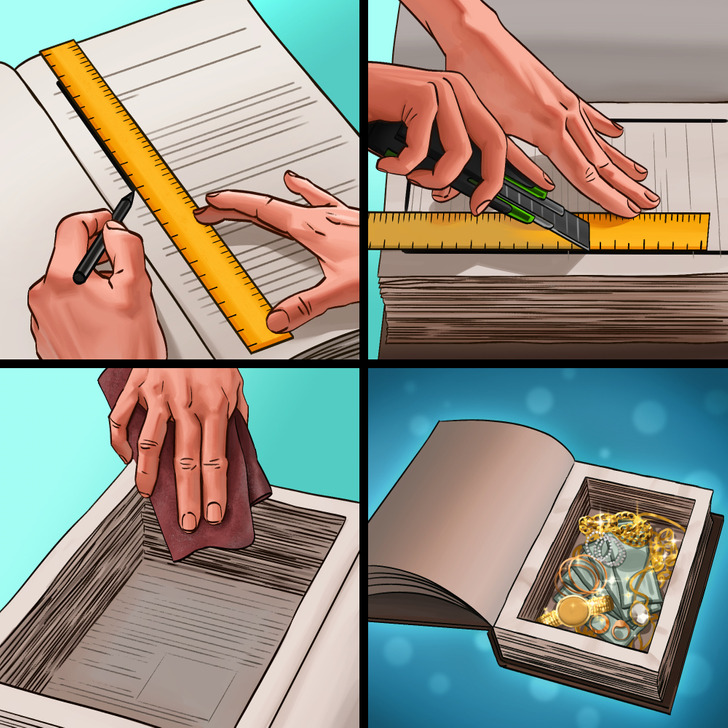
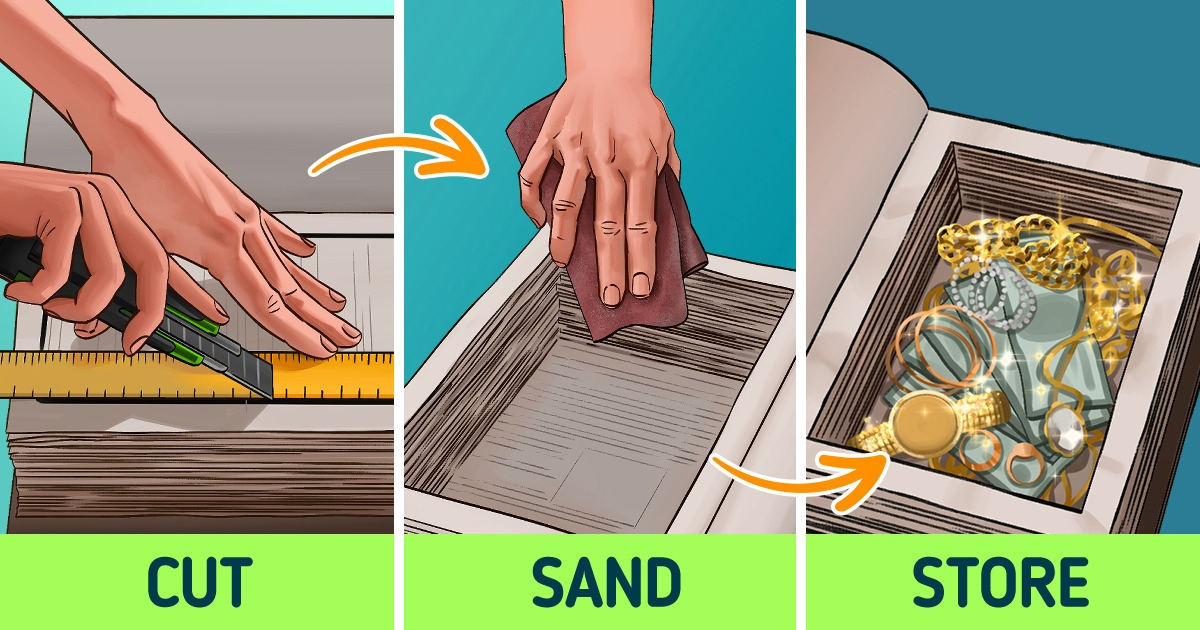
Step 1: Open the book to the first few pages. Measure a 5″ x 4″ rectangle.
Step 2: Using the utility knife and ruler, start cutting the straight lines from the rectangle on each page. Repeat the step until you reach around 30 pages from the end.
Step 3: Take a piece of sandpaper and run it across the cut surfaces to smooth the edges.
Step 4: Put your things in the storage box, and keep them safe.
3. Turn it into a garden.
What you will need:
- old book
- utility knife
- ruler
- plants and dirt
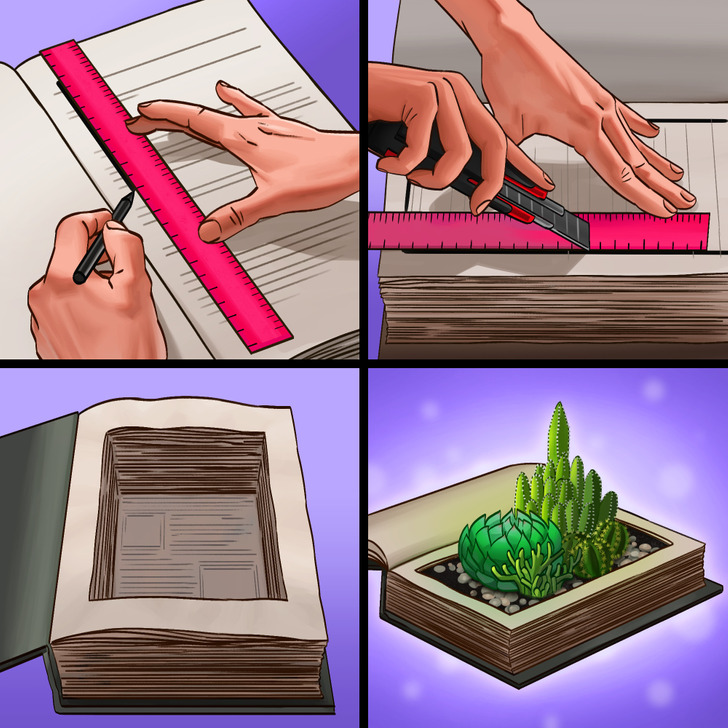
Step 1: Open the book and measure a 3″ x 3″ square.
Step 2: Start cutting the square using the utility knife and ruler. Repeat this step until you get to the end of the book.
Step 3: Start adding dirt to the square.
Step 4: Plant the plants.
4. Paper wreath
What you will need:
- papers from an old book
- cardboard
- large bowl
- small bowl
- pencil
- scissors
- hot glue
- ribbon
- glue stick
- string
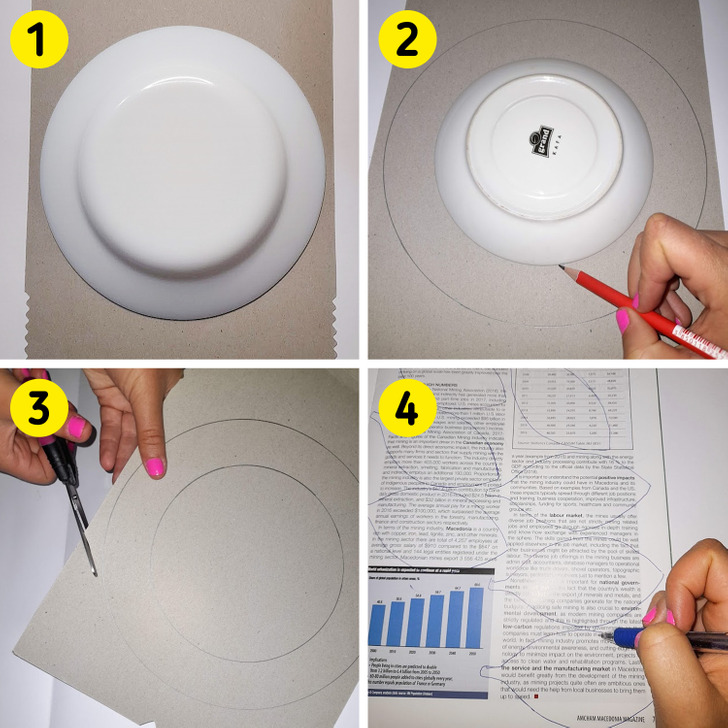
Step 1: Place the large bowl upside down on the cardboard and trace around it.
Step 2: Put the small bowl upside down in the center of the drawn circle and trace around this one as well.
Step 3: Cut the excess paper from the larger circle and the inside of the smaller one. You should have a donut shape.
Step 4: Draw leaves on 20 sheets of an old book that are about 5″ each in length.
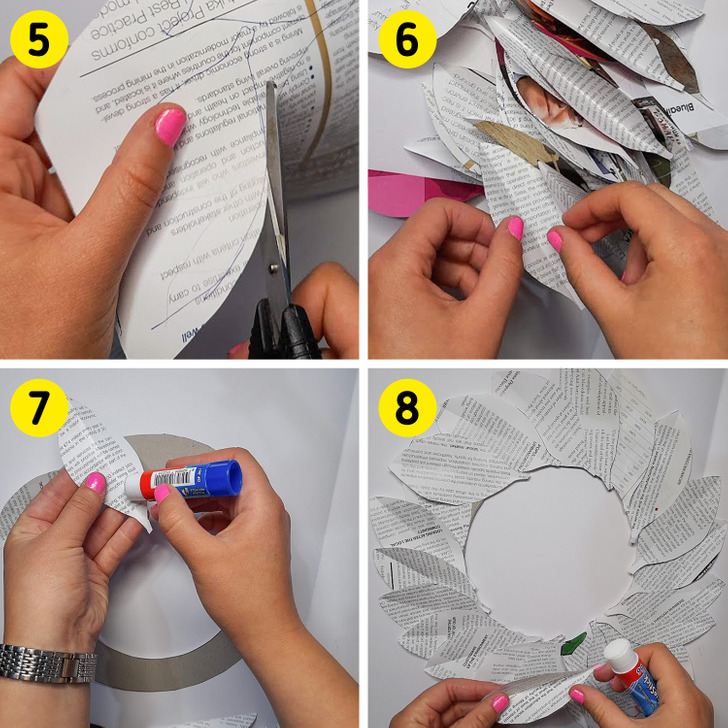
Step 5: Cut the leaves.
Step 6: Fold each one of them in half lengthwise.
Step 7: Attach one end of the leaves to the wreath form to create the first row.
Step 8: Start a second row that slightly overlaps the base of the first.
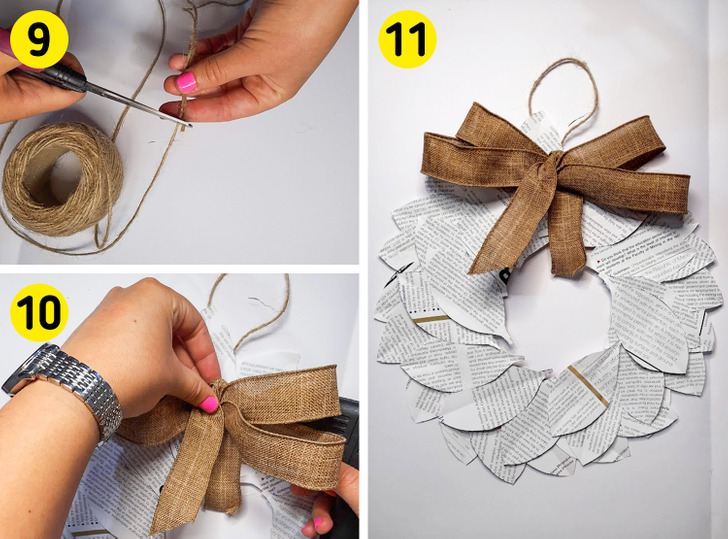
Step 9: Cut one longer piece of string and attach it to the back of the wreath using hot glue.
Step 10: Add a ribbon to the front side of the wreath.
Step 11: The wreath is done!
Bonus: If you don’t like the current version of the wreath, you can spray paint it in any color before attaching the ribbon.
5. Knife holder
What you will need:
- old books
- burlap ribbon
- string
- double-sided tape
- dried flowers
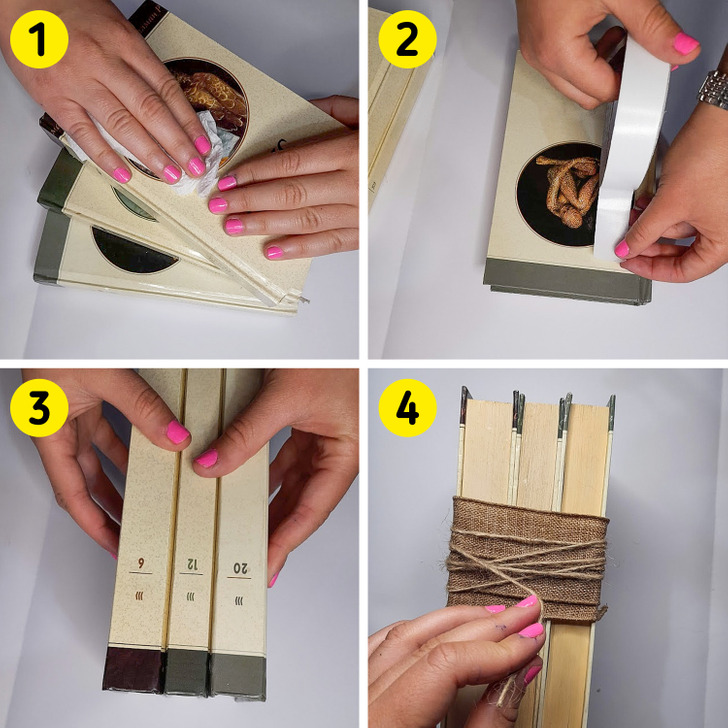
Step 1: Pick 3 old books. Clean them up and dust them.
Step 2: Put double-sided tape on each side of the cover of each book.
Step 3: Arrange them as you wish and stick them together.
Step 4: Wrap the books using a burlap ribbon and string, making sure to place the ribbon over the double-sided tape to keep it in place.
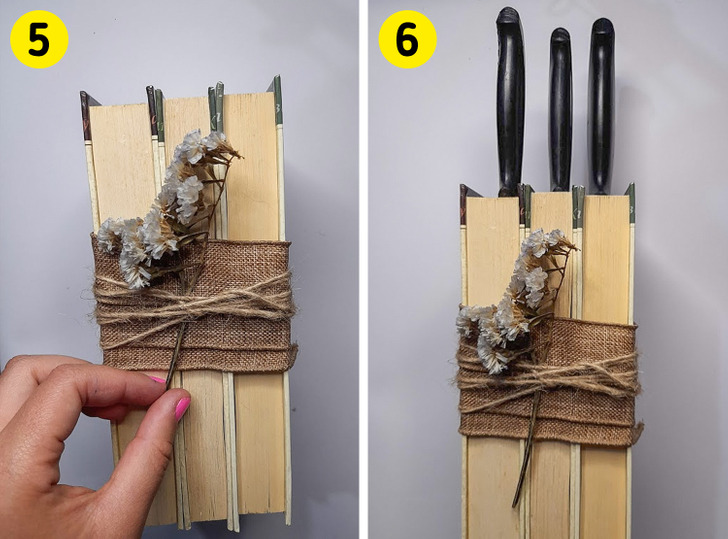
Step 5: Put the dried flowers in between the string.
Step 6: Place your knives inside the books and find the perfect place to store them.
6. Vintage book frame
What you will need:
- papers from an old book
- picture
- string
- glue
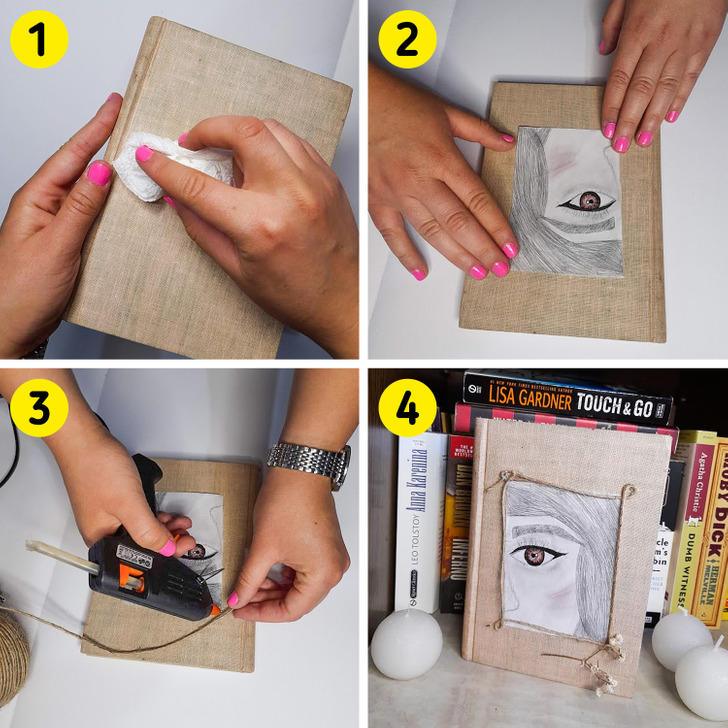
Step 1: Chose an old book. Clean it up and dust it.
Step 2: Take one picture and make sure it fits on the hardcover of the book. Glue the picture to the outside cover of the book.
Step 3: Glue string around the picture using hot glue.
Step 4: Add small elements like buttons, flowers, or pearls that will spice up your new book frame.
7. Envelopes
What you will need:
- papers from an old book, 8″ x 8″
- glue
- ruler
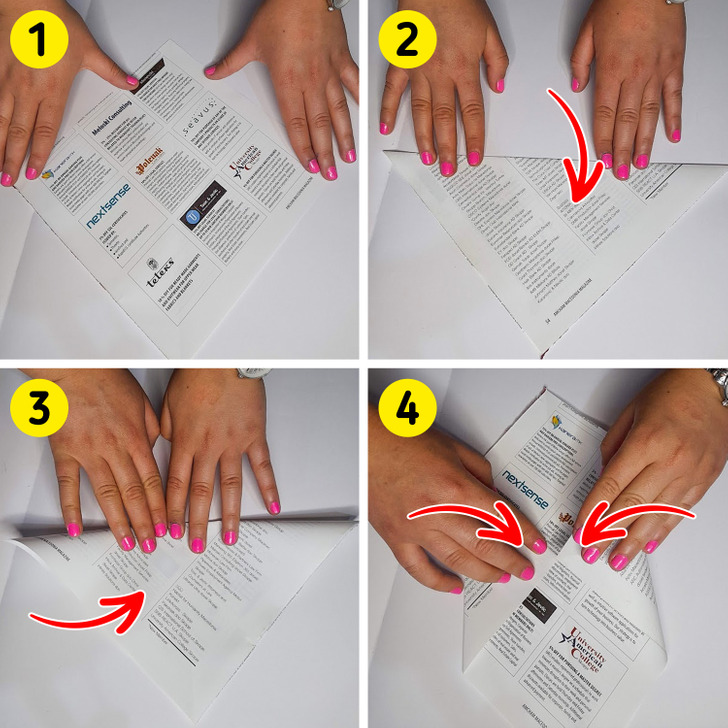
Step 1: Take one piece of paper and place it in a diamond shape. The corners should be facing up and down, left and right.
Step 2: Fold the top corner to the bottom one, in half.
Step 3: Repeat the same with the left and right corners.
Step 4: Touch the top of the left and right corners to the crease in the middle of the paper.
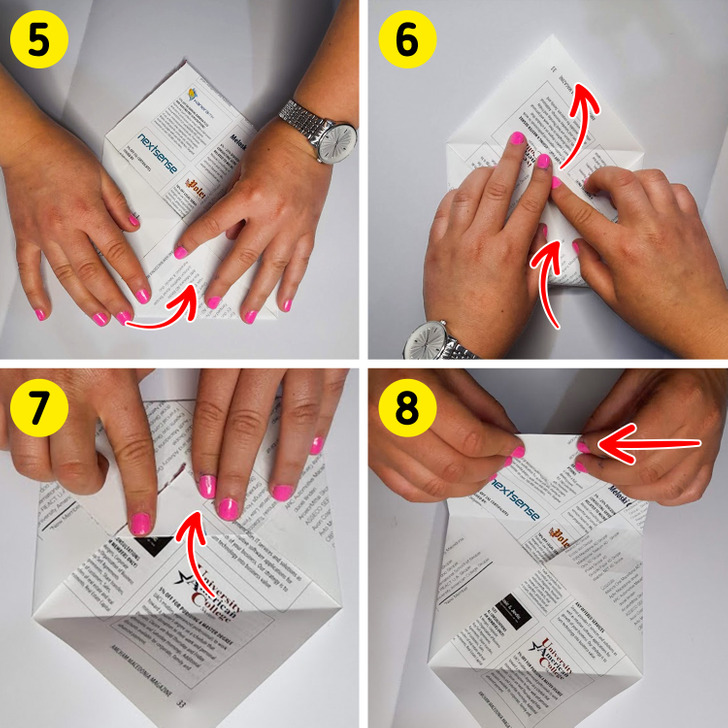
Step 5: Fold the top corner up to the center so it touches the top angles of the side triangles.
Step 6: Unfold the top corner, and flip the bottom corner so it touches the crease on the upper part.
Step 7: Fold the top side of the bottom corner so it’s in the same line as the side triangles.
Step 8: Glue the top side of the bottom corner onto the inside of the envelope.
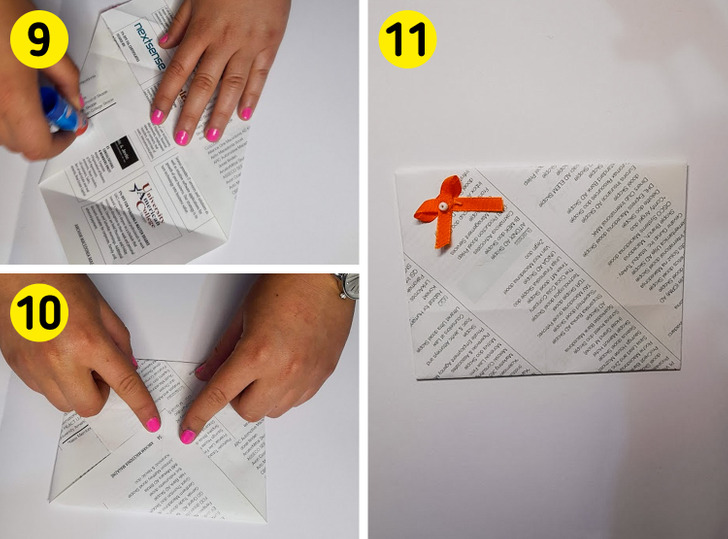
Step 9: Apply glue to the side triangles and glue the bottom corner to them.
Step 10: Glue the top side of the bottom corner on the inside of the envelope.
Step 11: Add decorations to the envelope if you want. It’s ready!
8. Gift cards
What you will need:
- A4 colorful cardstock
- paper from an old book or newspaper
- scissors
- glue
- pearls, bow
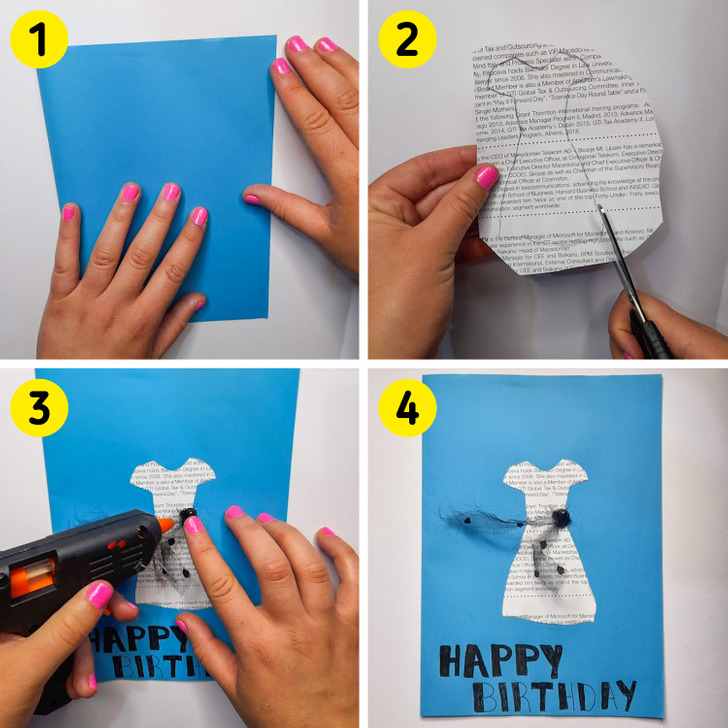
Step 1: Take a piece of paper and fold it in half. If you want a smaller card, you can cut the paper down to a smaller size.
Step 2: Draw a dress on a piece of paper from an old book or newspaper and cut it out.
Step 3: Glue the dress on the card.
Step 4: Add decorations like a bow and pearls, and write a message.