9 Christmas Gift Tags You Can Make at Home
December has arrived, so it’s time to start planning what you will give to your friends and loved ones this holiday season. Let your creativity run wild by complementing your gifts with personalized tags that have your own personal magic. 5-Minute Crafts compiled step-by-step instructions to make your own DIY personalized Christmas gift tags using things you probably already have at home.
Christmas tree tags
Design 1
What you’ll need
-
Green paper, A4 size
-
Red paper, A4 size
-
Gold star
-
Pearl beads (different colors and sizes)
-
Glue
Step-by-step instructions
-
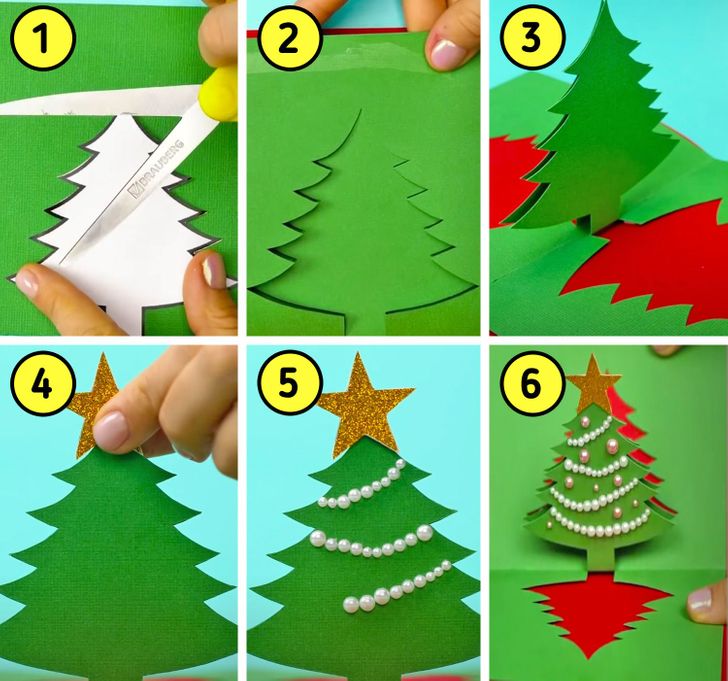
Fold the green paper in half, widthwise. Right where the paper folds, draw a Christmas tree and carefully cut it, following the figure you just outlined.
-
Fold the red paper in the same way you folded the green one in step 1. Then, glue both pieces of paper together, but make sure to use glue only in the parts that are close to the border of both pieces of paper.
-
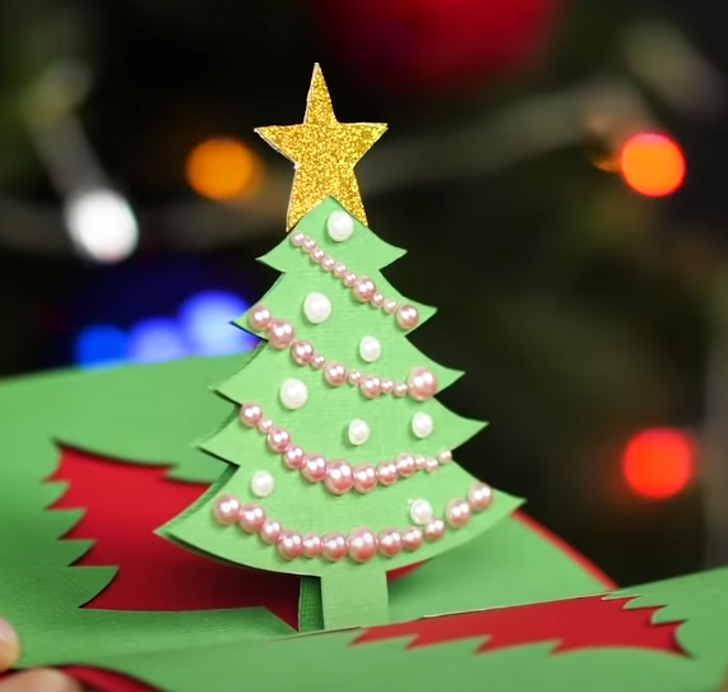
When you open the paper, that is now shaped like a card, you will see 2 Christmas trees appear in the center. Glue the points of the trees together.
-
Stick a gold star on the top of the tree.
-
Decorate both sides of the tree by gluing a few pearl beads of different colors and sizes, as if they were garland and Christmas lights.
-
You can decorate the outside of the design with gift paper and ribbons.
Design 2
“Merry Christmas”
What you’ll need
- White paper, A4 size
- Cinnamon stick
- Golden ribbon
- Golden beads
- Liquid glue
- A red star
Step-by-step instructions
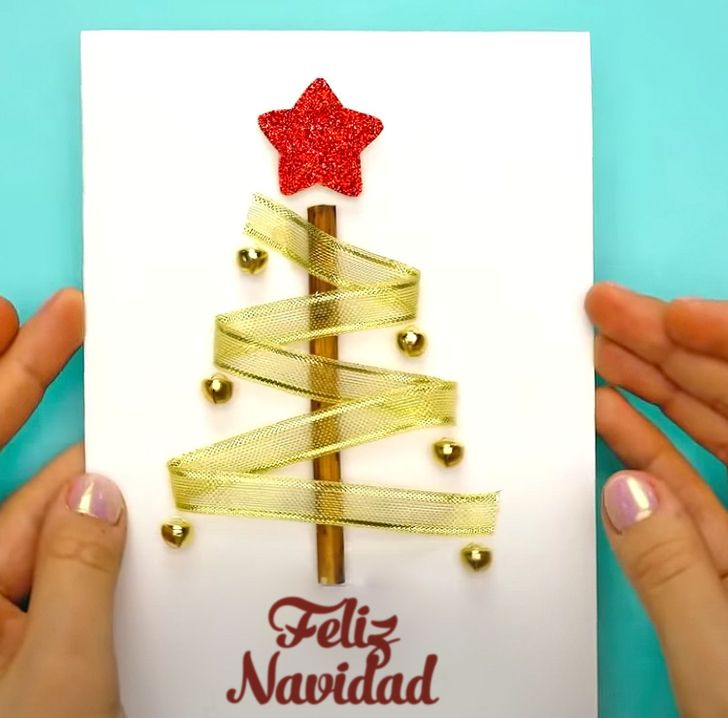
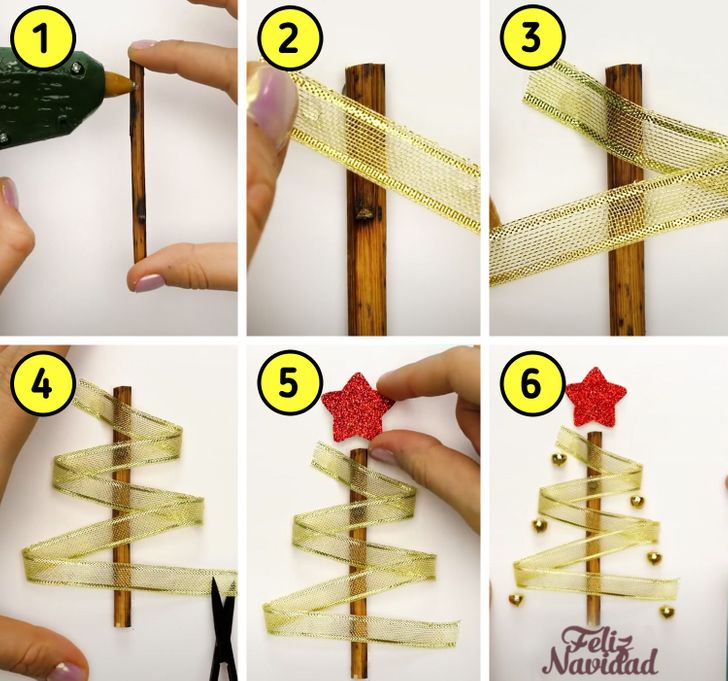
- Fold the white paper in half, widthwise. Glue the cinnamon stick in the center of the resulting front cover of what will be the front of your card.
- Put 6 drops of liquid glue in a zigzag shape. These will be the points of the tree. Start at the top of the stick and then move all the way to the bottom by dropping glue to the left and right of the stick. The further you move down the cinnamon stick, the more the glue drops should be placed far from the stick.
- Stick the gold ribbon to the glue pattern you made in the previous step.
- Cut off the excess tape at the base of the tree.
- Place the star at the top of the Christmas tree.
- Glue the golden beads to the folds of the ribbon.
- Write a message of your liking under the Christmas tree.
Design 3
What you’ll need
- Green paper
- Scrapbook paper, A4 size
- A golden star
- Glue
Step-by-step instructions
-
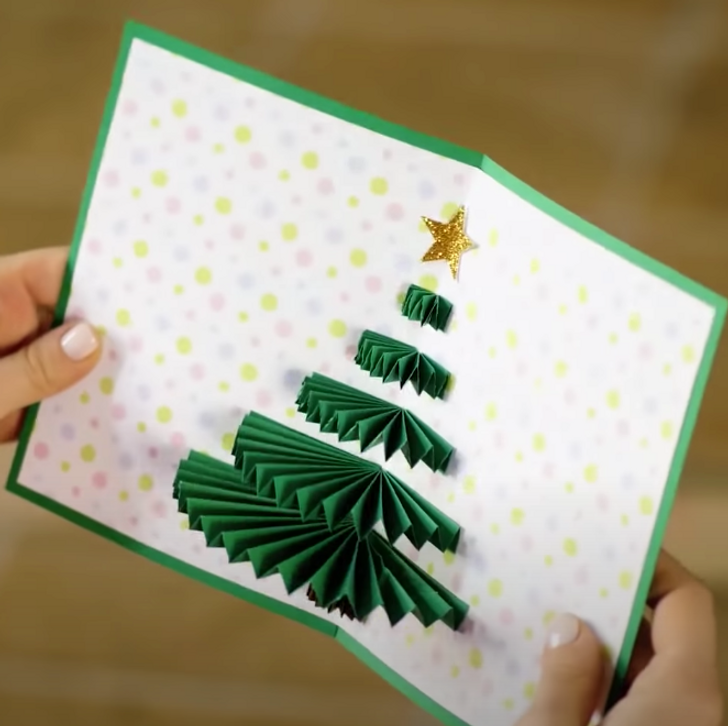
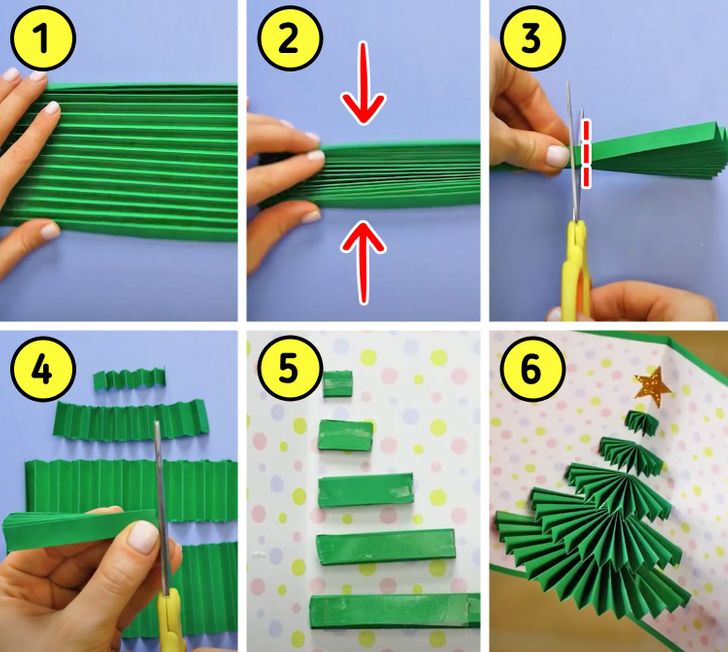
Start by creating 1-centimeter folds with the green paper.
-
Press the folds tightly to make sure the accordion-like shape of the paper is maintained.
-
Hold the folded paper tightly together and cut 5 snippets, each of them longer than the previous one.
-
Fold the scrapbook paper in half, widthwise. Glue the 5 snippets right in the folds of the scrapbook paper, from shortest to longest. Each of the snippets should be about half an inch lower than the previous one.
-
Close the card and make sure that each of the snippets is glued well to the card.
-
Glue a golden star right above the shortest snippet and you’ve got a Christmas tree.
Gift box tag
What you’ll need
- White paper, A4 size
- Gift wrap scraps
- Colored ribbons
- Green ribbon
- Golden snowflakes
- Glue
Step-by-step instructions
-
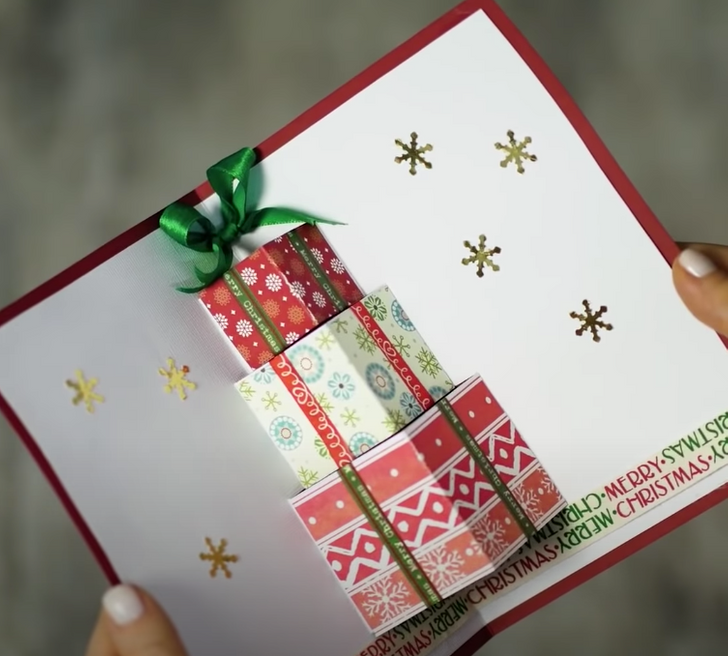
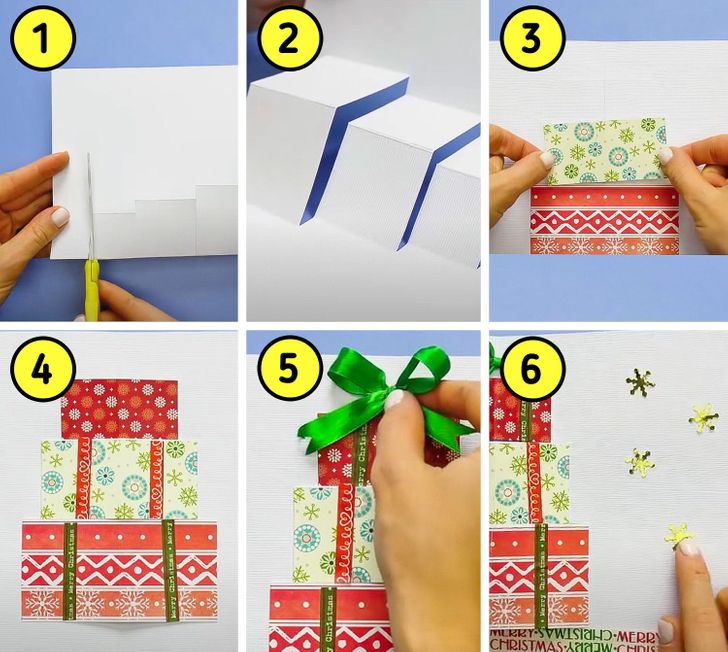
Fold the white paper in half, widthwise, then, while still folded, make 3 vertical cuts in the folded border. Each pair of cuts has to be longer than the previous one. Leave about 1/4 of an inch between each cut.
-
When opening the card, you’ll see that the cuts make the fold look as if it has 3-D cubes.
-
Decorate each of these cubes by gluing different gift wrap scraps to them
-
Stick decorative ribbons on both sides of the boxes.
-
Glue a green ribbon at the top of the boxes.
-
Stick golden snowflakes around the gift boxes.
Dried-flower bouquet tag
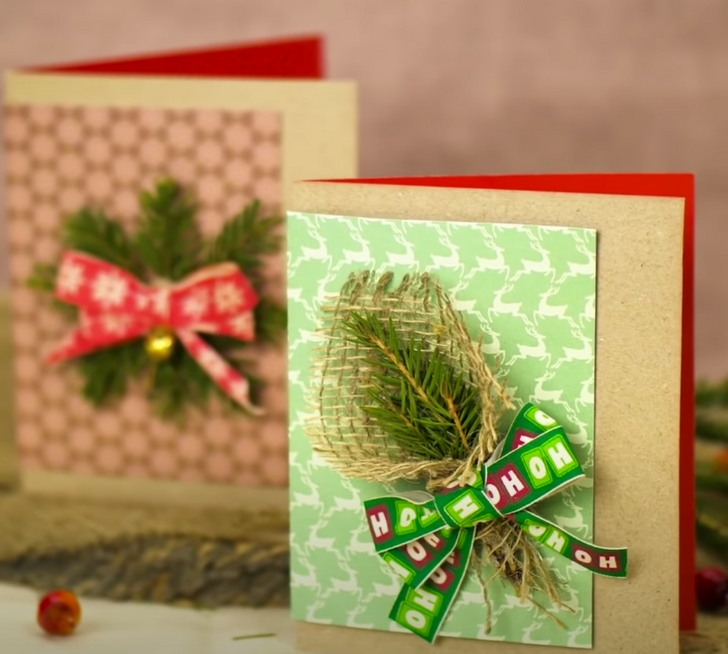
What you’ll need
- Scrapbook paper
- Cardboard paper, A4 size
- Dried flowers or twigs
- Woven twine
- Printed or colored decorative ribbon
- Glue
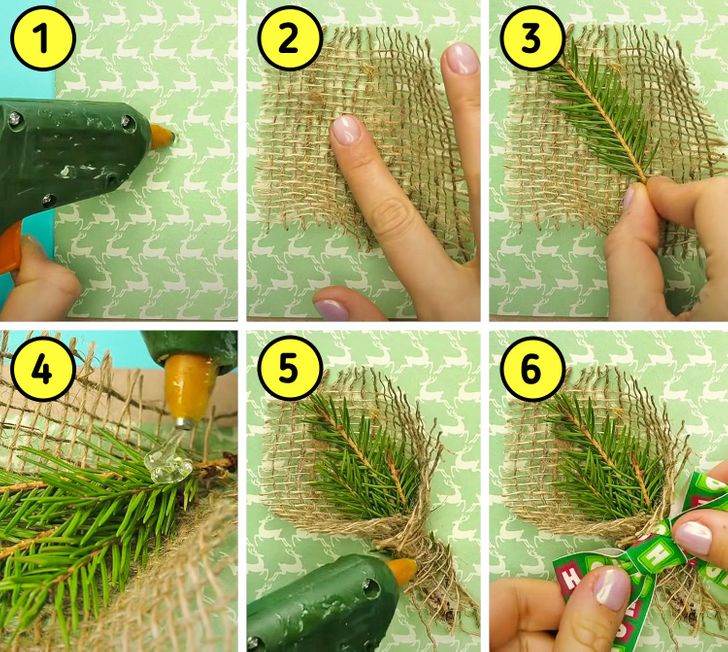
Step-by-step instructions
- Put a small drop of liquid glue in the center of the scrapbook paper.
- Stick the woven twine on the glue.
- Then place the twigs perpendicularly on the woven cane.
- Glue them together.
- Seal the bottom corner of the woven cane with glue.
- Place a ribbon over the bouquet.
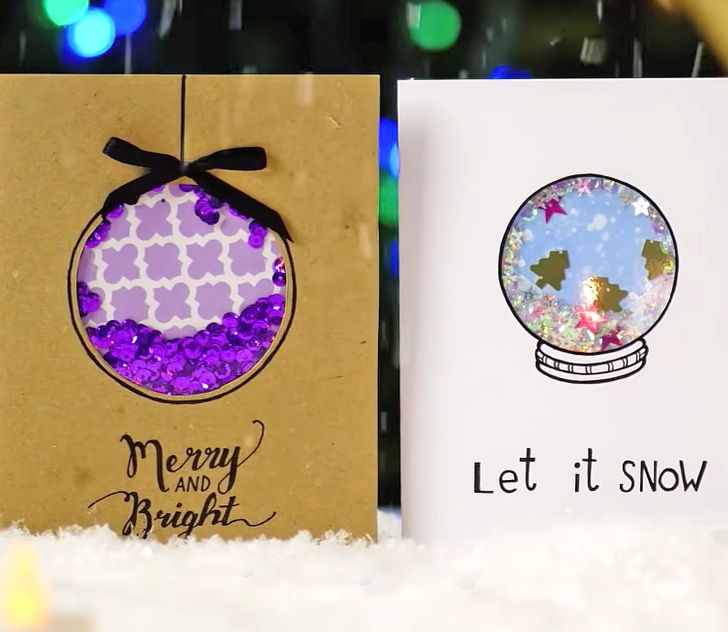
Christmas ball tags
Design 1
What you’ll need
- Cardboard paper, A4 size
- Transparent plastic sheet
- Colored sequins
- Liquid glue
- Ribbon
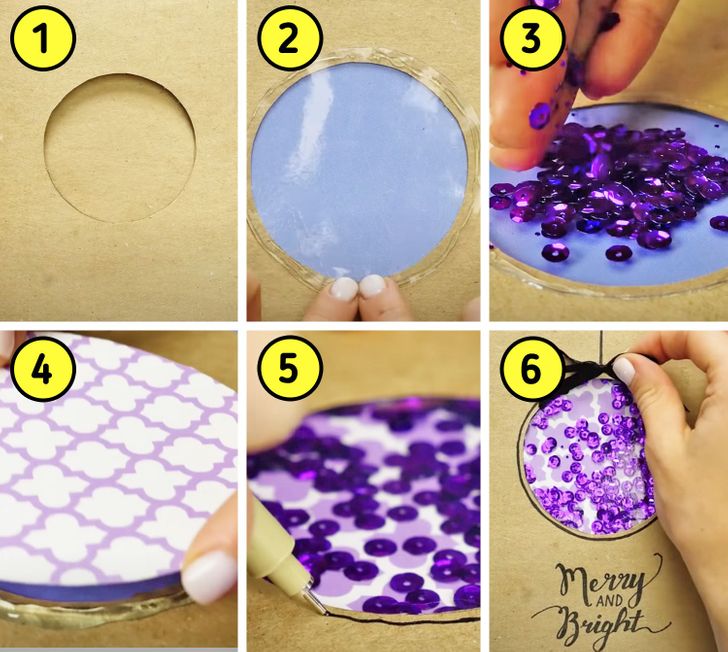
Step-by-step instructions
- Fold the paper. At the top of the front cover, cut a circle that is 8 centimeters in diameter.
- Paste a 10-centimeter circle of transparent paper in the same place but on the other side.
- Place the sequins on the transparent paper.
- Glue a second circle of the same size to the first circle you made to prevent the sequins from falling out.
- Draw an outline of a Christmas light bulb around the circle on the front of the card.
- Glue the ribbon to the figure. Personalize the note on your card.
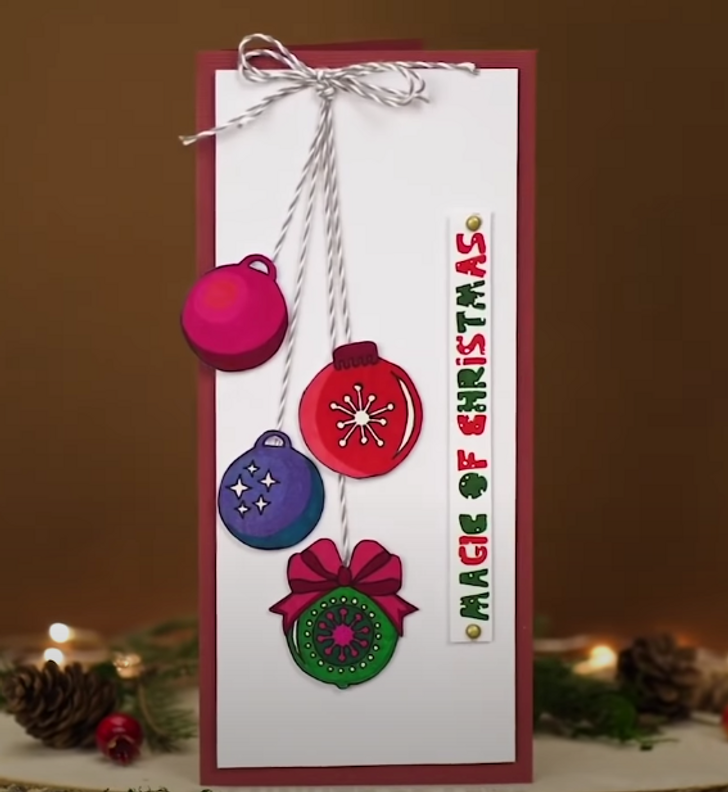
Design 2
What you’ll need
- White and red paper
- 2-colored thread
- Christmas ball figures
- Liquid glue
- Fine tip marker
- Adhesive tape
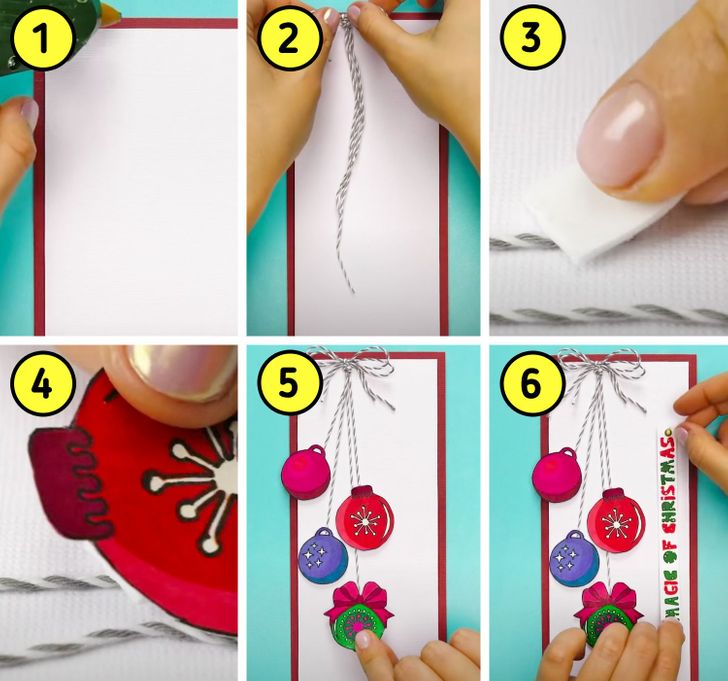
Step-by-step instructions
- Place a drop of liquid glue in the upper left corner.
- Make a bow by putting 4 strings together and glue it to the paper.
- Spread the hanging threads on the paper and stick small pieces of tape to each end.
- Stick the Christmas ball figures onto the tape.
- Try to place the Christmas balls so that they don’t overlap each other.
- Write a message of your choice. You can place it on the right side, next to the Christmas balls.
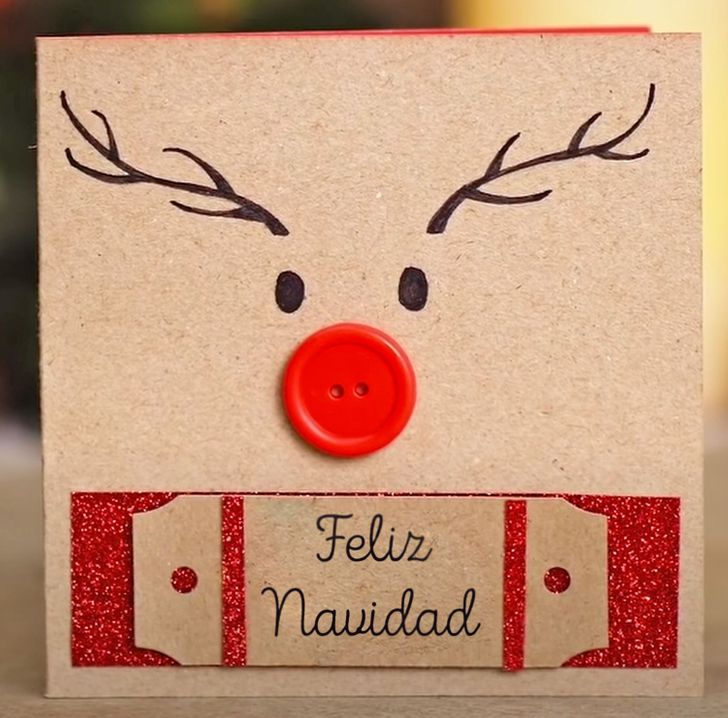
Button animal tags
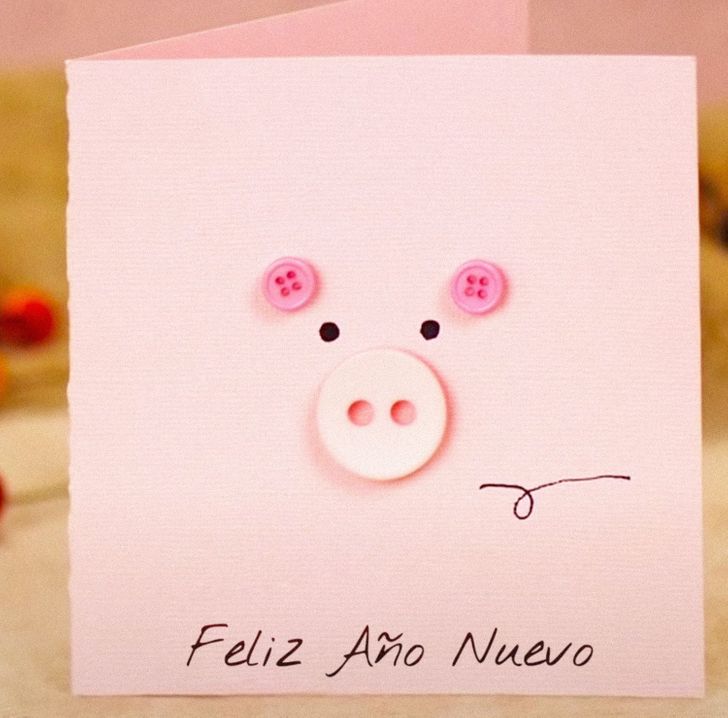
Design 1
“Happy New Year”
What you’ll need
- 8″ x 8″ colored paper
- Buttons in different sizes and colors
- Glue
- Fine tip marker
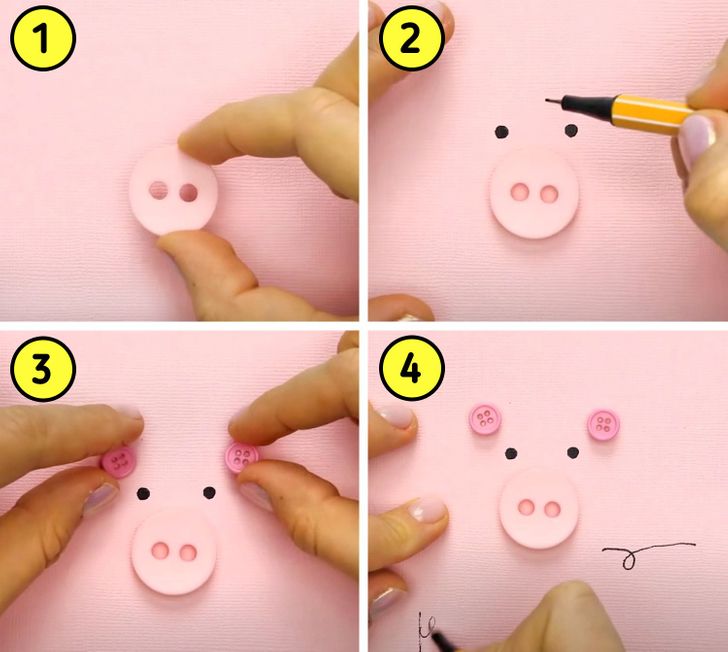
Step-by-step instructions
- Paste a large button in the center of the paper.
- Draw the eyes of the animal above the button.
- Glue 2 smaller buttons diagonally to the drawn eyes.
- Write a message of your liking with a fine tip marker.
Design 2
“Merry Christmas”
- Follow the same steps as you did with the previous card, but replace the colors of the paper and buttons according to the character you want to depict.
