BACK TO SCHOOL! 10 Amazing School DIYs You Should Try
Today, we want to share with you a creative compilation of incredible school hacks and awesome crafts that will undoubtedly make your school life easier. We’ve prepared step-by-step tutorials on how to create amazing stationery with your own hands, and we’re confident that some of our crafts will help you save money. The best part is that most of the crafting materials are likely already in your home.
1. Cute trash bin
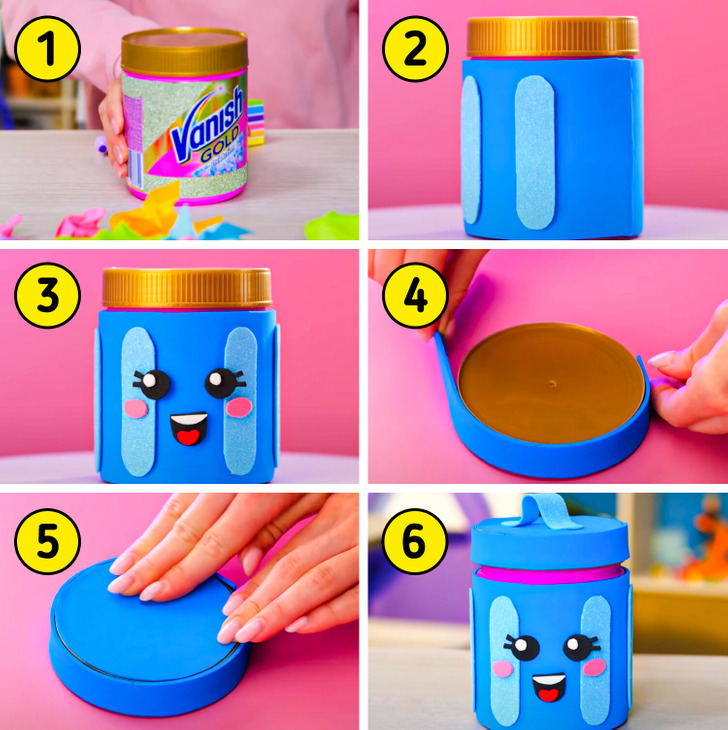
You will need:
- Plastic container with a lid
- Craft foam
- Hot glue
- Scissors
How to do it:
- Cover the plastic container with craft foam.
- Cut and add craft foam details as desired.
- Then, cover the side of the lid and, finally, its top.
- Allow it to dry thoroughly before using.
2. Personalized pushpins
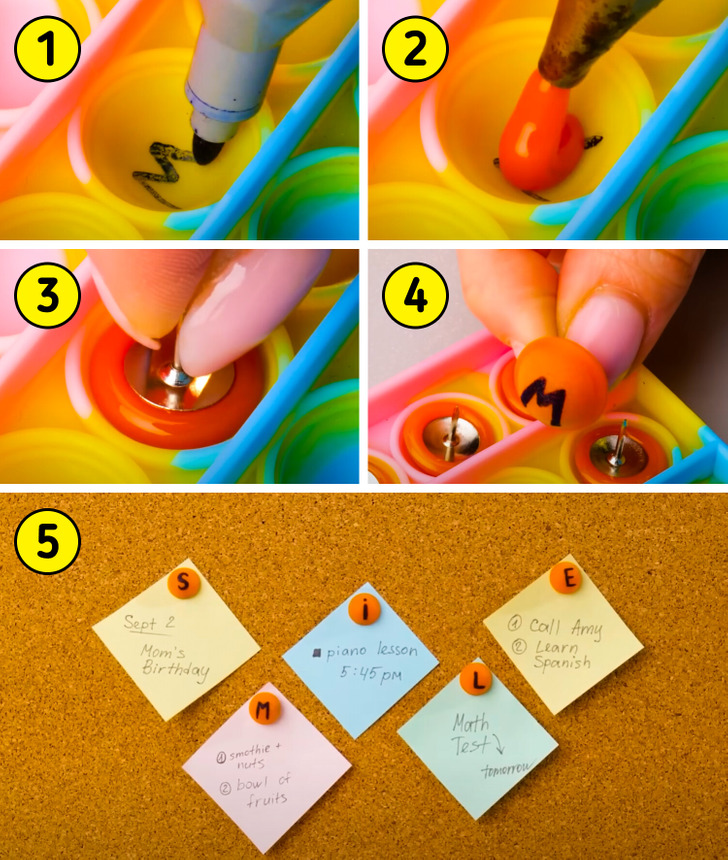
You will need:
- Pop-it
- Thumbtacks
- Marker
- Hot glue
How to do it:
- Write the desired initial in each compartment of the Pop-it using a marker.
- Fill each compartment completely with hot glue.
- Press the thumbtack into the hot glue while it’s still fresh.
- Allow it to dry and then remove it from the mold.
3. Magnetic bookmarks
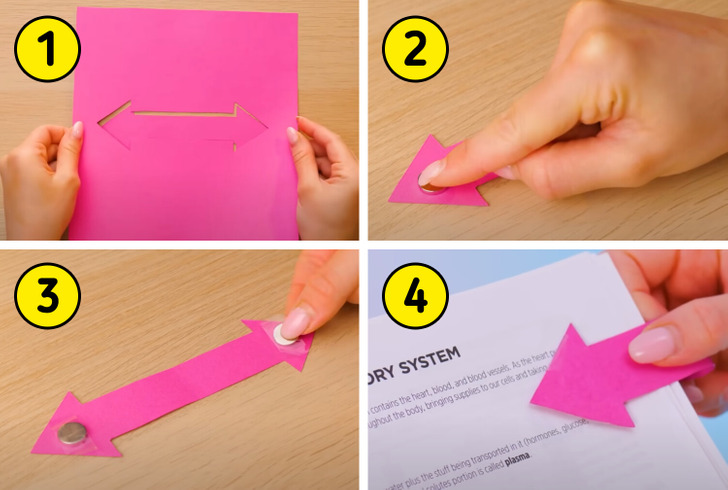
You will need:
- Card stock
- Magnets
- Tape
How to do it:
- Cut a large, double-ended arrow shape from the cardboard.
- Attach a magnet to each of the ends, effectively placing one magnet on each tip.
- Fold the arrow in half, allowing the magnets to attract and hold the arrow in position.
4. Brush and marker holder
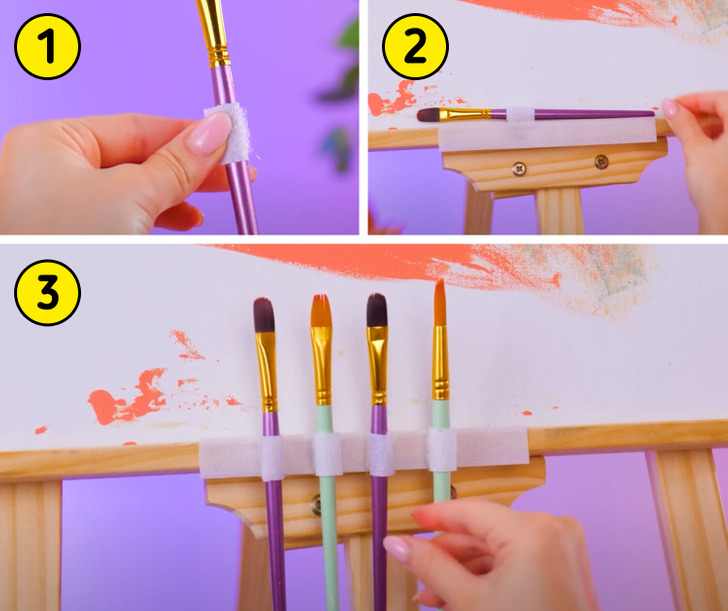
You will need:
- Velcro
- Double-sided tape
How to do it:
- Wrap each brush or marker with Velcro.
- Then, place a piece of double-sided tape on the base of the board.
- Attach the Velcro to the tape, and then attach the brushes or markers to the Velcro.
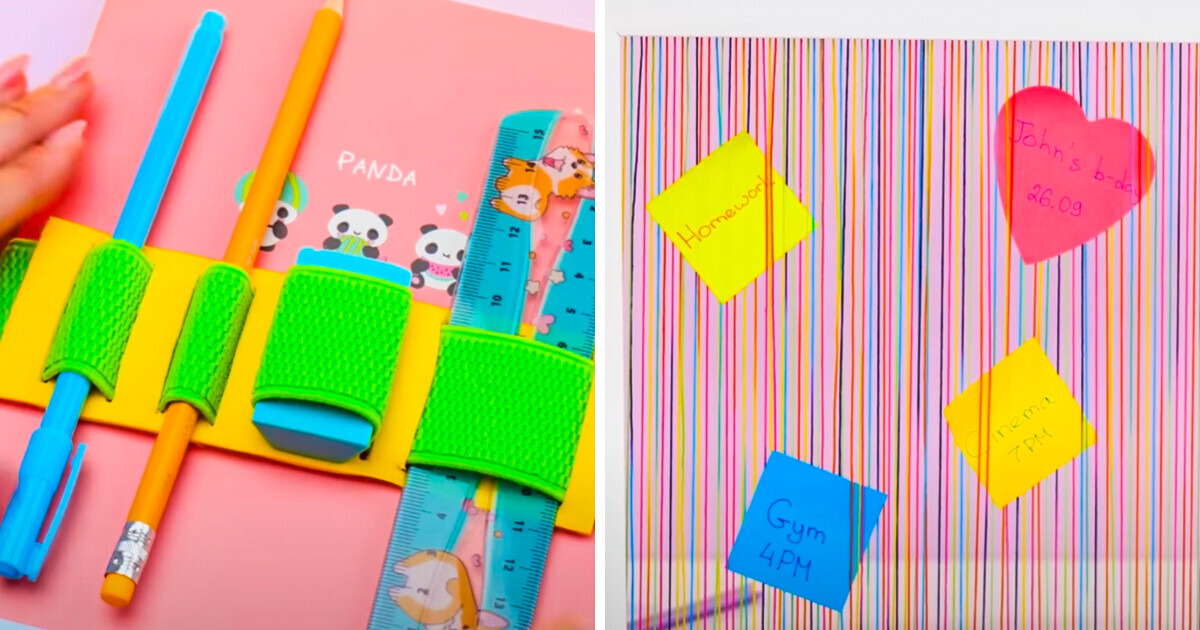
5. Memo board
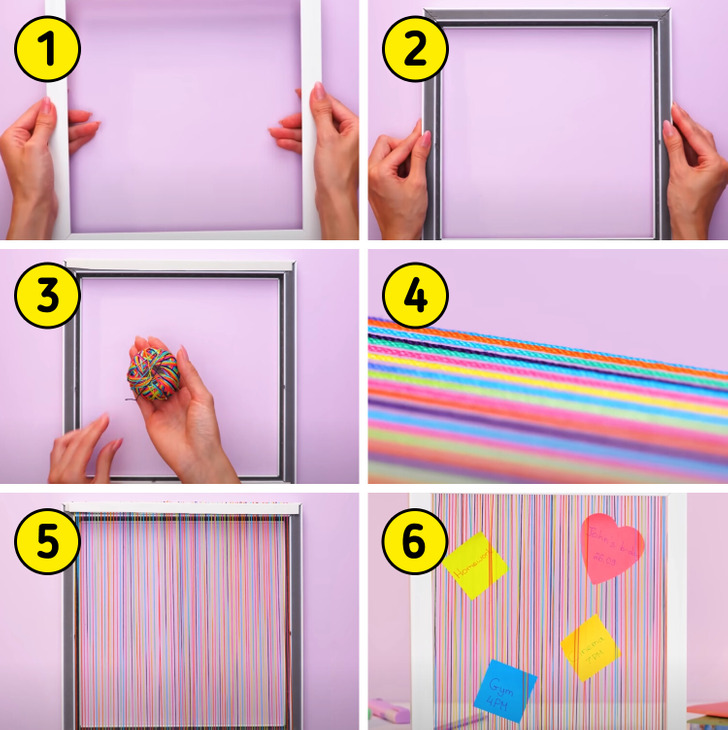
You will need:
- Frame
- Yarn
- Double-sided tape
How to do it:
- Remove the back of the frame.
- On the back of the frame, attach strips of double-sided tape at the top and bottom.
- Stick strips of yarn to the double-sided tape, side by side, until the entire surface is covered.
- Cover the yarn attached to the double-sided tape with more tape.
- Hang paper notes on the threads.
6. Elastic pencil case
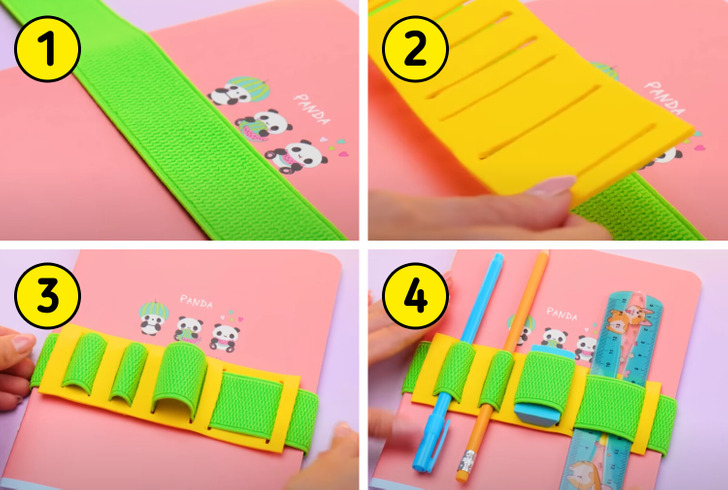
You will need:
- Elastic band
- Craft foam
- Thread and needle
How to do it:
- Cut a strip of EVA foam slightly wider than the width of the elastic band.
- Also, cut paired vertical lines in the EVA foam strips.
- Thread the elastic band through all the paired lines to create compartments.
- Sew the two ends of the elastic band together tightly to secure it to the notebook.
7. Erasable whiteboard
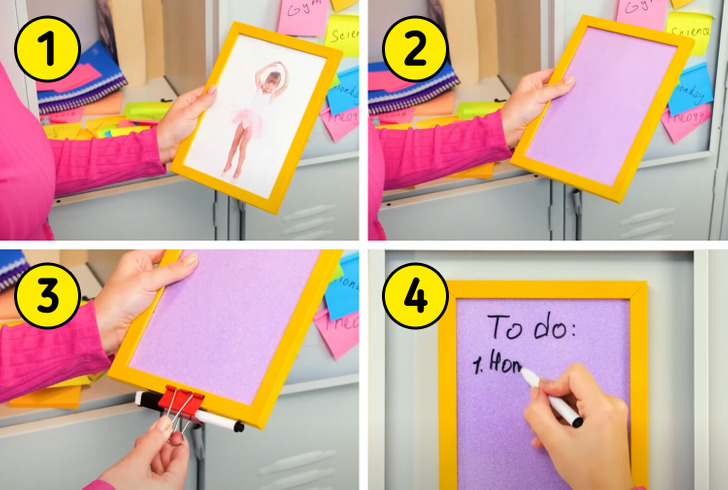
You will need:
- Photo frame
- Card stock
- Clip
- Marker
- Felt or eraser
How to do it:
- Remove the image from the photo frame and replace it with a plain sheet of paper or card stock.
- Attach a clip to the edge of the photo frame and thread a marker through it.
- Place two large strips of double-sided adhesive tape on the back and stick it in the desired location.
8. Brush holder
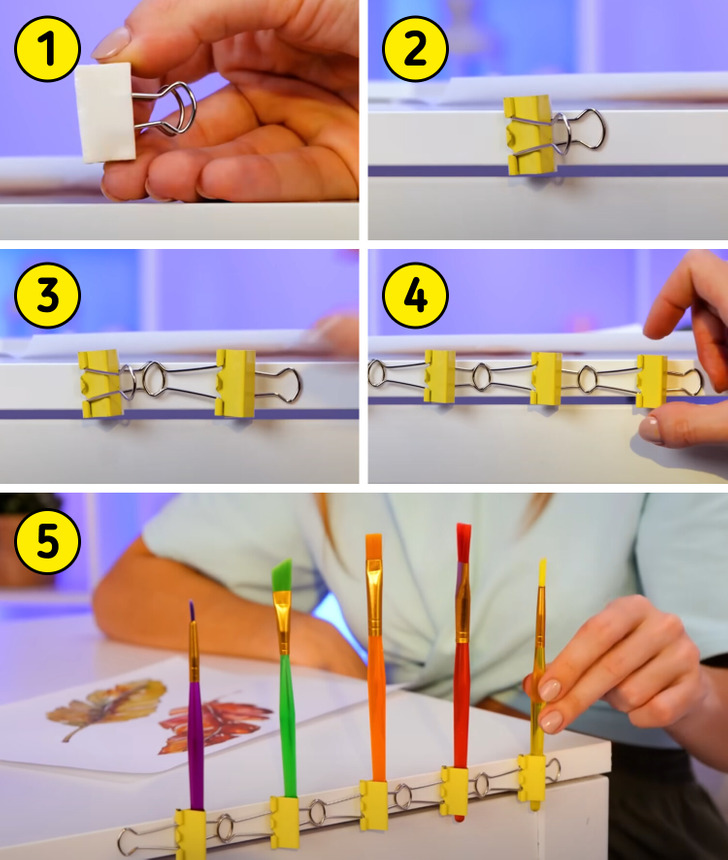
You will need:
- Clips
- Double-sided adhesive tape
How to do it:
- Using double-sided adhesive tape, attach the clips next to each other along the edge of the table.
- Place a paintbrush in each clip.
9. Emergency eraser
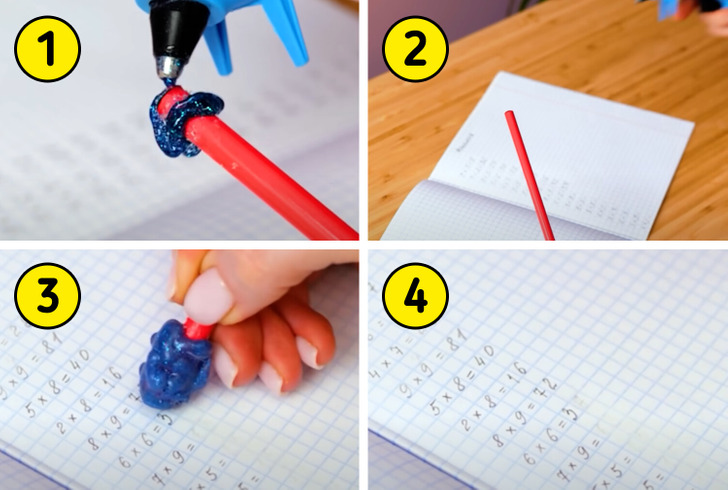
You will need:
- Pencil
- Hot glue
How to do it:
- Take the pencil without an eraser and apply silicone to the non-tip end.
- Make circular movements with the silicone around the pencil to create a small ball.
- Let it dry before using it as a regular eraser.
10. Recycled wall hooks
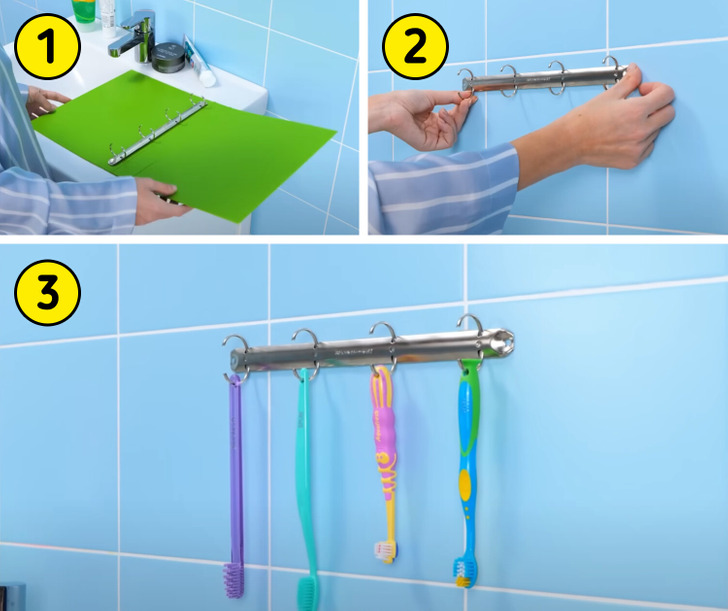
You will need:
- Folder
- Double-sided adhesive tape
How to do it:
- Remove the metal hooks from the folder.
- Attach a strip of double-sided tape to the back of each metal hook.
- Stick the metal hooks in the desired location.
Check out more amazing school DIYs you should try
Share This Article