How to Build a Pool Yourself
A summer pool at your country house or in your backyard is a great solution for a hot day, especially if you can’t go to the sea. Many people prefer to assemble a temporary pool every year because the construction of a stationary pool requires a large area and a serious investment.
At 5-Minute Crafts, we put together a few reliable recommendations for those who want to build a simple pool with their own hands.
Choosing a place
-
It is best to place a pool where there is a lot of sunlight that will be warm the water.
-
There should be no trees with leaves or branches in its immediate vicinity, as this debris can pollute the pool.
-
If it’s a windy place, you need to install a special screen or plant a hedge to block the airflow. Otherwise, the water will evaporate faster, and when coming out of the pool you’ll experience an unpleasant chill.
-
There should be no telephone, electrical cables, or sewage above or under the pool.
-
It’s best if you can see everything that happens in the pool from the window of your house. So, you shouldn’t place the pool out of sight.
Choosing materials
-
It’s recommended to use wooden pallets with the code HT (treated). This means that wooden pallets undergo a pest control treatment called heat treating (HT) which involves heating the pallet to a certain temperature. HT pallets are not harmful to your health.
-
It’s also best to use a thick, waterproof material called tarpaulin.
A pool made of pallets
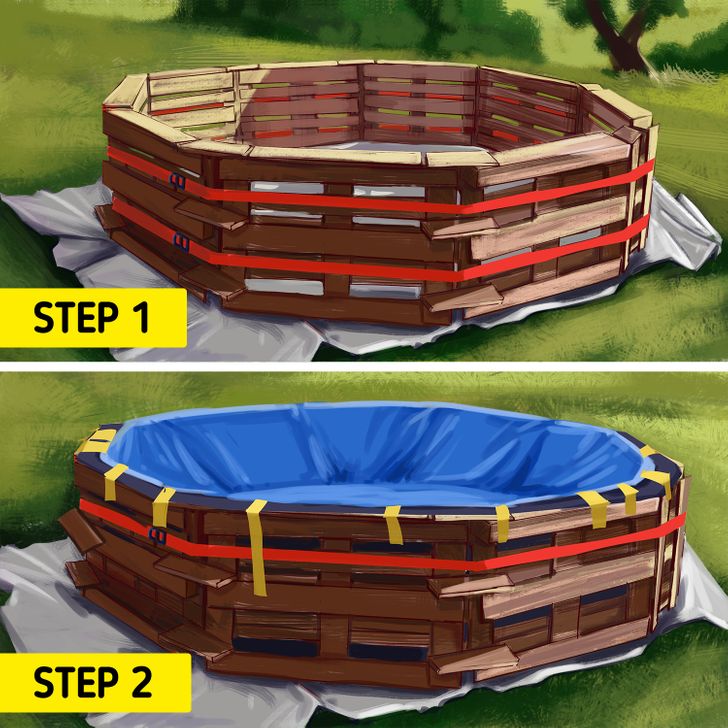
Step 1. Put wooden pallets on a tarp in a circle so that they form the walls of the future pool. To calculate the necessary amount of the tarp, measure the size of the planned pool. Add the height and width of the pool’s sides to it, because the material will be laid inward along the sides, and will be secured to them. Attach the pallets together using wooden planks and load straps.
Step 2. Put the second layer of the tarp inside. Foam rubber can be attached along the edges of the pool, then the third layer of the tarp can be laid inside.
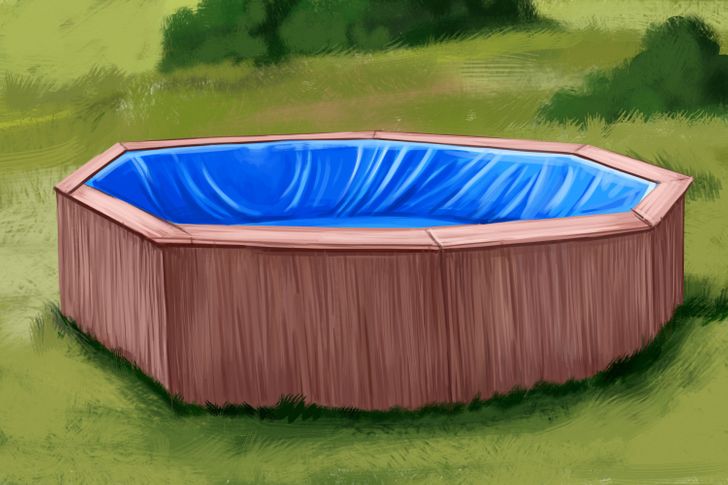
Step 3. Arrange a frame made of wooden boards on the top. The outer surface can be decorated with a bamboo fence or some other material. Now the only thing that’s left to do is to fill the pool with water.
This pool can be easily assembled within an hour. But if you want to jump into it from the side, the edges should also be strengthened from the outside.
A modular pool with a platform made of pallets
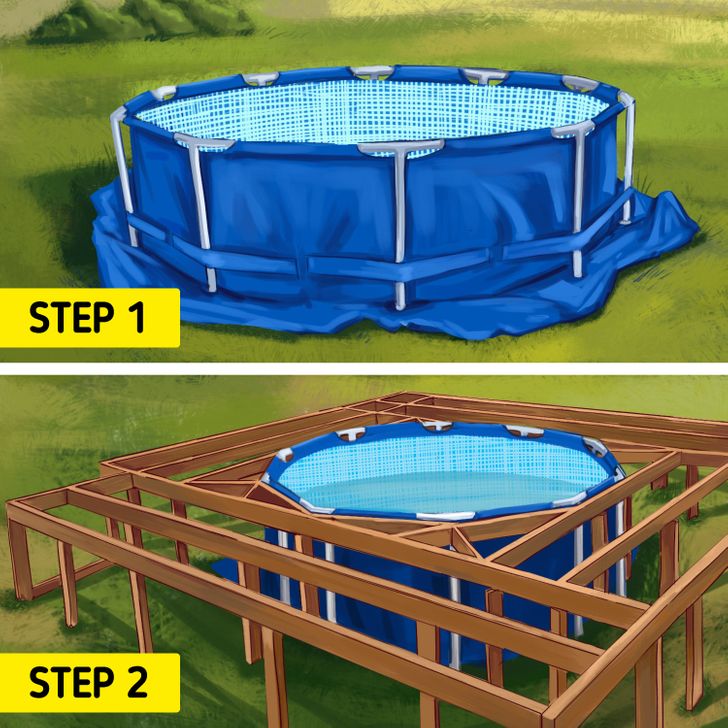
Step 1. Install a simple modular pool that consists of a plastic structure and waterproof material, on a sheet of tarpaulin. To calculate the necessary amount of tarp, measure the area of the pool, and add an additional 4 to 5 inches around the edges.
Step 2. Then build a wooden frame around it: its upper level shouldn’t be higher than the pool’s sides.
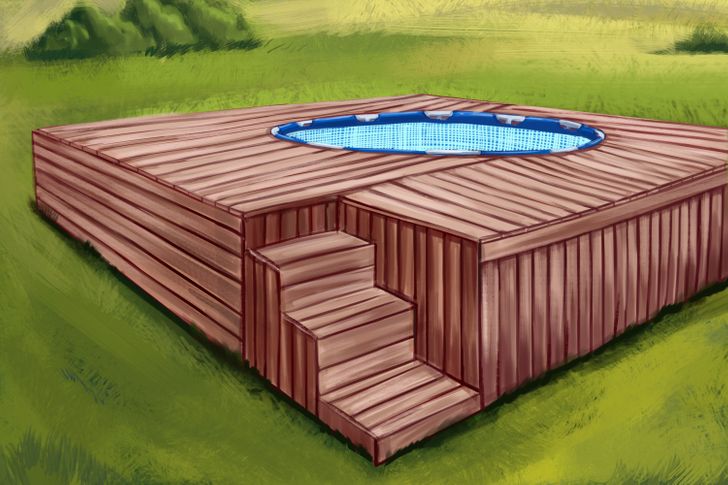
Step 3. To make the floor, attach the deck boards of the wooden pallets to the created frame. Use them to decorate the sides of the structure too. Don’t forget to install a small ladder in one corner to make it easier to climb into the platform.
A pool made of hay
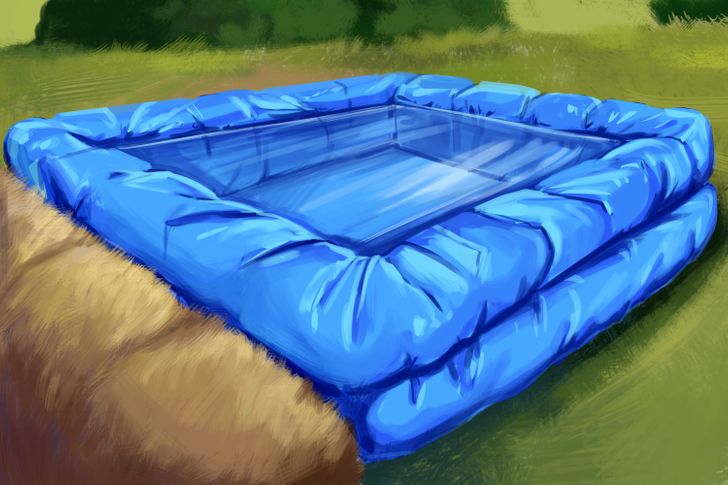
Step 1. Lay out hay cubes around the perimeter of the future pool. Cover them with a double layer of tarpaulin, and secure it with a rope. To calculate the necessary amount of tarp, measure the area of the planned pool, and add it to the area of the sides, then add approximately 8 to 12 inches around the edges.
Step 2. Put additional hay cubes around the pool. This simple pool that will cool you off on a hot day is ready.
Maintaining the pool
-
To prevent water in the pool from heating, evaporating quickly, and getting dirty, cover it with a special tent or an additional layer of tarp.
-
Pool water must be drained after 24 to 48 hours if you don’t use a water purification system. If you chlorinate the water, you can change it every 2 weeks.
-
The water from the temporary pool has to be drained if you expect the weather to turn cold. If the pool is made of tarpaulin, you should disassemble it for the winter and put it into a warm storage. If the pool is frost-resistant, cover it with waterproof material and fix it with bags filled with water or some other weights along the material’s edge. They won’t let snow and ice push the cover down.