How to Decorate Your Ceramic Mugs With Nail Polish
Decorating ceramic objects with nail polish can be a very useful skill if you want to give someone a homemade gift. Or maybe you just want to have customized table ware. In any case, 5-Minute Crafts has collected some ideas for decorations that you can do using just nail polish and a few easy tools you probably already have at home. At the end of the article, you’ll also find a bonus that shows you how to repair broken ceramic objects.
1. Watercolor mug
What you’ll need:
- A white ceramic mug or bowl
- Nail polish
- A container with cold water
Instructions:
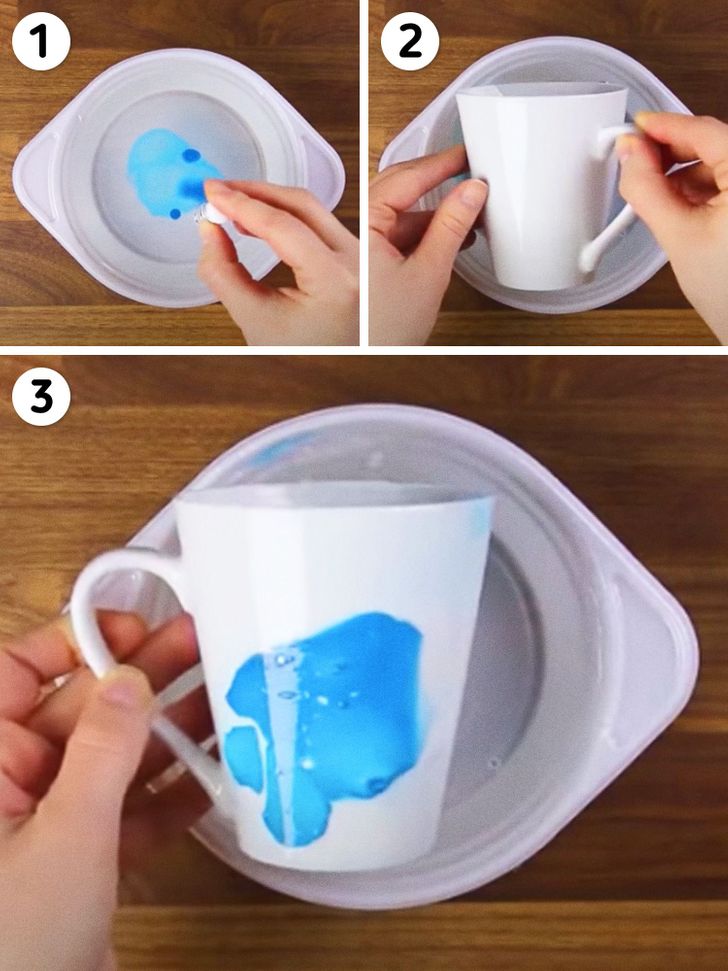
- Add a few drops of nail polish to the container with cold water.
- Paint the cup or bowl by pressing it against the surface of the water that has paint. Normally the paint will stick to the mug.
- Let it dry for a few minutes and then it’s ready.
2. Thermal meter mug
What you’ll need:
- A white ceramic mug or bowl
- Adhesive tape
- A marker
- Thermal nail polish
Instructions:
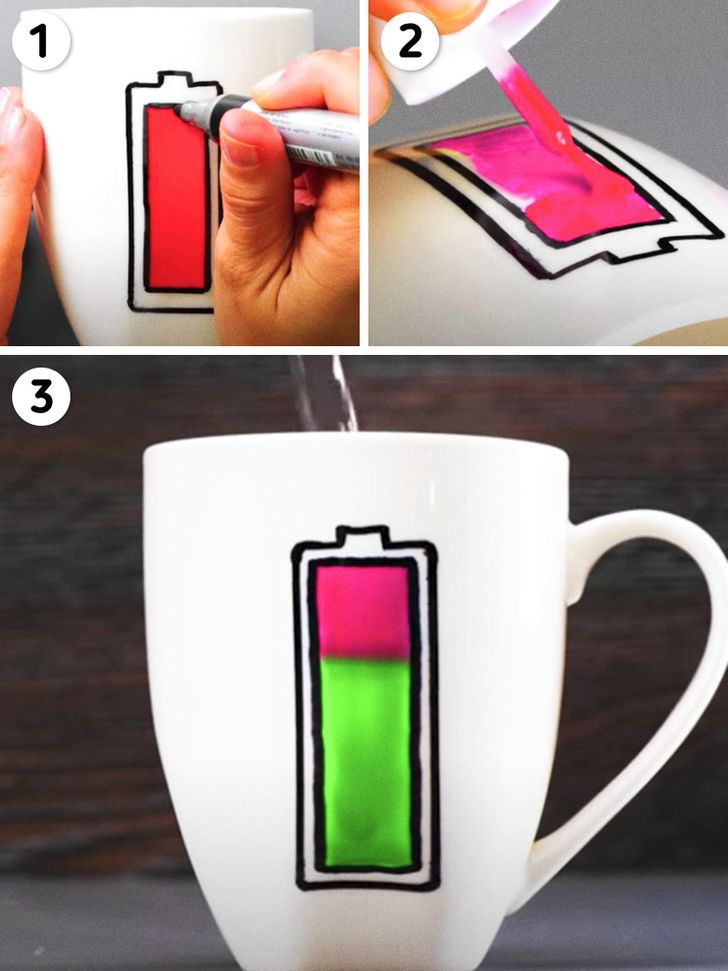
- Draw a battery on the mug or bowl. You can use the adhesive tape as a guide.
- Color the inner part of the battery using the thermal nail polish
- Pour hot water into the bowl and watch the battery change color.
3. Multicolored mug
What you’ll need:
- A white or light-colored ceramic cup or bowl
- A container with cold water
- 3 nail polishes in different colors
- A wooden stick or toothpick
Instructions:
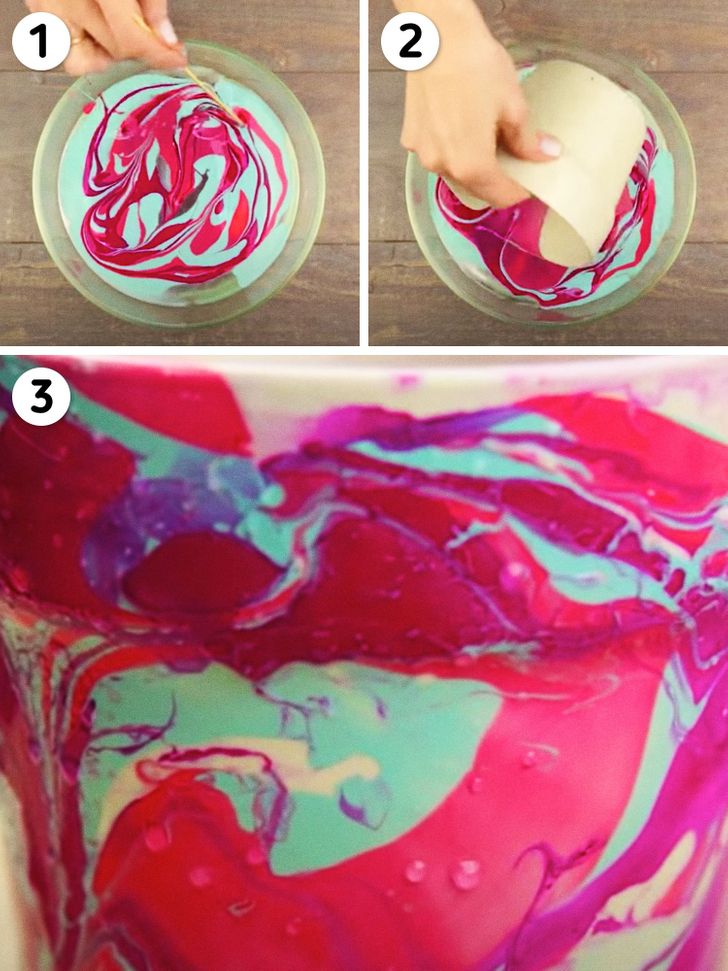
1. Pour the nail polishes in the container with water. Do it in a circular motion and then mix them just a little bit using the stick or toothpick.
2. Take your cup or bowl to the container with water and dip it in such a way that the paint adheres to the whole exterior.
3. Let it dry. Your mug or bowl will now look as if you had painted it with watercolor.
4. Mug with a pattern
What you’ll need:
- A white ceramic mug or bowl
- Nail polish
- A wooden stick or toothpick
- Adhesive paper/tape
- Scissors
- A pencil
Instructions:
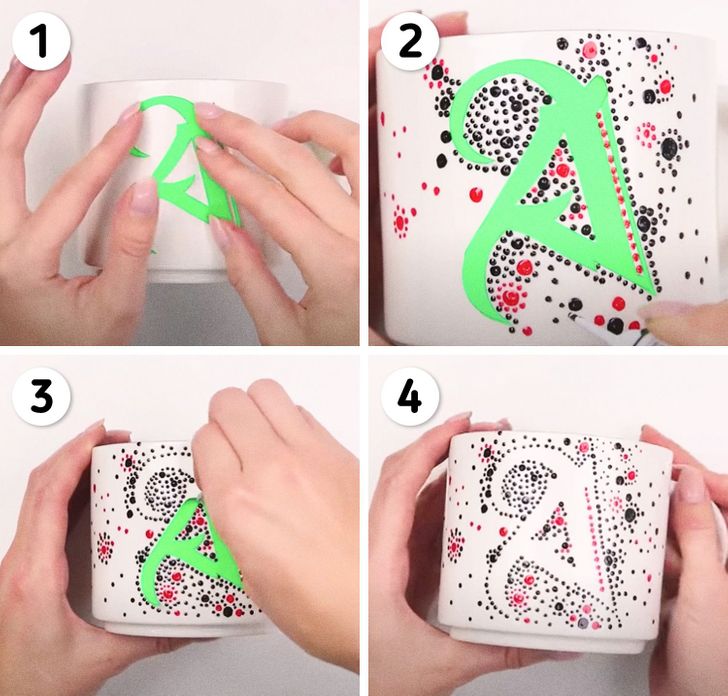
- On the paper, draw the shape you’d like to see on the mug. Cut the shape to have a sort of template and then paste it on the bowl or mug.
- Use the wooden stick or toothpick to draw patterns around the adhesive paper that you’ve pasted on the mug. You can use as many colors as you like.
- Let the nail polish dry for a few minutes and then remove the adhesive paper.
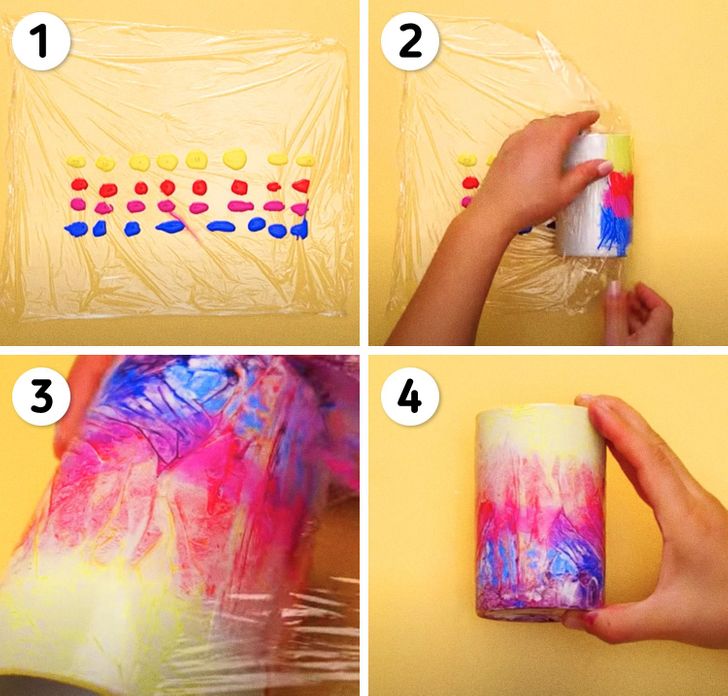
5. Color gradient mug
What you’ll need:
- A mug without a handle or a bowl
- Plastic wrap
- Colored nail polish
Instructions:
- Cut a piece of plastic foil and apply the nail polish in small circles. The goal is to form 4 lines of colors, ordered from the lightest shades to the darkest ones.
- Wrap the bowl or mug in the plastic wrap. The side with the paint should be in contact with the bowl or mug.
- Let the nail polish dry and remove the film carefully.
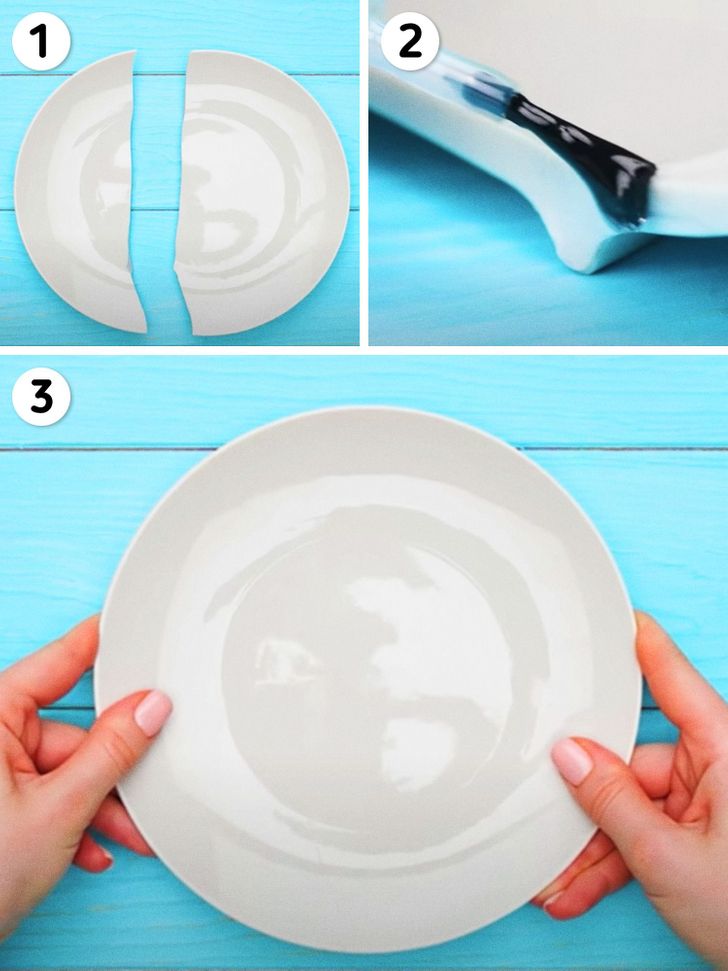
Bonus: How to repair ceramic objects
What you’ll need:
- Transparent nail polish
- Lamp with an ultraviolet light
Instructions:
- Clean the ceramic object that you want to repair.
- Apply the nail polish to the edges of the broken plate or any other ceramic object and join them together.
- Let them dry under UV light.
