How to Do a Cable Knit
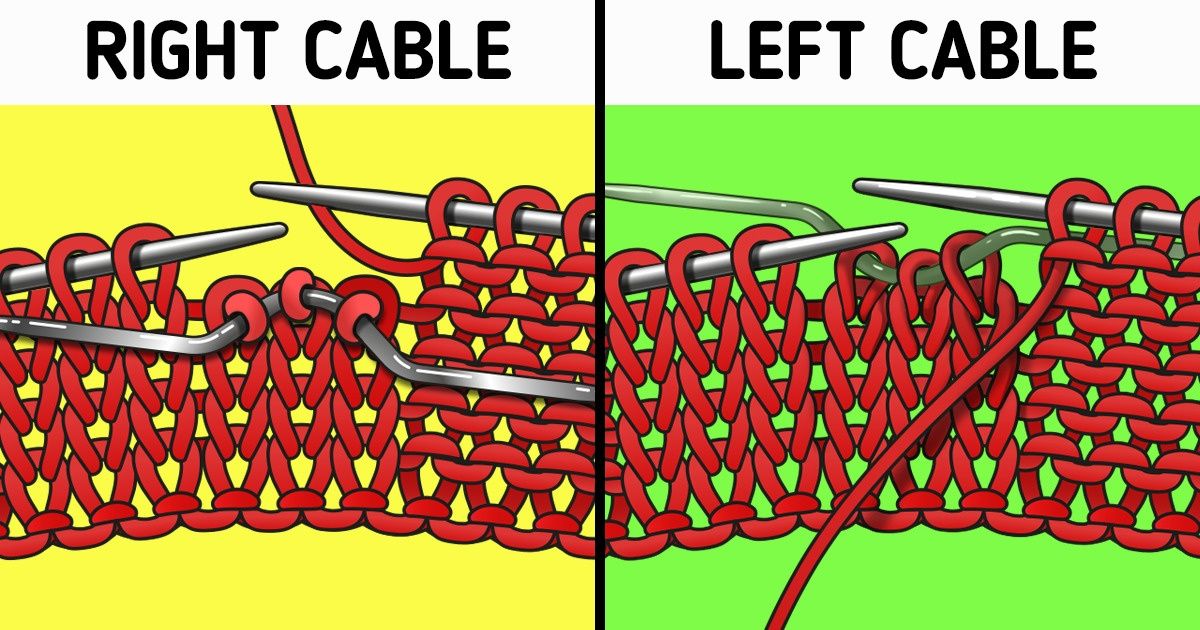
Cable knitting means that you are crossing one group of stitches over another. Even though it seems challenging, it’s actually an easy thing to do and it’s the perfect way to add a classic and surprising touch to your knitting. 5-Minute Crafts shows you how to do it, but keep in mind that this article is written for people that have already learned the basics of knitting. If you have never knitted before, we suggest you learn the basics first and then try doing a cable knit.
A. Before starting
1. Gather what you’ll need
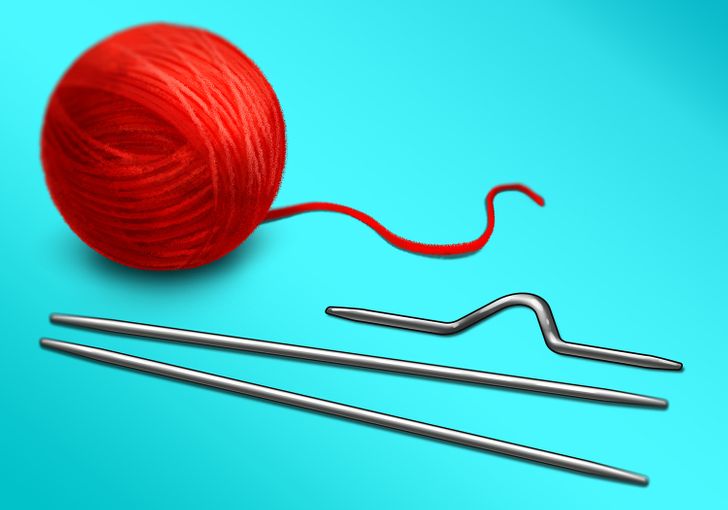
- 2 Needles
- Yarn
- Cable needle (see note below)
Note: A cable needle is a small needle with a special curved form or with grooves in it designed specifically for holding stitches aside as you knit a cable. It is recommended that you use a diameter that is slightly smaller than the needle size you’re using for your project, but big enough to not make the stitches you’re placing on hold slip off.
2. Think about the pattern you want to make
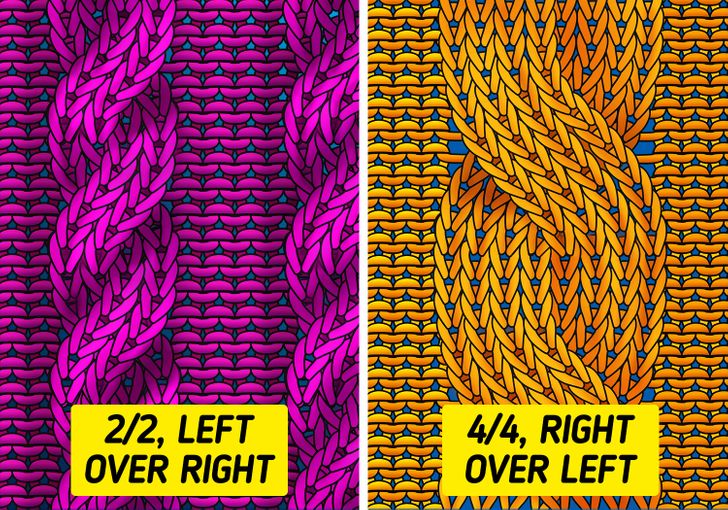
There are many types and styles of cable knitting. In this article we will focus on the simple cable stitch. In any case, you have to plan your pattern ahead of time in order to know what count of stitches to keep. For example, you can choose to make just one cable in the whole pattern. You can also choose to make multiple cables or a combination of cables and other patterns. Most commonly, you’ll find a columns and cables pattern that makes the cables more visible.
Whatever you choose, you’ll have to always have to decide on 2 things:
- The size of the cable: This corresponds to the amount of stitches that you’ll use to make the cable. You can use any even number of stitches. As a reference, keep in mind that if you want a small cable you can go for 2 stitches on the left, 2 stitches on the right, written as 2/2 (see the left image above). If you want a bigger one, try 8 stitches, so a 4/4 cable (see the right image above).
- The direction of the cable: This tells you whether the left part of the cable goes over the right one, or the other way around. The left over right is called a left cable, and you can see it in the example on the left. The right over left cable is called a right cable and you can see it in the example on the right.
For our article, we’ll use cables and columns with a purled background. The exact pattern is:
- 3 stitches, 3 purls, right cable (3/3), 3 purls and 3 stitches
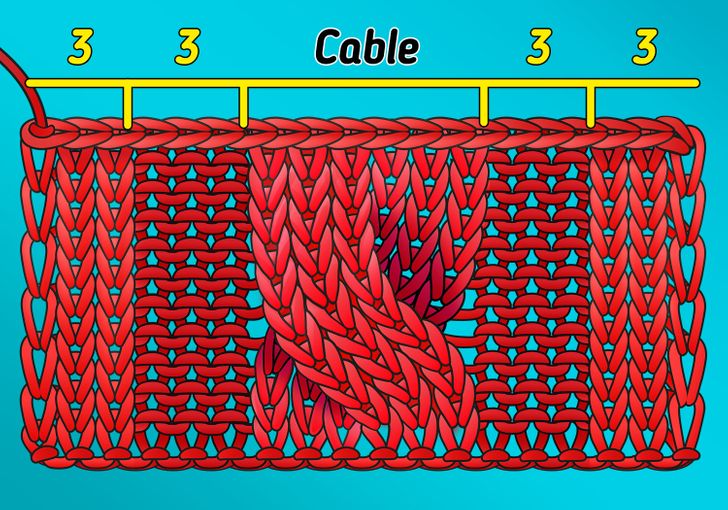
The first and last 3 stitches of our pattern correspond to the columns. It’s actually the purled background that makes them stand out.
3. Set up the stitches for your pattern
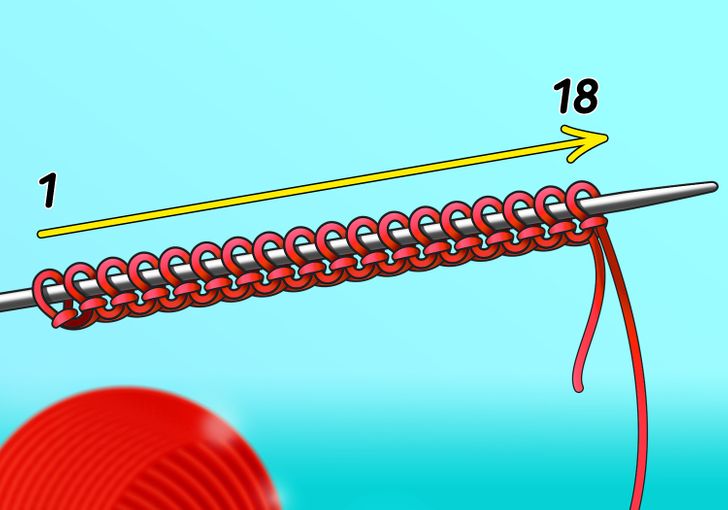
Set up the pattern as you’d normally do.
- In our case, we’ve made 18 knots in total since our pattern is:
3 stitches, 3 purls, right cable (3/3), 3 purls and 3 stitches
B. Example with a 3/3 right cable cross
1. Knit 4 rows of your pattern (stitches and purls only)
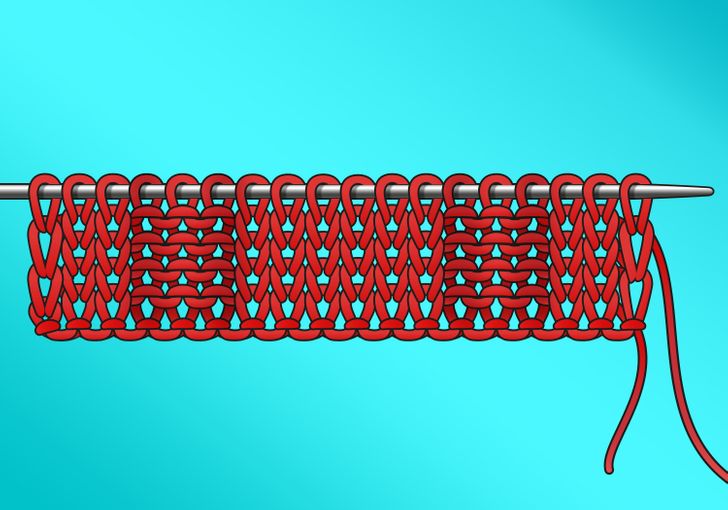
In this step you’re just creating enough room for the cables to cross at some point. If you want to knit more than 4 rows, you can. Just keep in mind that the right side of the fabric, or in other words the side of the fabric you want to showcase, should be facing you when you do the crossover for the cable.
- Our pattern is 3 stitches — 3 purls — 3/3 right cable — 3 purls — 3 stitches. Because the cable is always a column of stitches crossing over itself in the middle, in this step we’ll be knitting 4 rows of:
3 stitches — 3 purls — 6 stitches — 3 purls — 3 stitches
2. Insert cable needle in half of the stitches and take them off the main needle
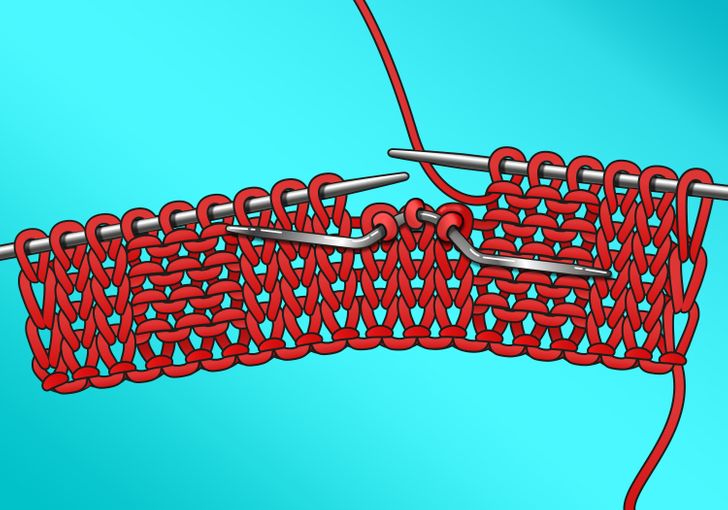
Start your next row normally. Then, when you reach the first cable location, put the first half of the cable stitches on the cable needle.
- That means that we first knit 3 stitches and 3 purls.
- Next we take 3 stitches from the 4th row and put them on hold on the cable needle — so we “skip” them so far in row 5.
3. Move the cable needle to the front or to the back of the fabric
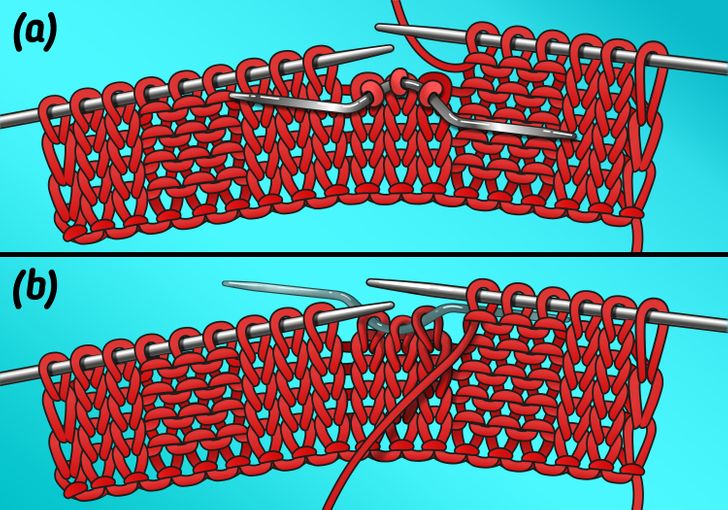
At this point, the position where you place the cable needle will determine if you’re doing a left cable or a right cable. By putting the cable needle in front of the fabric (a), you will make your cable cross right over left. On the other hand, if you put it behind the fabric (b), your cable will be crossed left over right. Both options are equally fine.
- We wanted to do a 3/3 right cable cross, so in our example, we’re putting the cable needle in front of the left needle.
4. Keep knitting the other half of the cable
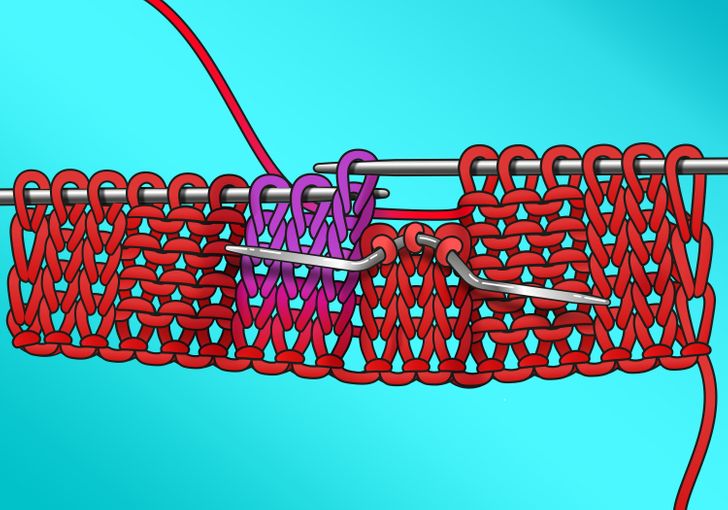
Now knit the second half of the cable using the “main” needles. While doing this, the first cable half is still on hold on the cable needle, either in front or behind the work.
- In our case, we’ll keep the 3 stitches in the cable needle, and then continue knitting the rest of the cable, so that’ll be 3 more stitches.
5. Knit the reserved parts normally
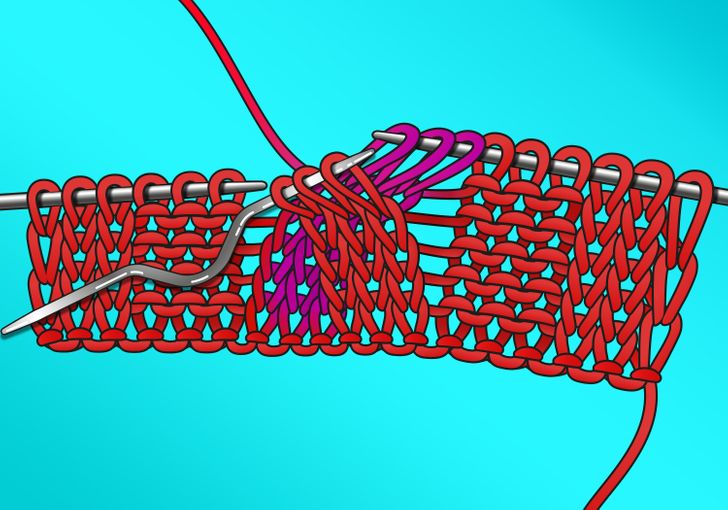
Now you have to finish the cable. To do that, you’ll use the cable needle to knit the 3 stitches that you “skipped” in step 4 onto the right needle. By doing so, you actually pull half of the work over the other half, creating the effect of the cable. DO NOT remove them from the cable needle, but knit them directly from the cable needle.
- In our case, we’ll knit 3 stitches off the cable needle onto the right needle. After this the cable needle has no stitches anymore and can be put aside for now.
Then, you’ll need to finish the row the way you planned it.
- In our case that means 3 more purls and then 3 more stitches. Now we have finished our pattern in the 5th row of 3 stitches — 3 purls — 3/3 right cable — 3 purls — 3 stitches.
6. Knit the last row normally
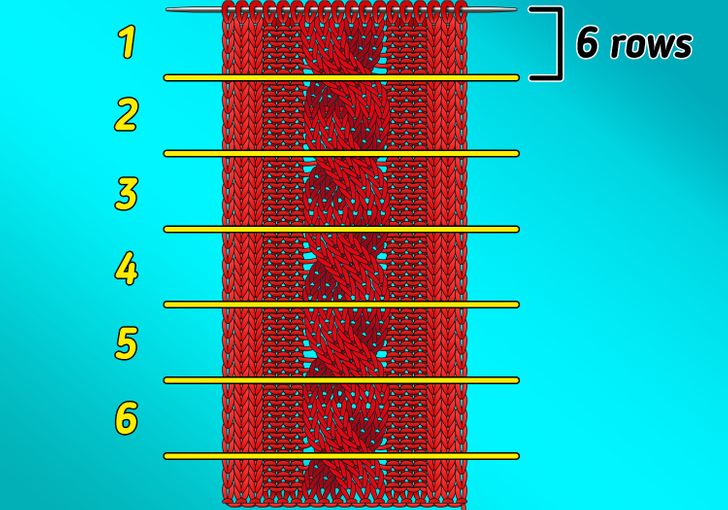
Now knit row 6 according to your regular pattern again (3 stitches — 3 purls — 6 stitches — 3 purls — 3 stitches), so without making any cross-over.
- If you want to make more cross-overs to get a spiraling effect throughout the whole work, simply go back to step B1 and repeat the process as many times as you want. By doing so, starting from row 6, you’ll end up following a pattern of 5 regular rows — 1 crossover — 5 regular rows — 1 crossover — etc.
- You can play with how many rows or rounds you work between your cable crosses. A pattern like 5 regular rows — 1 crossover — 5 regular rows — 1 crossover — etc. will look more dense than, for example, an 8 regular rows — 1 crossover — 8 regular rows — 1 crossover — etc.