How to Draw an Eye Step by Step
Many people enjoy drawing, but some of them may have some problems with picturing reality in the proper way, especially when it comes to drawing a human face. While it’s likely to take you years to master your skills, there are basic rules that will help you improve your drawing technique right away, even if you’re a complete beginner.
Today, 5-Minute Crafts is going to share with you how to draw a realistic eye, and we hope this tutorial will become the first step on your way to drawing a portrait.
What you’ll need:
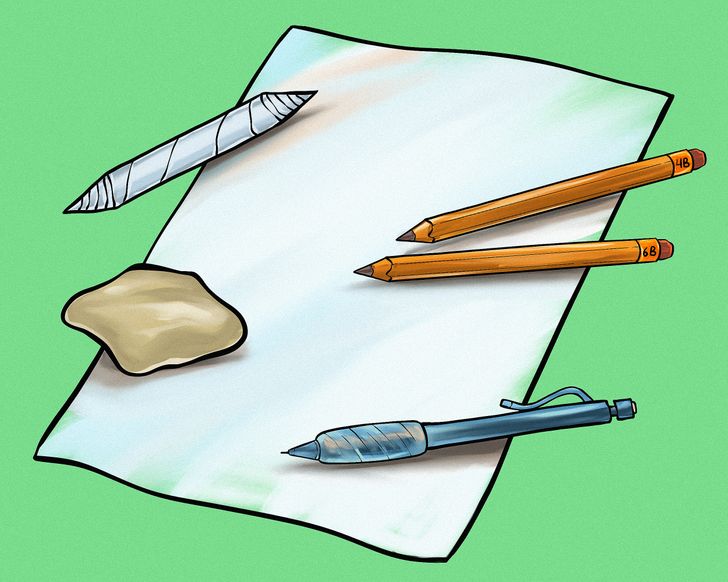
To draw an eye, you’ll need:
- A sheet of paper
- A couple of soft pencils. You can use a 4B pencil as the main one and a 6B pencil to draw the areas that are supposed to be darker. You can try pencils with different softness and figure out which ones work best for you.
- A mechanical pencil (HB)
- A kneaded eraser
- A blending stump
Step 1. Sketch the shape of the eye.
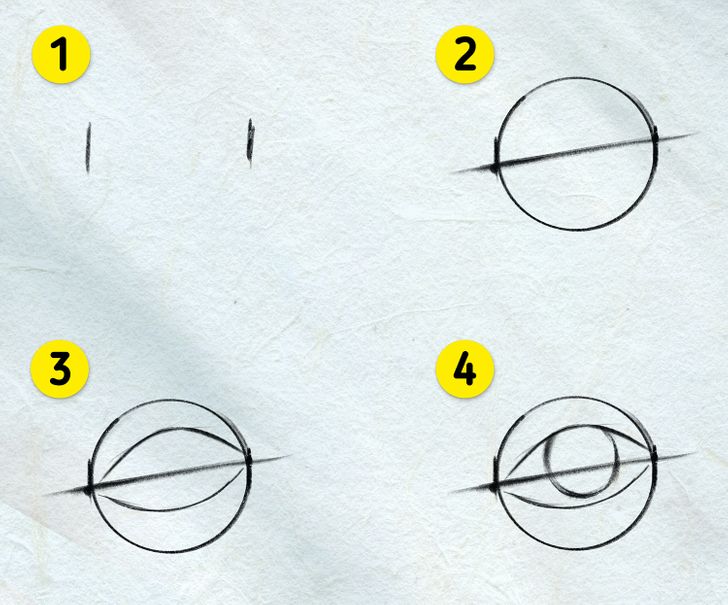
- Grab your HB pencil and start with determining the size of the eye by placing 2 light strokes next to each other. Then draw a circle between them, so the circle touches the strokes. Determine the eye position by drawing a diagonal line between the strokes.
- Outline upper and lower lids and add the upper eye crease.
- Draw the iris. The iris should occupy about 1/2 of the eyeball horizontally.
Step 2. Make the iris more detailed.
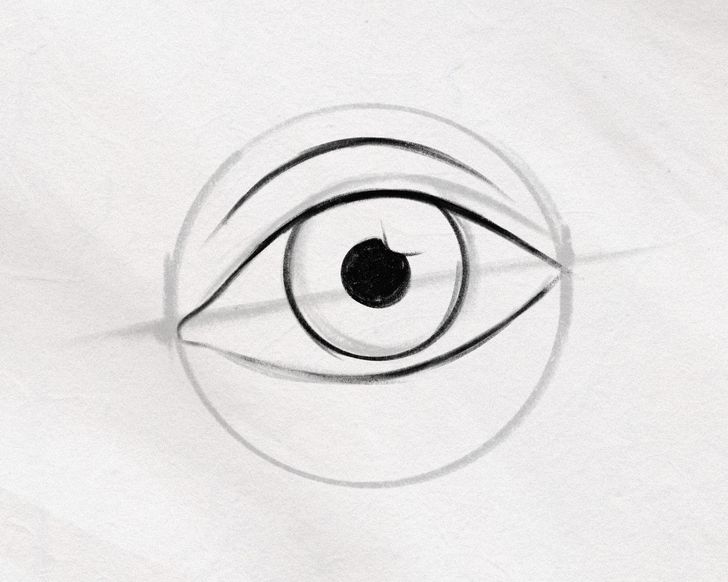
- Draw the pupil and add a reflection from a source of light to the eye. For example, if your source of light is a window, draw a rounded rectangle that either touches the pupil or is located near it. Make sure the pupil is positioned in the center of the iris.
- Create shadows in the pupil with a 6B pencil and make it as dark as possible. Leave the reflection of the source of light white.
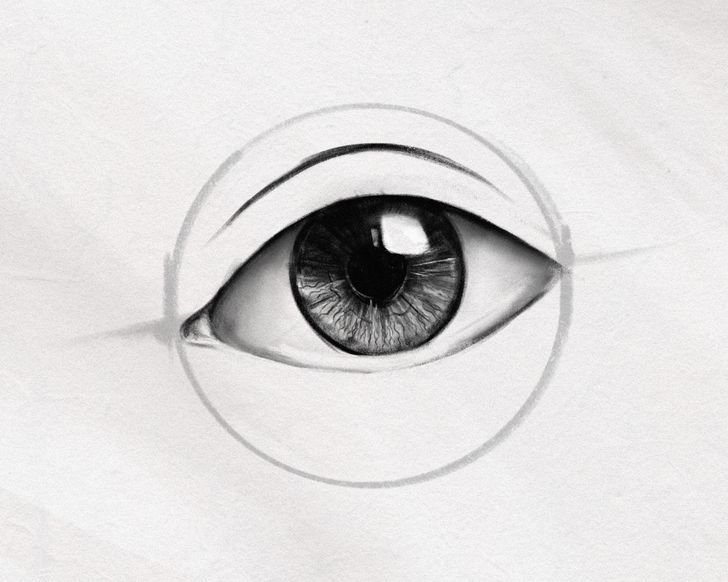
- Cover the rest of the iris with a 4B pencil and draw some strokes from the pupil to the outer part of the iris. The strokes can be a different width, and some of them can overlap to create a more realistic effect. Draw a wiggly circle around the eye to add more volume to it.
- Darken the inner part of the iris with a pencil around its border, to add more depth to the eye. Don’t forget to add some shadows to the whites.
- Use the eraser to add bright stokes and spots in the eye.
Step 3. Add some definition to the skin.
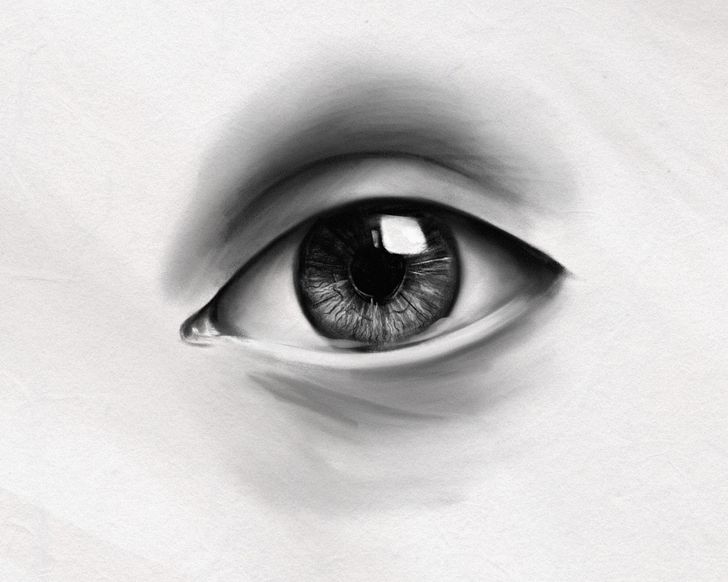
- Take a soft pencil and darken the eyelid crease. Define the skin around the eye area, darkening the areas near the lids and the crease. Add some highlights to the inner corner of the eye and to the lower lash line using the kneaded eraser.
- Don’t forget to thoroughly blend everything together with a blending stump to avoid a sharp contrast between the skin areas.
Step 4. Draw eyelashes.
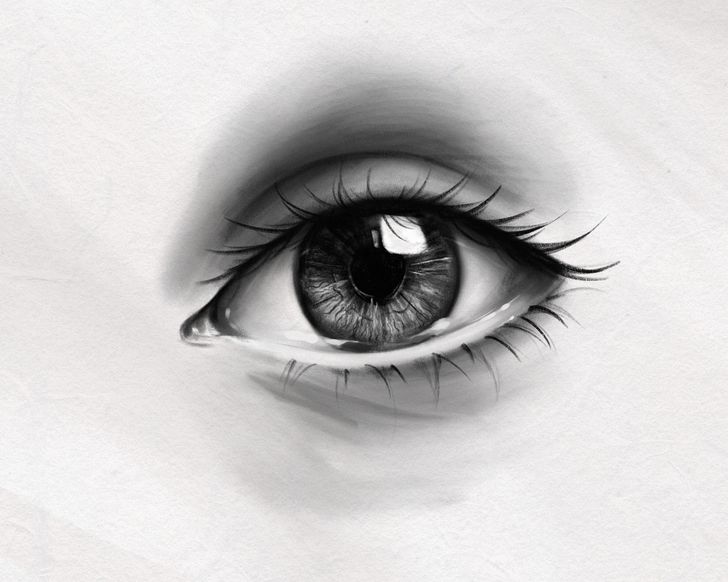
- Outline the shape of the eyelashes on the upper and the lower lids with soft and curved lines. To achieve a more realistic effect, draw some eyelash triangles by bringing the ends of the eyelashes together. Draw as many eyelashes as you want, to create a realistic effect.
- When you’re happy with the number of eyelashes, darken the area at the base of the eyelashes with a 6B pencil.
Step 5. Check and see how everything looks and finish your drawing.
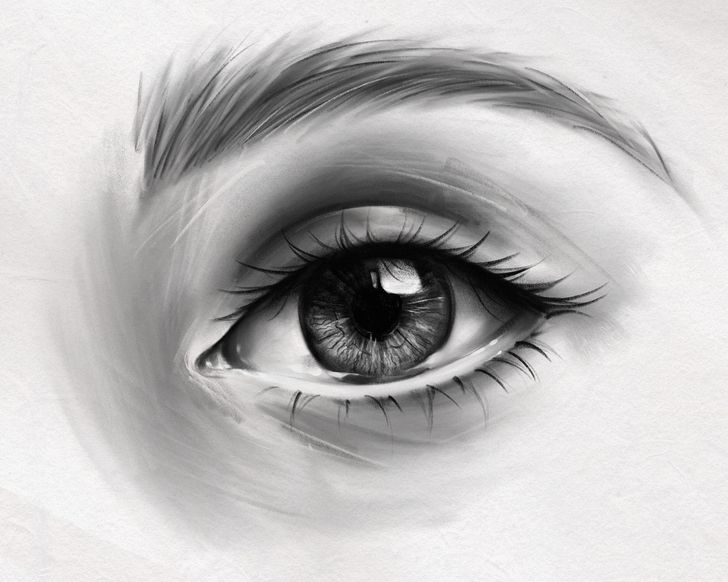
- Your drawing is ready!
Note: At this point, you may want to add more contrast to certain areas, for example, to outline the iris, the lids, or the eyelashes more. Make sure that everything is thoroughly blended together, and there are no white areas left (except for the reflection of the source of light). Add more highlights if necessary.