How to Get the Perfect Colors for Your Eggs: 3 Ways
Easter is one of the most fun and meaningful celebrations of the year that is long-awaited by many children to hunt beautifully colored eggs. One of the popular fun past times is to paint the eggs any colors and show your creativity and skills while decorating them with different techniques. When done right, you can turn it into a fun activity that your whole family can join in on.
5-Minute Crafts would love to share some tips on Easter cheat sheets with you to achieve the most beautiful colors on your eggs.
Prepare your eggs.
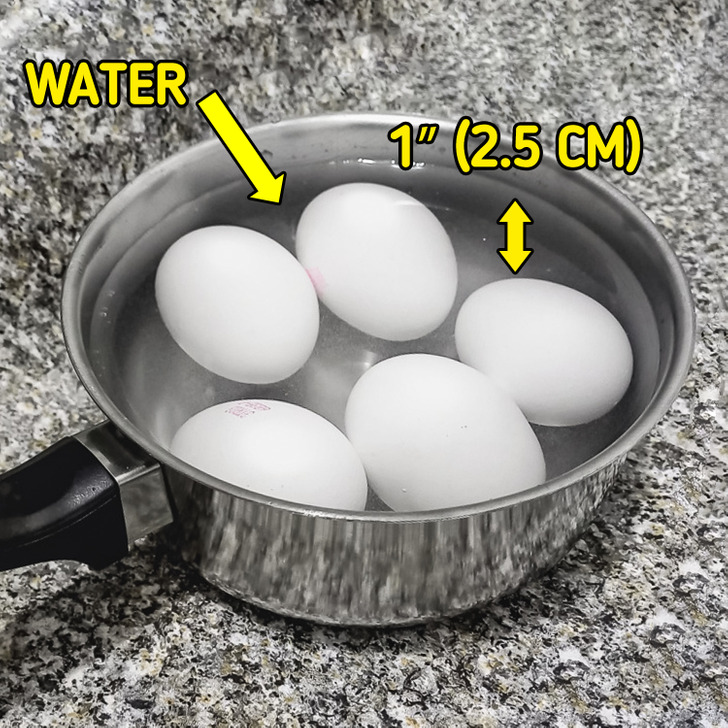
Ensure your eggs are hard-boiled.
1. Place eggs in a large pot and cover them with water about 1 inch (2.54 centimeters) above the tops of the eggs.
2. Gradually bring water to a boil over medium heat. Once it begins to boil, remove the pot from the heat.
3. Cover it with a lid and let it sit for 10-12 minutes if the eggs are large-sized.
4. Transfer the eggs to a colander, then run them under cold water. You can proceed with the dyeing process when they’re cool.
Way 1: Use egg dye.
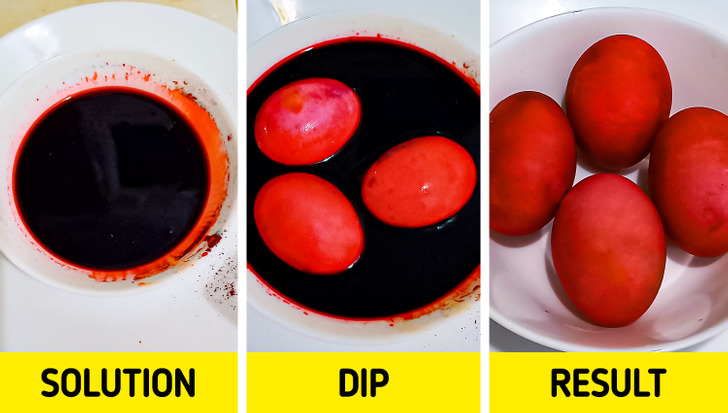
Prepare the dye for 1 solid color.
1. Mix 1/2 cup boiling water, 1 teaspoon vinegar, and about 20 drops of liquid food coloring in a cup. Repeat for each color.
2. Dip your eggs in dye for about 5 minutes or until the desired color is achieved. Use an egg holder or slotted spoon to submerge the eggs. Then take them out from the dye, one by one.
3. Let them dry on a rack by placing some paper towels underneath. Refrigerate when they’re fully dry.
Prepare the dye for ombre colors. Immerse a portion of the egg in one color, then dip another portion in another color. You’ll have a combination of 2 colors once the 2 sections overlap.
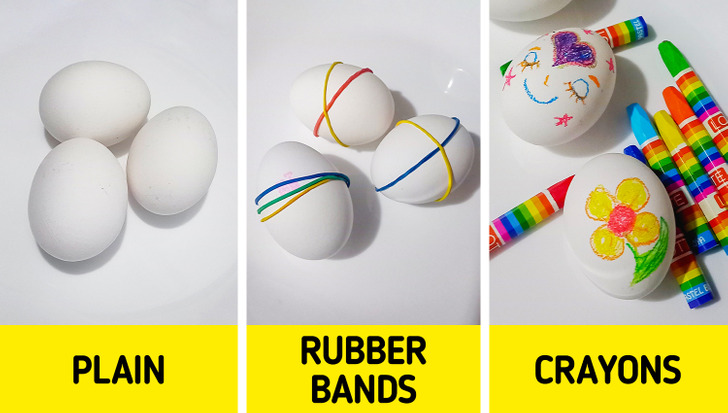
Design your eggs. You can make use of some rubber bands, stickers, wax, crayons, and waterproof tape so that those parts won’t have any dye. Please note that you can achieve 2-toned eggs using all of these designing methods too.
- Stripes: Wrap rubber bands around an egg before dyeing it. Once you achieve your desired dye time, take it out and let it dry. Then remove the bands to reveal the white, undyed strip underneath.
- Decals: You can use stickers or tape in different shapes and decorate your eggs by blocking off some portions. Make sure the stickers are smooth at the edges. Remove them from the eggs one by one when they’re dry.
- Crayons: Using a wax crayon, you can write or draw whatever you’d like on your egg before dyeing it. The dye won’t adhere to the areas covered with wax. When the egg is dry, you can wipe off the wax by softening it over a candle flame.
Way 2: Use natural ingredients.
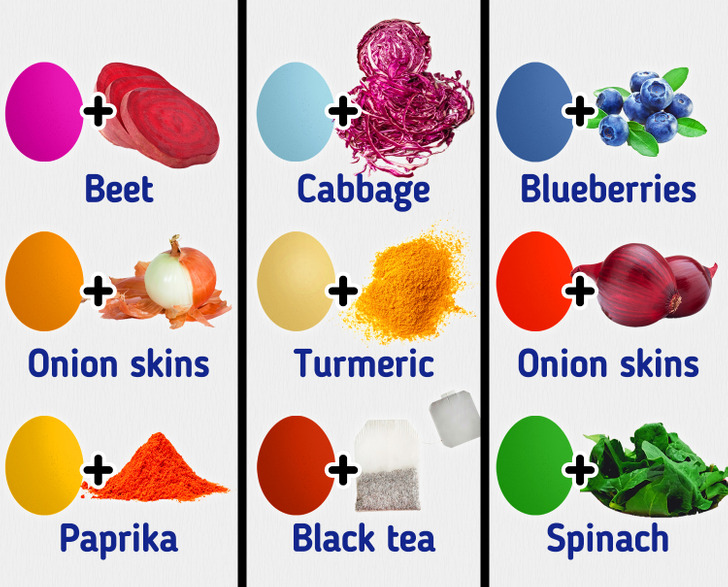
When naturally dyeing Easter eggs, you can use different dye ingredients, like spices, fruits, and veggies, depending on what kind of colors you want to create.
1. Fill a saucepan with a quart of water and 2 tablespoons of white vinegar, then bring it to a boil.
2. Add your desired dye ingredients and let it simmer for 30 minutes over low heat. Repeat the process for other spices, fruits, and veggies.
3. Cool and strain the dye to get rid of any spices, fruit, or veggie pieces. Then keep the eggs dipped in for 30 minutes or more. Once you achieve the color you want, remove the eggs with tongs. You can dry them on paper towels.
Add the following ingredients to a mixture of a quart of water and 2 tablespoons of white vinegar to achieve your desired color:
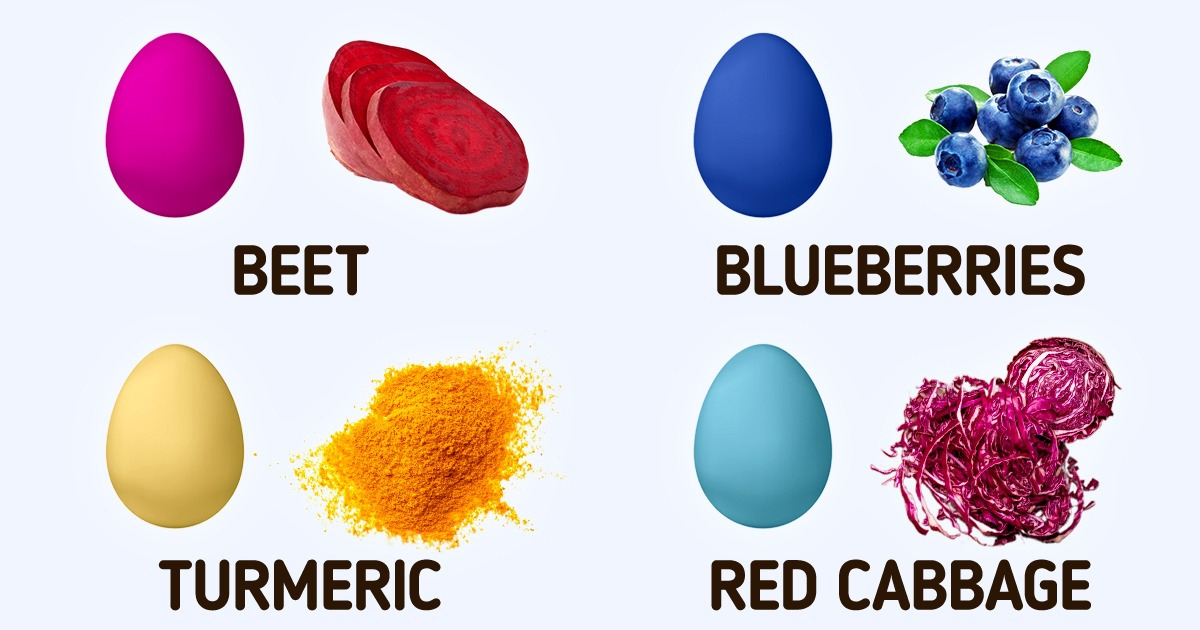
- Red-dark pink eggs: Add 4 cups of chopped beets.
- Orange eggs: Add 4 cups of yellow onion skins. For a brighter orange, let the eggs sit in the dye overnight.
- Light orange: Bring 2 cups of water to a boil. Add 4 tablespoons of paprika and white vinegar, and mix until well blended. After pouring the mixture into a jar, let it cool to room temperature. Then immerse an egg until you achieve your desired color. Using a slotted spoon, take it out, rinse with cool water, and let it dry.
- Yellow: Add 3 tablespoons of turmeric.
- Light blue: Add 3 cups chopped red or purple cabbage. For a brighter blue, let the eggs sit in the dye overnight.
- Dark blue: Add 4 cups of blueberries.
- Deep red: Add the skins of 6 red onions, 2 cups of water, and 3 tablespoons of white vinegar to a pot. Bring the mixture to a boil, then simmer for 15 minutes. Cool to room temperature and strain the liquid into the jars. Then immerse an egg until you achieve your desired color. Using a slotted spoon, take it out, rinse with cool water, and let it dry.
- Green: Add spinach leaves to a saucepan, then pour in 2 cups of cold water and 4 tablespoons of white vinegar. Bring it to a boil.
- Burnt orange: Pour boiled water into a jar with 3 black tea bags and let it steep for 30 minutes, then cool at room temperature. Immerse an egg until you achieve your desired color. Using a slotted spoon, take it out, rinse it with cool water, and let it dry.
Way 3: Use shaving cream.
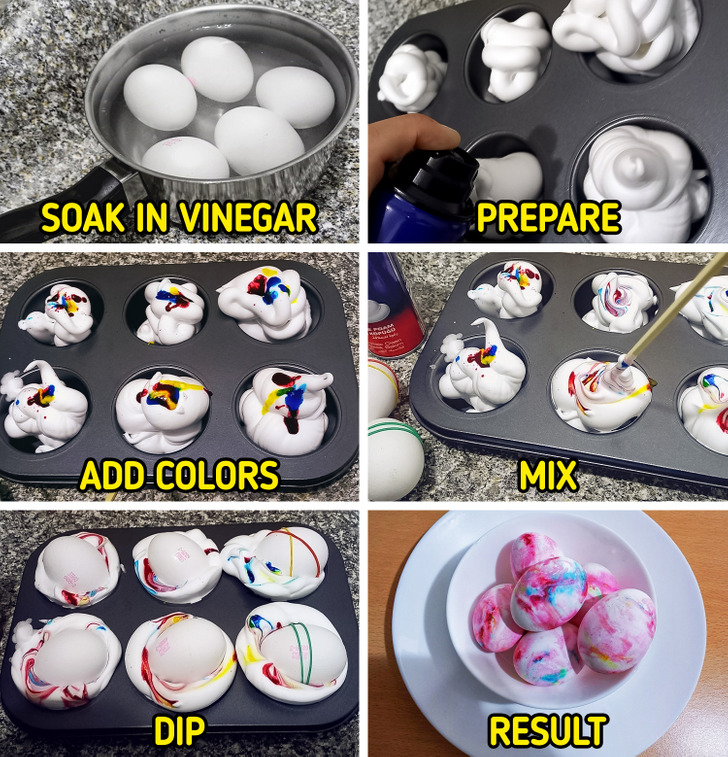
You’ll need: Hard-boiled eggs, vinegar, shaving cream (not gel), a muffin pan, gel food coloring, toothpicks, or wooden skewers.
How to do it:
1. Keep your eggs in the vinegar for at least 20 minutes, no longer than 4 hours to prevent them from getting brittle. Carefully rinse the vinegar off of the eggs and pat dry before continuing.
2. Fill each of your muffin cavities with 2/3 shaving cream, then add some drops of gel food coloring in two or three complementary colors on top of the shaving cream.
3. Using a toothpick or a wooden skewer, gently stir and swirl the food coloring into the cream for a marbled effect. If you wish, you can add additional drops of color too.
4. Place your dry egg on top of the colored shaving cream gently, ensuring it doesn’t touch the bottom of the tin. Then completely cover it all up with the shaving cream. If you keep it in the mixture for 10 minutes, you’ll get pastel colors. Bolder colors will be achieved after an all-night sitting.
5. You can rinse your eggs directly under the tap to remove the shaving cream as soon as you get your desired colors. Gently pat them dry with a paper towel and place them on parchment paper, etc.
