How to Learn Machine Sewing
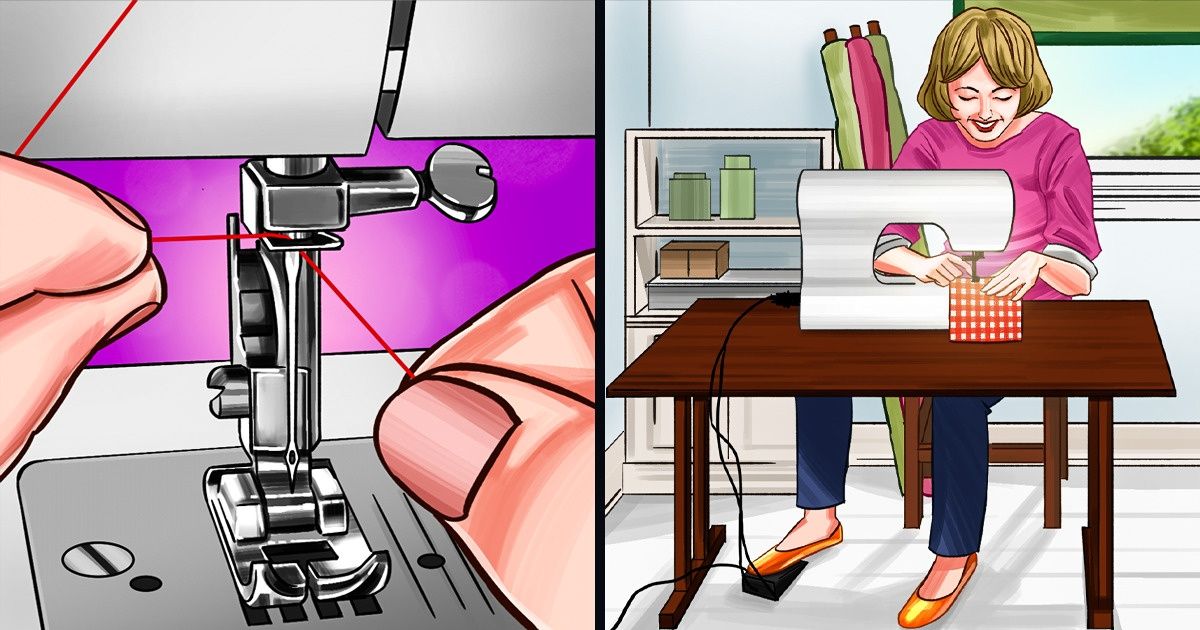
Knowing how to use a sewing machine can be very useful since it allows us to save time when repairing damaged garments, and it can also become the ideal hobby for those who enjoy fashion or crafts.
5-Minute Crafts will teach you some basic steps to learn how to use it.
Get to know your machine.
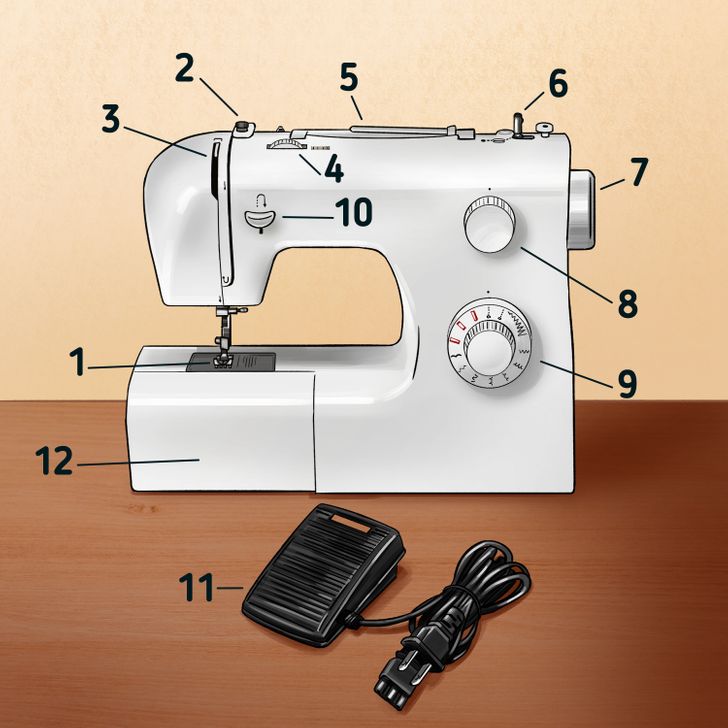
Before you really start sewing, it’s important that you know what the basic parts of your sewing machine are and how it works. Although there are many different models of sewing machines, some functions and components are common to all of them:
- Presser foot: This is a piece that exerts pressure on the fabric so that it remains straight while you’re sewing.
- Thread guide: There are small pieces that allow the thread to be drawn to the needle to be threaded.
- Thread puller: This mechanism pulls the thread up or down when sewing. It’s also the mechanism that determines the tension. This will be important later.
- Stitch tension dial: This is basically a dial that controls the tension of the upper thread when sewing.
- Thread stand: This holds the upper thread spool.
- Bobbin winder: This winds the thread spool that should go on the lower part of the machine.
- Manual feed: This is the dial that allows you to raise and lower the needle and sew manually.
- Stitch length: This dial allows you to choose the distance between each stitch.
- Stitch type: This dial allows you to choose the type of stitch you’ll be using. It usually comes along with drawings showing what the stitch will look like.
- Reverse lever: This is a piece that allows you to make stitches at the beginning and at the end of the seam so that the seam doesn’t unravel.
- Foot controller: This turns the sewing machine on and off in order to actually sew. It also controls the speed according to the pressure exerted on it.
- Accessory compartment: This allows you to store machine accessories, such as needles, spools, etc. Here, you can also access the compartment where the looper thread is often placed.
Set up your machine.
Step 1
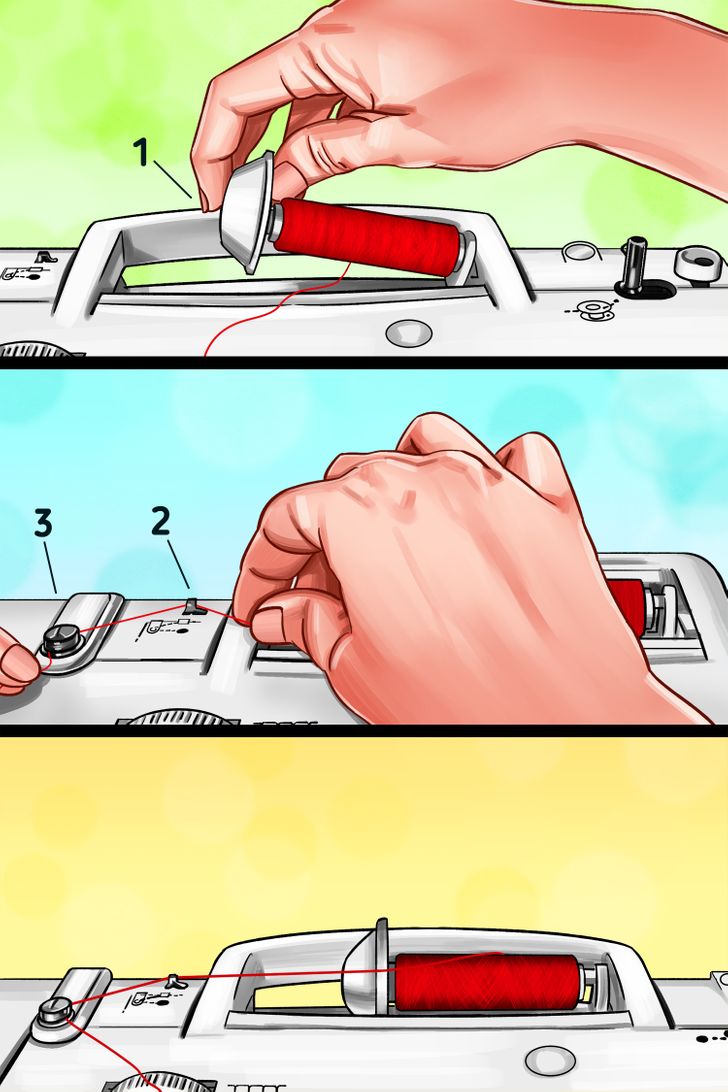
- Start by plugging the machine into the power supply, but make sure you’re not pressing the power button yet. Then place the thread spool in the thread holder.
- Be sure to tighten the piece that holds it securely so that it doesn’t slip out when sewing. Then position your thread with help from the thread guide.
Step 2
-
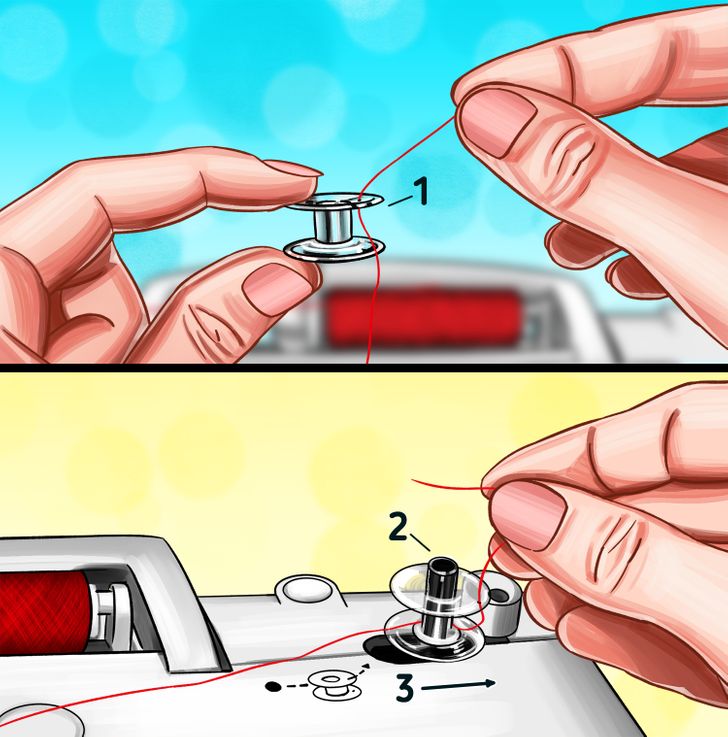
Wind the thread onto the bobbin, which should go on the bottom of the machine. To do this properly, it’s best to put the thread through one of the upper holes of the bobbin, place it on the bobbin winder, and tighten it by pulling it to the right side.
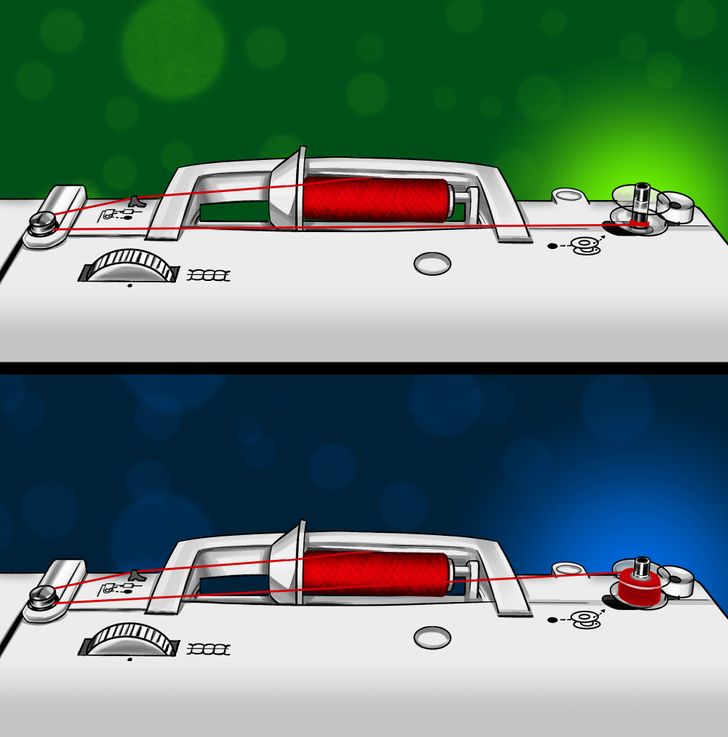
- Step on the foot controller lightly to start winding the bobbin. In most cases, the machine will stop winding the bobbin winder when it has enough thread to get started.
- When you finally see that it’s ready, remove the bobbin from the bobbin winder and cut the thread. Set it aside for later use.
Step 3
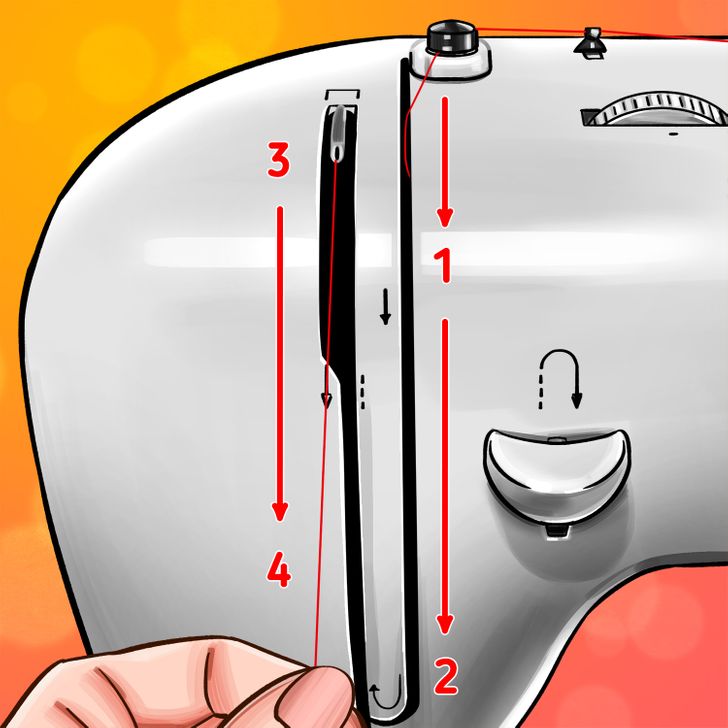
- Take the end of the thread from the upper spool again and pass it through the thread take-up.
- There are machines that indicate with numbers the parts through which the thread must pass before reaching the needle, but this will depend on the model you use.
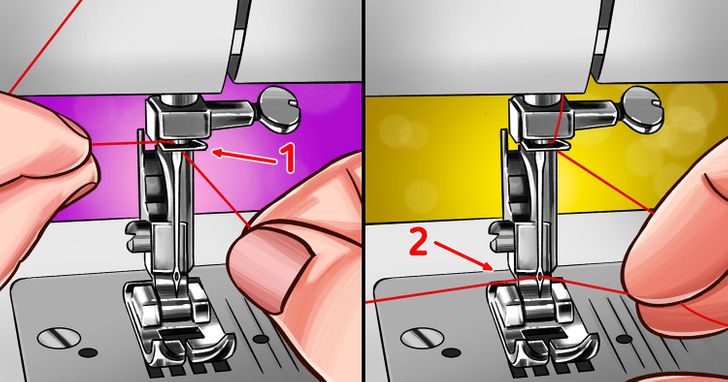
- Bring the thread up to the needle area and thread it through the small wheel on top.
- Then thread the needle by passing the thread through the hole.
Step 4
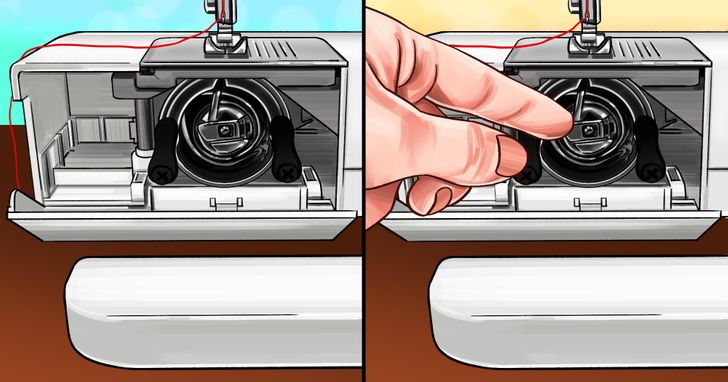
- Take the thread spool to the lower compartment of the machine. To do this, remove part of the base under the needle and remove the cover.
- To remove the bobbin part, pull the small flexible lever on top of the bobbin, outward.
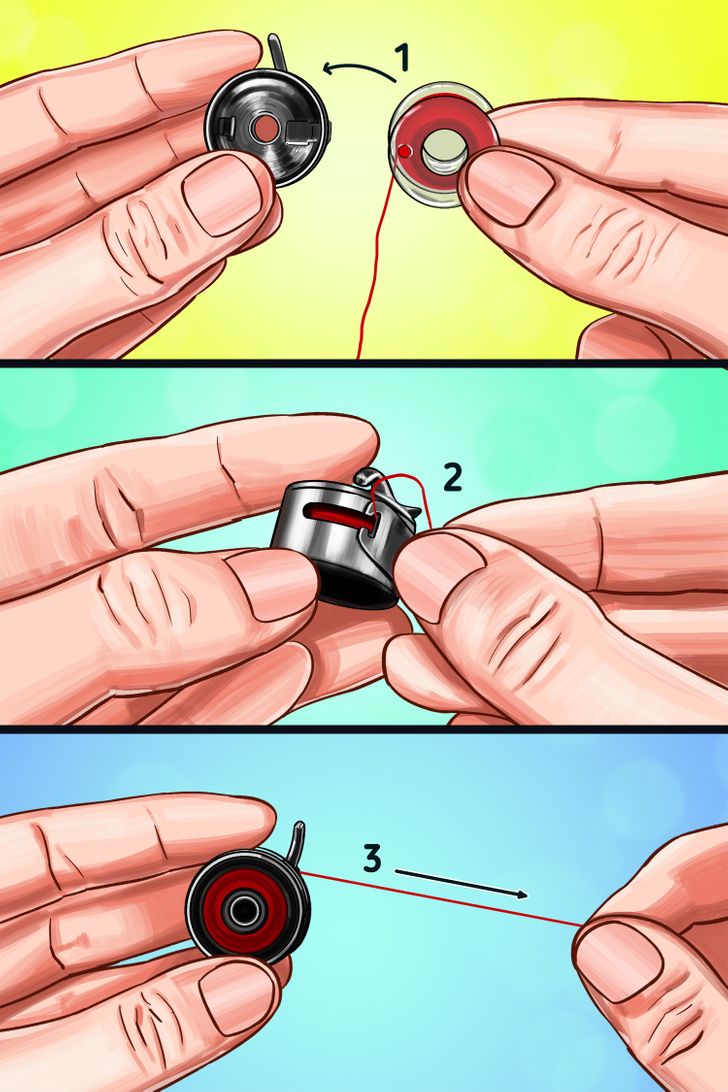
- Place the bobbin inside the piece with the point to the left side, as if you were trying to form the letter “P.” Then pass the thread through the slit in the piece so that it comes out from the side.
- Then pass the thread through the slit in the piece so that it comes out from the side. Pull the thread to make sure it comes out smoothly. You will see how the bobbin turns inside the piece without getting stuck.
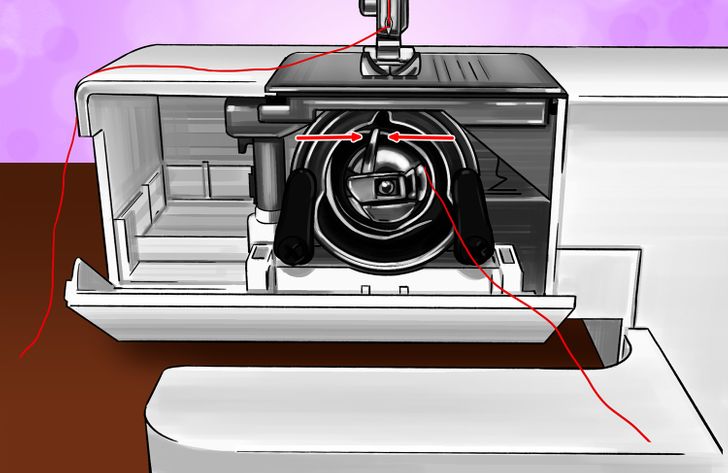
- Bring the piece back into place by pulling the small lever again and tightening the metal “stick” that sticks out of the top.
- Check that the piece is securely in place by trying to move it sideways and outward with your fingers.
- Finally, close the lid and put the base part in place.
Step 5
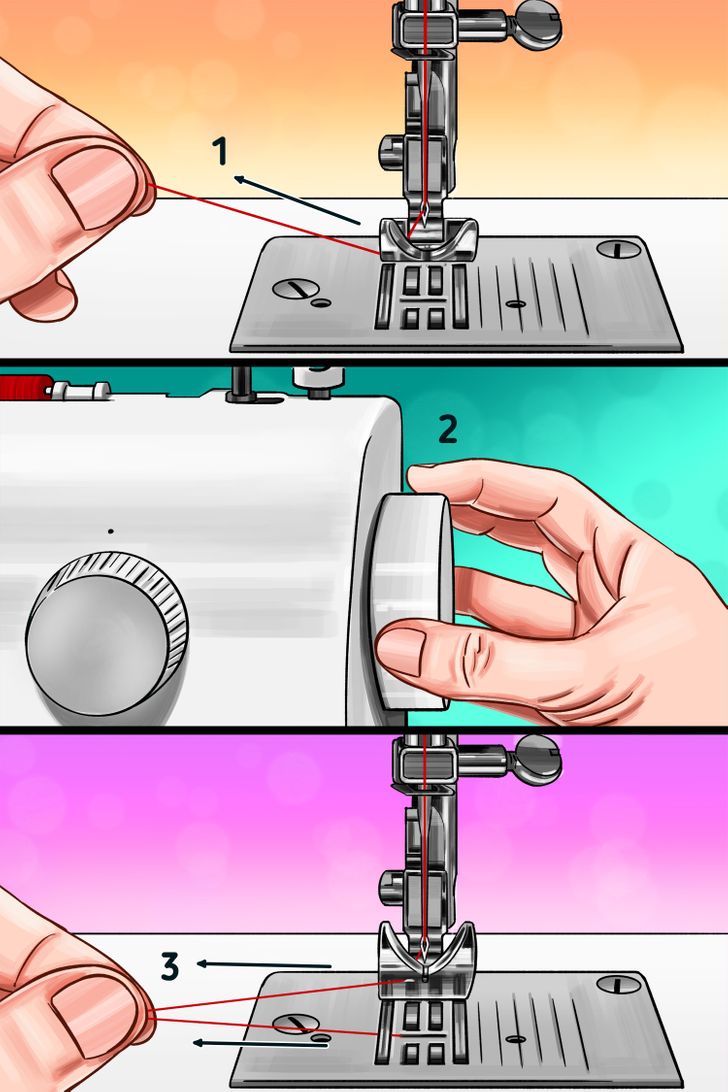
- To remove the end of the looper thread, pull out the upper thread and turn the manual feed disk located on the side of the machine.
- Carefully pull both ends of the upper and lower thread to the left side.
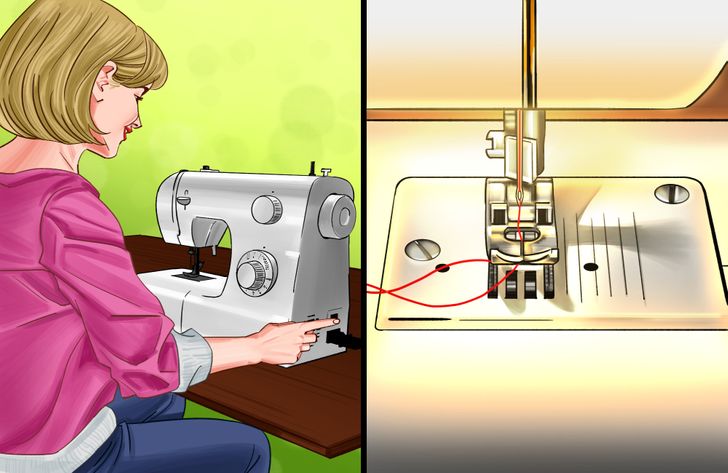
-
Turn on the machine by pressing the switch on the back. The machine is now ready to start sewing anything you want.
Now you can knit.
Step 1
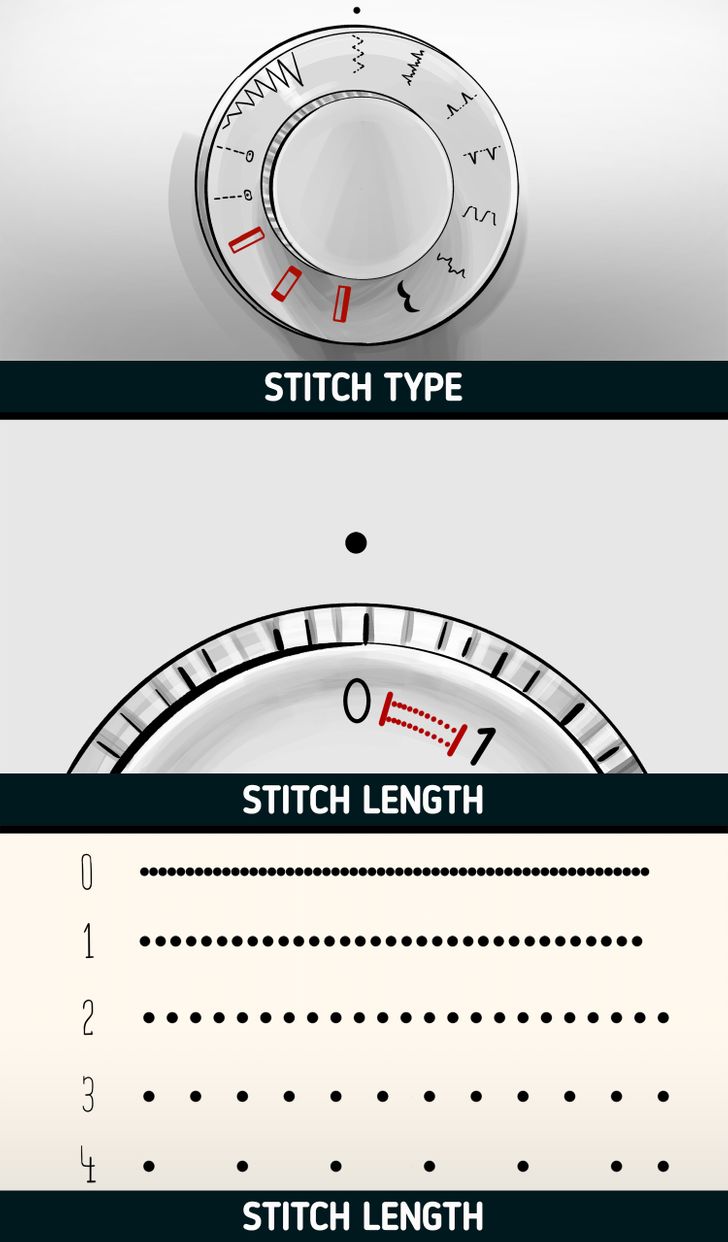
- Select the type of stitch you want to use according to the drawings shown on your machine.
- Then choose the distance you’ll be using between each stitch. The smaller the number, the smaller the space between each stitch will be.
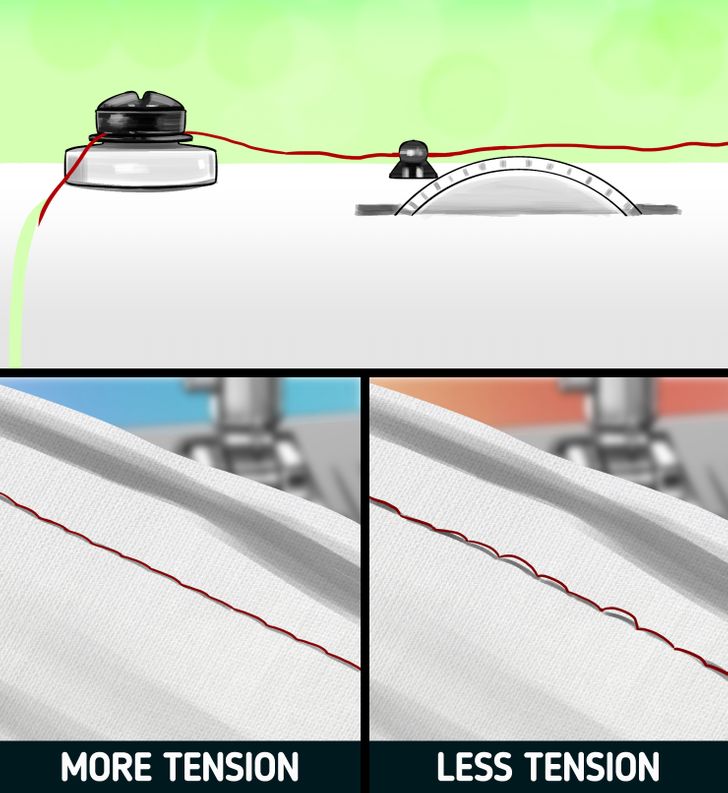
- Select the thread tension with the upper dial. The larger the number, the higher the thread tension will be. That means that the stitch will be tighter.
- The thread tension and type of stitch you’ll be using will both depend on what you want to sew and the type of fabric you are using. It’s often recommended that you always use a small piece of fabric to test before sewing the final piece.
Step 2
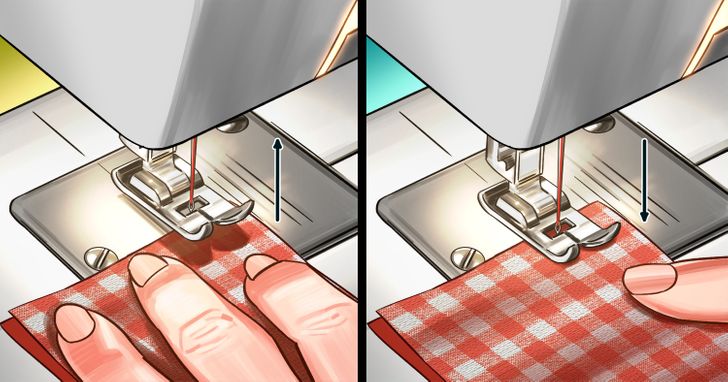
- Lift the presser foot up by using the lever on the side of the mechanism.
- Position the fabric and lower the presser foot again with the same lever.
Step 3
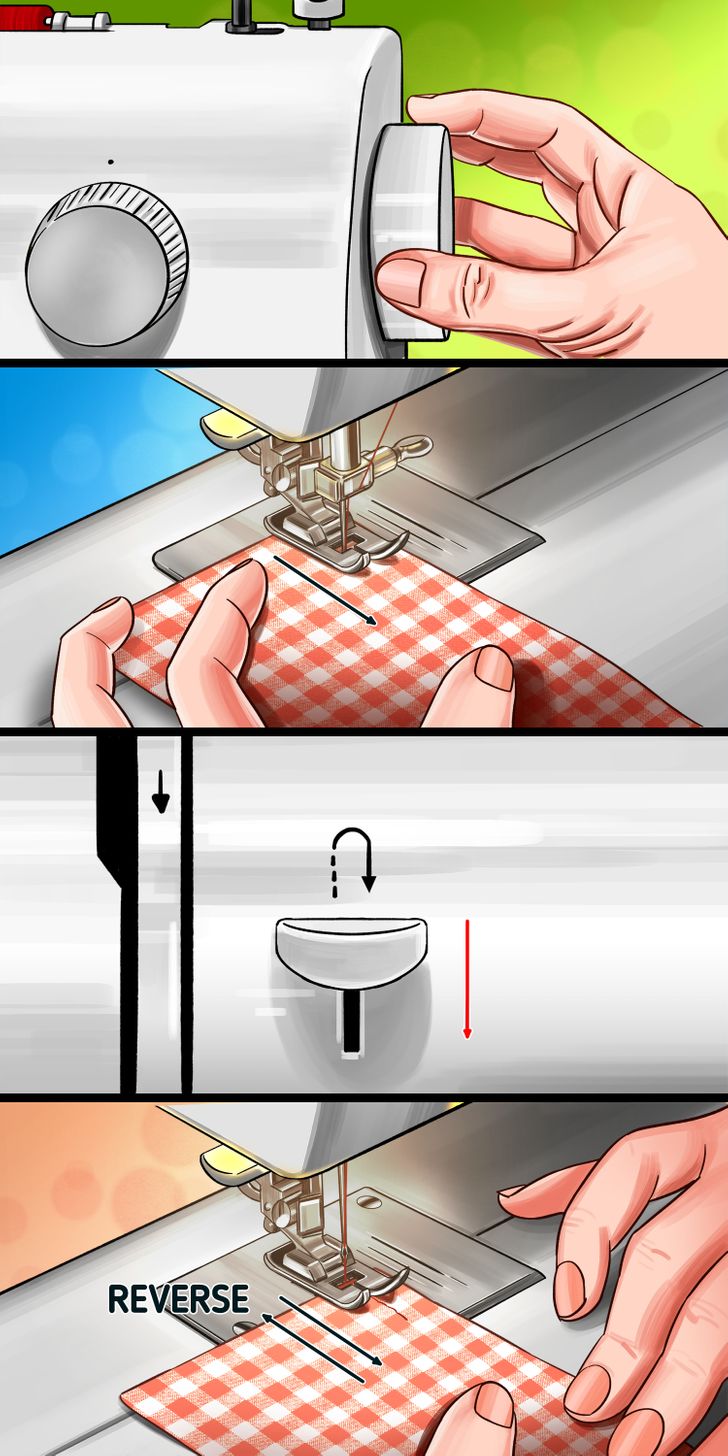
- When starting to sew, it’s often recommended that you use the reverse lever to make a tack. This will make the seam stronger and prevent it from unraveling at the edges.
- To do this, insert the needle into the fabric using the manual feed dial and make 4 or 5 stitches. Then press the reverse lever and you’ll see how the stitching goes backward. Press the lever again to return the stitching back to the normal direction. Repeat this step at the end of the seam to reinforce the other end.
Step 4
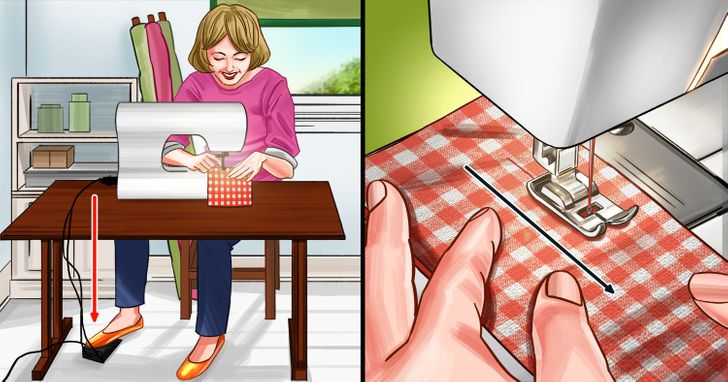
-
Continue sewing by stepping on the foot controller and holding the fabric taught and straight. You should use the lines on the side of the needle as a guide.
Step 5
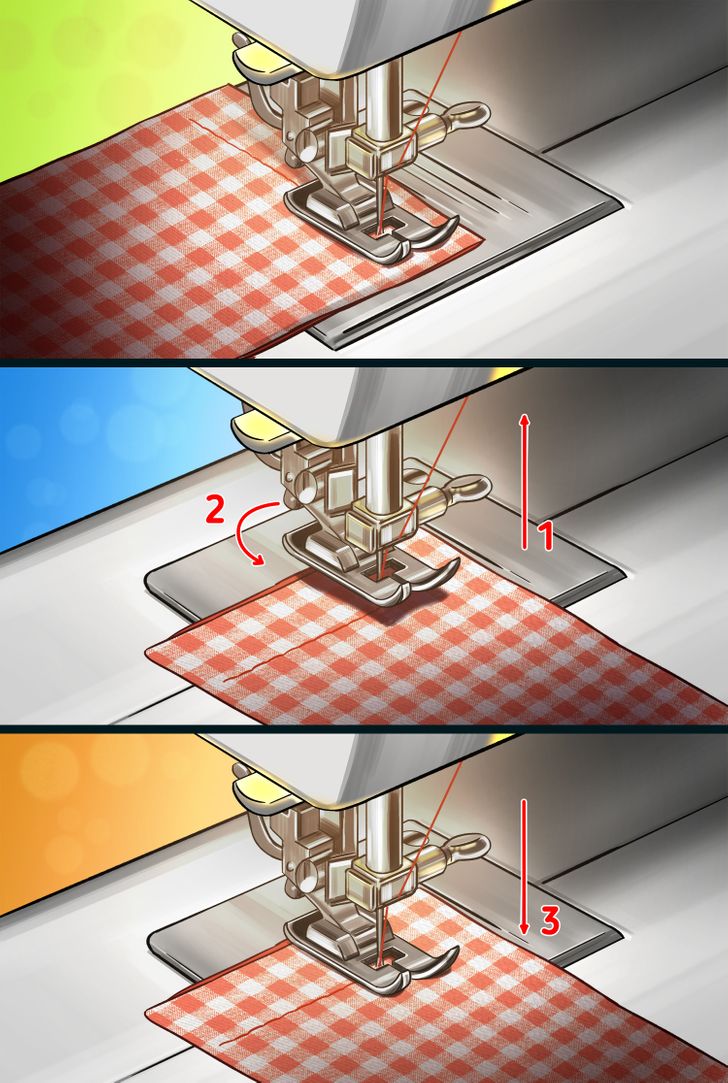
- To turn the fabric when sewing corner seams, press the foot controller until you’ve reached about 1.5 centimeters from the fabric’s edge.
- Leave the needle in the fabric, raise the presser foot, rotate the fabric to the desired position, and lower the presser foot again.