How to Make a Beaded DIY Phone Strap
Beads are very popular and in fashion. You can see them in the fashion collections of famous designers, and internet users publish many master classes where they show how to make DIY straps, charms, keychains, and other accessories from colorful beads.
5-Minute Crafts put together simple guides and instructions that will help even a beginner to make a fashionable accessory in under an hour.
Materials you’ll need
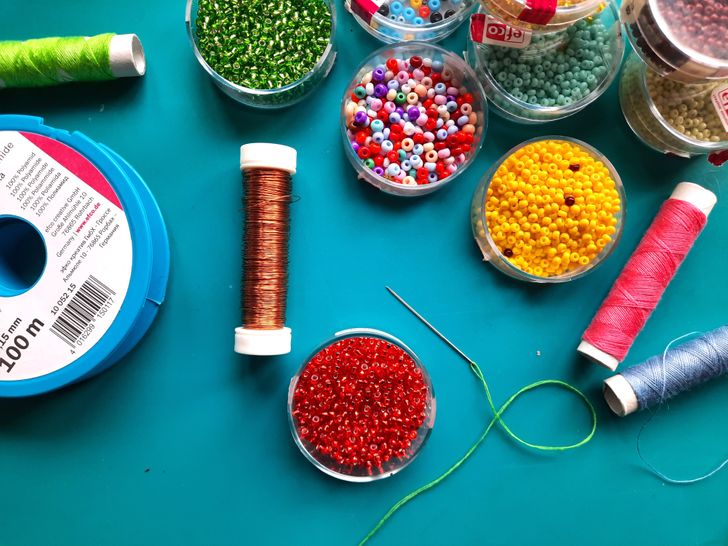
- Beads of any size
- Thin fishing line (for example, 0.15 mm thick)
- Thin copper beading wire
- A beading needle or an ordinary thin needle (a threaded needle should be able to pass through a bead hole easily)
- Beading thread (we recommend durable silk thread)
- Scissors
- A lighter (if you’re going to work with fishing line)
- Different rings and spring hooks for keychains (optional)
✅ You may need extra laces, thread, or mini rubber bands to attach a charm to your phone case. You can also purchase a special suction cup holder with a ring for your phone.
1. Simple charm strap

To make a simple charm strap, take fishing line or a needle and thread that is about 8 inches long. Put on the first bead. Lower it along the thread or line to the very end. Pass the fishing line or the needle and thread through the bead to form a loop as shown in the picture above: this way you will secure the position of the bead.
Additionally, you can tie a knot on the thread or use a lighter to gently burn the end that is sticking out of the fishing line (do this slowly so that the line forms a ball from the heat that sticks to the bead).
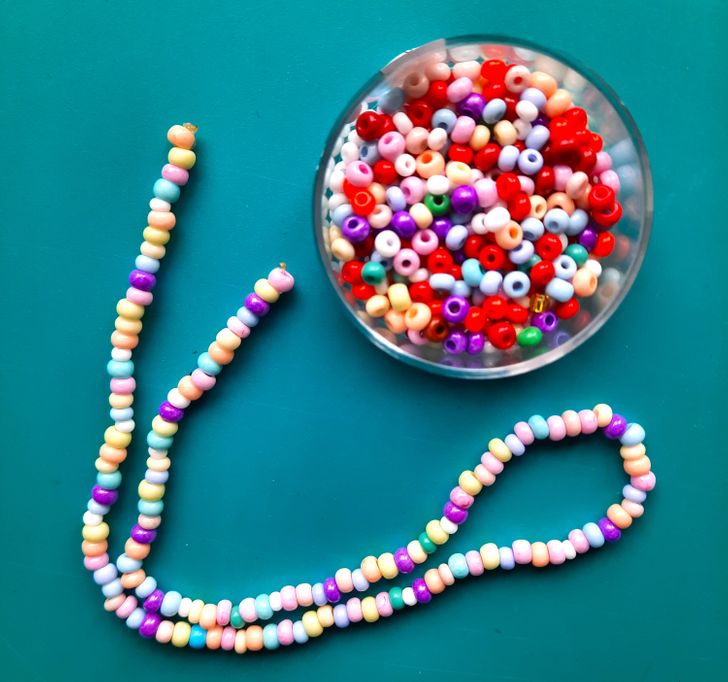
Now that the first bead is securely in place, string the remaining beads to the desired length. At the end, secure the last bead in the same way described above.
Pull the ends of the finished charm strap with a mini-elastic band or tie them with a thread — this way you can adjust its length in the future if necessary. Then attach the strap to a spring hook, ring, or just tie it to your phone case with a thread.
2. Simple charm strap with letters

This charm strap is similar to the previous one, except beads with letters and a heart are added to the plain beads. If they are difficult to find, you can make them yourself from modeling clay.
To do this, roll out small balls of clay. Poke holes in them with a toothpick and let the clay dry so that the beads become hard. Then apply clear nail polish to them to protect them from water.
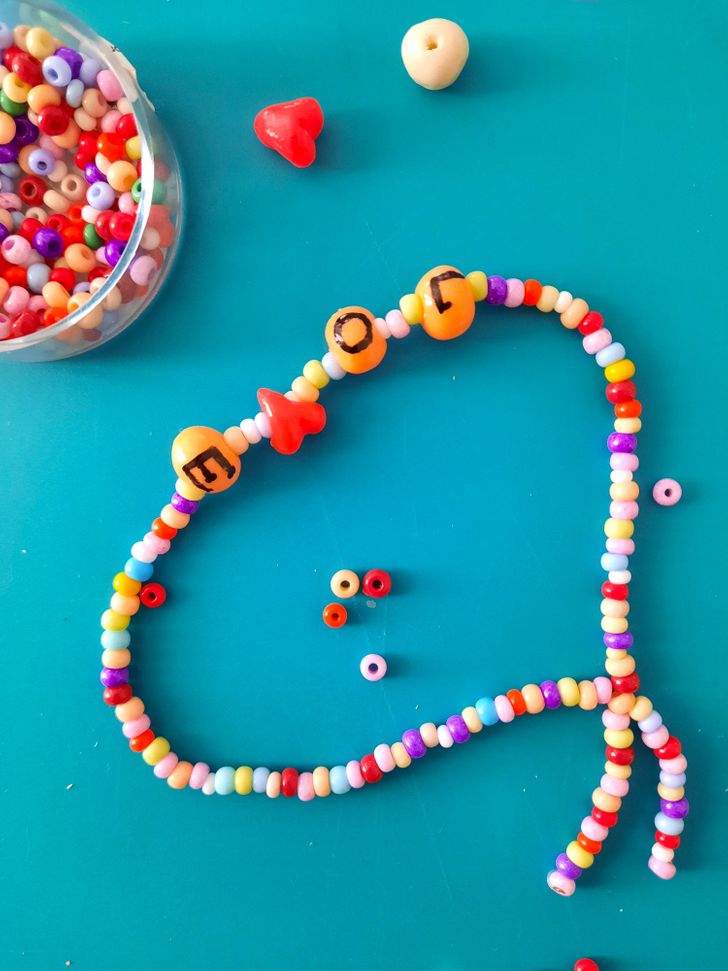
Write necessary letters on the beads with a black permanent marker, then string these beads along with the other beads. Thus, you can make any beads of any shape from modeling clay.
3. Flower charm strap

For this charm strap, it’s better to use thread (10 inches long) so that the beading stays smooth and has more regular and neat shapes. Secure the first green bead at the end of the string, then string 2 more green beads, and 7 red ones. Pass the thread through the beads as shown in the diagram above. Use yellow beads for the centerpiece of the flower.
Important: You may need more or fewer red beads to make the flower, depending on their size. To figure out the correct number of beads, create the first flower and see if it looks good: you may need to add or remove some petal beads.
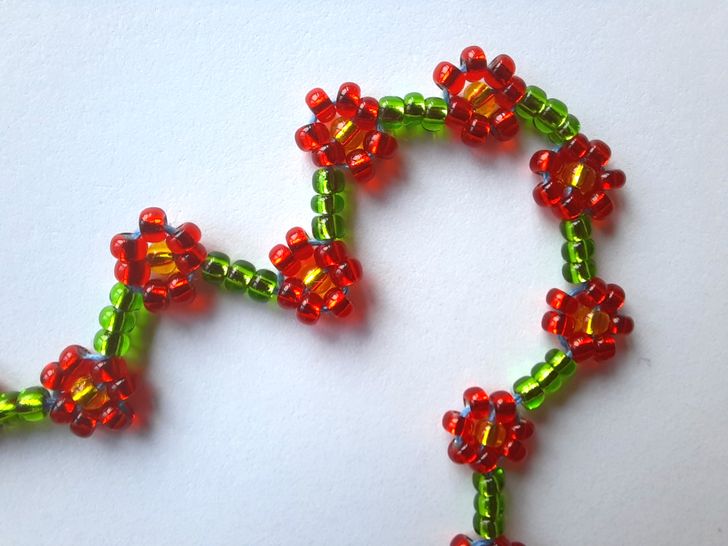
Look at the photo above: the shape and size of the beads, as well as the bead through which you pull the thread, attaching the yellow bead inside the flower, can affect how smooth and round the whole flower appears. Therefore, when making the first 2 flowers, don’t be afraid to experiment to get the desired result. Also try to select beads that are the same size for the flowers.
Now make a circle out of the finished craft and fasten the ends together. Attach the strap to a spring hook or ring, or tie it to your phone case.
4. Watermelon slice
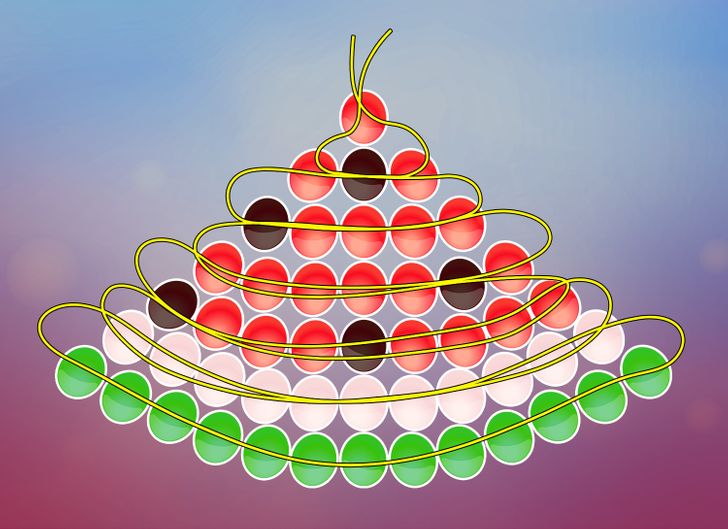
Take a wire (12 inches long) and string 13 green beads and 11 pink ones on its left end. Pass the right end of the wire through 11 pink beads toward the left end and pull it all the way down, while lowering the beads to the middle of the wire. So you’ll get 2 bottom rows: the green watermelon rind and its pink pulp.
Now string 9 beads on the left end: 7 of them should be red and 2 should be black. Pass the right end of the wire through them in the same way. You’ll get a 3rd row — the watermelon pulp. Continue to weave other rows, referring to the picture above. At the very end, after stringing the last bead, you can tighten it like the previous row, or immediately pull the edges of the wire through it.
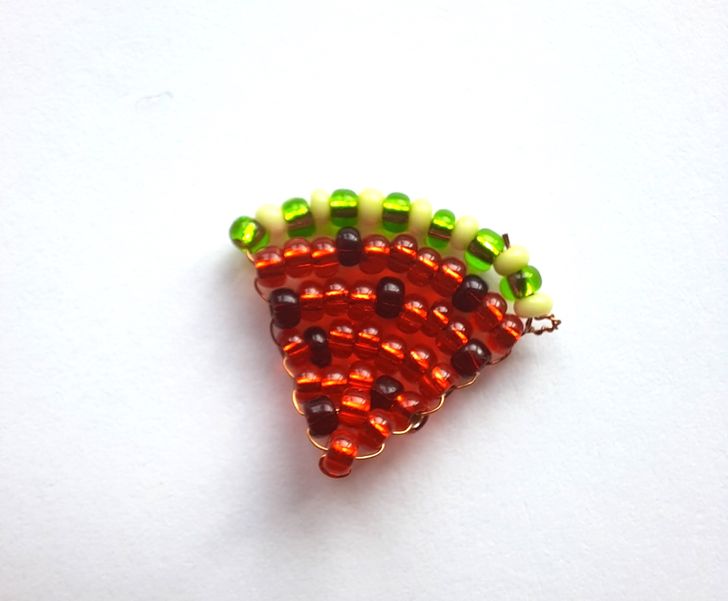
You can also weave in the opposite direction from top to bottom, or change the colors and order of the seed beads. Pay attention to the photo above: in this craft, the beads were arranged in a different order. Also, for the row of the watermelon rind, beads of 2 colors and different sizes were used, which is why we had to add a fourteenth bead to make the edge of the rind look correct.
The finished watermelon slice can be attached to a spring hook, or a ring, or tied directly to the phone case.
5. Pear

Take a wire (16 inches long), string 13 green beads on it, and move them to the middle. Connect the ends of the wire so that the green beads are gathered in a loop, and string 4 brown beads on the ends. Bring them down to the green beads. The ends of the wire in your hands should be the same length.
Now string a yellow bead on the left end, and pass the right end of the wire through the opposite side of the bead. If done correctly, the ends of the wire will stick out from different sides of the bead.
Moving on, the weaving of a pear is not much different than creating a watermelon slice. Follow the weaving pattern shown above until you get to the bottom. After finishing the last row, pass one end of the wire through the row above again and pull it out where the second end is. Then secure them together, cut them, and hide them inside the last row.
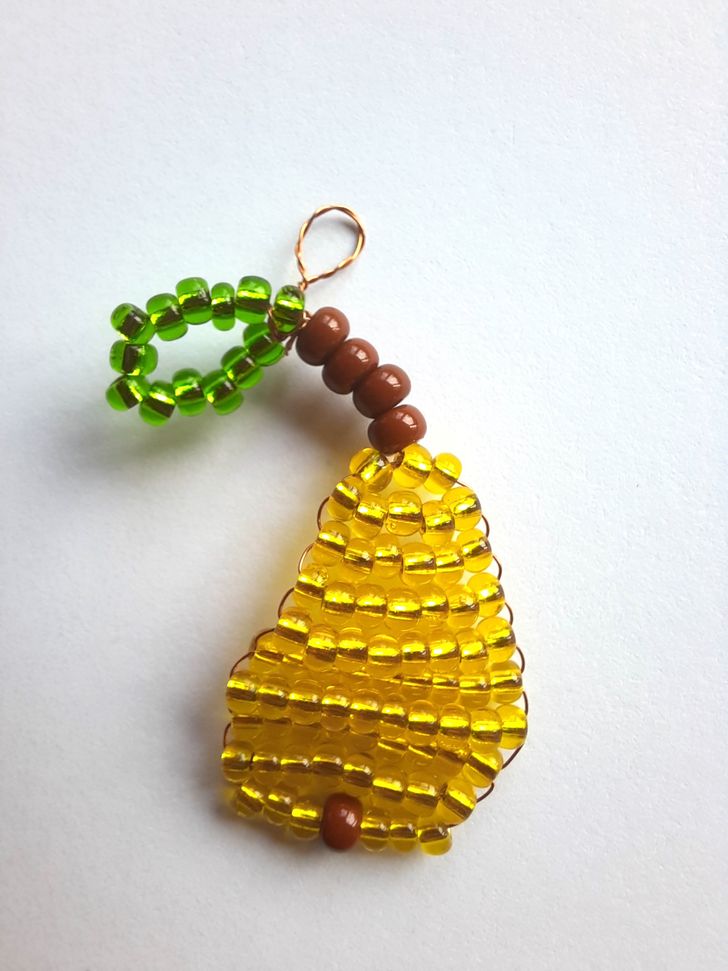
You can attach a wire loop to the pear leaf to turn the pear into a pendant.
6. Emoji
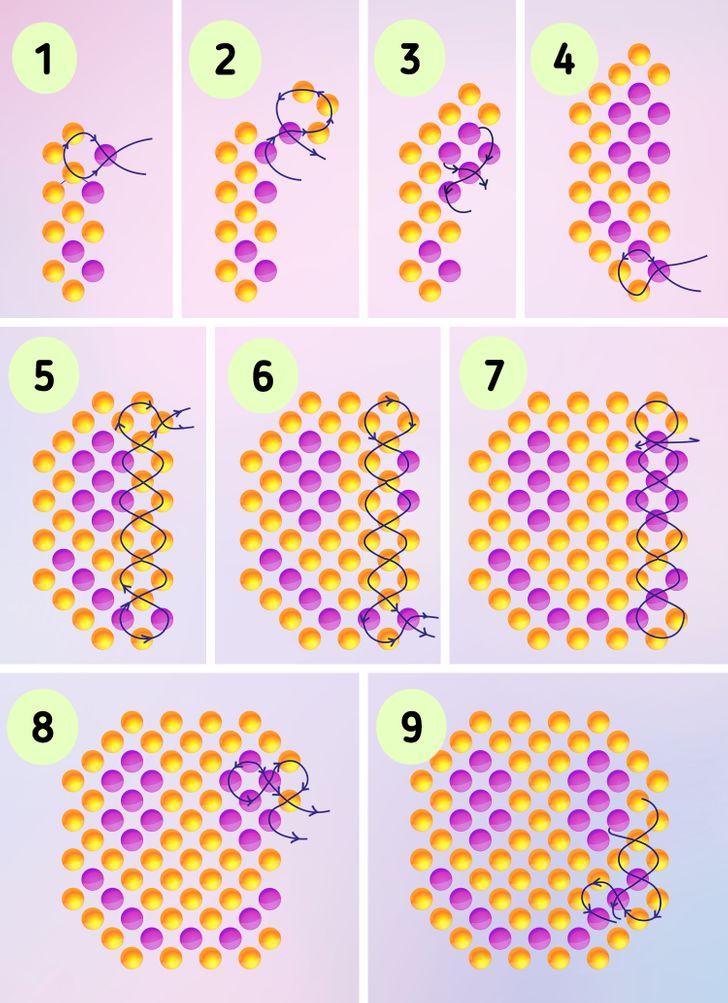
Take a piece of fishing line (20 inches long). Make right angle weave stich from yellow and black beads according to the pattern shown above. Pay attention to the following steps:
1. There are 3 beads strung on the left end of the fishing line, and the right one only passes through the last of them, due to which the weaving turns to the right.
2. After that, string 4 beads on the left end. Then pass the same end though the opposite side of the first of the 4 beads. This way one end of the line forms a cross.
3. Continue to weave, by passing the first end of the fishing line through the already secured beads, and adding 2 new beads on the second end.
4. Again, string 3 beads on the left end to turn in the direction of the weaving.
5-6. Weave the next 2 rows in the same way.
7. Form a new row, but after reaching the last cross, weave it on one thread (string 3 beads on any end of the fishing line and pass it through the bead of the previous cross).
8. Pass the ends of the line through the previous cross and bring it out to the side to complete the last row.
9. Having finished it, pass the ends through the crosses of the previous rows, closer to the center, and then secure them by tying a knot and lighting them.
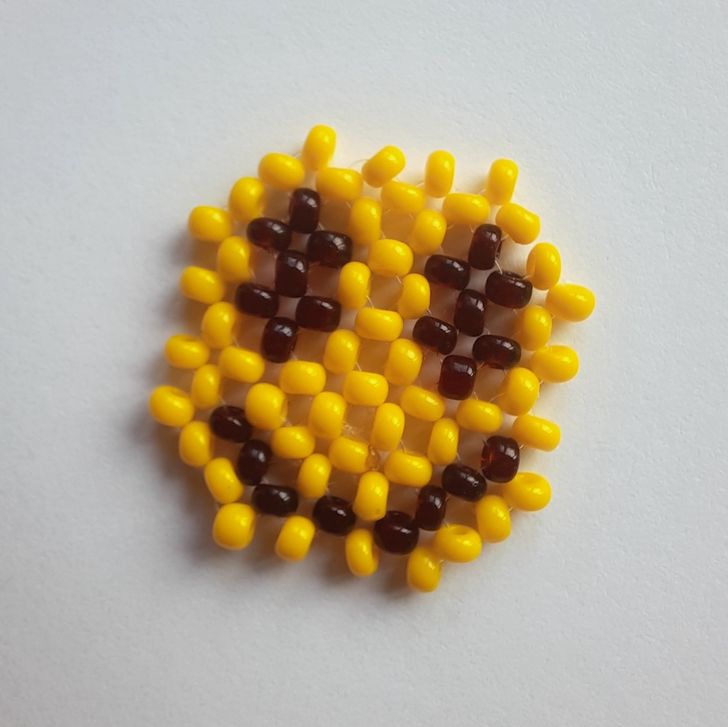
Take your time to make sure that the pattern is right. As a result, you’ll get a smile emoji when this is done with a right angle weave stitch. You’ll just have to attach it to a ring or a lace, and then attach it to your phone case.
7. Heart

Take fishing line (approximately 40 inches). Weave red and burgundy beads according to the pattern shown above. The numbers indicate the sequence of the crosses, and the different colors of the thread indicate different ends. Take your time and make sure that you get the correct pattern as a result of the weaving. Please note that at some places a cross is made with just one thread.
Important: First, make a red heart with burgundy edges, while the second half you weave not separately, but as if connecting these burgundy edges. Therefore, in the picture above, the gray beads correspond to the burgundy beads found on the piece on the left.
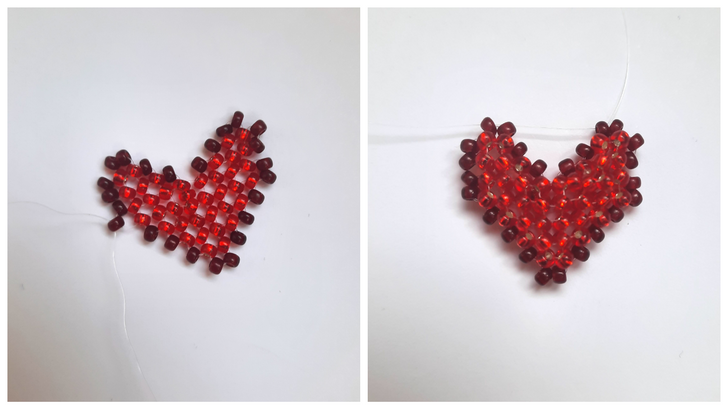
Finally, pass the ends of the line through a few finished crosses close to the center of the heart. After that, tie a knot and light the ends. Attach a ring or a lace to the middle or the edge of the heart, and attach it to the phone case.
8. Lemon slice
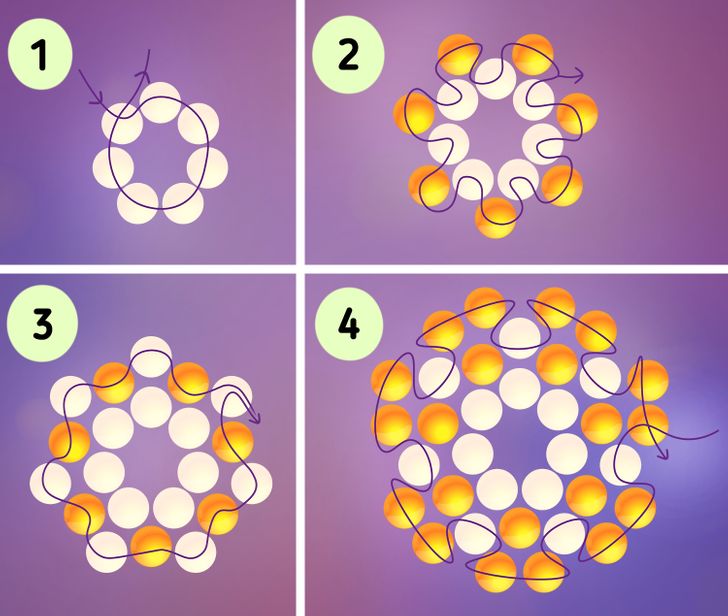
Take fishing line (approximately 5 feet) and secure a white bead with a loop at the edge of one of its ends, then light the fishing line.
1. Now string 6 more beads and pass the long (working) end of the line through the very first white bead. You will have a white beaded ring and the first row of the lemon slice.
2. Take 1 yellow bead, lower it to the white bead, and pass the working end of the line through the adjacent white bead. Repeat with 6 other yellow beads to make the second yellow row. Finish it by passing the end of the line through the very first yellow bead, thus starting the third row.
3. Weave the third row using white beads in the same way. When finished, pull the end of the line out through the very first bead of this row.
4. On the next row, add 2 yellow beads in between the white beads in the same way, creating a fourth row. To complete a row, pass the line through the first 2 yellow beads in this row. This way, you’ll understand the basic principle of the weaving.
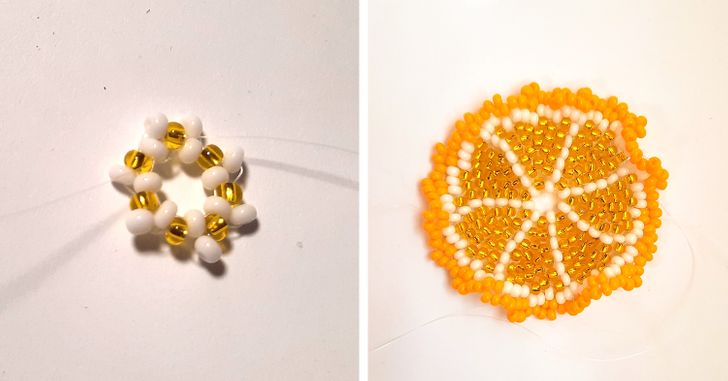
Alternate the beads in the fifth row: add 1 white bead between 2 yellow beads, and 1 yellow bead between 2 yellow beads of the previous row. Then pass the end of the line through the first white bead.
In the sixth row, add 1 yellow bead in the gaps between the beads. Then pass the end of the line through 1 white bead and 3 yellow ones to start to the next row.
Alternate the beads. In the seventh row again: place 1 white bead over the white beads, and place 2 yellow beads in the remaining gaps. To complete the row, pass the line through the very first white bead in that row.
In the 8th row, add yellow beads: one for each gap. Then pass the end of the line through 5 yellow beads (3 from the current row and 2 from the previous one).
Weave the remaining rows following the same principle, gradually alternating colors. The size of the finished lemon slice will depend on the number of rows. A lot depends on the size of the beads too. If you want, you can slightly change the weaving pattern by adding or removing beads in one row or another, so that the pattern looks smoother or, conversely, more chaotic, like in a real lemon.
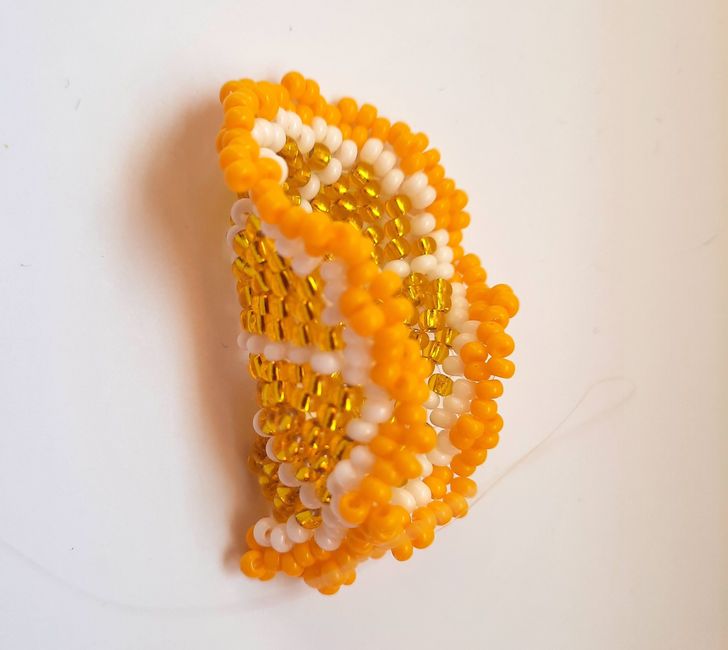
Fold the ready-made lemon slice in half, connect its edges with the fishing line, or sew them together with a thread. If you take beads of a different color, you can make an orange slice, a watermelon slice, or a kiwi slice following the same pattern.
