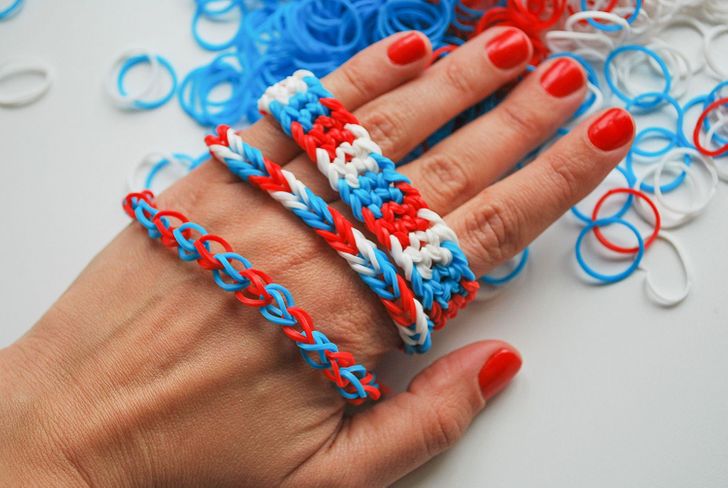
How to Make a DIY Bead or Rubber Band Bracelet
Friendship bracelets paved the way for the popularity of bead and rubber band weaving. These bracelets were based on simple types of weaving techniques that even a child can handle. If you master the basic techniques, you will be able to create accessories that are popular not just among young people, but also with adults.
5-Minute Crafts would like to show you the basic techniques of weaving if you want to make your own bead and rubber band bracelets.
How to weave bead bracelets
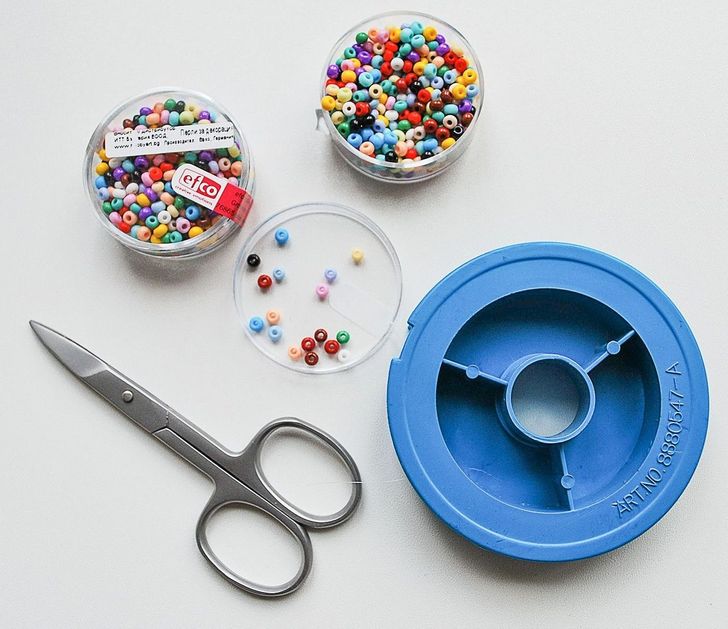
You’ll need:
- beads in different colors (it will be easier to start with big beads)
- scissors
- thin fishing line
You can use thin wire, elastic thread, or regular thread instead of fishing line. If you decide to use regular thread, it will be easier to string beads with a needle or you can apply nail polish to the end of the thread to make it hard.
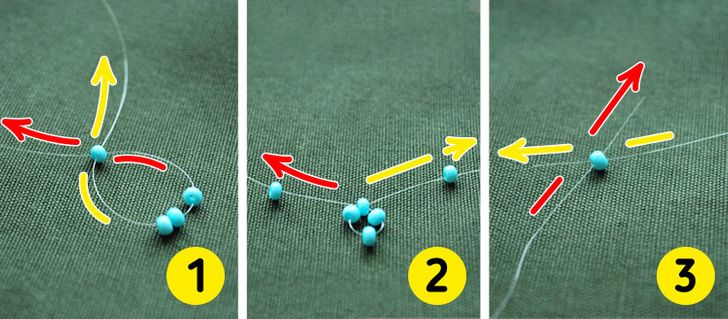
The right-angle weave is one of the simplest techniques. Cut a piece of fishing line that is equal to 2 lengths of the finished bracelet. Usually, this is about 16 inches. Put the beads on a piece of fabric — it will be more convenient to grab them this way.
- First, string 4 beads to the middle of the line. Take the outermost bead on the left and pass the right end of the line through it. The ends of the line should come out through the opposite holes of the bead forming a loop of beads. Now tighten the ends so that the beads gather into a cross.
- String one bead on one end of the line, and 2 beads on the other.
- Now you need to connect the ends through the outermost second bead and tighten them, making the chain of crosses longer. Continue to weave by adding one bead on each side and then tightening the ends through the outermost bead.
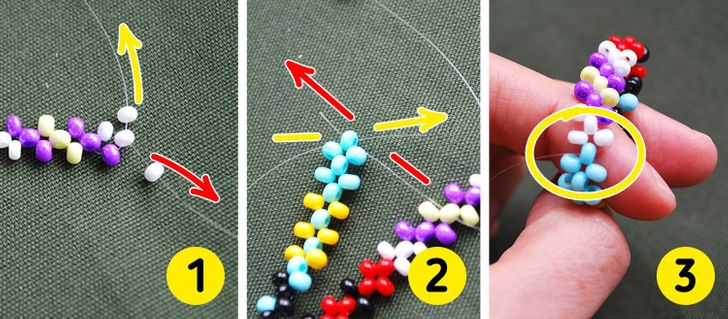
By combining beads of different colors, you can create unusual patterns on the bracelet. If you want to loop the bracelet making the connecting spot invisible, you need to:
- Make the last cross in the chain and string one bead on each end of the line.
- Pass the ends of the line through the very first bead at the beginning of the chain.
- Tighten the ends of the line after having connected the ends of the bracelet.
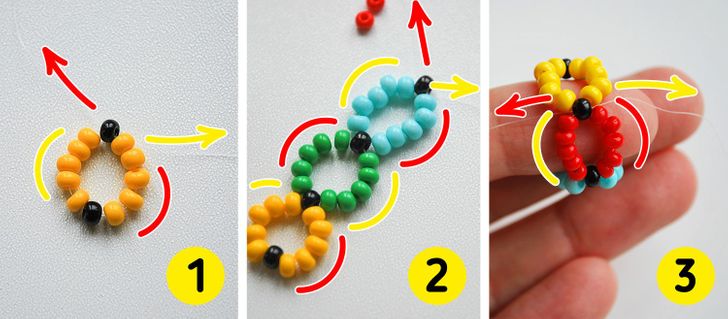
Feel free to experiment with colors, sizes, and the number of beads. In the photos above, the weaving is similar to the right angle weaving, but you should use more beads on the sides.
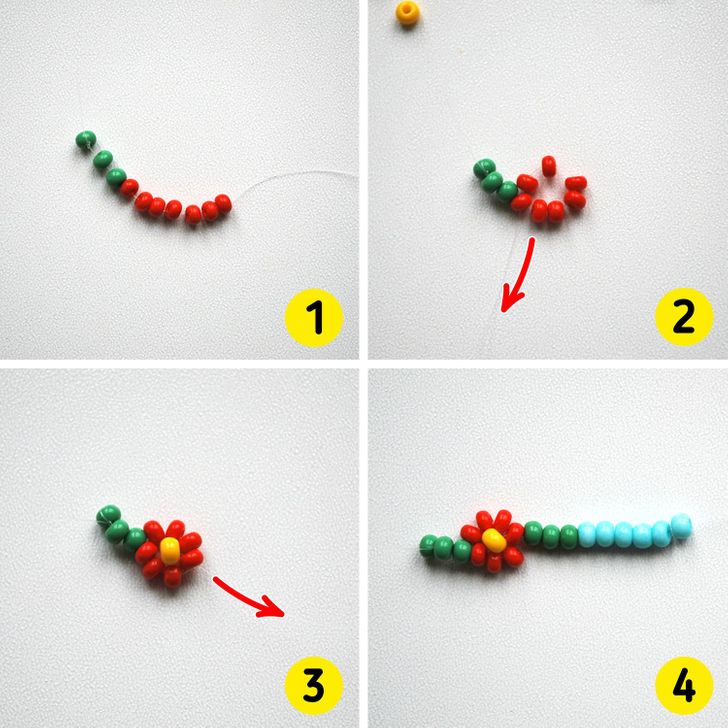
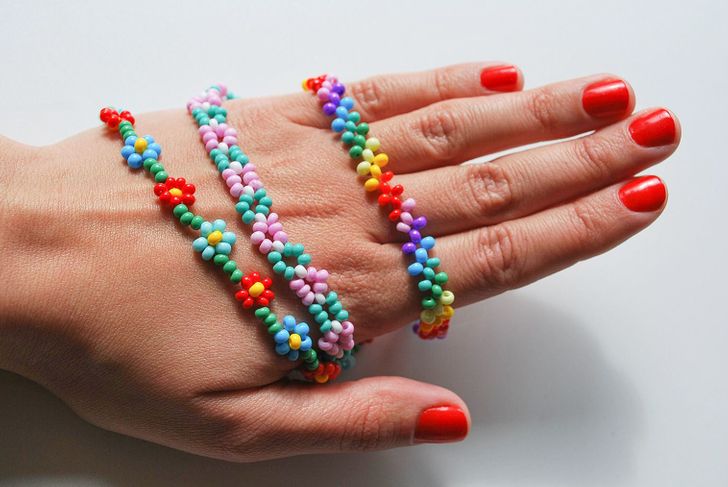
Another simple technique of weaving is a bracelet made of a chain of flowers.
- String one green bead on the fishing line, slide it down almost to the other end of the fishing line and tie a knot around the bead. Now slide down 2 more green beads and 7 red ones.
- Pass the end of the line through the very first red bead to make a loop. The red beads will form a circle.
- Pick up a yellow bead on the fishing line. Pass the end of the line through the bead in the middle of the red circle so that the yellow bead becomes the middle of the flower.
- Next, pick up beads for the next flower to continue the weaving in the same way. The number of beads for flower petals may vary depending on the size of the yellow bead in the middle: the petal beads should form a tight circle around it.
A more complex technique is the square stitch bead weaving that allows you to create bracelets with names and illustrations. This type of weaving requires a thin needle and thread.
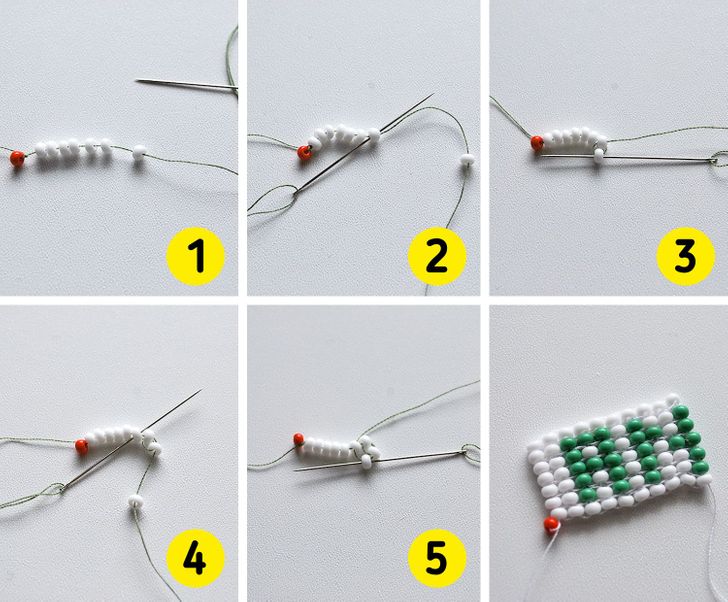
- Take a needle and thread it. First, pick up one bright bead and tie a knot on it. Then pick up 7 white beads. This will be the first row.
- Then pick up another bead and pass the needle and the thread through the last bead of the first row. This way, you will tie the bead of the new row to the previous one.
- Now pass the needle through the first bead of the new row again. This way you’ll secure it in place.
- Pick up the second bead for the new row, then pass the needle through the second to the last bead of the first row.
- Now secure the second bead by passing a needle through it. Continue to weave in this technique. When you reach the end, tie a hard knot on the last bead.
In the photos above, we used a thread of a contrasting color to show the weaving technique. In reality, it’s worth choosing a thread that will merge with the color of the beads.
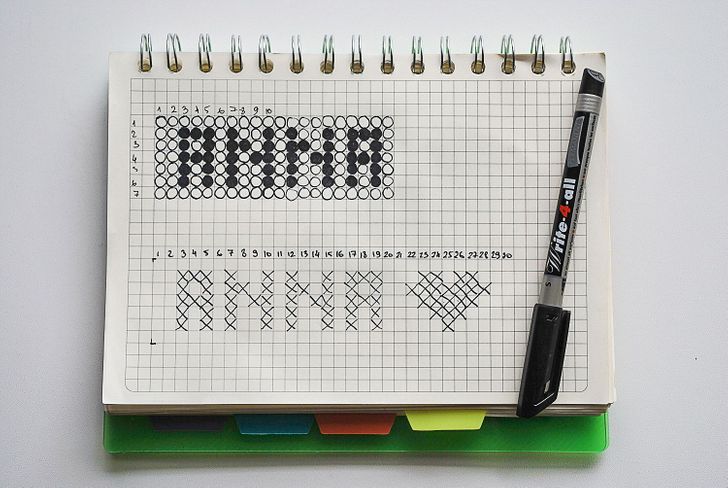
Once you understand this technique, you can weave a bracelet with a name on it. In order to not get confused in the process of work, try to make the weaving pattern on a sheet of graph paper beforehand. The picture above shows 2 ways of creating the weave pattern for a bracelet with the name Anna on it.
How to make a rubber band bracelet
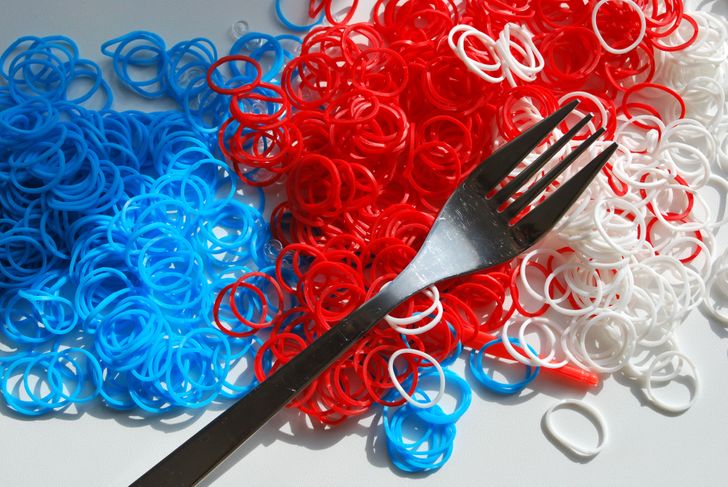
You’ll need:
- colorful rubber bands
- hooks for rubber band weaving
- plastic rubber band S clips
- an ordinary fork
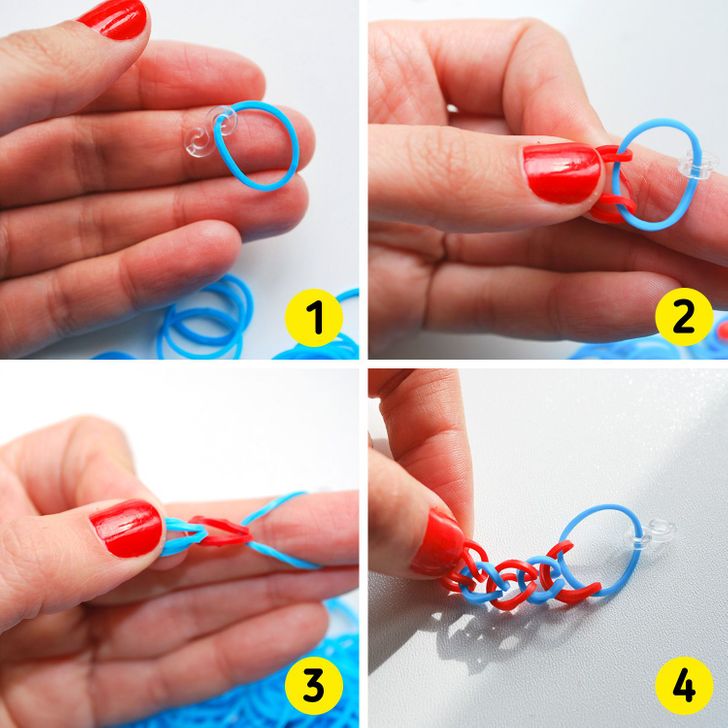
The simplest rubber band weaving techniques are based on the fact that rubber bands should be folded in half to form loops, and wrapped around each other. The process of the weaving can be like this:
- Attach a plastic S clip to the rubber band.
- Wrap the second band around the first one.
- Repeat the previous step — wrap another blue band around the red one.
- Continue to weave using this technique.
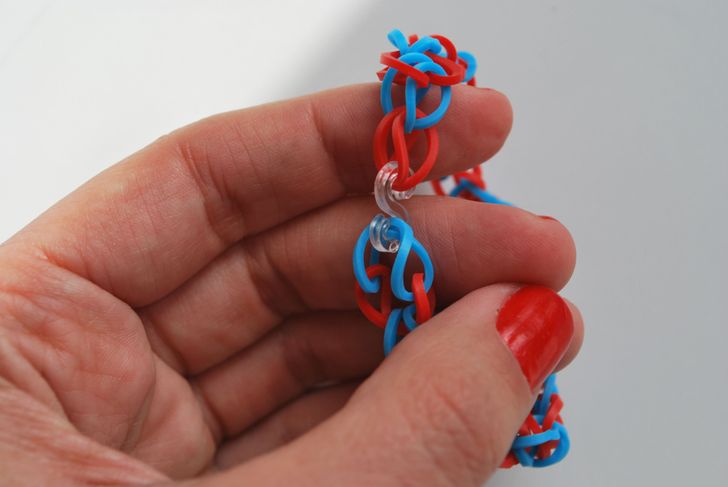
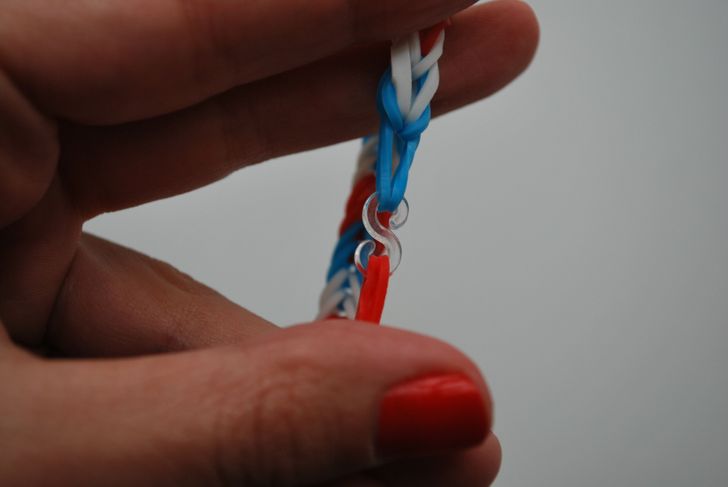
Attach the last rubber band, folded in half, to the S clasp. Next, fold the very first band in half too and fasten it to the S clip as shown in the photo above.
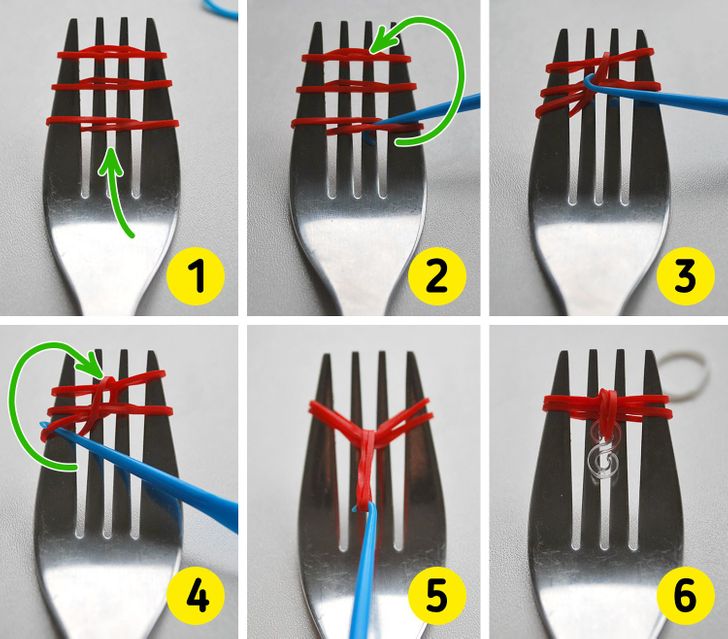
The fishtail weaving technique is a little more complicated. But, after having mastered the basic steps, you can weave bracelets in a matter of minutes.
- Take the fork. Twist the rubber band in the middle and put it on the outer tines. Add 2 more rubber bands on top without twisting them. Bear in mind that rubber bands shouldn’t be put on the inner tines (they are not involved in the process, since this type of weaving uses only the outer tines).
- Hook up the lowest band on the right side.
- Pull it up taking it off the tine.
- Repeat the same action on the left side by pulling the band up to take it off the tine too.
- Pull the taken-off band toward yourself, as shown in the photo above.
- Attach the plastic S clip to it.
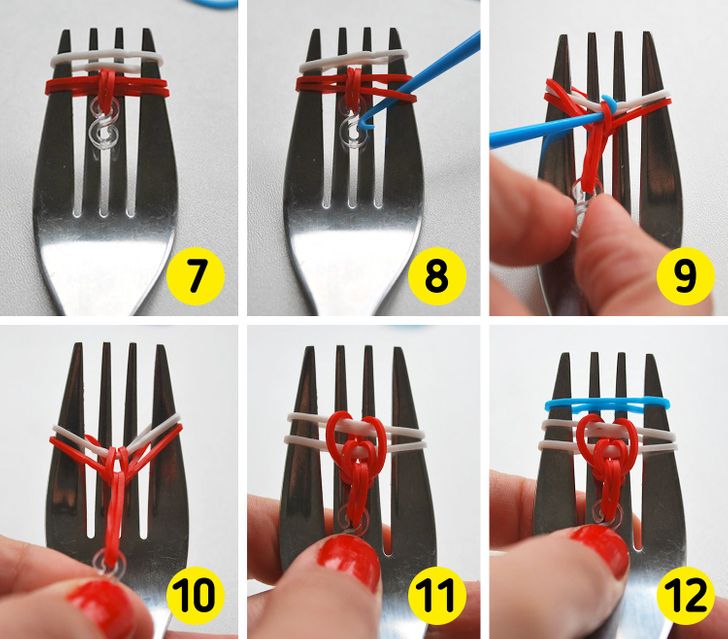
7. Put another rubber band on the fork without twisting it in the middle.
8. Hook up the lowest rubber band on the right side and pull it up.
9. Take it off the right tine. This will move the right end of the lowest band to the middle.
10. Repeat the same action on the left side.
11. As a result, the band will hang in the middle, becoming the next link of the weave.
12. Put another rubber band on top and continue to weave until the bracelet reaches the desired length.
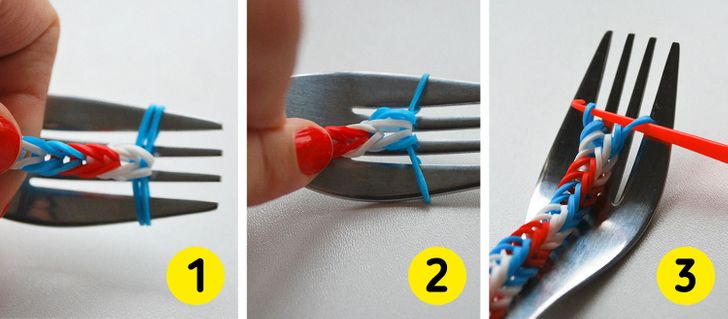
When you want to finish the bracelet, there should be 2 rubber bands on the fork. Don’t add a third one. Do this instead:
1. Take the bracelet in your hand and pull it slightly away from the fork. Lift the right end of the bottom rubber band and pull it off the tine. Repeat the same action on the left side.
2. Now remove the rubber band from one tine by transferring it to the hook.
3. Repeat the same action on the other side so that the last rubber band is completely on the hook.
It’s more convenient to use a special slingshot instead of a fork. You can buy this slingshot in a sewing store.
You can weave a more complex voluminous bracelet on a fork.
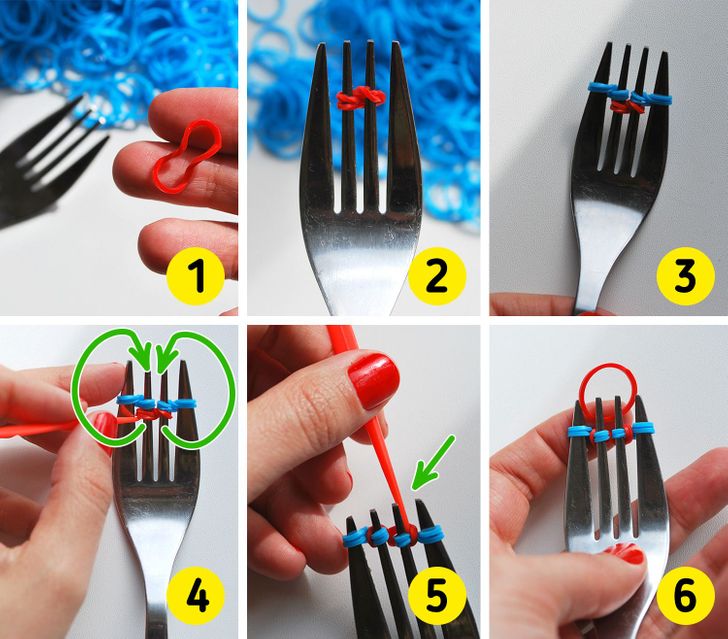
1. Take a rubber band and fold it in half.
2. Twist it in the middle and slide it over the inner tines of the fork.
3. Repeat this step by putting the rubber bands, in the same way, on the outer tines.
4. Using the hook, grab the loops of the lower rubber band.
5. Take them off the tines so that they are on the back of the fork.
6. Now slide a new elastic over the inner tines by folding it in half.
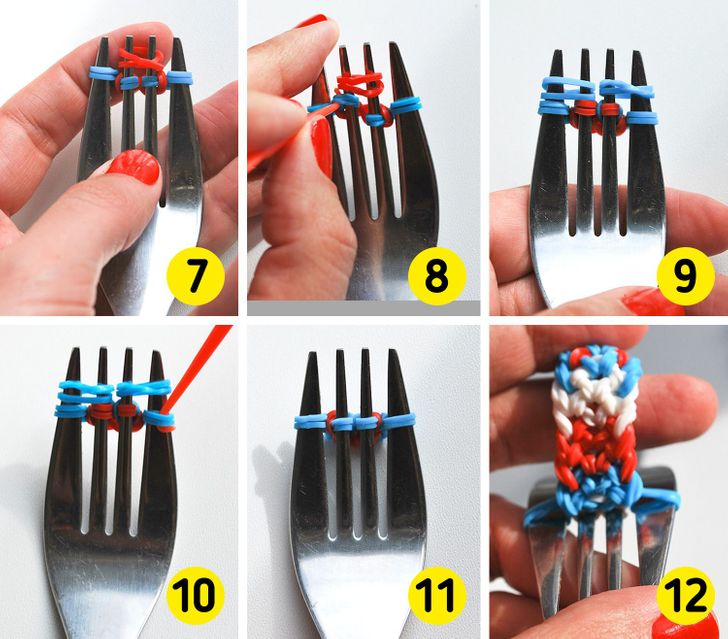
7. Look at the photo above — new rubber bands shouldn’t be twisted in the middle.
8. Hook up the loops of the rubber bands that are under the new red rubber band. Pull them up and off the tines so that they are on the back of the fork.
9. Put new rubber bands on the outer tines.
10. Hook up the loop of the lowest rubber band on the right side and pull it upward and backward taking it off the tine.
11. Repeat this step with the rest of the lower rubber bands.
12. Thus, the bracelet will gradually become longer on the back side of the fork.
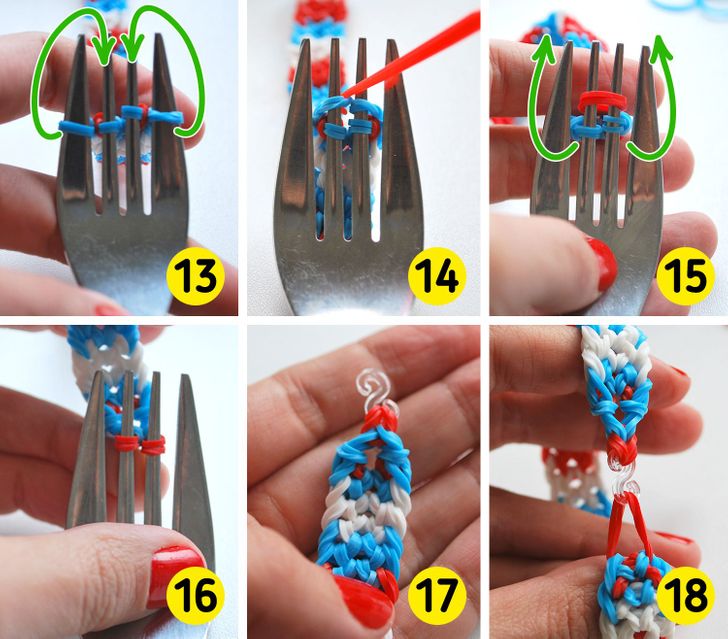
13. Once the bracelet reaches the desired length, grab the outermost loops with the hook and transfer them to the inner tines.
14. Pull the lower loops upward and backward taking them off the tines.
15. Put a new rubber band on the inner tines. Pull the loops of the lower rubber band upward and backward, taking them off the tines.
16. Transfer the loops from the inner tines to the S clip.
17. One end of the bracelet is ready.
18. You just have to hook the other side of the clip to the very first loop of the bracelet, and the bracelet is fully done.
