How to Make a Hanging Bookcase and Add a Creative Touch to Your Book Storage

Discover how to create a sleek and modern book hanger using a wooden hanger. This DIY project not only adds a stylish touch to your home decor but also keeps your favorite books within easy reach. Whether you’re a minimalist enthusiast or just looking for a creative way to display your literary treasures, this article has you covered.
Materials you will need

- Hanger
- String or cord
- Beads
- Books
1. Cut a piece of rope and fold it into four parts, this will be the final length they will have
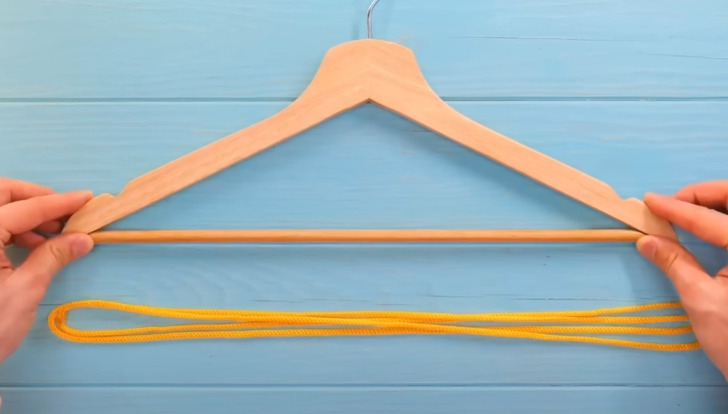
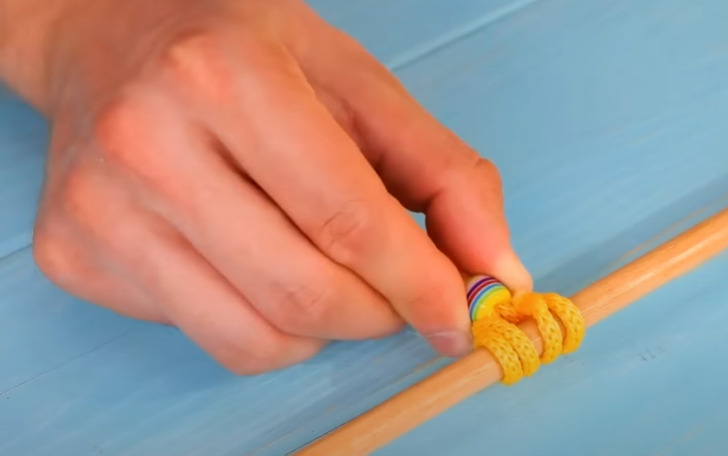
2. Close the string at both ends and place the end without a knot beneath the hanging rod of the hanger
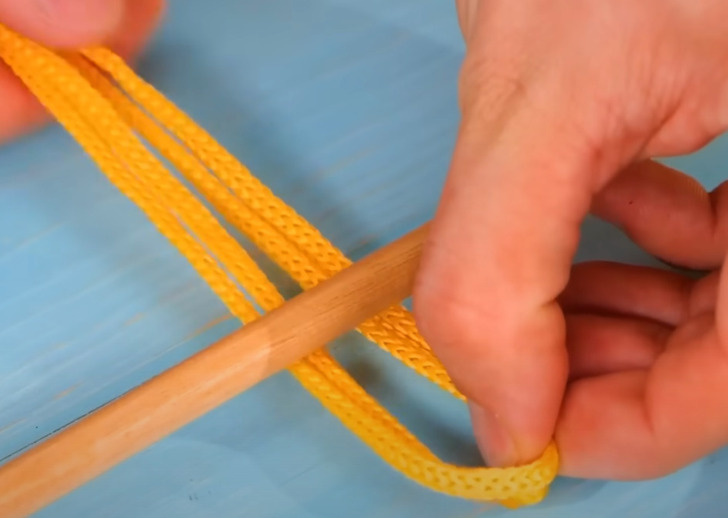
3. Insert the opposite tip into the loop you’ve created so that the string encircles the hanger
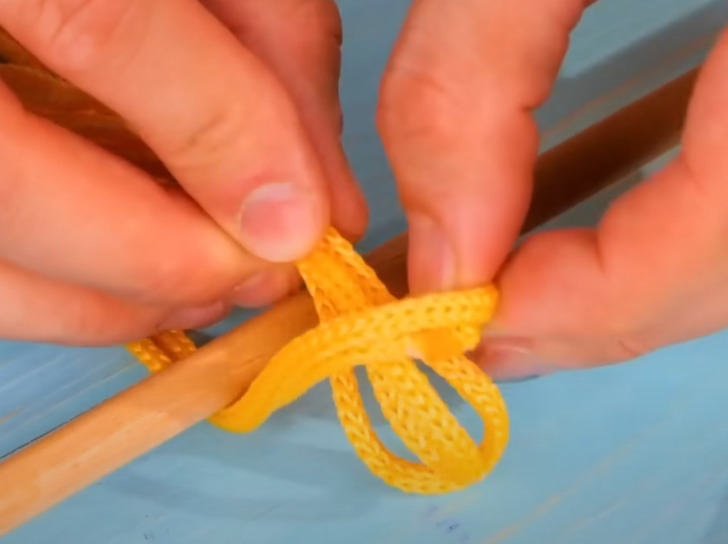
4. Pull to tighten it securely
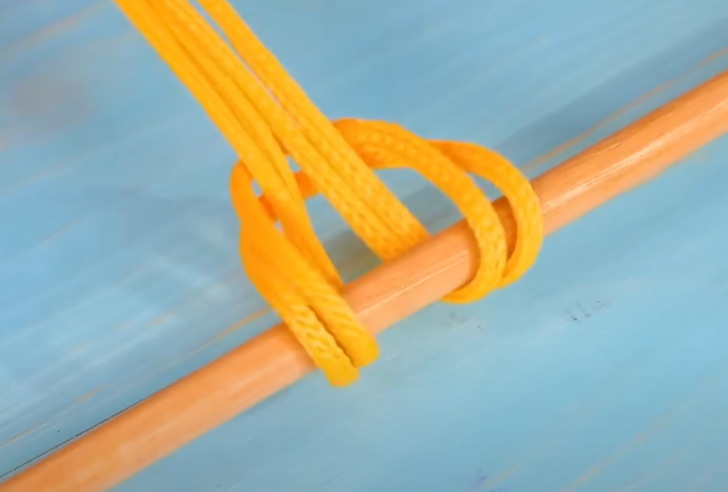
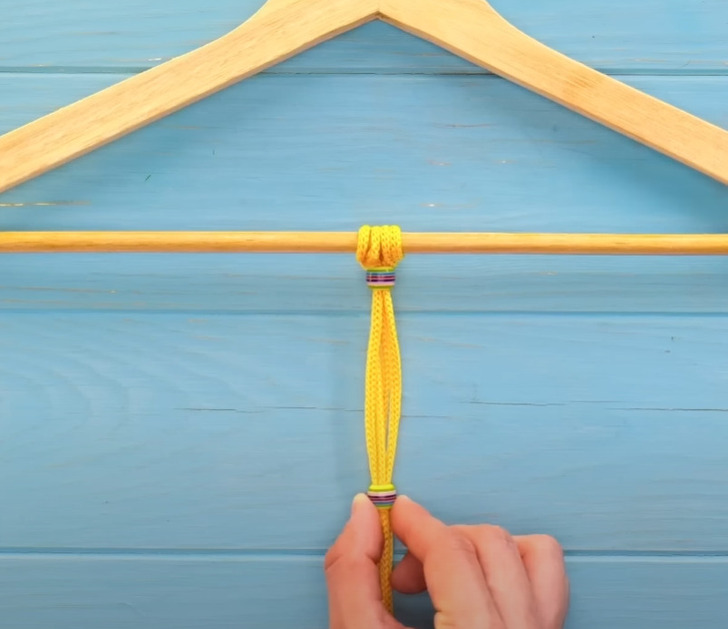
5. Thread the strings through two beads, one for holding the top section
6. The other for securing the books in the middle of the string
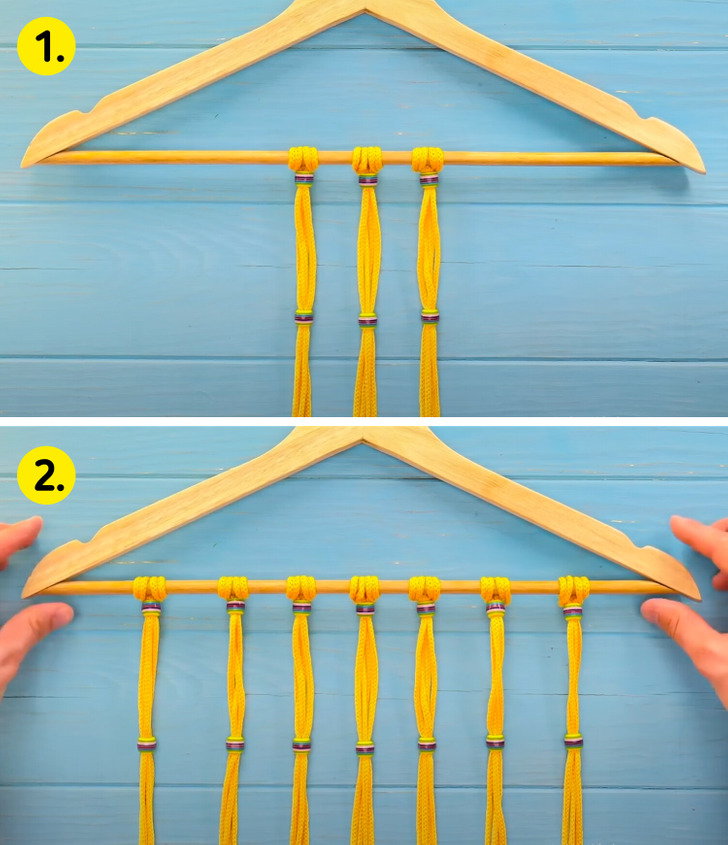
7. Add as many strings as you desire and that can fit to create multiple hanging points
8. Hang the hanger on a wall-mounted hook or nail, ensuring it’s securely fastened

9. Slide the books onto the strings

10. Use the beads to hold them in position

11. Continue placing books on the rest of the available ropes

Check out more amazing DIYs for every occasion
Share This Article