How to make a self watering mini garden
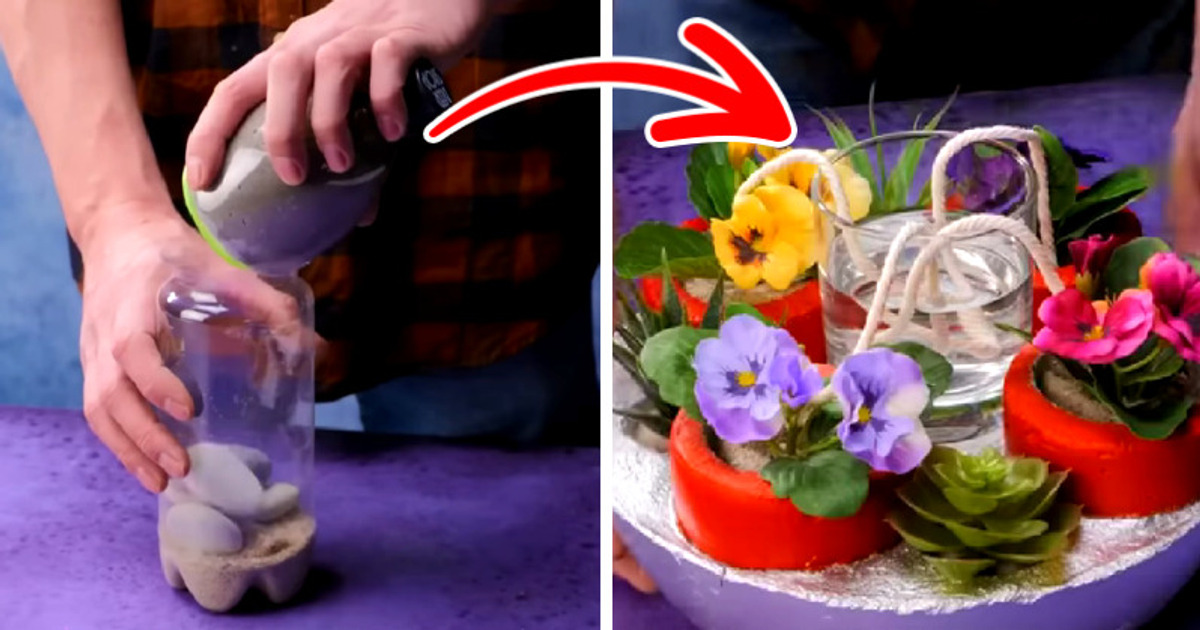
The idea of gardening has evolved, adapting to our busy schedules and urban lifestyles, giving rise to innovative solutions such as self-watering mini gardens. These small, yet beautiful oases, not only add charm to our living spaces but also make it easier to cultivate and care for plants, even if you have limited time or gardening experience. Here, we will walk you through the steps to craft a self-sustaining, miniature botanical haven that will brighten up your living space and inspire you to connect with nature in a whole new way.
What you’ll need
- Sand
- Cement
- A cutter
- An ice cream scoop
- A plastic bottle
- A plastic cup
- A glass cup
- An absorbent string
- Stones
- A plastic bowl
- Paint
- Soil and flower plants
How to do it
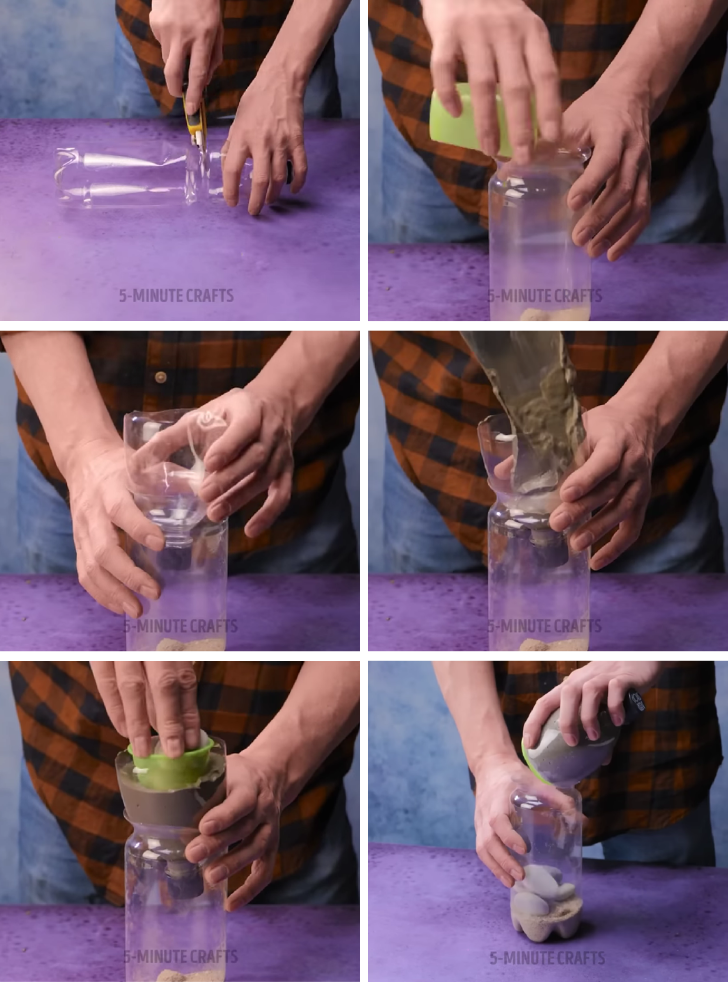
- Cut off the upper third of plastic bottle
- Put some sand inside the bottle base
- Put the other part of the bottle in the base, facing down
- Fill it to the half with cement mix
- Dip the plastic cup in the cement
- Put the stones inside the cup and let it harden
- Repeat the process for three more pots
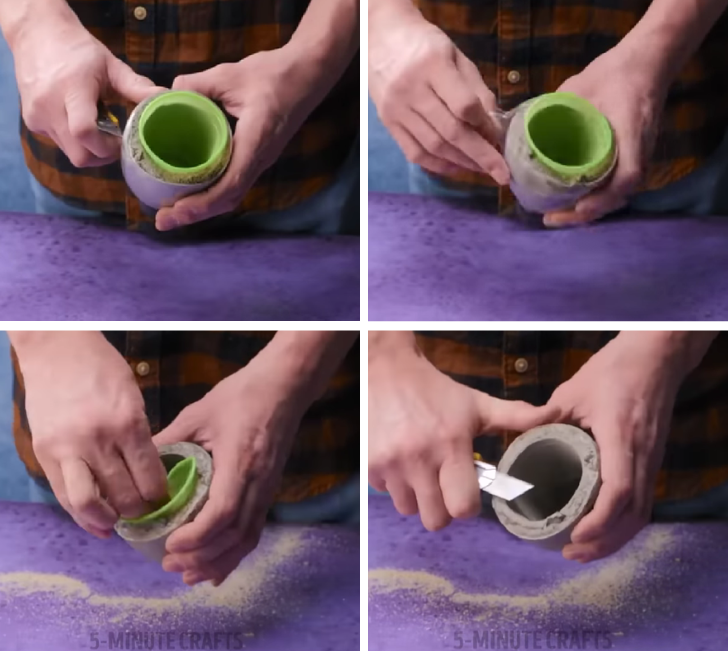
- Remove the plastic around the cement pots
- Remove the cup inside them
- Cut edge irregularities, with the cutter
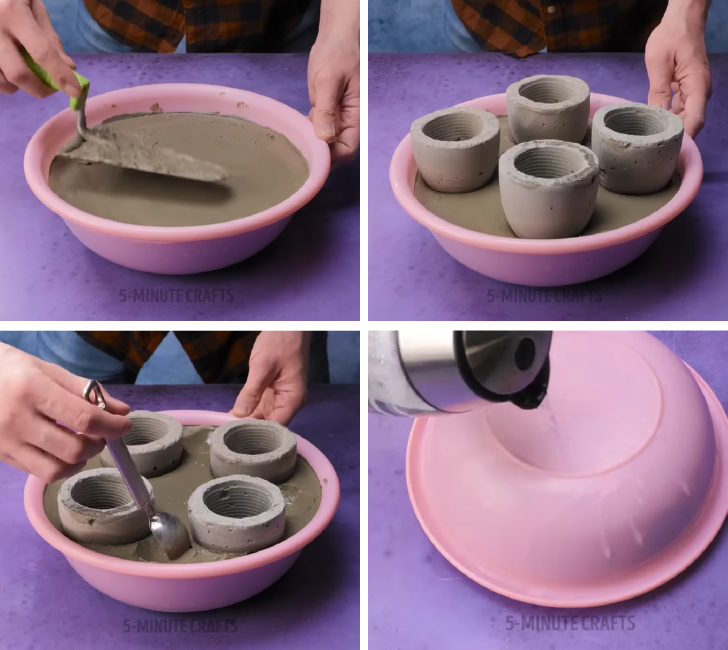
- Pour cement base inside the plastic bowl and flatten it
- Put the pots in the cement
- Take one scoop of cement out from besides each pot
- Let it harden
- Flip the bowl down and pour some hot water onto it to unmold
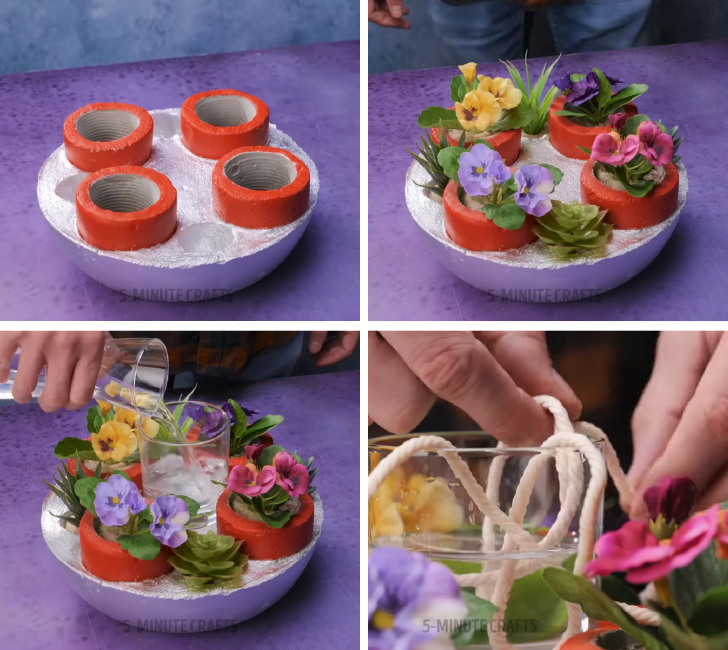
- Paint the base and pots
- Put the soil and plants in the holes
- Place the glass cup in the middle of the garden
- Fill the cup with water and put the strings inside to absorb water
- Put one edge of the strings in each pot
Check the video for more amazing cement crafts
Share This Article