How to Make a Shopper Bag
Shopper bags are practical, spacious, and easy to wash. Additionally, they help the environment since they can replace plastic bags. Such a bag can be folded compactly and taken with you on shopping trips.
5-Minute Crafts wants to tell you about some easy ways to make a shopper bag yourself. At the end of the article, there’s a bonus tip waiting for you to help give you ideas on how to decorate this ready-made tote.
Option #1
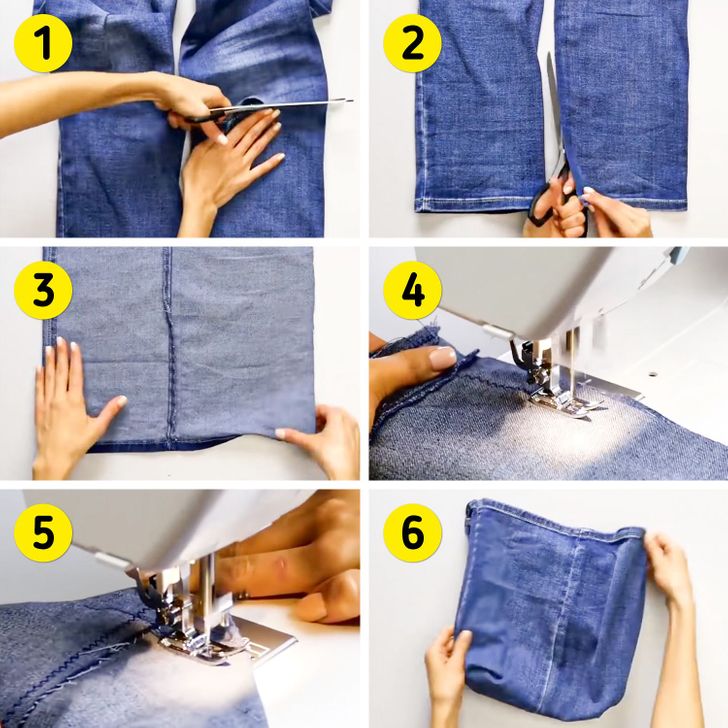
1. Take a pair of jeans and cut off their legs right under the spot where your knees would be located.
2. Cut each trouser leg along the line of the inseam.
3. Unfold the cut trouser legs and place them with their obverse sides flat against each other.
4. Stitch your future shopping bag on a sewing machine on 3 sides. Leave the part of the soon-to-be bag unstitched in the place where the lower edge of the trousers was located, this bottom part will be the upper part of your bag.
5. Stitch the corners of the bag diagonally (see the photo) to create the bottom part of the bag.
6. Turn the item inside out.
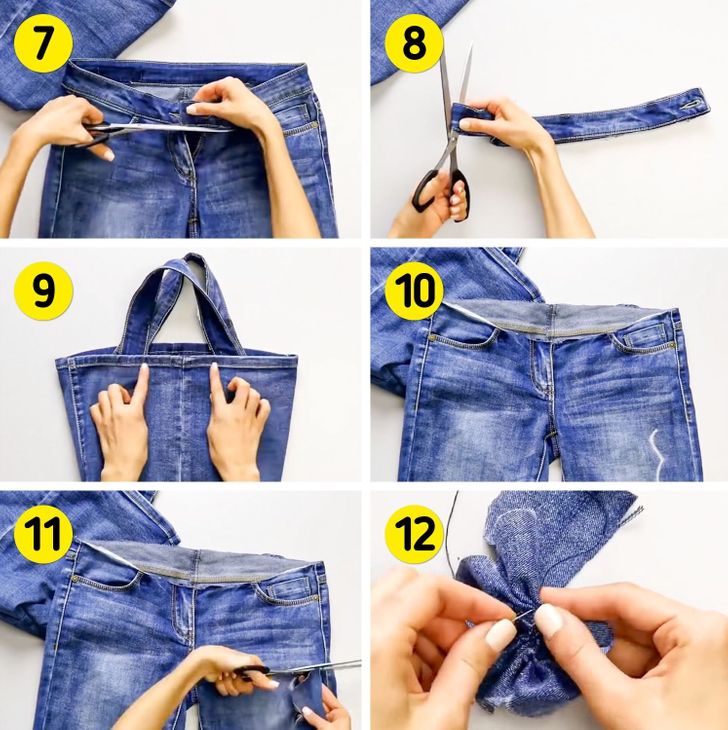
7. Remove the waist part of your jeans.
8. Cut it in half.
9. Stitch 2 parts of the belt to the bag to make handles, just the way it’s shown in the photo.
10. Apply a wavy line to the rest of the jeans with the help of tailor’s chalk.
11. Cut out an inkle that will have a wavy edge on one side and a straight edge on the other side.
12. Collect the cutout inkle on a thread and make a flower out of it.
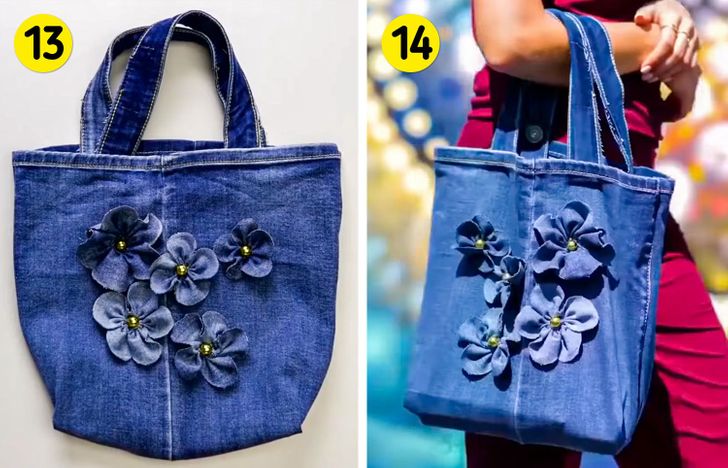
13. Attach the flowers you made to the bag. Sew or glue a bead or a beautiful button over each flower.
14. It’s gorgeous!
Option #2
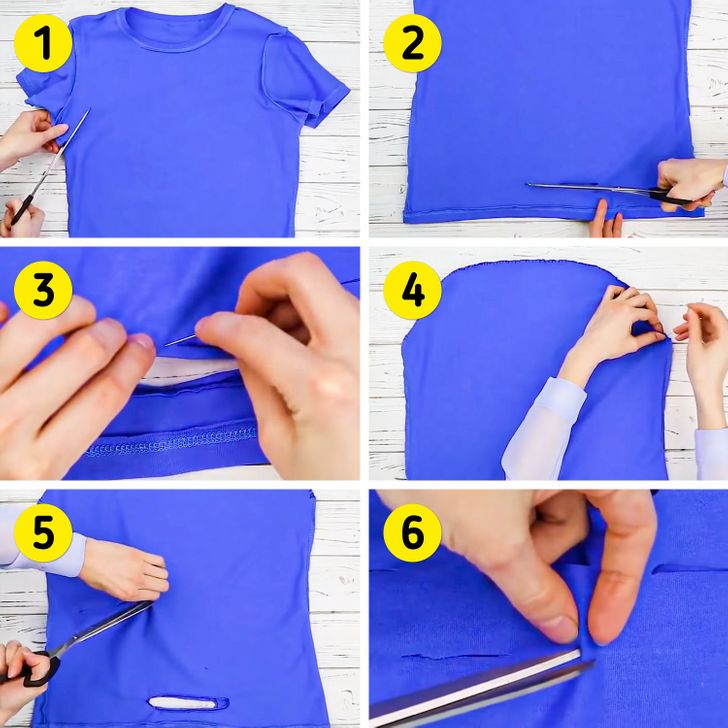
1. Take an old T-shirt and cut off the sleeves and neckline.
2. Make a cut in the middle of the bottom part of the former T-shirt.
3. Hem the slit and stitch it carefully by hand with matching thread.
4. Stitch the place where you cut off the sleeves and the neckline. It will be the bottom part of your bag.
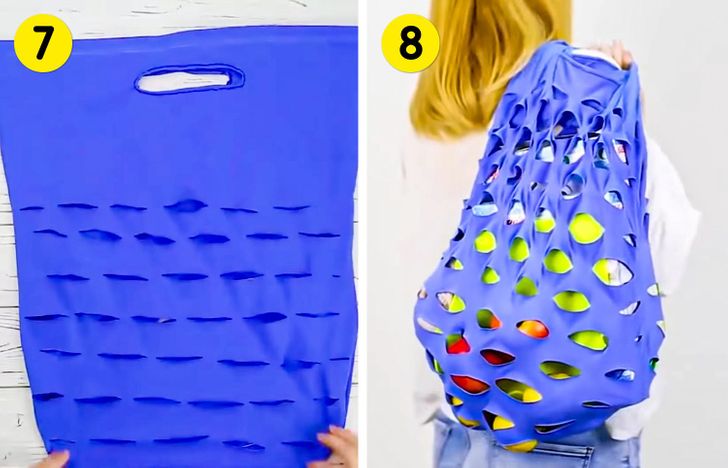
5 and 6. Leave some distance at the top and make the slits on the front part of the bag.
7 and 8. Your shopper bag is ready!
Option #3
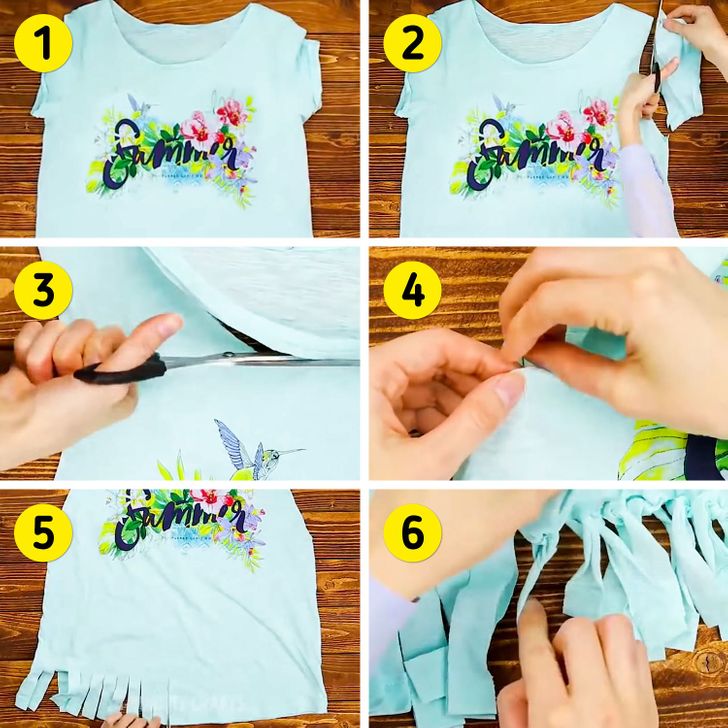
1. Take a T-shirt.
2. Cut off the sleeves.
3. Cut off the neckline.
4. Hem the sleeves and the neckline and stitch them carefully.
5. Cut the bottom part of the shirt into a fringe.
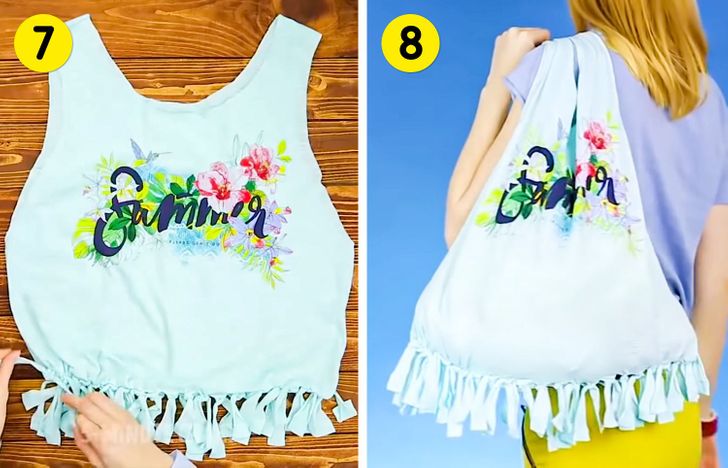
6. Tie the fringe pieces in pairs — make a double knot with every 2 fringes.
7. Tie all the fringes from the beginning to the end of the bottom part of the bag.
8. It’s gorgeous!
Bonus: how to decorate a ready-made shopper bag
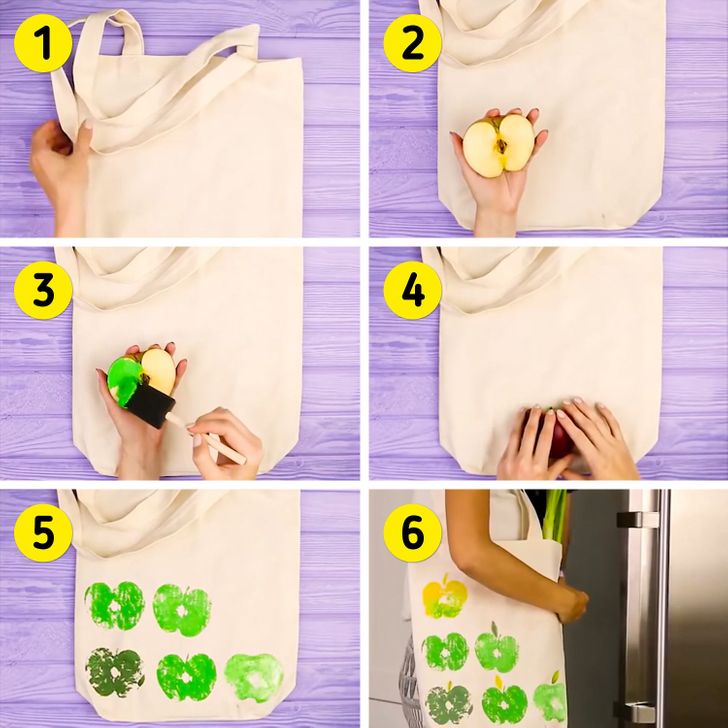
1. Get a ready-made shopper bag in a neutral color.
2. Cut an apple into 2 halves.
3. Cover half of the apple with acrylic fabric paint.
4. Apply the apple to the bag.
5. Use the apple as a stamp, cover it with fabric paint, and press it to your bag.
6. Your renewed shopper bag is ready!
