How to Make Christmas Tree Alternatives
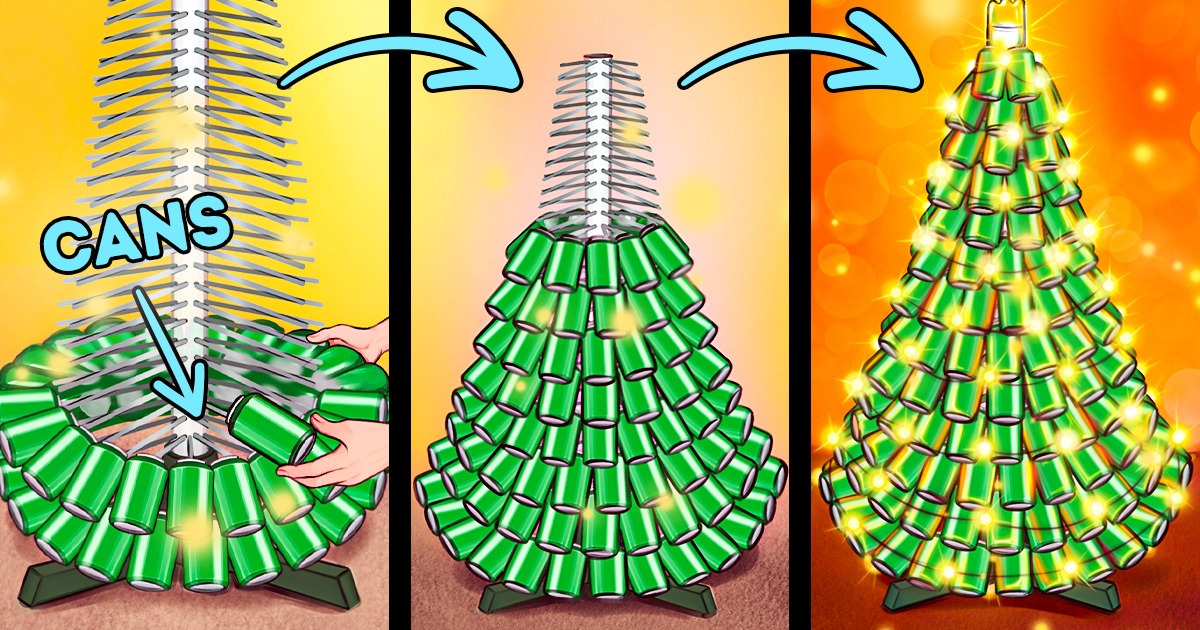
The Christmas tree is, hands down, one of the most important centerpieces of the best, festive time of the year. However, sometimes you may be inclined toward using Christmas tree alternatives; whether you want to save money, have better artistic décor in your home, or pursue a sustainable, eco-friendly lifestyle.
On this page, 5-Minute Crafts will show you how to make Christmas tree alternatives.
Way 1: ribbon candy cane Christmas tree
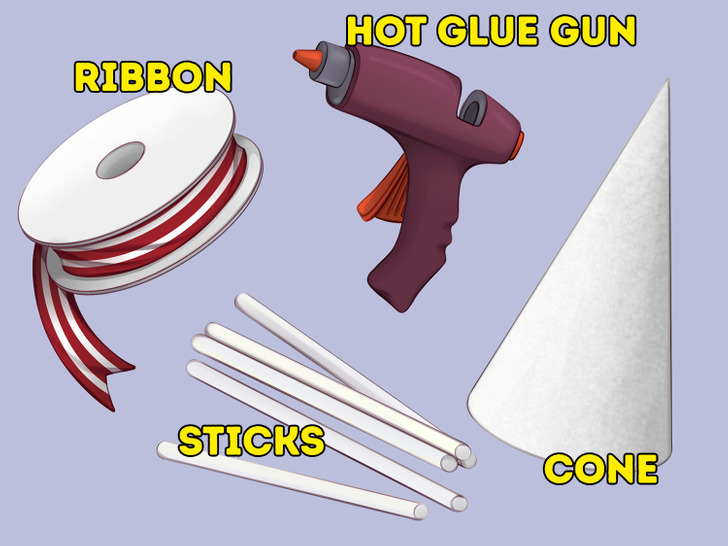
You’ll need:
- 1.5 inches (~3.8 cm) of ribbon
- Hot glue gun and glue sticks
- Paper cone
How to make it:
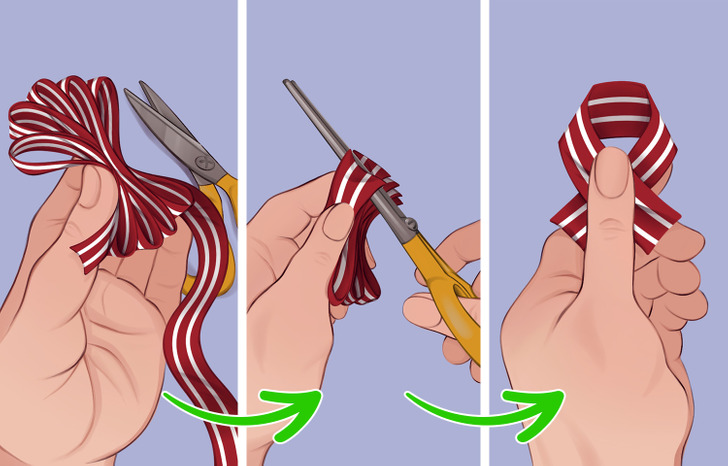
Step 1: To prepare the ribbon, loop it 3 inches (~7.6 cm) in diameter, and cut the loop on one side only. This way, when you open the loops, they will be nearly 6-inch (~15.2 cm) long strips. Then fold each strip into a tear shape.
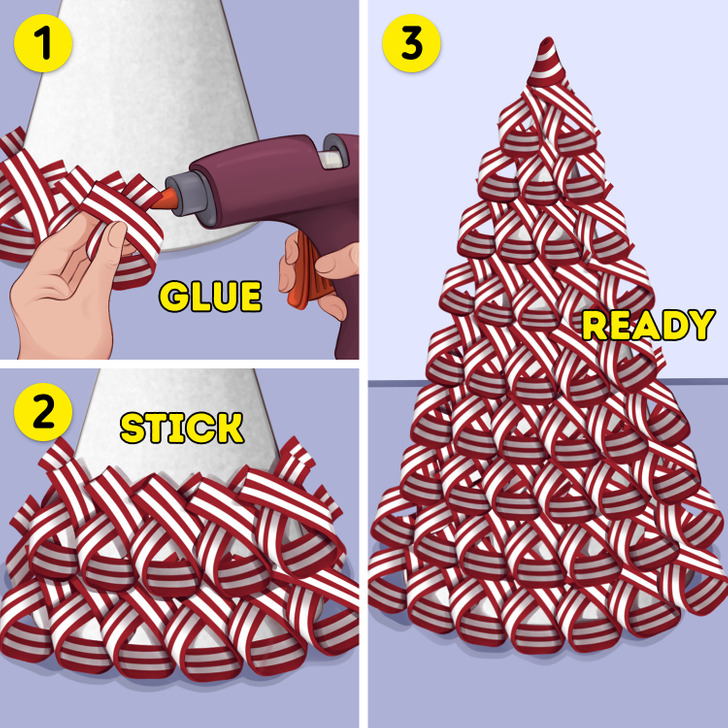
Step 2: Glue your first row of ribbons on the cone using a hot glue gun. Notice how the bottom row of the ribbon loops is wide. Keep gluing the rest of the loops around the cone until you reach the top. Your candy cane Christmas tree is ready!
Way 2: soda can Christmas tree
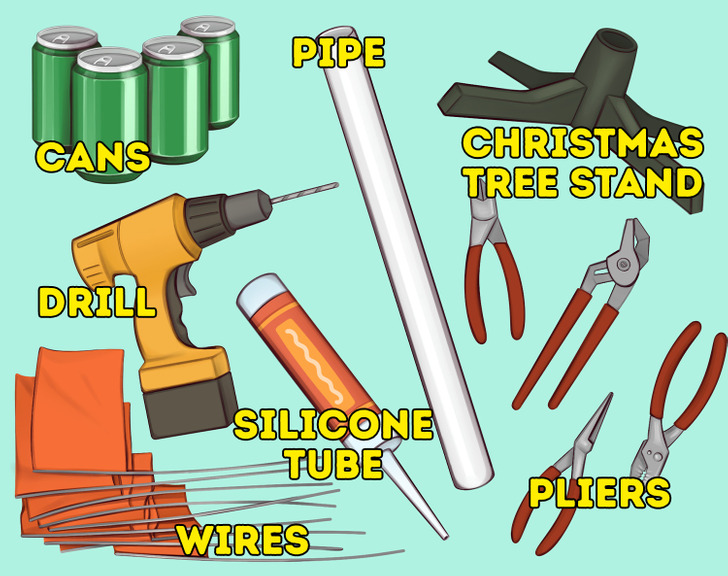
You’ll need:
- Around 400 green, empty soda cans
- Construction flag wires
- 2 inches (5 cm) of PVC pipe
- A power drill with a 1/8-inch (~0.30 cm) drill bit
- A tube of silicone bathtub caulking cement (optional)
- Pliers
- 2-inch (5 cm) Christmas tree stand
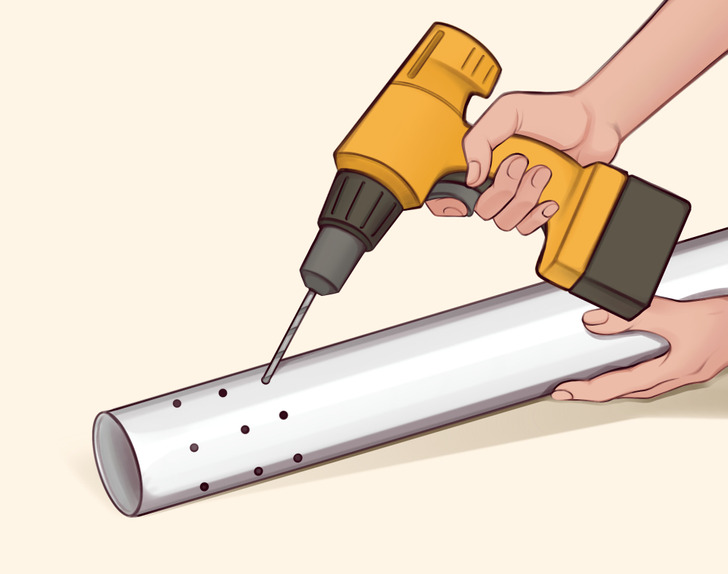
How to make it:
Step 1. With the spiral pattern of each revolution to be 4 inches (10 cm) in height, drill holes on your PVC pipe for the wires to go in. For your safety, place the PVC pipe outside on the ground and drill the holes.
Note: Make sure to have the total number of required holes within every 4 inches (10 cm) of pipe.
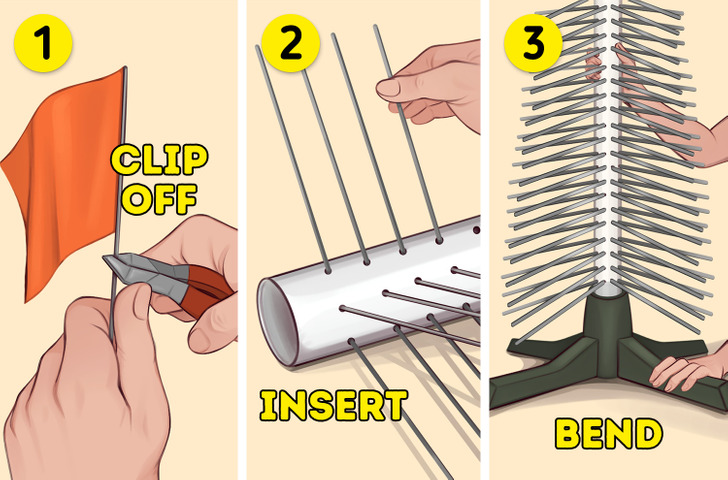
Step 2: Clip the wires off of the construction flags. Insert the PVC pipe into a tree stand. Then, starting from the longest to the shortest, carefully insert the wire into each hole on the pipe, and bend the wires around 3/4 inches (~2 cm) on both ends so that they make an “L” shape at a right angle.
Tip: Insert the longer wires to the bottom and the shorter ones toward the top part of the pipe. You can use silicone cement on each end for a permanent attachment.
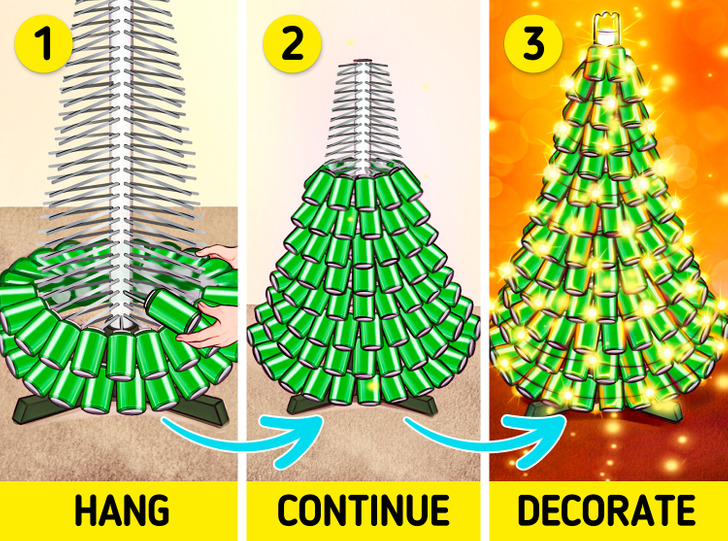
Step 3: Then start hanging the cans on each end of each of the wires. Once you’ve reached the top, you can insert an empty plastic bottle cut from the bottom with a 25-watt appliance light bulb or an 11-watt compact fluorescent bulb in it. It’s time to decorate the tree with Christmas lights and ornaments!
Way 3: dream books Christmas tree
You’ll need:
How to make it:
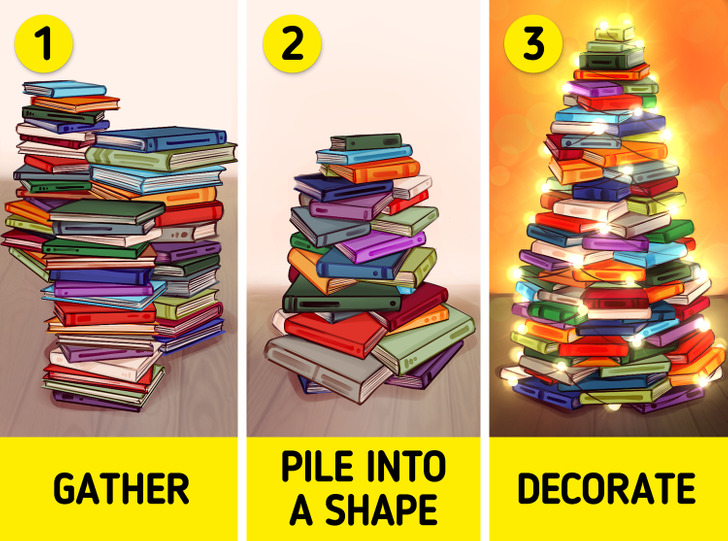
Step 1: Grab nearly 100 books of any size and dimension to make a 3-foot (1 meter) book tree. The shape of the tree depends on the number of books you use. A triangular base is achievable with 100 books using the largest and widest ones at the bottom.
Step 2: Once you have a solid base, keep piling up the books; use smaller ones for each new layer and the smallest pocketbooks to finish the treetop. Decorate as you like!
Way 4: plastic spoon Christmas tree
You’ll need:
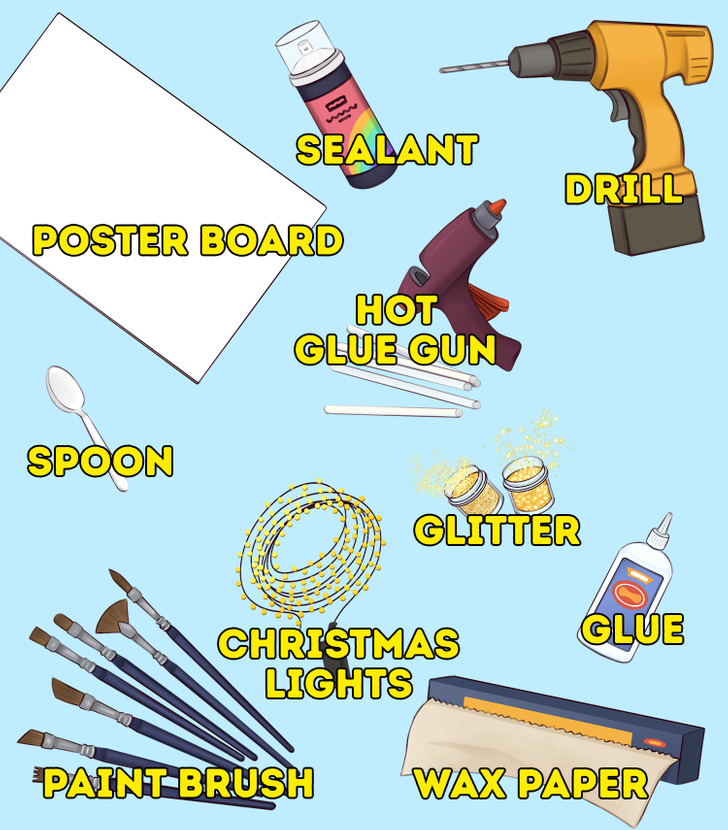
- Teaspoon-sized plastic spoons
- A poster board
- A hot glue gun
- Glitter
- PVA glue
- A craft paintbrush
- Wax paper
- Acrylic spray sealant or gloss finish
- A power drill with 1/8-inch (0.3 cm) drill bit
- Christmas lights
How to make it:
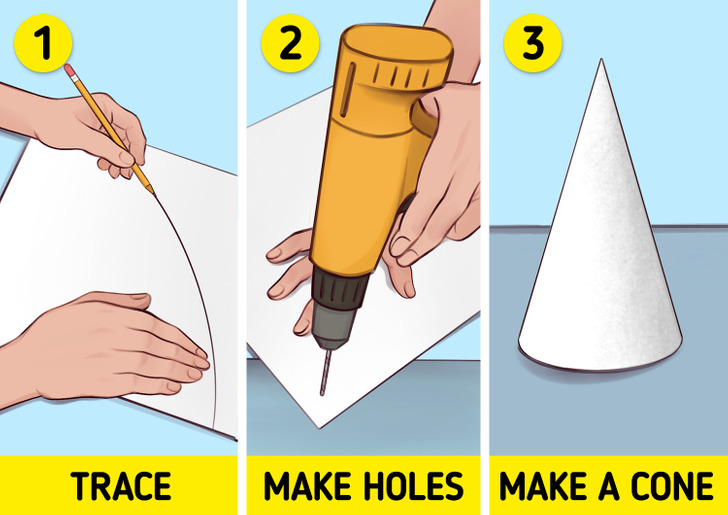
Step 1: Cut a poster board and create a cone. To do so, place one of your hands on one corner of the board and trace an arc with the other hand. Then cut out the cone. Using a drill, make holes on the cone. Aligning the bottom and top, glue the poster into a cone shape.
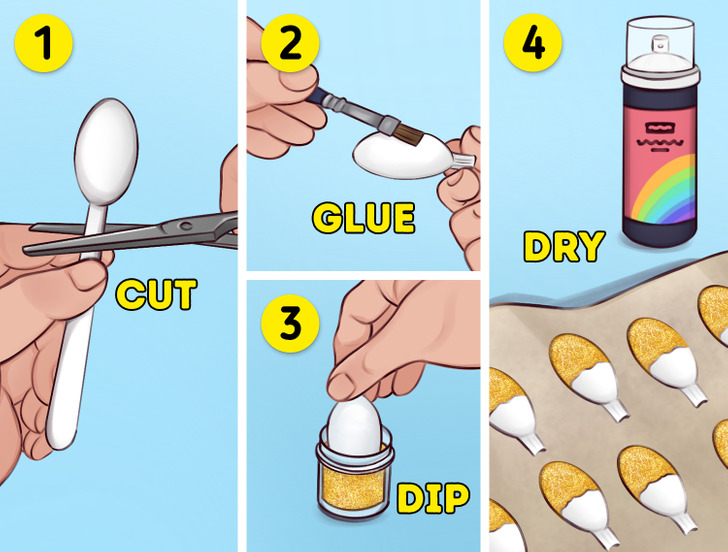
Step 2. Using scissors, cut handles off the plastic spoons that are 80-120 in number. Using a craft paintbrush, glue and add glitter to the spoons. Dip the spoon into the glitter and place it on wax paper to dry.
Tip: When the spoons are dry, lightly spray them with an acrylic sealant that prevents the glitter from falling off.
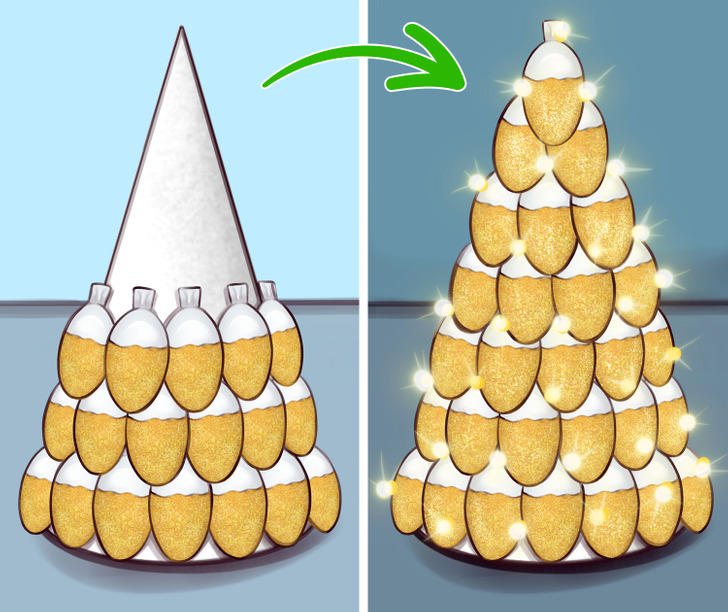
Step 3. Starting from the bottom, glue the spoons onto the cone in a full circle. Your tree is ready when you finally reach the top!