How to Make Coasters
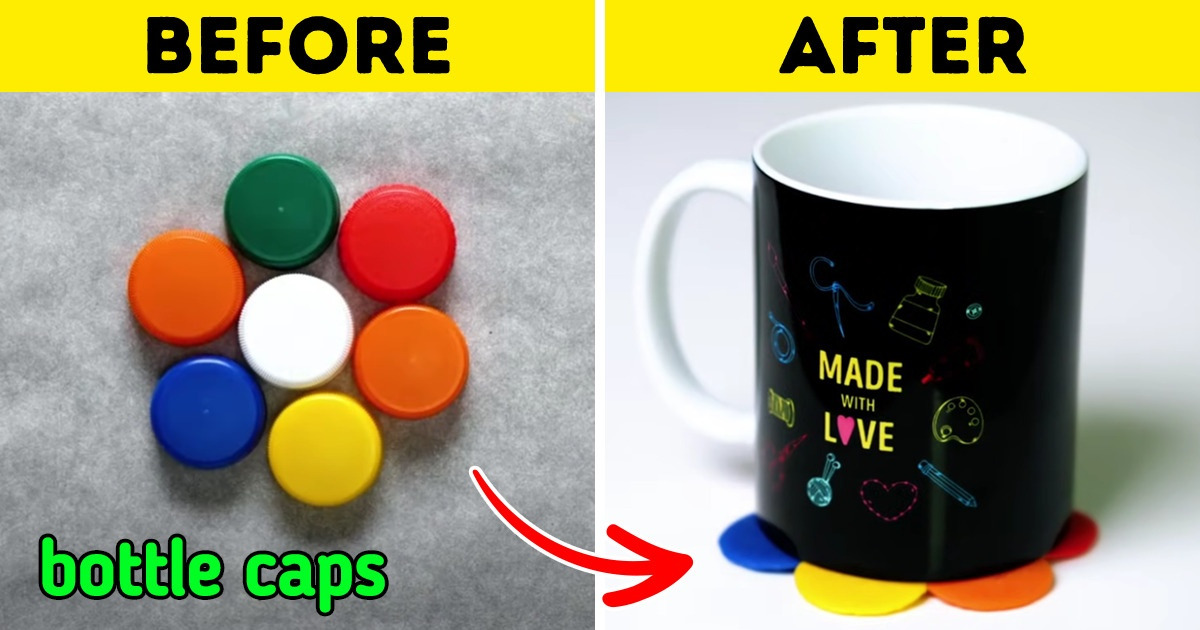
Adding spice to your everyday routine will make you feel better. Small details like coasters can turn your coffee experience up to a higher level. To help you achieve this, 5-Minute Crafts has highlighted the best ways you can make reusable coasters at home.
1. Wooden coasters
Materials that you will need:
- plywood
- white marker
- washi tape
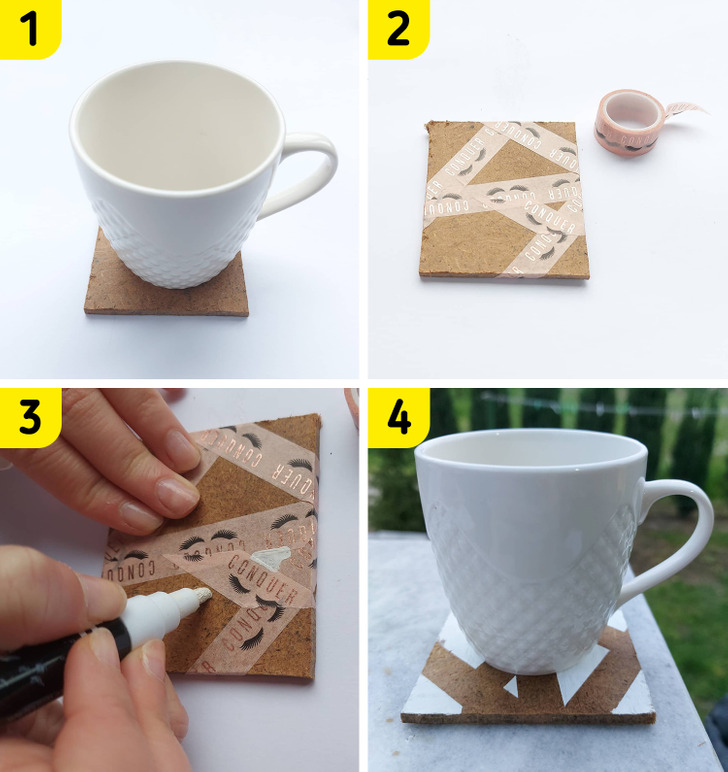
Step 1: Place one cup to see the correct dimension for the coaster. You can either ask for a professional to help or buy the plywood at the store.
Step 2: Put washi tape over the square to create shapes.
Step 3: Color the coaster with a white marker.
Step 4: Once it’s dry, remove the tape and the coaster is ready.
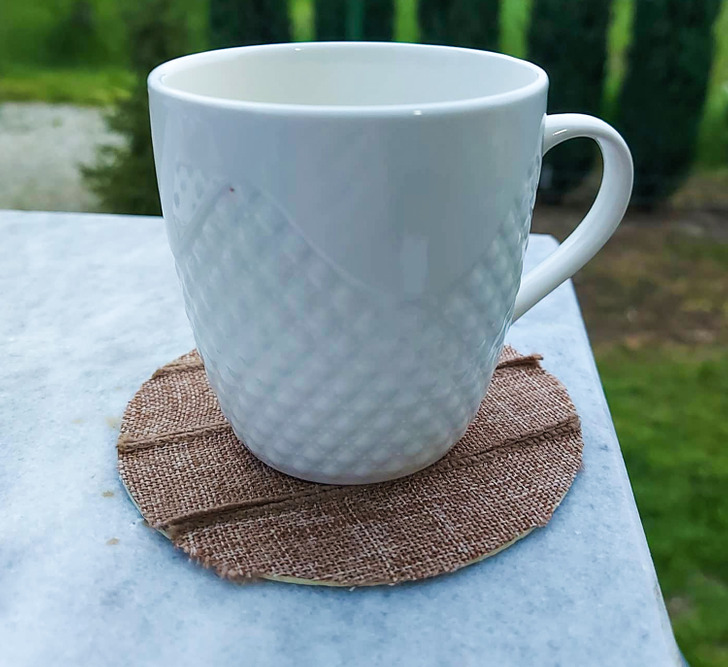
2. Burlap ribbon coasters
Materials that you will need:
- old coaster
- double-sided tape
- scissors
- burlap ribbon
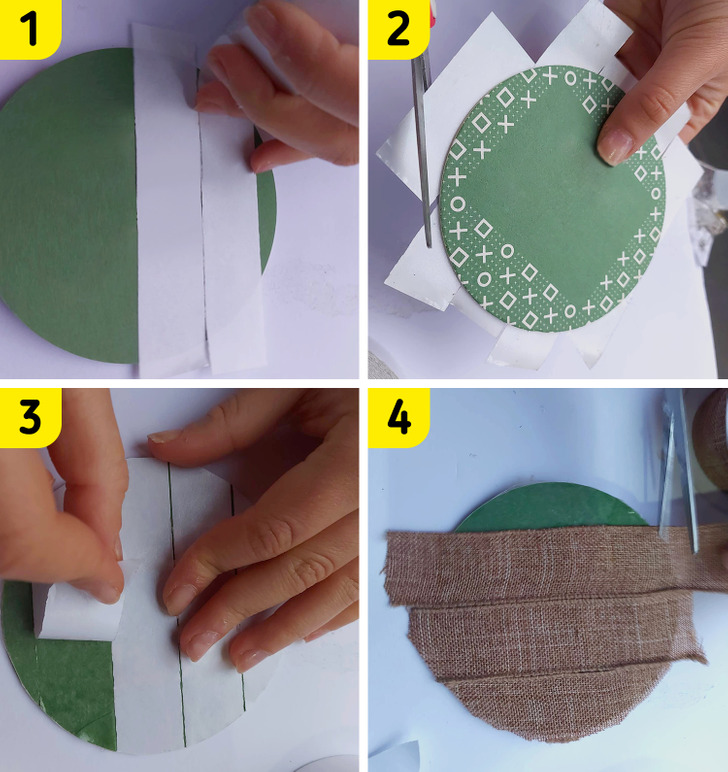
Step 1: Take an old coaster and start adding double-sided tape to it.
Step 2: Flip the coaster over and cut the excess tape.
Step 3: Remove the protective layer from the tape.
Step 4: Glue the burlap ribbon to the coaster and cut the extra ribbon.
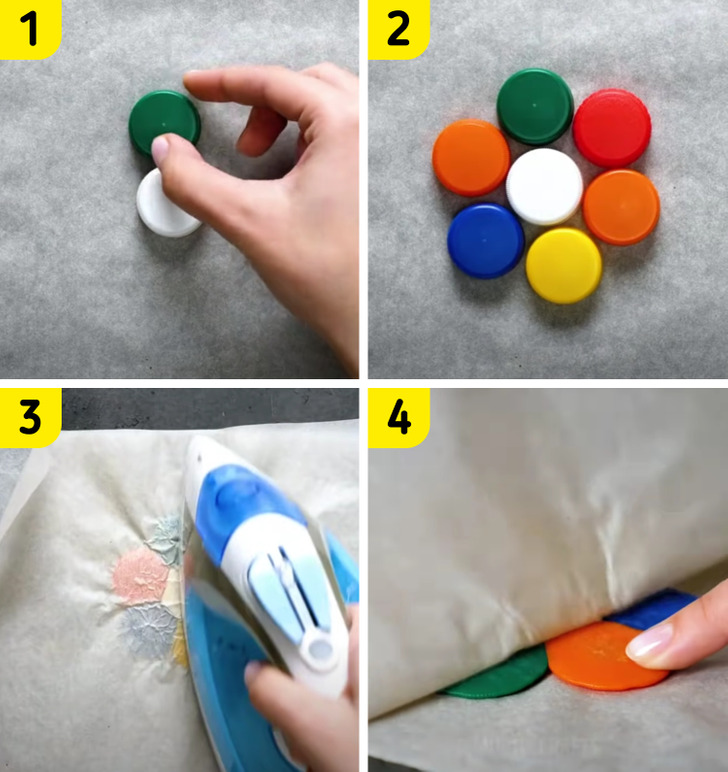
3. Bottle cap coaster
Materials that you will need:
- plastic bottle caps
- wax paper
- iron
Step 1: Put two plastic bottle caps on wax paper.
Step 2: Form a flower shape with other plastic bottle caps.
Step 3: Use a wax paper sheet to cover the caps, and gently start ironing them.
Step 4: Once they are melted, remove the wax paper from the caps.
Step 5: The coaster is ready!
4. With rope
Materials that you will need:
- rope or string
- old coaster
- hot glue
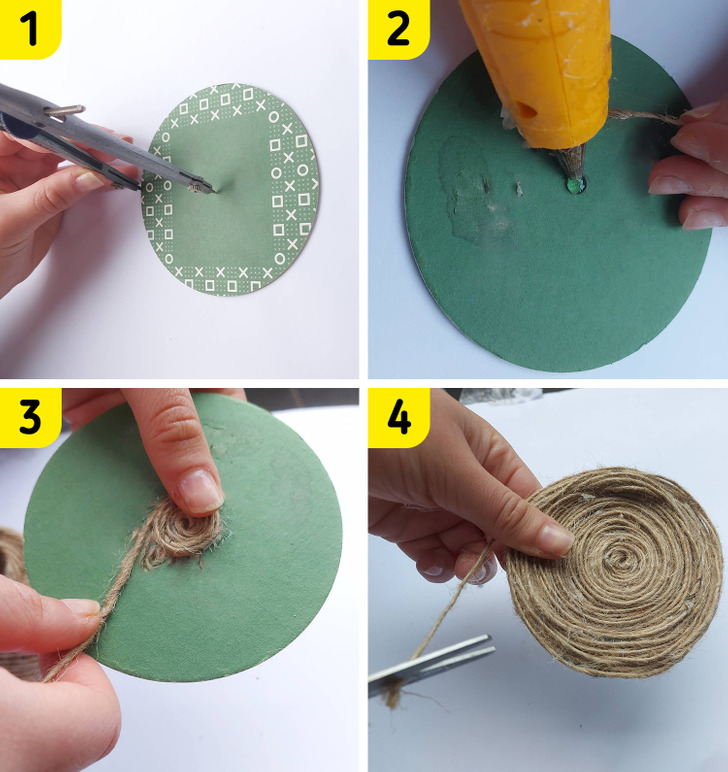
Step 1: Measure the center of the old coaster.
Step 2: Apply white glue at the center and glue the rope.
Step 3: Start looping the rope around the center. Make sure to pull it tight as you go and use hot glue to secure it in place.
Step 4: Stop winding when you reach the edges of the coaster and cut the rope at an angle to create a pointed tip.
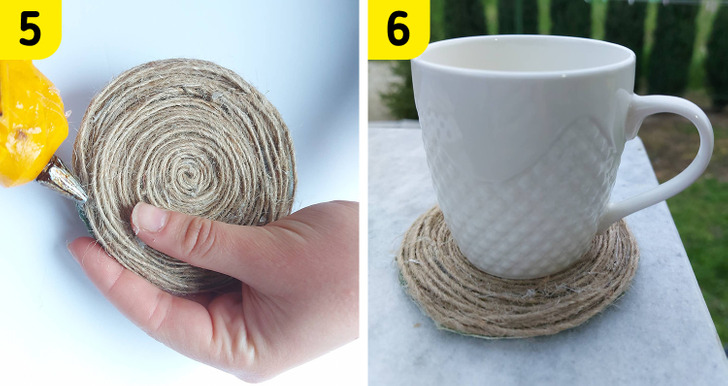
Step 5: Glue the pointed tip to the rope to finish the coaster.
Step 6: Wait for the glue to harden and the coaster is done.
5. Map coasters
Materials that you will need:
- cardboard
- old map
- white glue
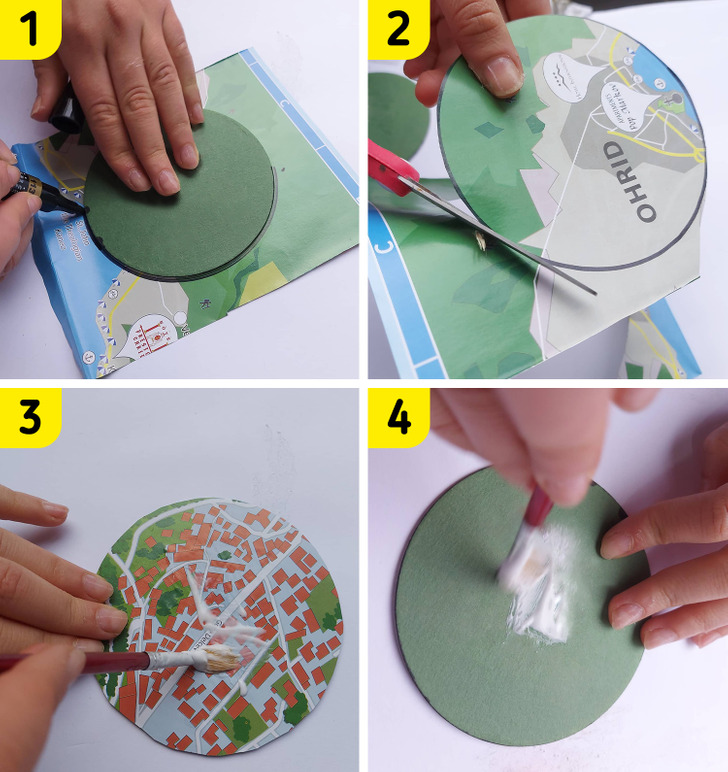
Step 1: Trace the coaster to the part of the map you want to use.
Step 2: Cut the map following the trace.
Step 3: Apply a thin layer of white glue to the back of the map and allow it to dry.
Step 4: Add a layer of white glue to the coaster itself and place your map on it.
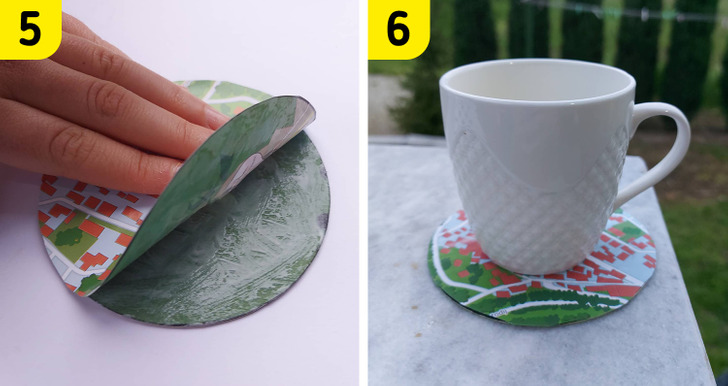
Step 5: After it dries, apply two more layers of white glue, covering the top of the coaster. Make sure that the coat is dry before applying one more.
Step 6: Once it dries, it’s ready!
6. Coasters with craft sticks
Materials that you will need:
- craft sticks
- hot glue
- washi tape
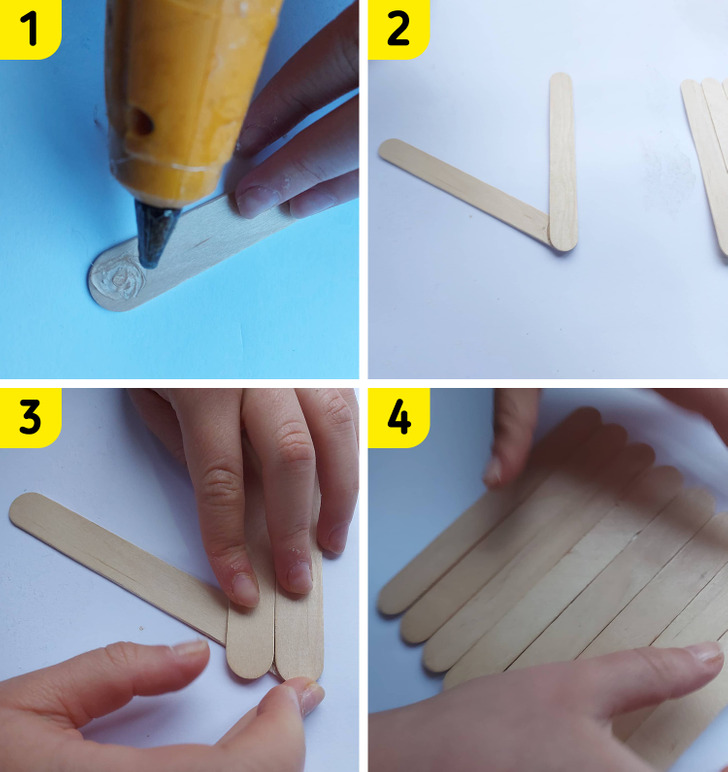
Step 1: Put hot glue near one end of the craft stick.
Step 2: Glue another stick diagonally to create the letter “V.”
Step 3: Continue to glue sticks along with the first glued sticks.
Step 4: Glue as many sticks as you want to.
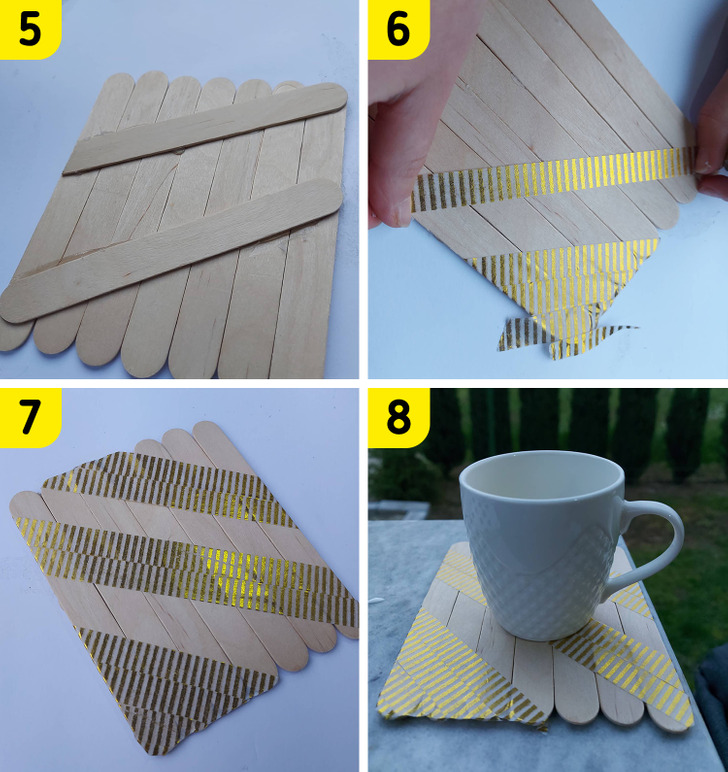
Step 5: Once you are done flip over the coaster and glue on one more craft stick lengthwise.
Step 6: Add colorful tapes to it. Chose any pattern you like.
Step 7: Press the excess edges and glue them to the back of the coaster.
Step 8:The coaster is ready!
