How to Make Halloween Treat Bags
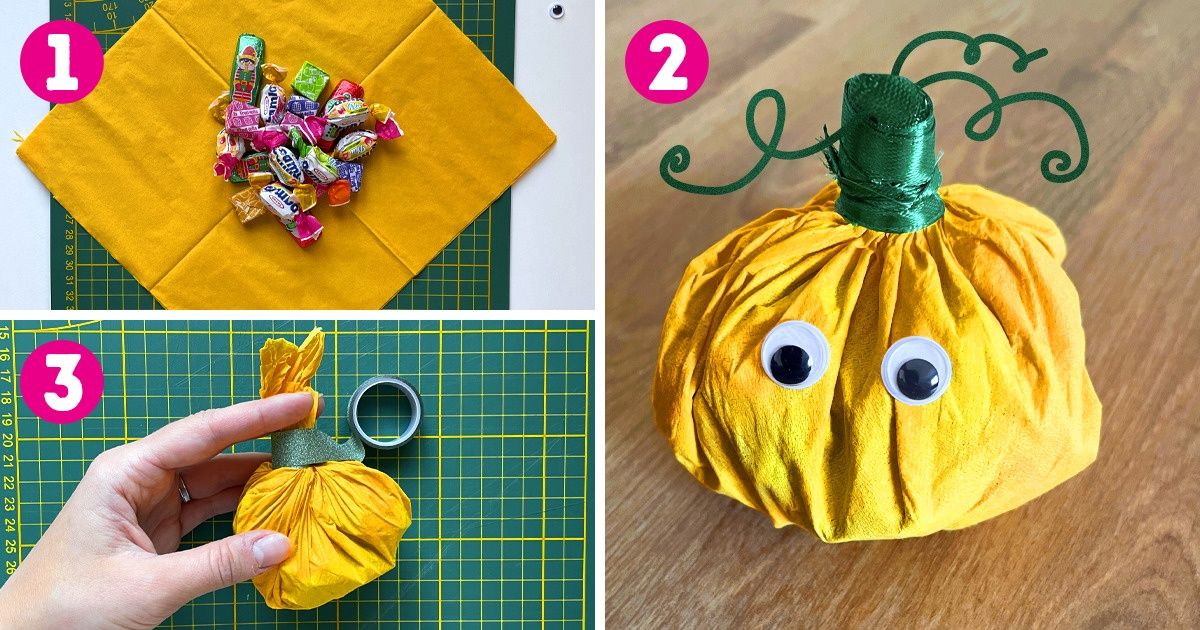
Halloween is the best time to give out candy. Also, it’s a perfect opportunity to create something original all by yourself. For example, you can make cute goody bags to gift to your family, friends or share with trick or treaters. 5-Minute Crafts has prepared 5 fun and easy-to-make ideas for treat bags that you can try. We also included patterns that you can download.
1. Pumpkin bags
You will need:
- Orange paper napkins
- Small candy
- Googly eyes
- Washi tape and/or scotch tape
- Ribbon
- Scissors
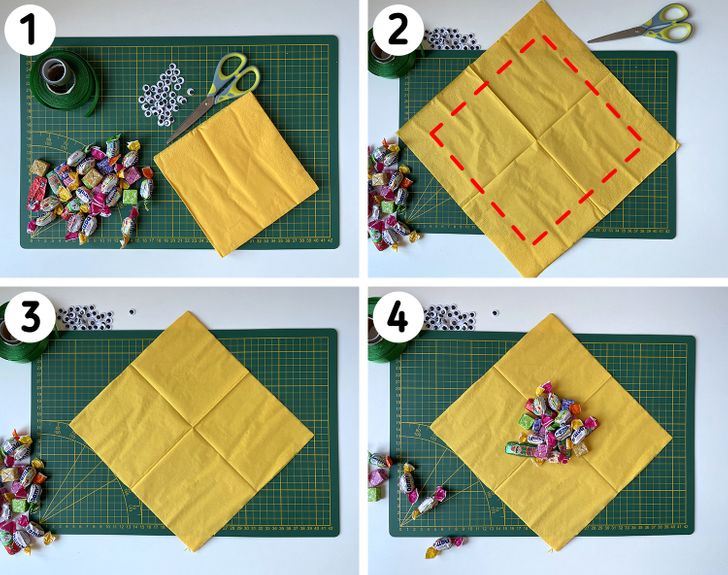
How to make it:
Step 1: Gather all the materials together.
Step 2: If napkins are too big, use scissors to cut their edges and turn them into smaller squares.
Step 3: After you make sure your napkins are of proper size, it’s time for the fun part: assembling!
Step 4: Put some small candy into the center of your napkin.
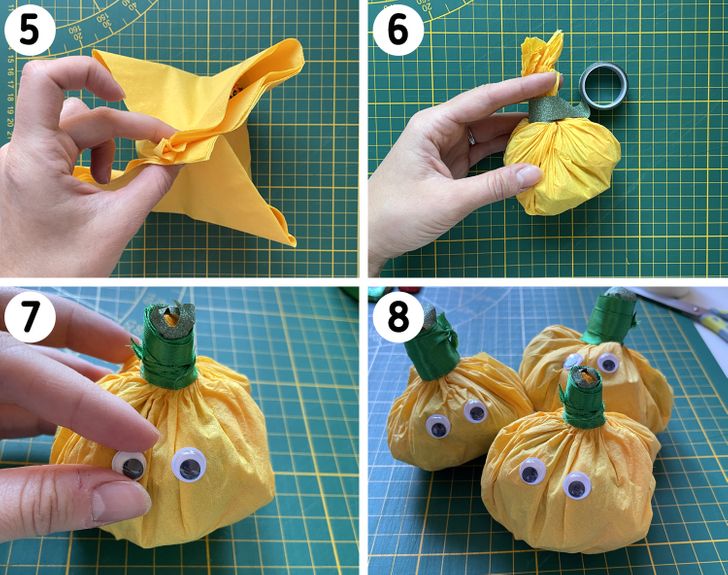
Step 5: Bring the edges of the napkin together to create a little pouch. Twist the ends to create a round pumpkin shape.
Step 6: Use washi tape to wrap around the edges of the napkin to create a stem. You can also use scotch tape, as it can secure the paper better.
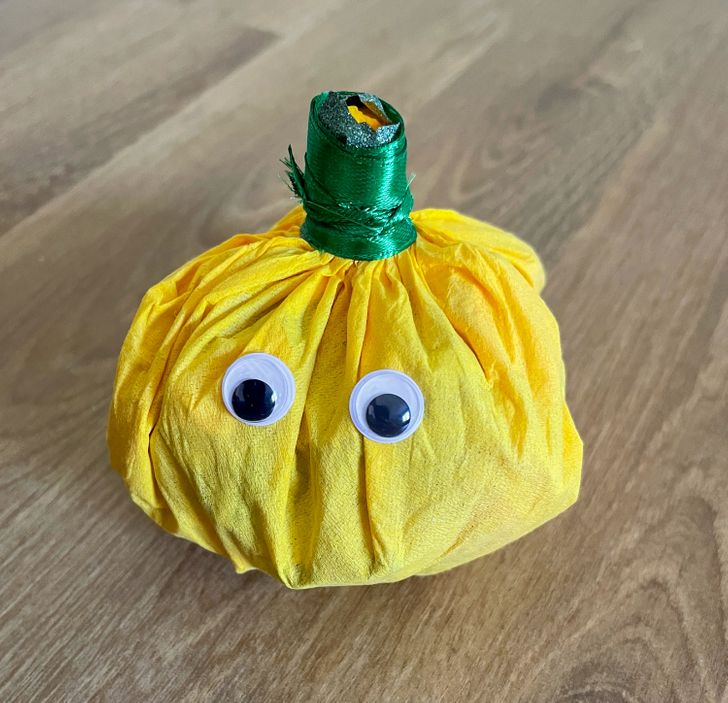
Step 7: Wrap a green ribbon around the stem. Add a pair of googly eyes to your pumpkin.
Step 8: Continue with the rest of the napkins to create as many pumpkins as you want.
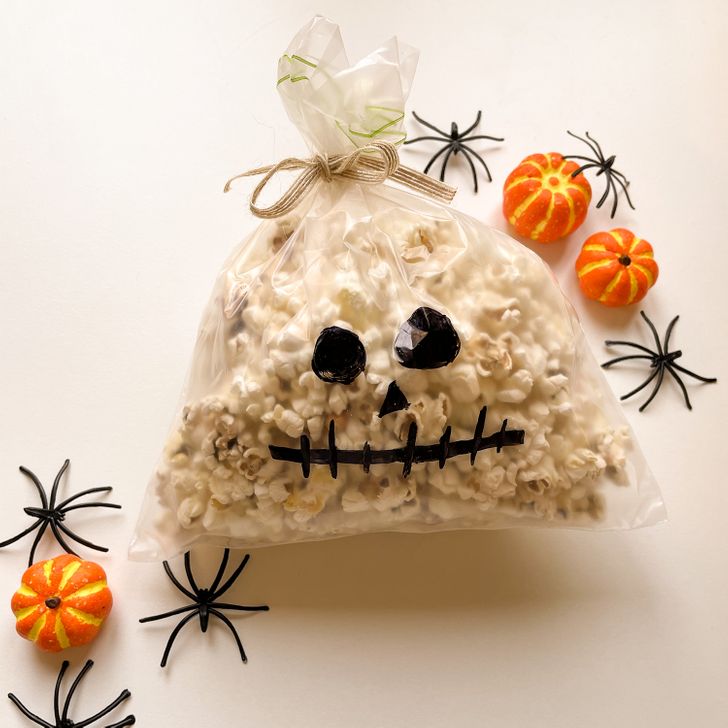
2. Skeleton popcorn treat bags
You will need:
- Popcorn kernels (or ready-made popcorn)
- A clear plastic bag
- A black marker
- Ribbon
- Scissors
How to make it:
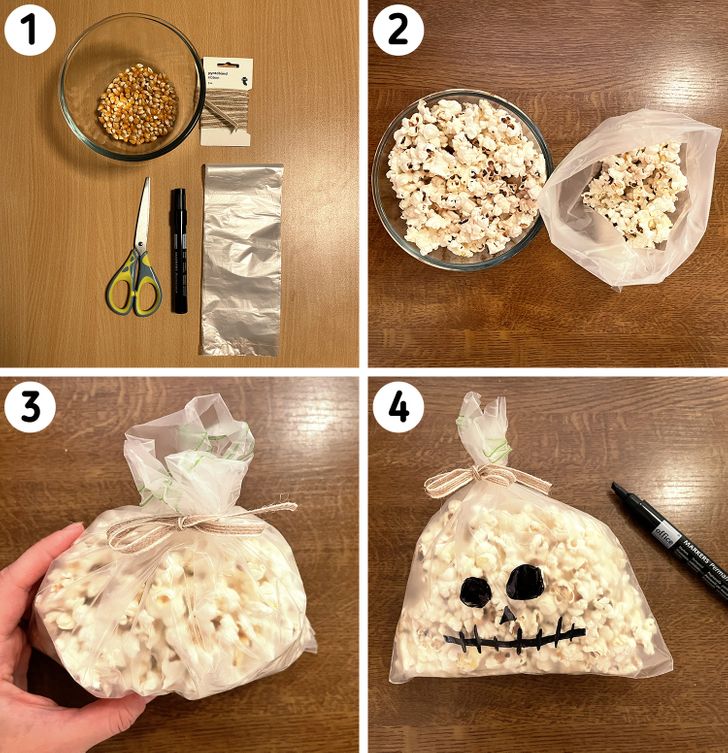
Step 1: Gather all the materials together.
Step 2: If you have popcorn kernels, microwave them for 3-4 minutes under a tight lid. After your popcorn is done, fill a plastic bag with it.
Step 3: Tie the bag up with a ribbon.
Step 4: Use a black marker to draw a skeleton face on the bag.
3. Ghost hands

You will need:
- Plastic gloves
- Small candy
- Ribbon
- Scissors
How to make it:
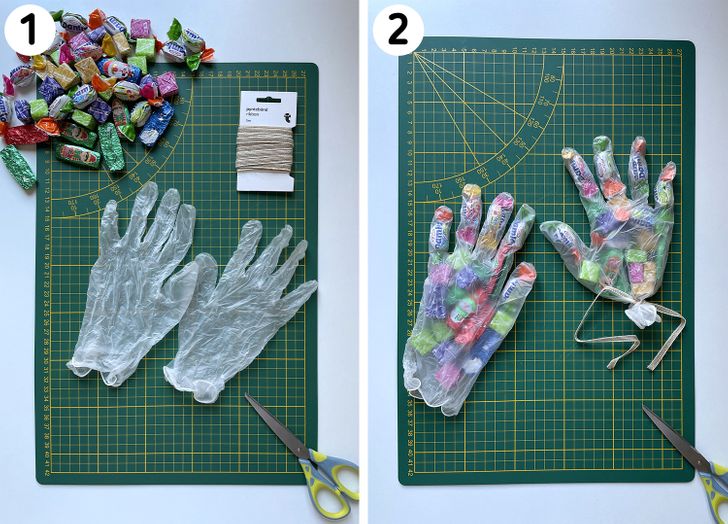
Step 1: Gather all the materials together.
Step 2: Fill the gloves up with small candy. Tie the ends of the gloves up with a ribbon.
4. Bat pillow bags
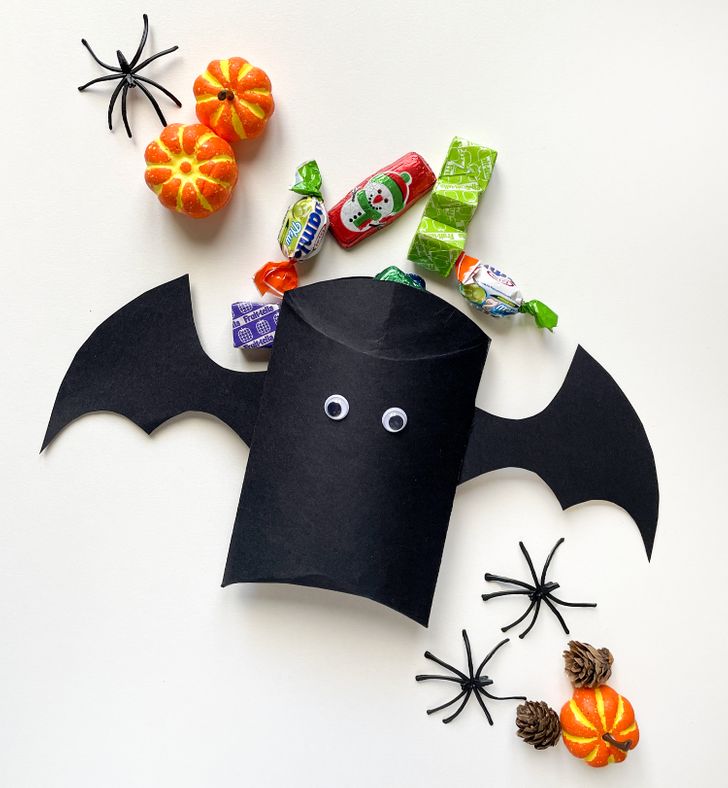
You will need:
- Black paper
- A pillow bag pattern, printed (we included it for you)
- A bat wing pattern, printed (we included it for you)
- A ruler
- Scissors
- Googly eyes
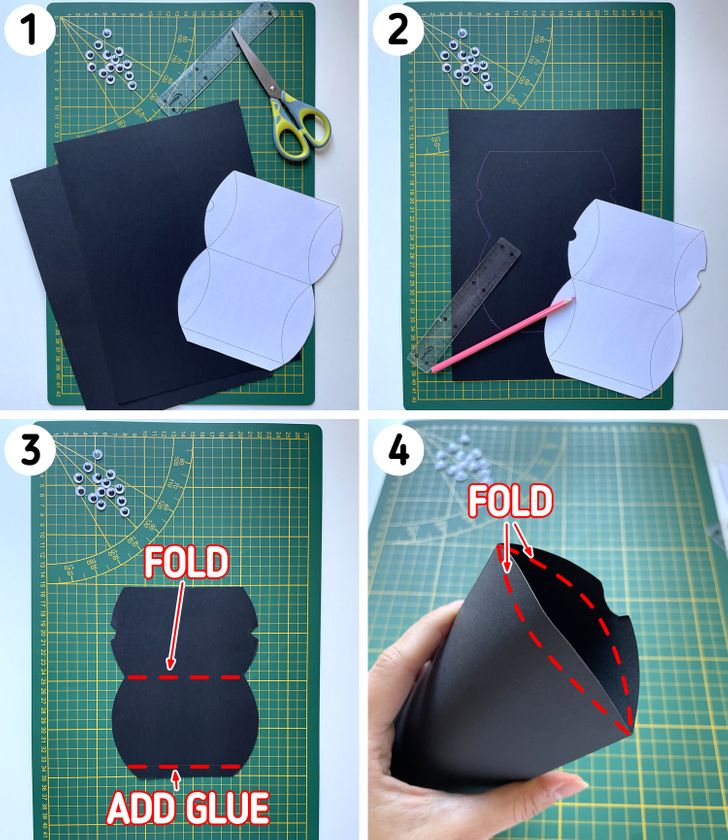
How to make it:
Step 1: Gather all the materials together.
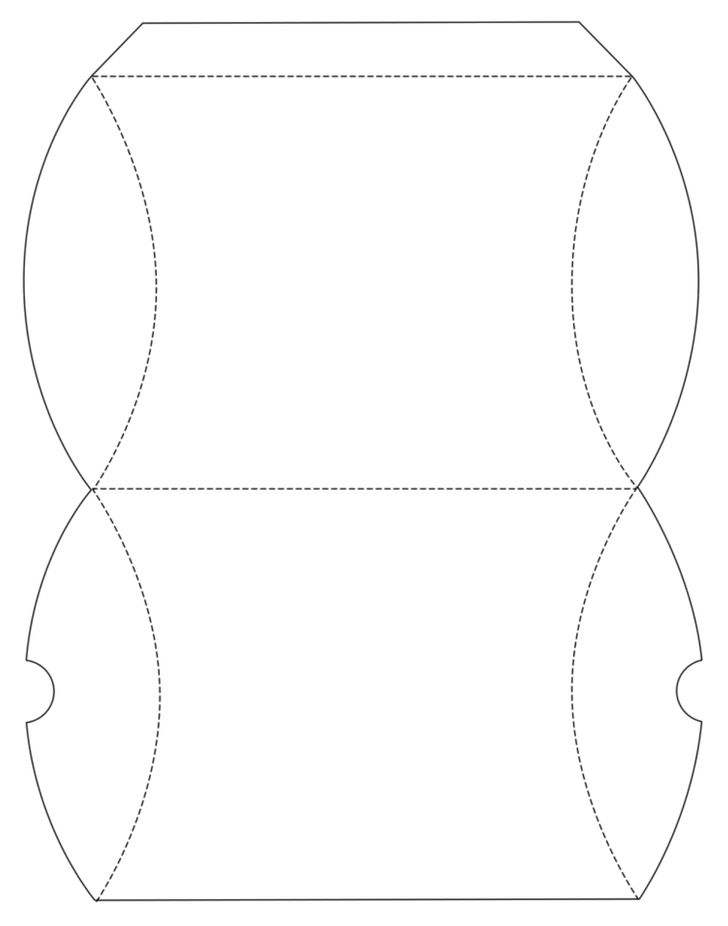
Step 2: Print the pillow bag pattern and use it to transfer the shape onto the paper. Use an old ballpoint pen to trace along the lines as shown in the pattern.
Step 3: Fold the pillow bag shape in the center and add some glue to the lower edge as shown in picture 3. Glue the paper together to create a hollow bag.
Step 4: After the glue dries, softly squeeze the sides of the box and fold along the score lines to create the flaps that will seal your box.
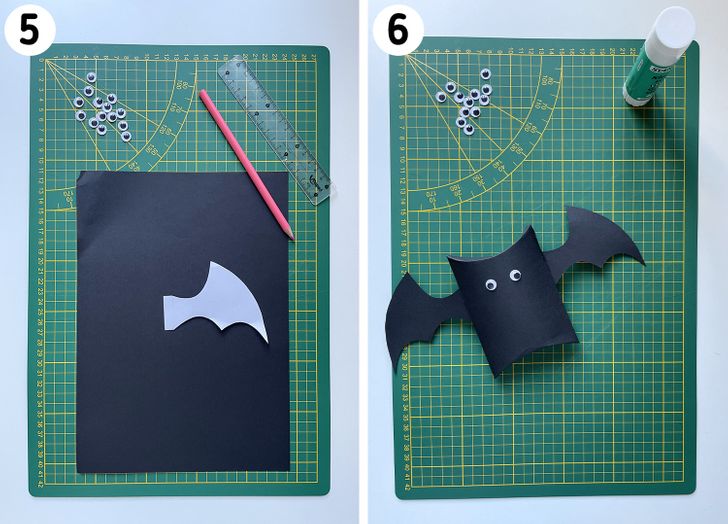
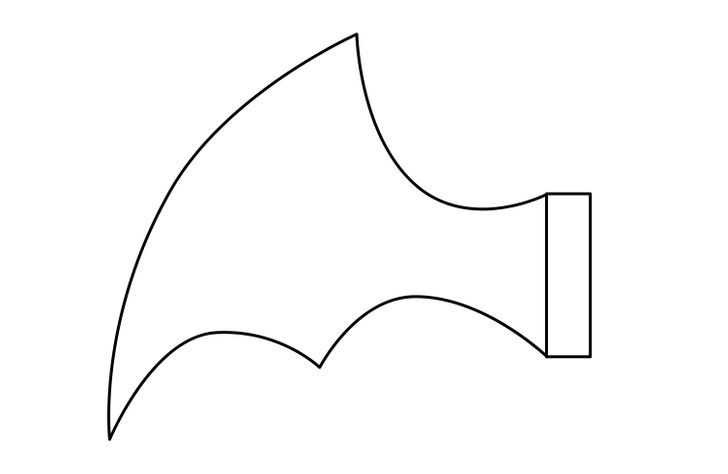
Step 5: Print the bat wing pattern and use it to transfer the shape onto the paper. Use scissors to cut out 2 bat wings.
Step 6: Glue the wings to the box (from the backside). Add googly eyes. It’s ready to be filled with candy!
5. Witchy gift bag
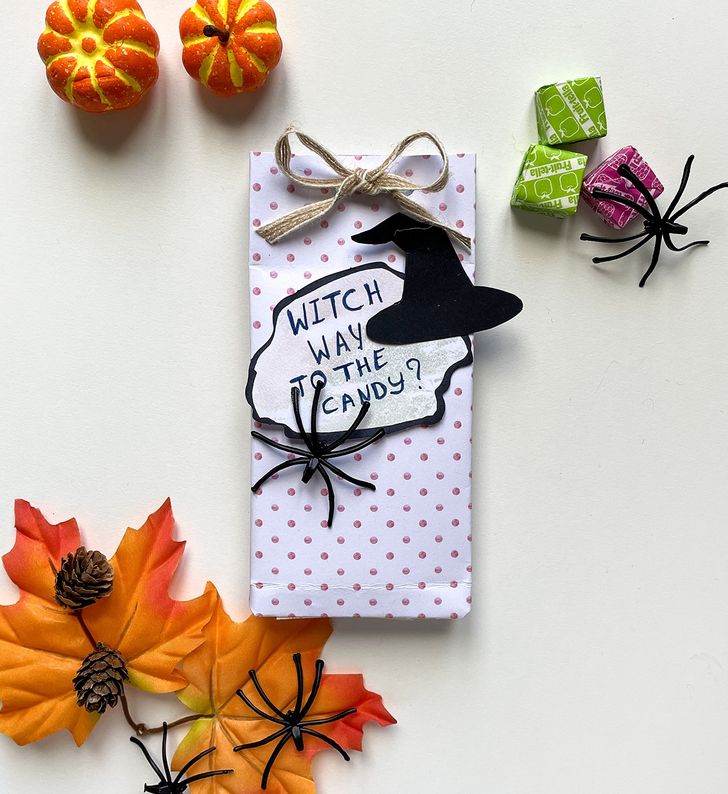
You will need:
- Paper of your choice
- A ruler
- Scissors
- Glue
- Ribbon
- A marker
- A hole puncher
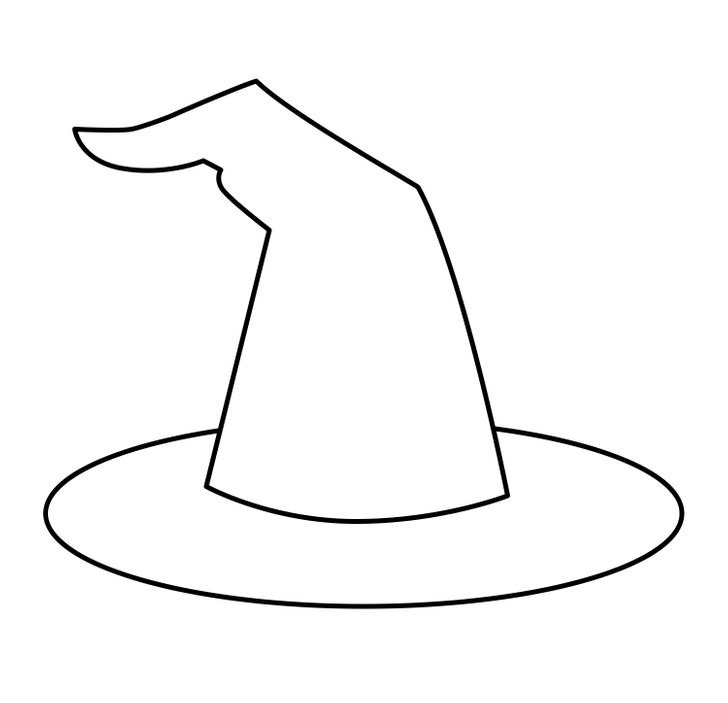
- A witch hat pattern, printed (we included it for you)
How to make it:
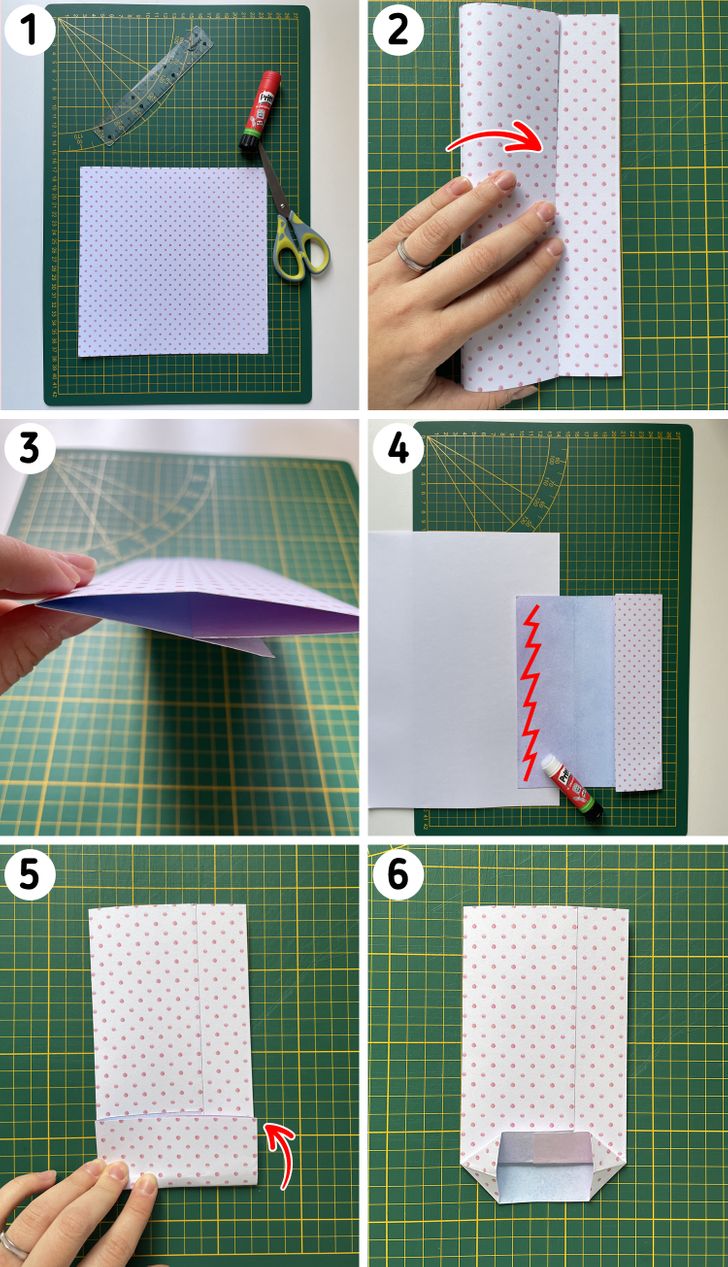
Step 1: If you have A4 paper, use scissors to cut it into a square shape. We used a 25 cm x 25 cm sheet.
Step 2: Turn the sheet to its backside. Place a ruler next to the edge of the sheet to mark where the middle is. Do the same at the opposite edge of the sheet. Bring the right side of your sheet to the center, go beyond about a centimeter, and fold it. Then bring the left side to the center, go beyond a centimeter to create an overlap with the right side, and fold it.
Step 3: If you look at your sheet from the bottom, the result should look like it’s shown in picture 3.
Step 4: Unfold the left side and apply some glue to it. Make sure you only apply glue to the area where the left side of the sheet overlaps with the right side.
Step 5: Hold the lower edge of the back and fold it up. This will influence how deep your bag will be.
Step 6: After folding the bottom, open the paper and apply some pressure to the sides to create 2 little triangles. The result should look like it’s shown in picture 6.
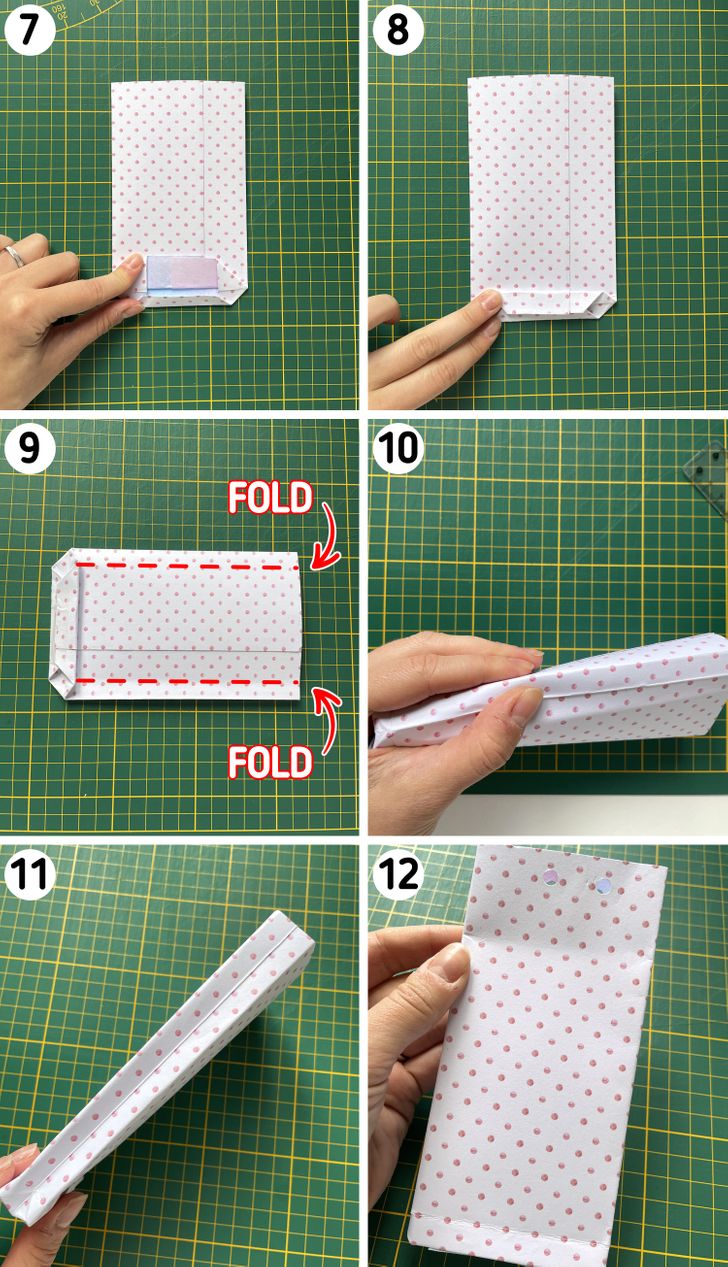
Step 7: Take the bottom part and fold it so that it goes a little bit beyond the center. Don’t go too far; all you need is to create some space for an overlap.
Step 8: Take the top part and fold it down. Make sure that the edges of the bottom and the upper part overlap.
Step 9: Use glue to bind the overlap together. Take the right side of the bag and fold it in to meet the little triangle on the bottom. Do the same with the left side of the bag.
Step 10: Pop the bag open. Use your fingers to create the sides of the bag.
Step 11: Use your finger to bring both sides together to reverse the middle crease. The bag is ready.
Step 12: Use a hole puncher to punch 2 holes for a ribbon. Decorate the bag with a witch hat made of black paper. Use a marker to add funny writing to the bag. Fill it with candy.
Bonus: paper patterns
1. Pillow box pattern
2. Bat wing pattern
3. Witch hat pattern
