How to Make Last Minute Christmas Gifts for Your Loved Ones
As the holidays are slowly approaching, the tension about giving presents is growing as well. We often have doubts about what our loved ones would like and whether we will pick the best gift for them. Sometimes it’s not all about the gift, but the act of giving itself. Paying attention and making an effort may bring more smiles than spending thousands of dollars on unnecessary items. That’s why we’ve prepared several gift ideas for you, which are pretty simple and easy to make.
1. Personalized picture ornament
Materials that you will need:
- holiday-themed picture/picture of your loved one
- scissors
- hot glue
- candy canes
- bow
- string
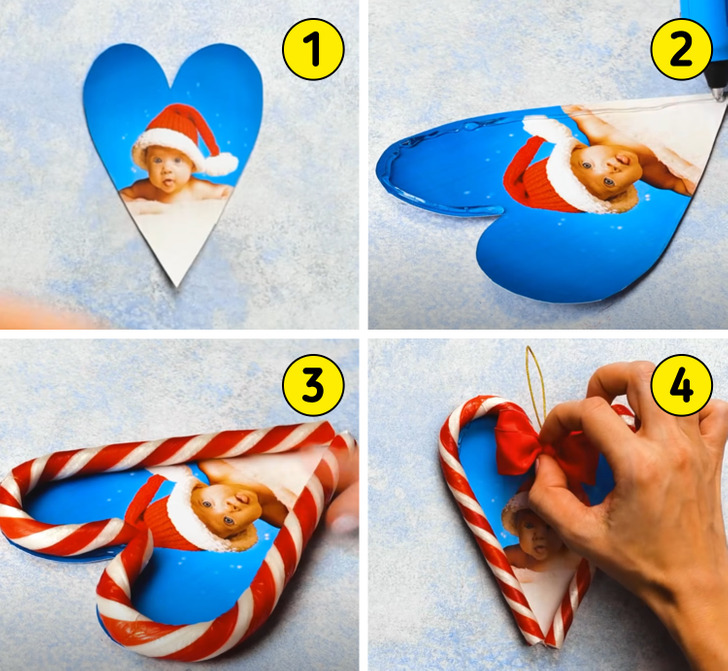
🔴 Step 1: Take the picture and cut it into a heart shape. Make sure it is big enough to fit the candy canes.
🔴 Step 2: Carefully apply hot glue along the edges of the heart.
🔴 Step 3: Glue the candy canes by turning them so that they follow the edges of the picture.
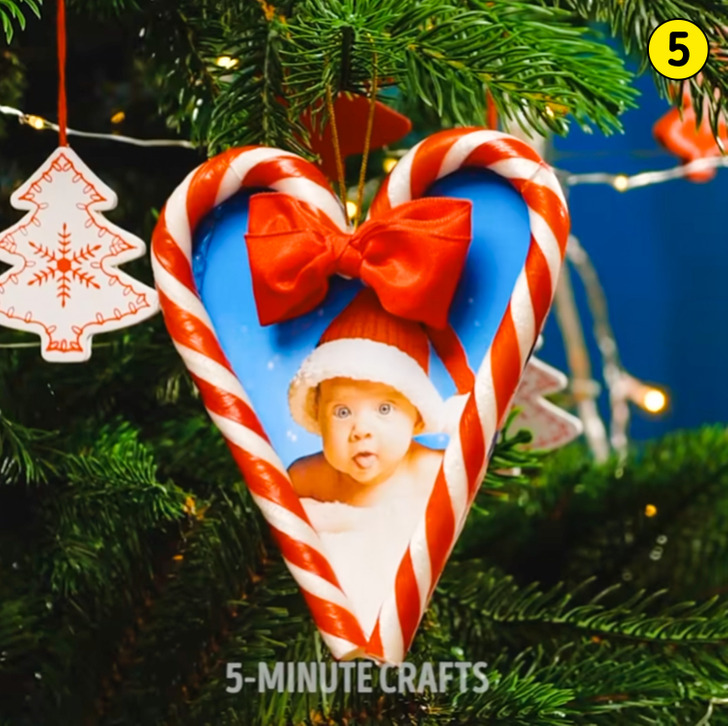
🔴 Step 4: Add a bow to the top of the heart and glue a short piece of string so the ornament can be hung.
🔴 Step 5: Once the hot glue is dry, pack the ornament inside a box and wrap it up. Now it’s ready to give to your loved ones.
2. Festive clay ornaments
Materials that you will need:
- polymer clay (green, white, red, beige)
- parchment paper
- necklace hook
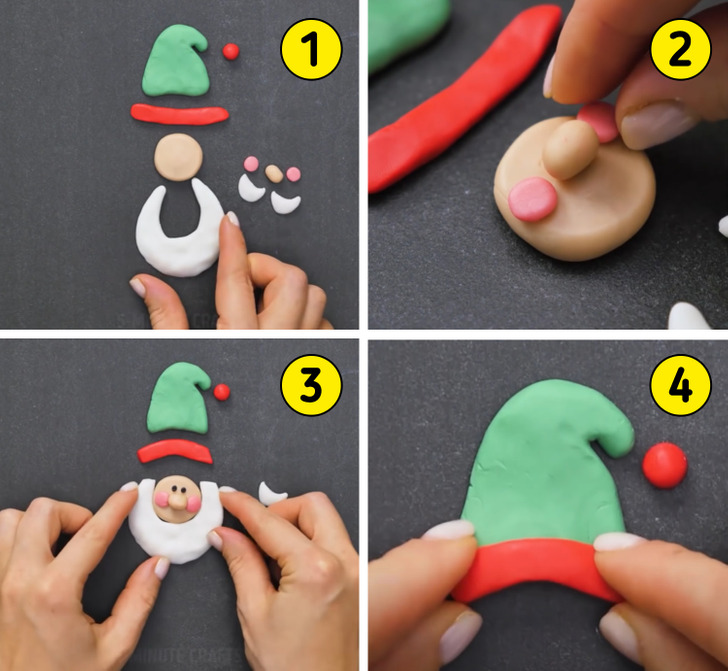
🔴 Step 1: Take polymer clay and squeeze it slowly to soften it. From the green clay, make a small structure that looks like a hat, from the red, make a small ball and a belt, from the beige, make 2 balls, one smaller and the other bigger, from the pink, 2 equally large balls, and from the white the beard and mustache. Separate 2 very small pieces of black clay for the eyes as well.
🔴 Step 2: Press the larger beige ball with your finger to make a circle. Arrange the small beige ball in the middle above it and the 2 pink balls on its sides. Gently press the pink balls with your finger to model the cheeks. Just above the nose and cheeks, place the small pieces of black clay for the eyes.
🔴 Step 3: Go around the now-made Santa’s face with the beard. Gently bring the clay together, but be careful not to press too hard so as not to destroy them.
🔴 Step 4: Connect the red belt and the ball with the green hat and carefully attach them to Santa Claus.
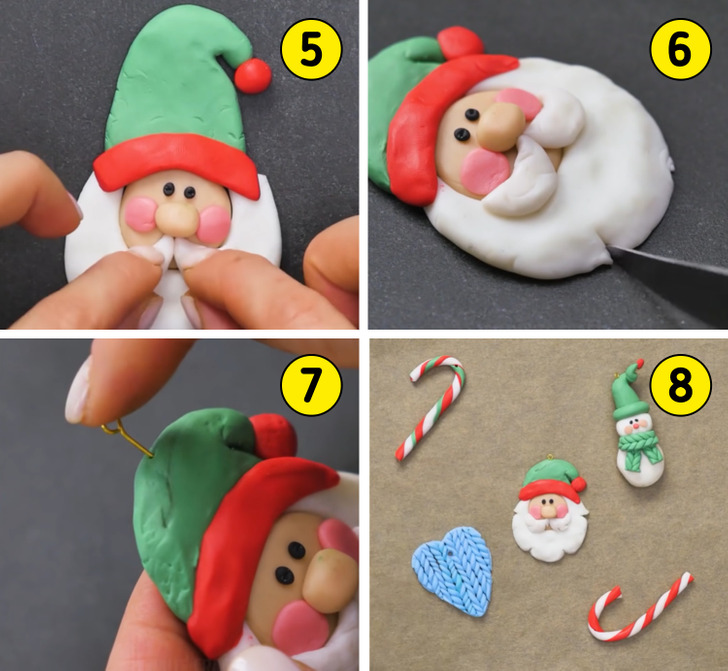
🔴 Step 5: Place the mustache right under the nose, but make sure to leave a small triangular space between the beard and the mustache for the mouth.
🔴 Step 6: With a knife or scalpel, make incisions on the beard and bend them a bit.
🔴 Step 7: Put the earring eye pin on top of the hat.
🔴 Step 8: Bake them for 15 minutes and leave them to cool down. Later you can use them as ornaments or put them on a chain to make a necklace.
3. Christmas pillow
Materials that you will need:
- Old Christmas cloth
- glue gun
- pillow stuffing
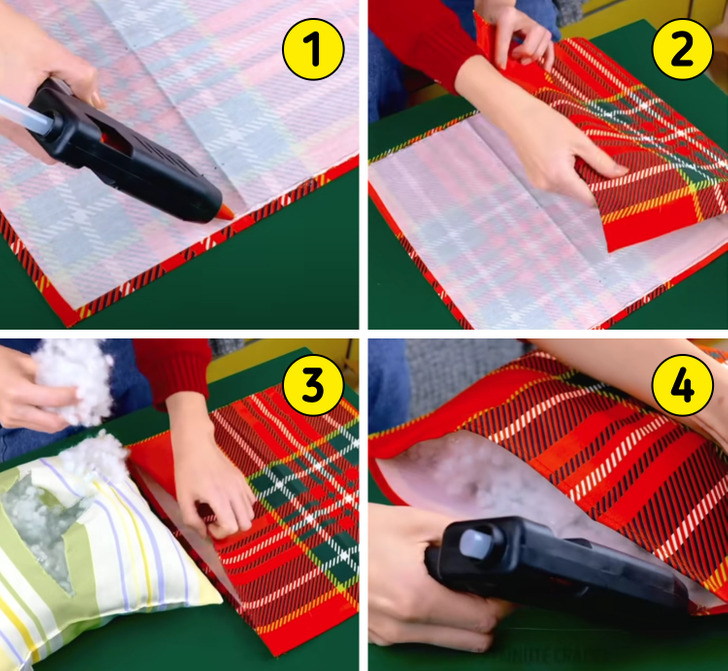
🔴 Step 1: Pick an old Christmas fabric that you no longer need and wash it. Once it’s dry, apply a glue gun to the edges and along the sides.
🔴 Step 2: Fold the material to create a rectangular pillowcase, leaving a small opening on one side.
🔴 Step 3: Fill the pillowcase with stuffing.
🔴 Step 4: Carefully close the pillowcase with the glue gun.
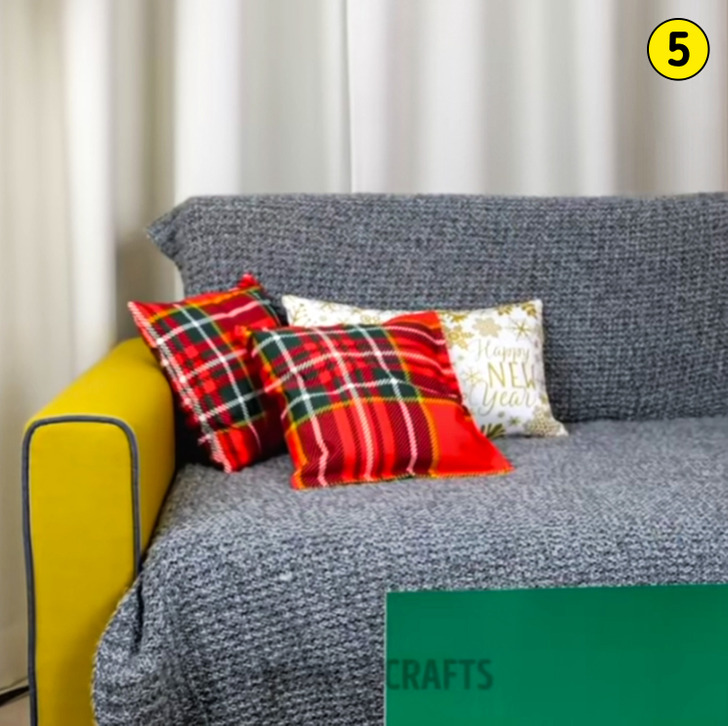
🔴 Step 5: Wait for the glue to harden and pack your present. A great decorative piece for your loved one’s bedroom.
4. Chocolate Christmas snacks
Materials that you will need:
- fork & parchment paper
- chocolate
- popcorn
- black and white M&M’s
- gummy strawberries
- cellophane
- bow
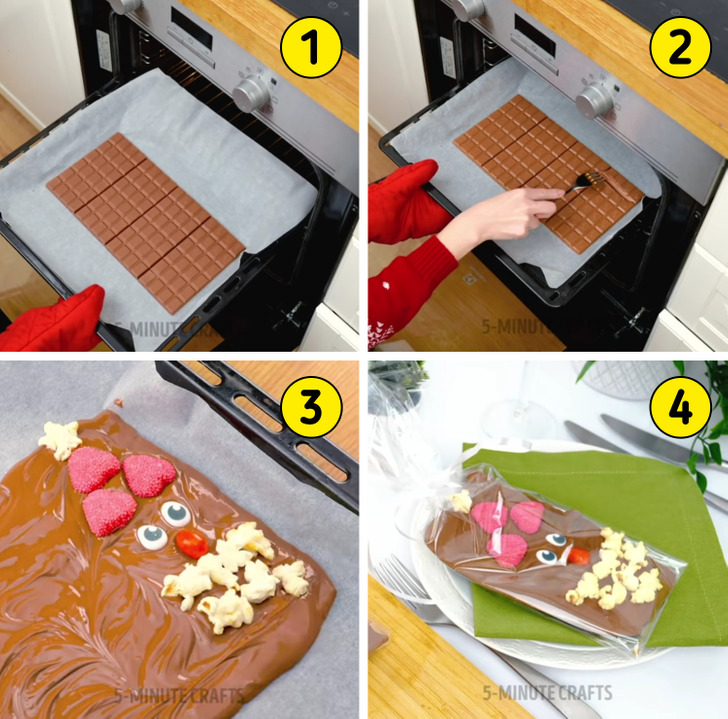
🔴 Step 1: Place parchment paper in a pan and add 4 bars of chocolate to it. Place the chocolate in the oven so it can melt.
🔴 Step 2: After the chocolate has melted, take a fork and gently, without breaking the chocolate, use the tips to mash it.
🔴 Step 3: Take red gummies and make the hat. Use black and white M&M’s to make the eyes, and use the popcorn to make Santa’s hat and beard. If you do not have black and white candies, you can use melted chocolate, but if you decide on that alternative, you will do this step with the eyes after the chocolate hardens, so that it does not overflow.
🔴 Step 4: Once the chocolate has hardened, break it into pieces. Cut squares of cellophane, large enough to hold the chocolates, and fold them over the chocolate like you’re wrapping a gift. Tie a bow on top.
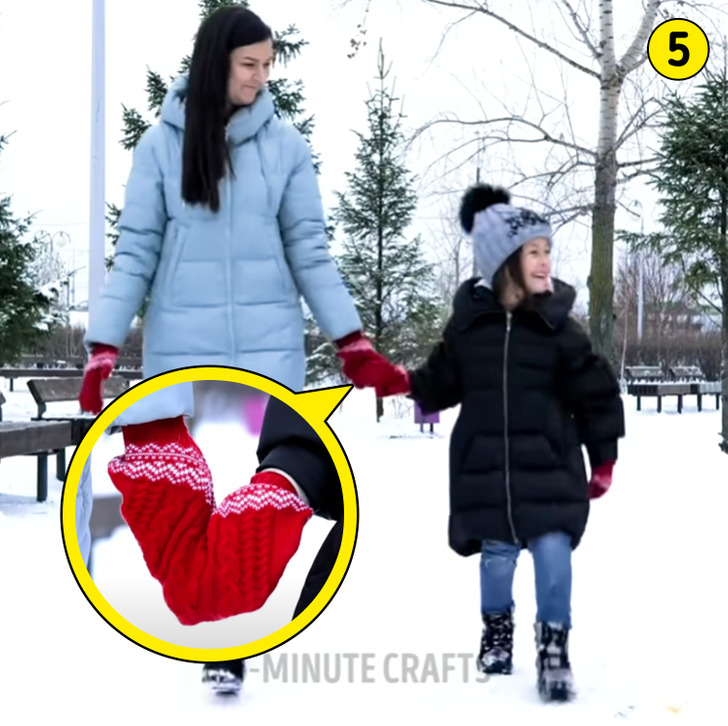
5. “Holding hands” glove
Materials that you will need:
- old sweater
- tailor’s chalk
- sewing machine or needle and thread
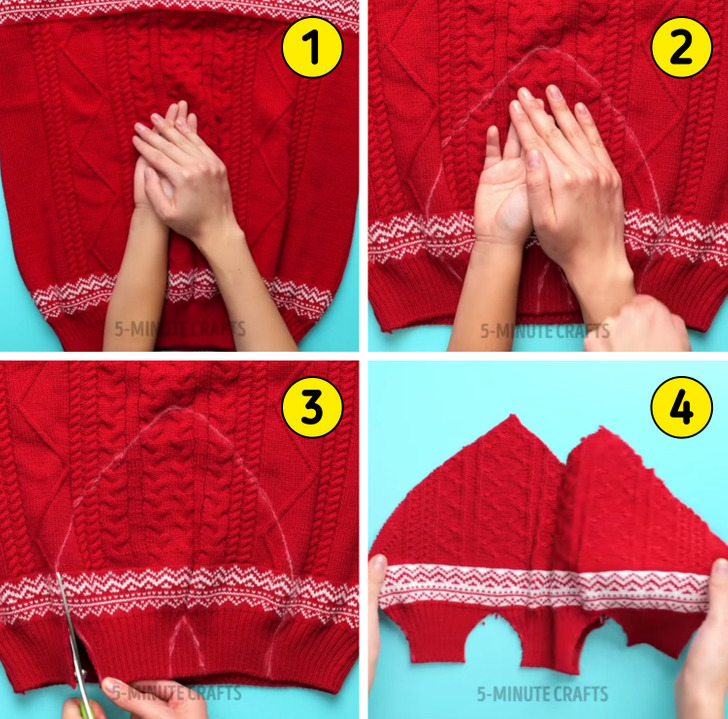
🔴 Step 1: Select one of your older sweaters and place it on a flat surface. Place 2 hands on the fabric to make sure you have enough room for the gloves.
🔴 Step 2: Place your hands in a holding position, and use tailor’s chalk to outline the shape for the new gloves.
🔴 Step 3: Cut the sweater following the outline, but make sure that you cut it on both sides equally.
🔴 Step 4: Turn the pieces over to the other side and carefully sew along the edges. Leave an opening for the hands on the underside.
🔴 Step 5: Flip the glove over and your gift is ready!
6. Pipe cleaner earrings
Materials that you will need:
- green pipe cleaner
- pliers
- earring hooks
- small pearls
- super glue
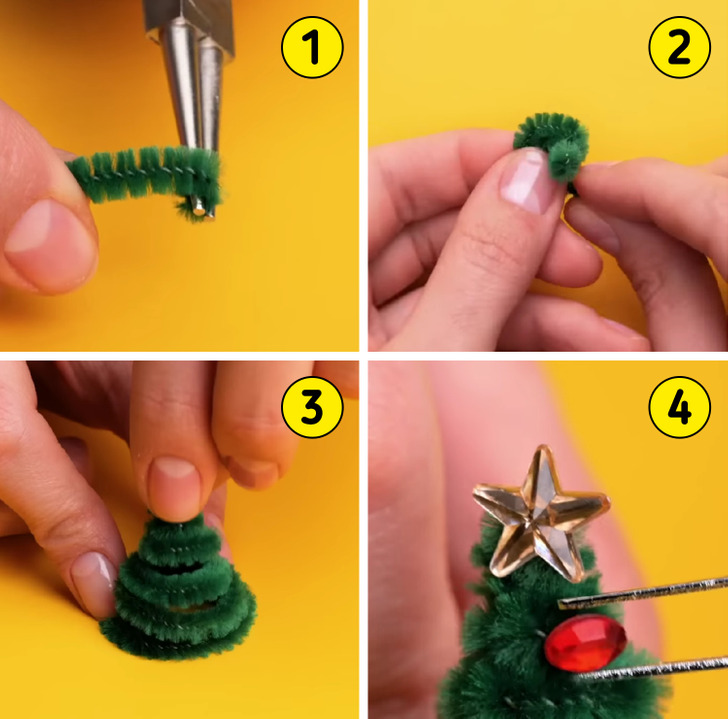
🔴 Step 1: Take modeling pliers and make a small hook with the green pipe cleaner.
🔴 Step 2: At the point where the circle ends, turn the pipe cleaner to the other side and start turning it, making a vortex.
🔴 Step 3: Carefully begin to twist the rest of the pipe cleaner into the shape of a Christmas tree. Stretch the pipe cleaner once you reach the end.
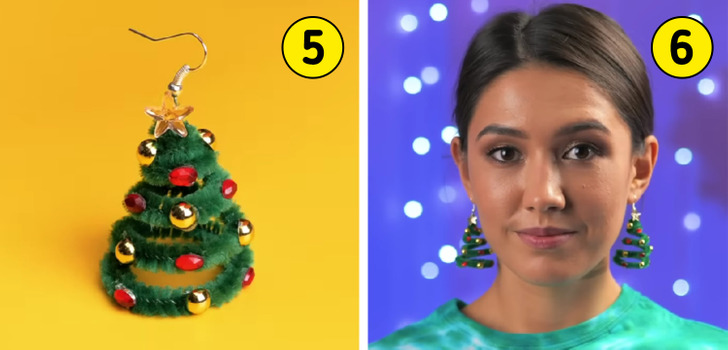
🔴 Step 4: Place a small star on top, and decorate the rest of the tree with small decorative accessories like ornaments.
🔴 Step 5: Insert the earring hook into the already-made hole at the top of the Christmas tree.
🔴 Step 6: Repeat all the steps for the other earring. Pack the earrings in a box and gift them to a friend.
7. Snowman ornament
Materials that you will need:
- white socks
- 2 Styrofoam balls
- string
- black pin x 2
- red pin
- red pom-pom
- red piece of felt
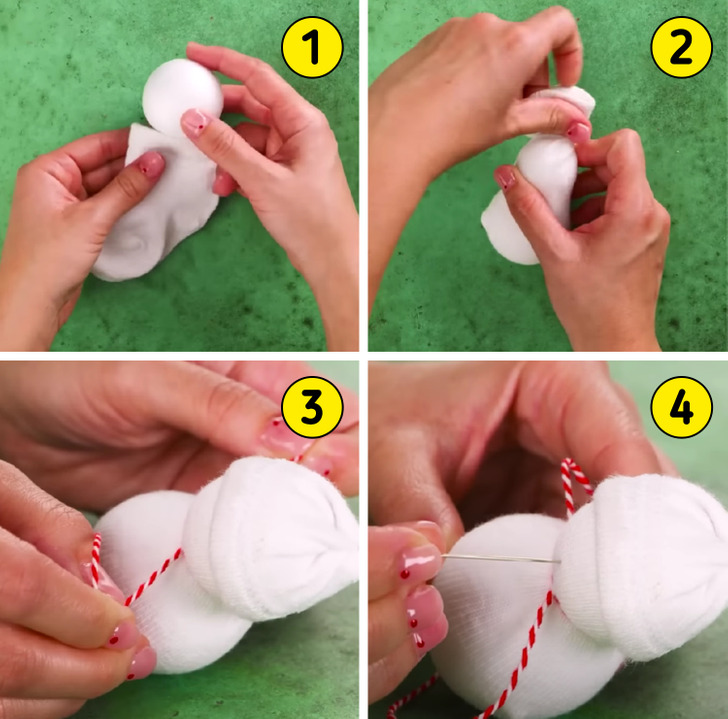
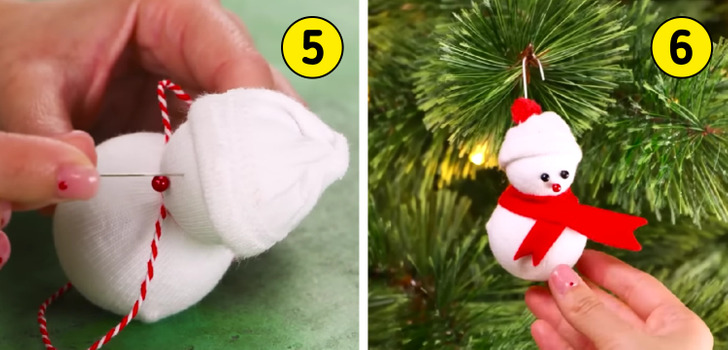
🔴 Step 1: Take a small white children’s sock and put 2 Styrofoam balls inside.
🔴 Step 2: Tie the opening of the sock with string and fold the part outside to look like a hat.
🔴 Step 3: With another string, tie the sock at the point where the 2 balls separate. Make a bow, so it doesn’t come untied.
🔴 Step 4: With the red pin needle, place the nose in the middle of the smaller ball.
🔴 Step 5: Just above the nose, add 2 black pin needles to make the snowman’s eyes.
🔴 Step 6: Add a red pom-pom on the top of his hat and the rest of the tied sock, and cut a piece of red felt to add as a scarf.
8. Reindeer headband
Materials that you will need:
- aluminum foil
- masking tape
- brown spray paint
- black headband
- hot glue
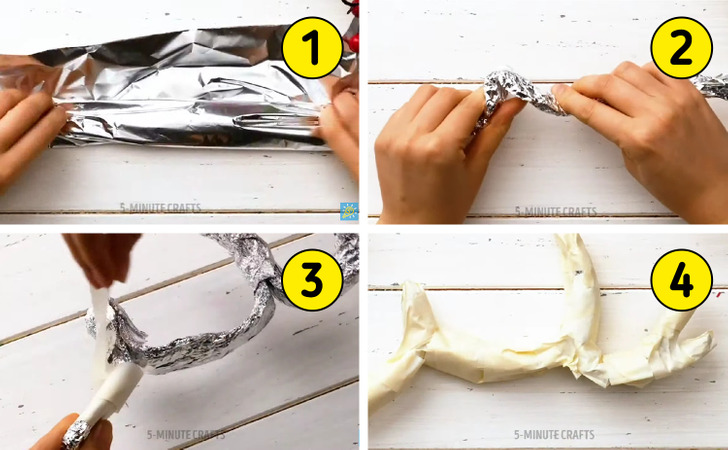
🔴 Step 1: Take a large piece of aluminum foil and fold it to the thickness of 2 horizontally folded fingers.
🔴 Step 2: Start folding the foil and making creases in several places.
🔴 Step 3: Take masking tape and wrap the entire foil together with the folds.
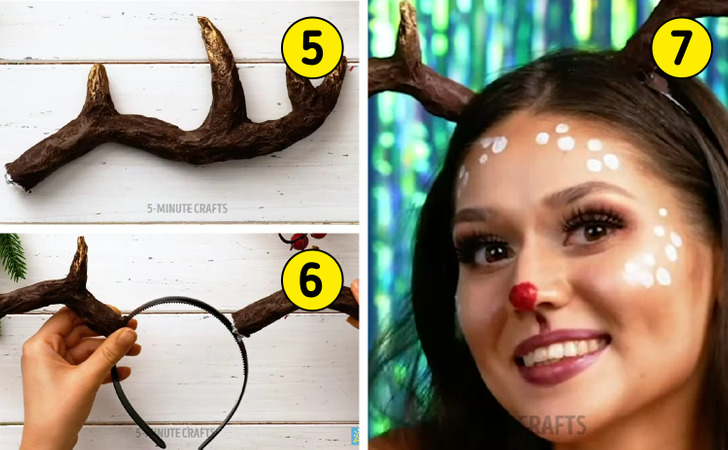
🔴 Step 4: Once you’ve folded it and are sure it fits the deer antlers, you can make minimal changes to the arrangement of the folds and even add an extra antler.
🔴 Step 5: Using spray paint, color the horns brown and leave them to dry.
🔴 Step 6: Repeat the steps and make another horn. Take a black headband and attach the horns carefully using hot glue.
🔴 Step 7: Once they are dry and attached to the wreath, they are ready to be part of your next present!
9. Wreath card
Materials that you will need:
- cotton swabs
- paper
- green acrylic paint
- white acrylic paint
- red ribbon
- paper roll
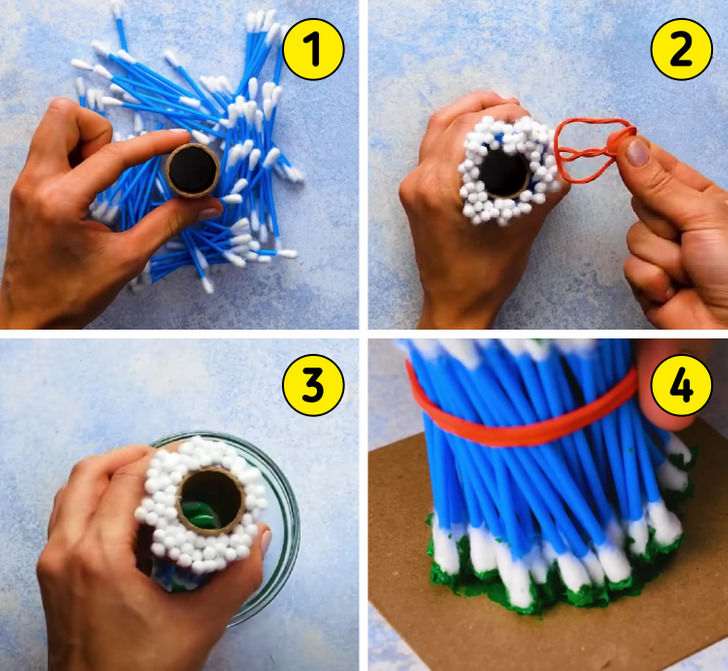
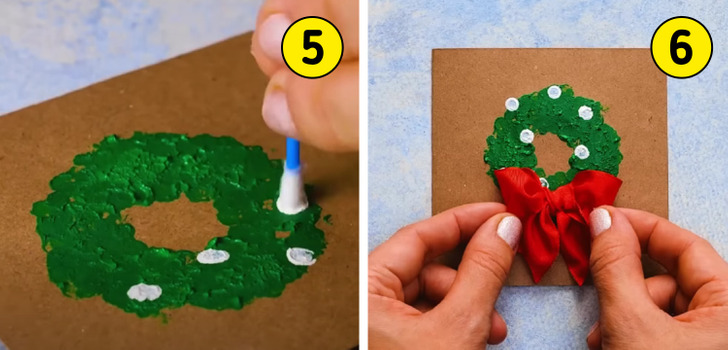
🔴 Step 1: Take a small paper roll and surround it tightly with cotton swabs, as shown in the above photos.
🔴 Step 2: Tie the cotton swabs to the roll with an elastic band. Fasten it securely so the swabs cannot fall out of the roll.
🔴 Step 3: Dip the newly made stamp into dark green acrylic paint.
🔴 Step 4: Take a piece of paper pre-folded as a greeting card and immediately make a stamp with the roll and cotton swabs. Let it dry for a bit.
🔴 Step 5: Take one cotton swab, dip it in white acrylic paint, and make dots around the wreath.
🔴 Step 6: Glue the bow in the middle of the card, at the bottom of the wreath.
10. Snowman
Materials that you will need:
- white sock
- rice
- spoon
- string
- googly eyes
- golden beads
- pink or orange beads
- green kid’s socks
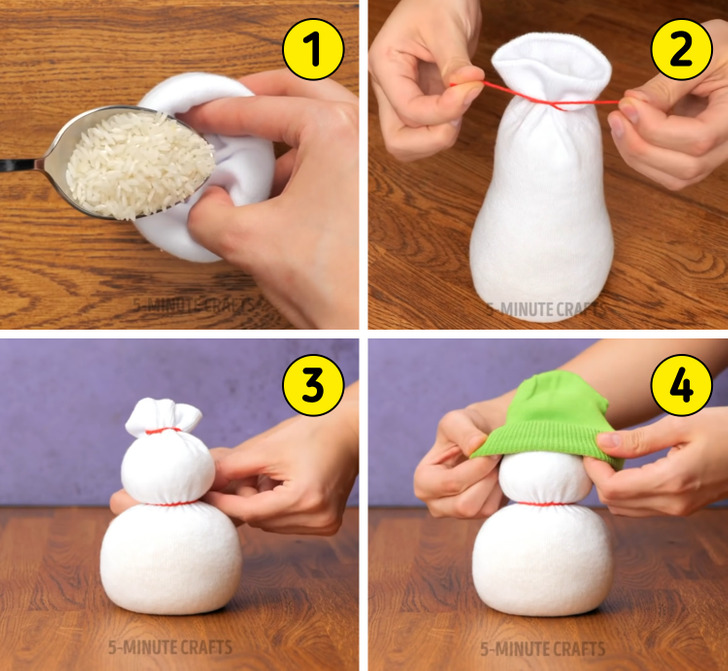
🔴 Step 1: Take a white sock and fill it with rice using a spoon.
🔴 Step 2: Once you are happy with the size of the sock, tie the top with a string and turn it inside out.
🔴 Step 3: Divide the filled sock with rice into 2 parts, a smaller one that will be on top, and a larger one that will be on the bottom. Tie a string to mark the sections.
🔴 Step 4:Take a green children’s sock and place it on top of the white rice sock to act as a hat.
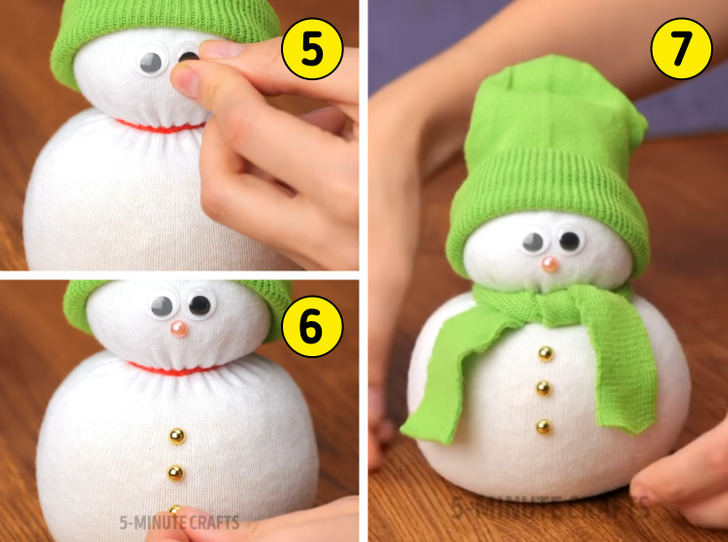
🔴 Step 5: Take the 2 googly eyes and glue them just below the hat of the smaller ball.
🔴 Step 6: Use pink or orange beads for the nose of the smaller ball, and gold beads as buttons for the larger ball. Stick them on with glue.
🔴 Step 7: Cut a piece of another green sock and stretch it to lengthen the material. Tie it on the snowman as a scarf, and you’re done!
