How to Make Simple Macramé Projects
Macramé is a kind of craft where you create textiles by making different knots in different combinations. By tying laces, yarn, or threads together, you can make clothes, accessories, and decor for your home!
5-Minute Crafts is sharing some simple instructions that will help you learn the basic macramé techniques.
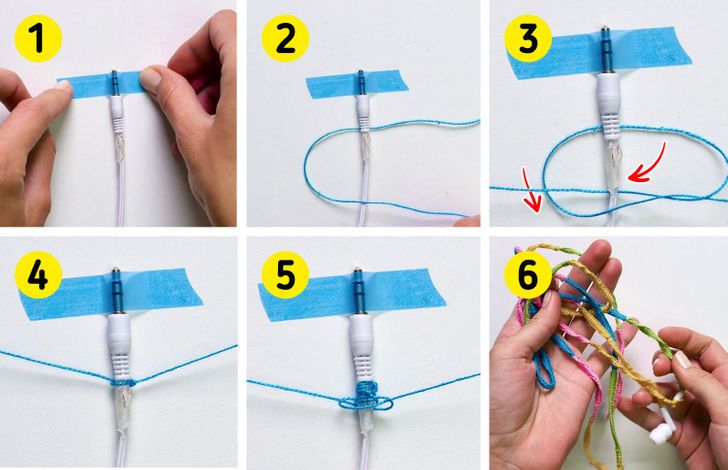
Technique № 1
Step 1. Using tape, attach the end of your headphones to the desk.
Step 2. Put a thread around the cord.
Step 3. Start making a knot and put the left end under the cord and then above the loop of the future knot.
Step 4. Tighten the knot.
Step 5. Repeat, making more and more knots. When the thread becomes short, make a regular knot. You can also use a drop of glue if needed. Continue wrapping the cord.
Step 6. Change the colors of the thread to make the result look more interesting.
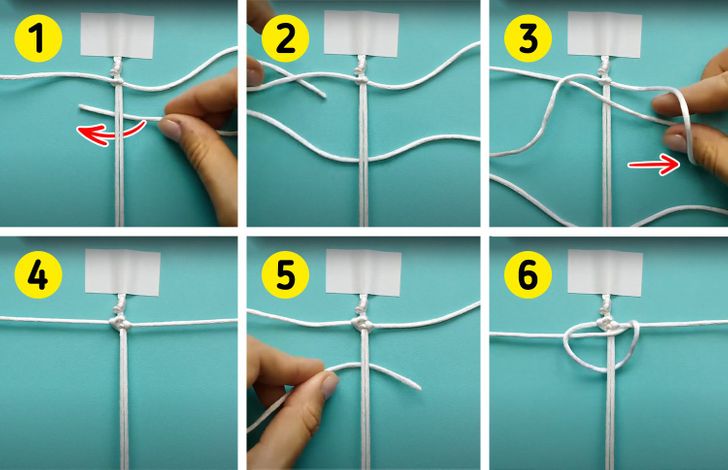
Technique № 2
Step 1. Fold a lace in half and attach it to the table using tape. This will be your base. Tie another lace to it. Put its right end under the base.
Step 2. Put it around the left end.
Step 3. Put it under the base and under the beginning of the right tip.
Step 4. Tighten the knot.
Step 5. Now take the left end of the lace and repeat.
Step 6. Keep making new knots until the bracelet is long enough.
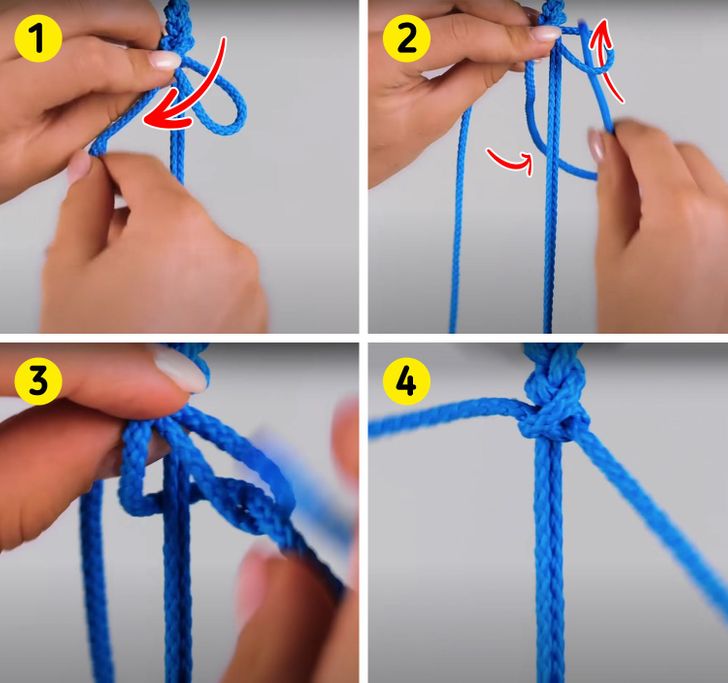
Technique № 3
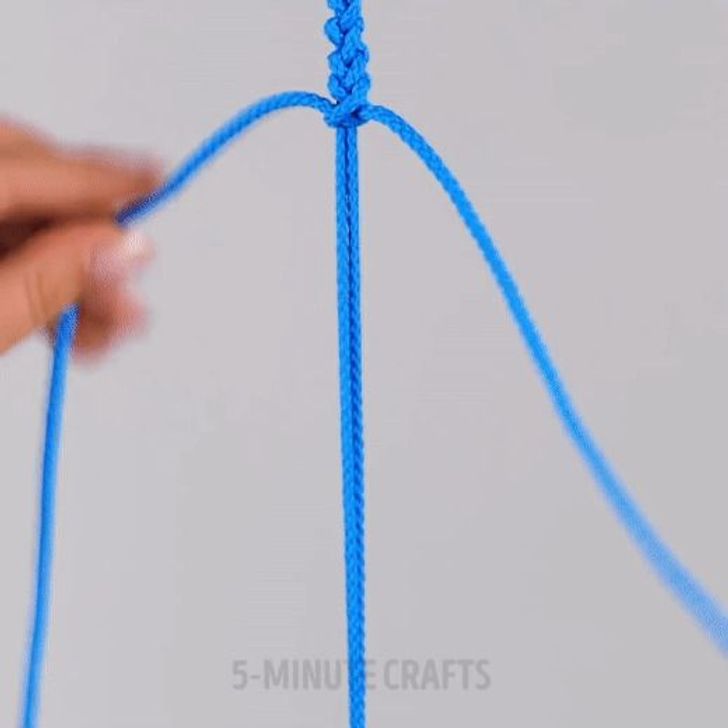
Step 1. Fold a lace in half and attach it to the table using tape. This will be your base. Tie another lace to it. Take its left end and make a loop. The right end should go above through the loop.
Step 2. Put it under the base and through the loop.
Step 3. You should have a knot like the picture above shows.
Step 4. Tighten it and repeat.
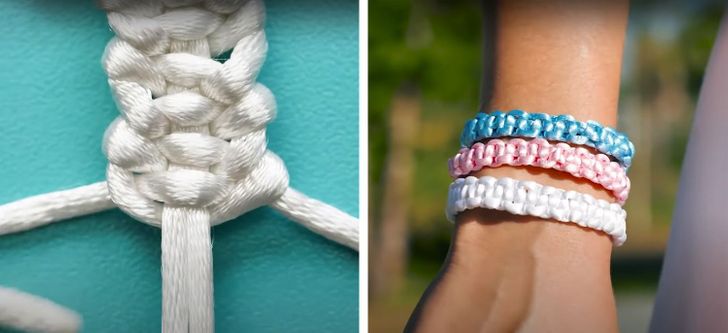
Repeat the steps as the animated picture above shows.
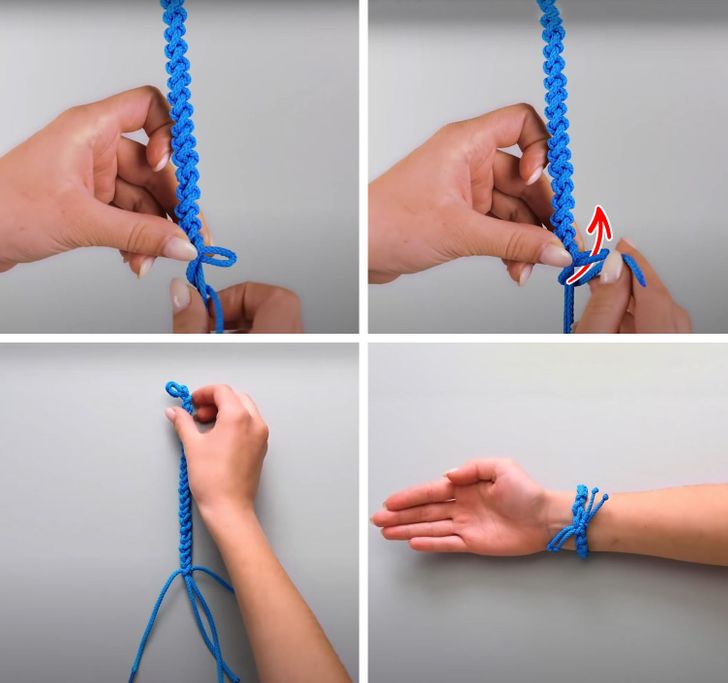
Once the bracelet is long enough, make a loop using the left end of the lace and use the other end to put around the base and through the loop. Now, tie the bracelet around your arm.
Technique № 4
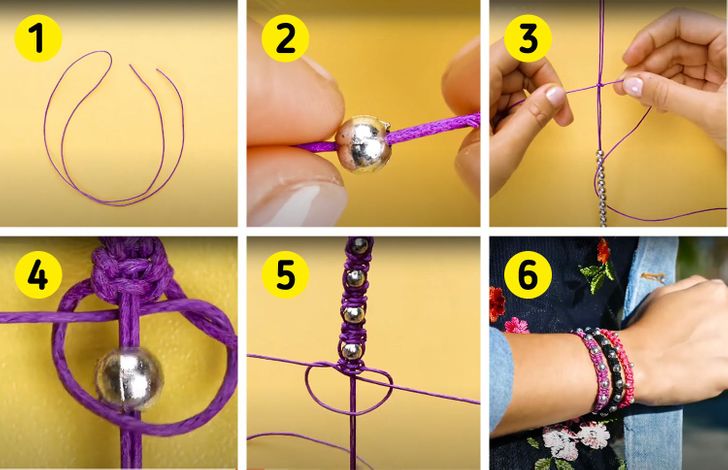
Step 1. Cut a thread long enough so when it’s folded in half, it’s a bit longer than the future bracelet.
Step 2. Put around 10 beads on it. Make sure the thread is folded in half.
Step 3. To one end of the double thread, tie another thread.
Step 4. Make a few knots as we did using “Technique № 2.” Then, make another knot like this around the bead.
Step 5. Make a few more knots without beads and then one with it. Keep going until the bracelet is long enough. If needed, you can add more beads.
Step 6. Once the bracelet is done, put it on your wrist and secure it by putting the end through the loop.
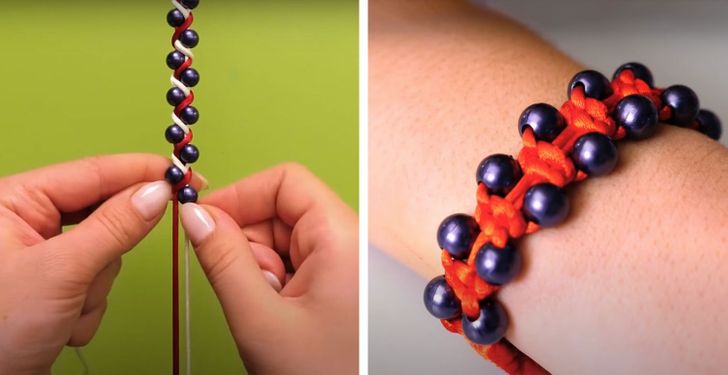
Thanks to the beads, this simple bracelet will look unusual. You can try different knots with the beads, like this video shows.
Technique № 5
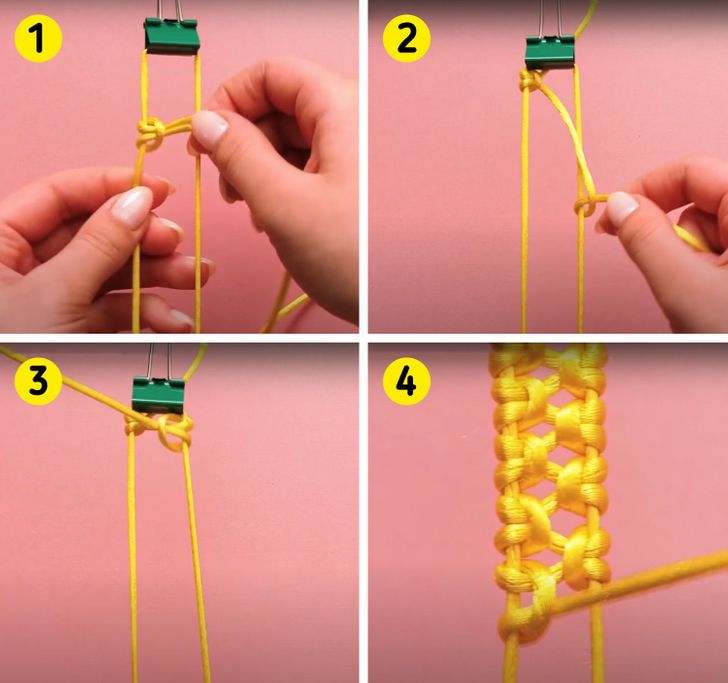
Step 1. Using a paper clamp, attach it to a lace in the middle. This will be the base for your bracelet. Take another lace that you will work with. Put it around the left end of the base, as the photo above shows.
Step 2. Fit the upper end of the second lace in the clamp. Using the free end, wrap the right end of the base. Put the loop up to the clamp.
Step 3. Make another loop as the photo shows.
Step 4. Repeat the same on the left and on the right.
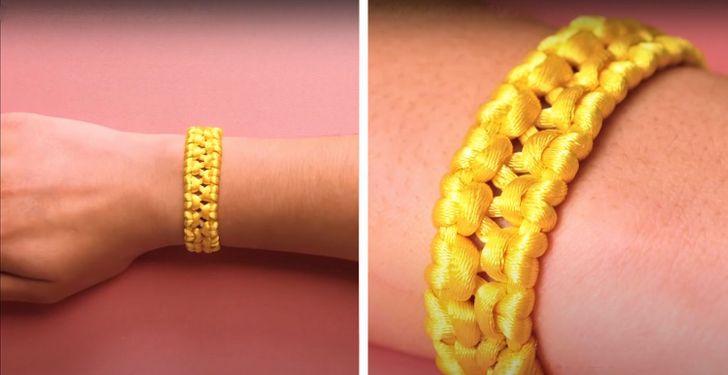
Once you reach the desired length, remove the clamp and tie the bracelet around your arm.
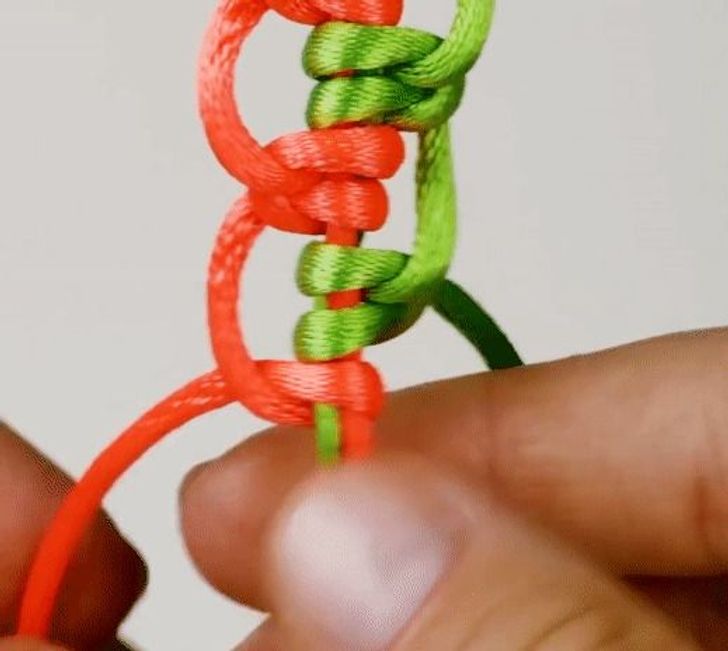
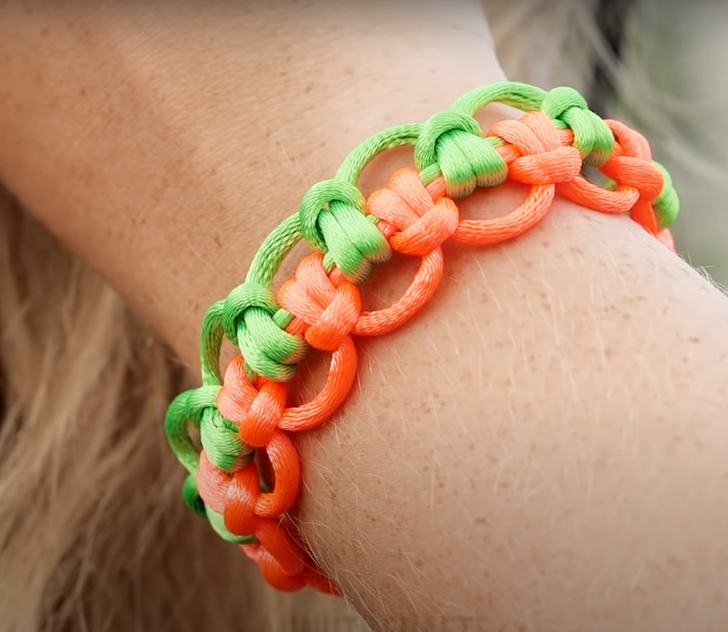
Using the same technique but with 2 laces, you can make the bracelet look even more interesting.
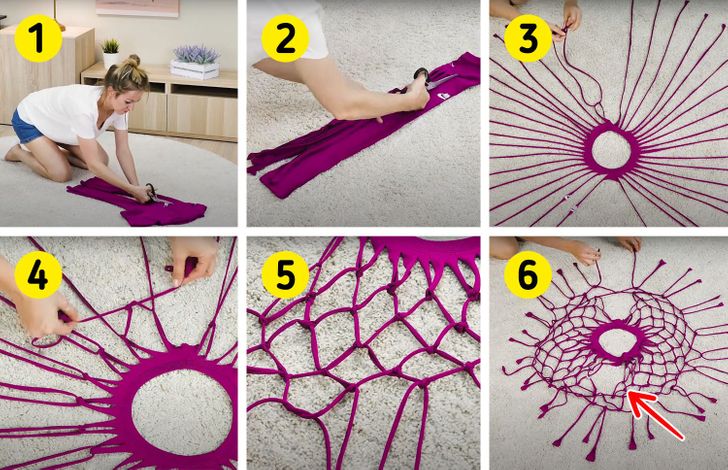
Technique № 6
Step 1. Take an old T-shirt, fold it in half vertically, and cut off the sides together with the sleeves. You should only have the middle with the neck.
Step 2. Cut the T-shirt into strips and don’t touch the neck.
Step 3. Put it on the floor so that the strips spread out from the neck. Tie them together to make the first row of knots.
Step 4. Do the second row the same way.
Step 5. Keep doing it along the entire length making more and more rows.
Step 6. Don’t forget to leave some space for the arms. You can also add beads if you like.
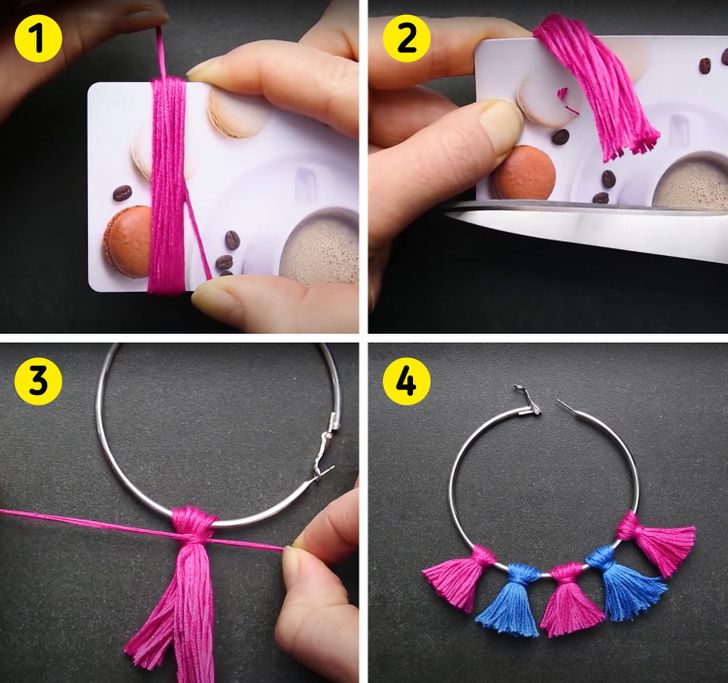
Bonus: Simple macramé earrings
Step 1. Take a plastic bank card and wrap it with mouline thread.
Step 2. Cut through the thread at the lower edge of the card.
Step 3. Wrap the threads you have around a round earring. Tie it as the photo above shows. Cut off the loose ends.
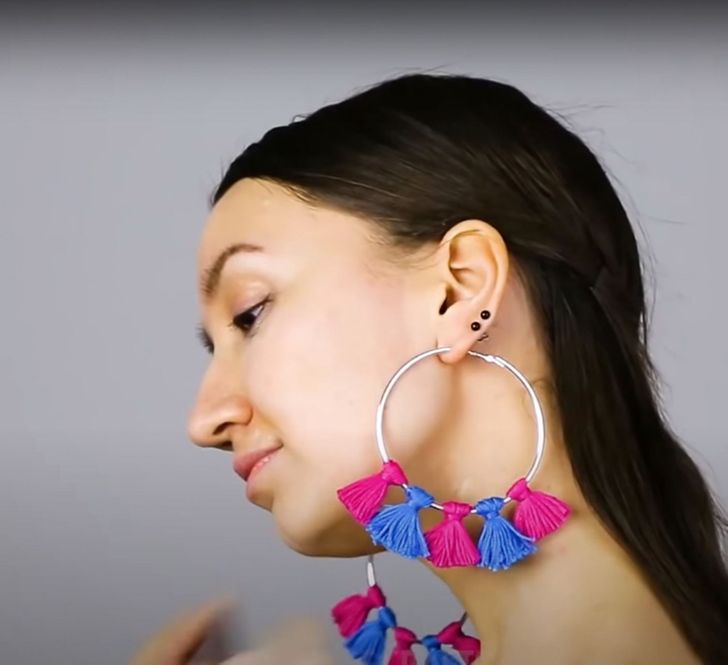
Step 4. Add more decorations like this to your earrings.
