How to Make Your Own Safe
An easy way to keep your belongings secured is in a safe where you’re the only person with the code to unlock it. However, this can be tough if you don’t have one. And we at 5-Minute Crafts want to show you an easy way to make one yourself.
You’ll need:
- A piece of regular cardboard
- A piece of cardboard with ridges
- A compass
- A ruler
- A pair of scissors
- A craft knife
- Glue
- 6 small sticks
Step 1
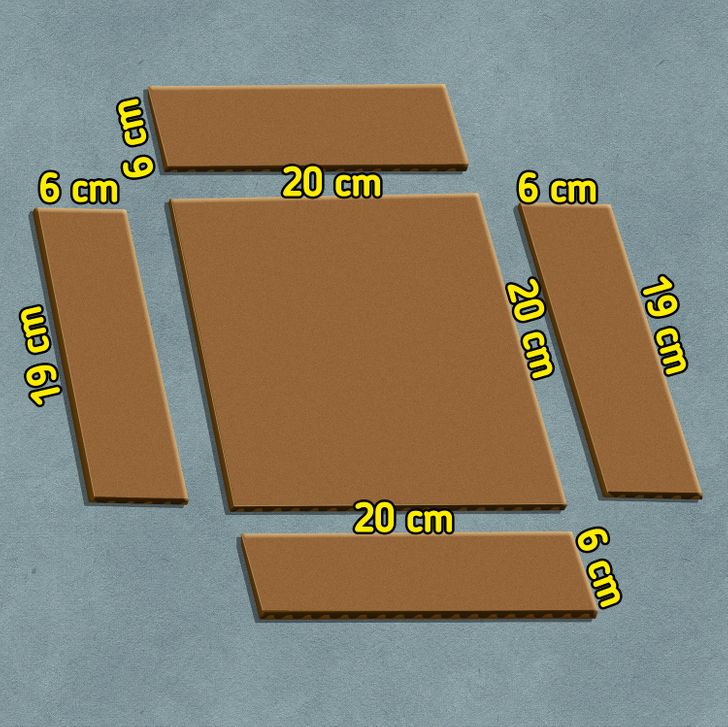
- Cut 2 19×6 cm rectangles out of the regular cardboard.
- Then, make 2 squares, 20×20 cm.
- Lastly, cut another 2 rectangles at 20×6 cm.
Step 2
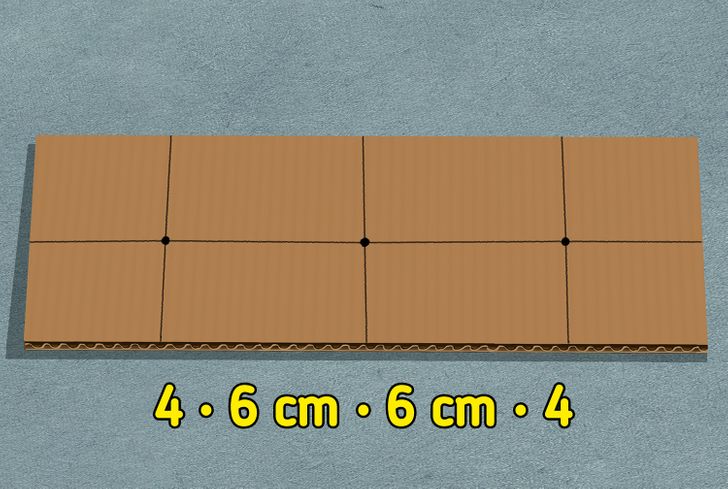
- On one of the 20×6 cm rectangles, cut 3 holes:
- From the start, draw a 4 cm line on your cardboard. Then, from the 4 cm line, mark another 6 cm. Again, from the previous line, mark another 6 cm; and lastly, mark another 4 cm.
- Mark 3 cm going from the bottom to the top of the rectangle, and draw a line.
- Make holes where the lines meet.
Step 3
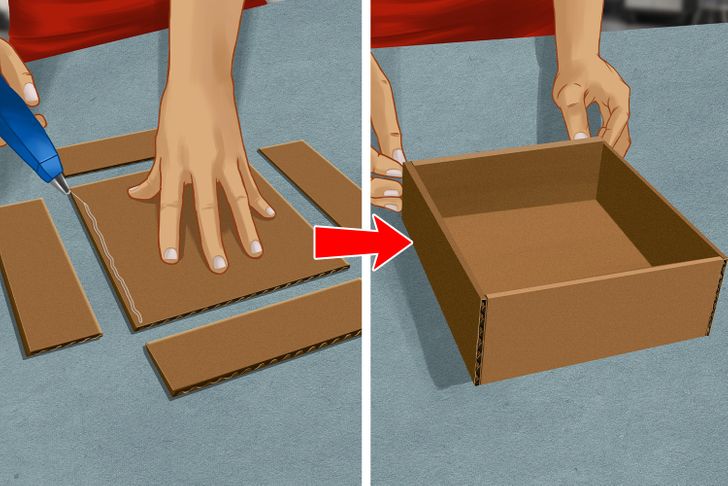
- Place a line of glue at the edge of each side of one of the squares.
- Now glue the rectangles to it.
Step 4
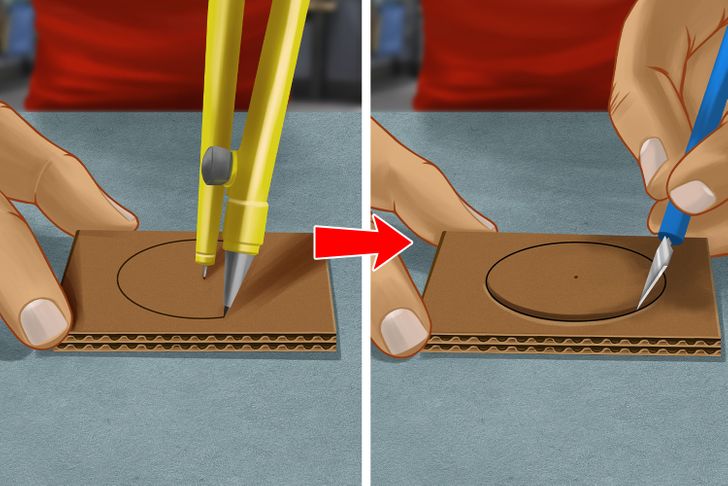
- Set your compass to 2.5 cm.
- On a small piece of cardboard, draw a circle.
- Cut the circle out with your craft knife, and place a hole in the very middle of it.
- Make 3 circles. These will be your dials.
Step 5
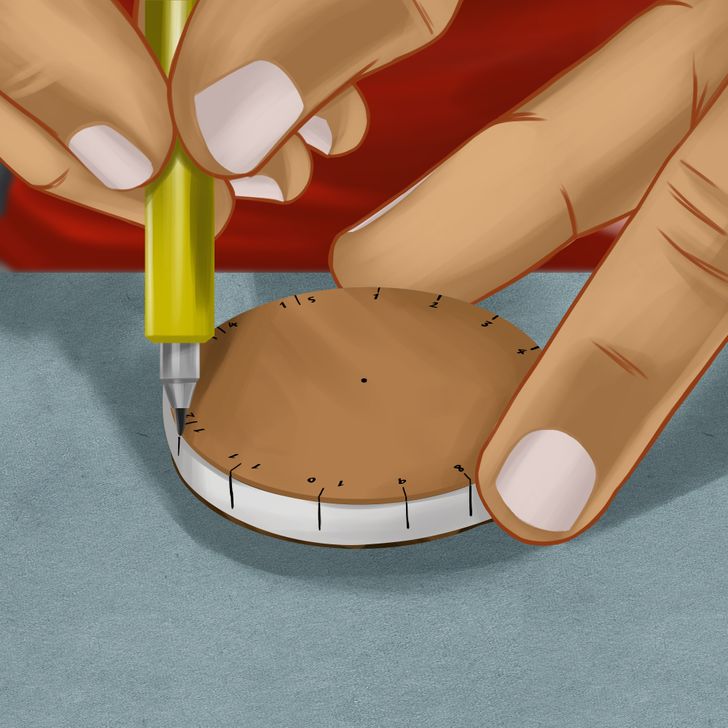
- Cut a string of paper and glue it to the sides of the dials you’ve just made.
- At their ends, draw 15 very tiny lines that extend to their sides.
- To finish up, write the numbers from 1 to 15 at the ends of the lines.
Step 6
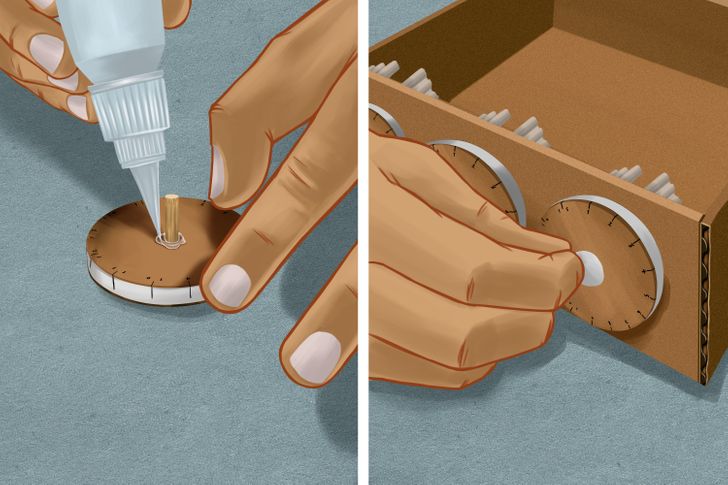
- Place a small stick (or anything that works) in the holes you’ve cut in the dials.
- Place a tiny bit of glue around the stick.
- Insert the dials on the 20×6 cm rectangle with the holes in it.
- Cut out tiny circles of paper to cover the central pieces of your mechanism.
Step 7
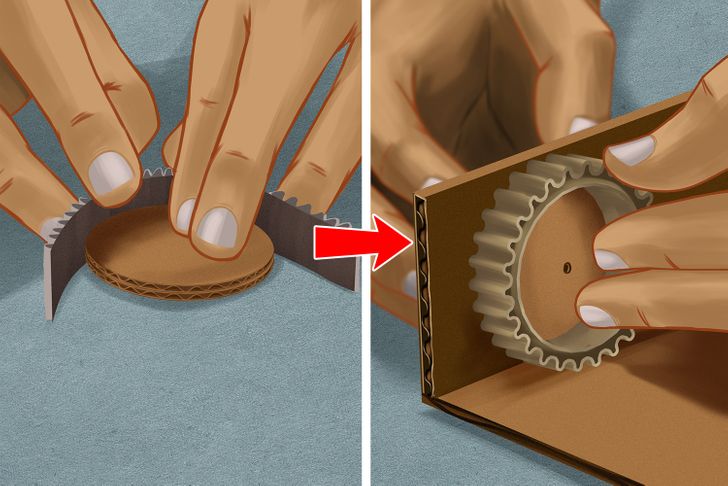
- Cut 3 more circles out of cardboard, exactly the same way you did it before for the dials, but without the piece of paper or the lines with the numbers.
- Then cut a small line (that won’t cover the entire side of the circle) out of the cardboard with ridges on it, and glue it to the sides of your circles. Make sure it’s wider than the circles.
- Place the circles inside of your safe, on the same sticks as your dials.
Note: The number that matches the space that’s not covered by the ridged cardboard will be your password.
Step 8
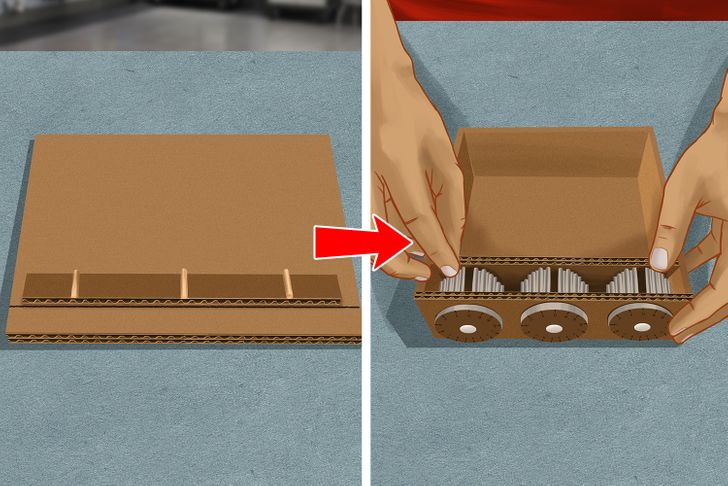
- On the square you’ll use to cover the top, mark a line 2.3 cm from one of the sides.
- Then cut an 18×2 cm rectangle out of cardboard, place glue on the line you’ve just drawn, and glue the rectangle while making sure it’s centered.
- Now, from the start of that rectangle, mark 3 cm, and from those, mark another 6 cm, then 6 cm again, and finally 3 more cm.
- On those lines, glue the 3 (3 cm) sticks on them.
- Lastly, cut a piece of cardboard to divide the mechanisms from your belongings (measure this piece yourself), and place it inside the safe close to the mechanisms.
Step 9
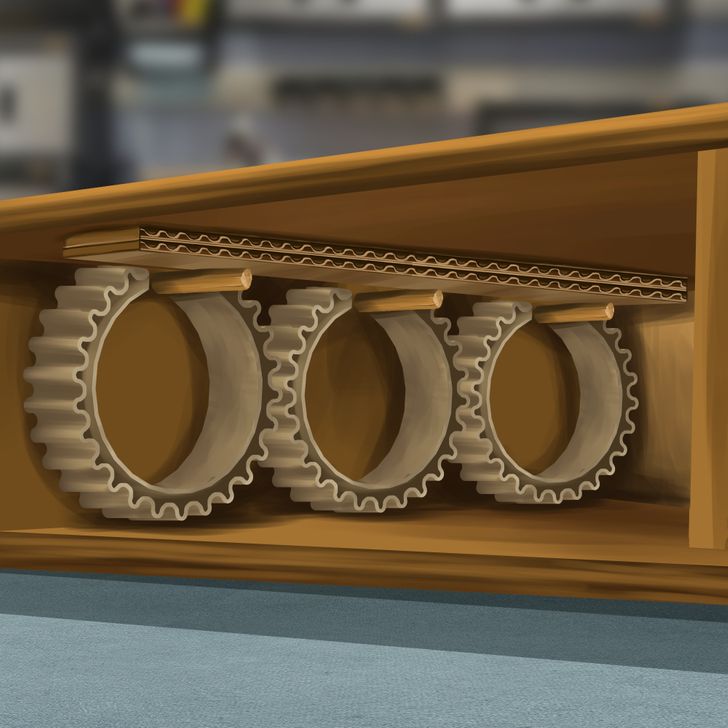
- Now, simply glue the top to the rest of your safe, but make sure the sticks are facing down.
How it works
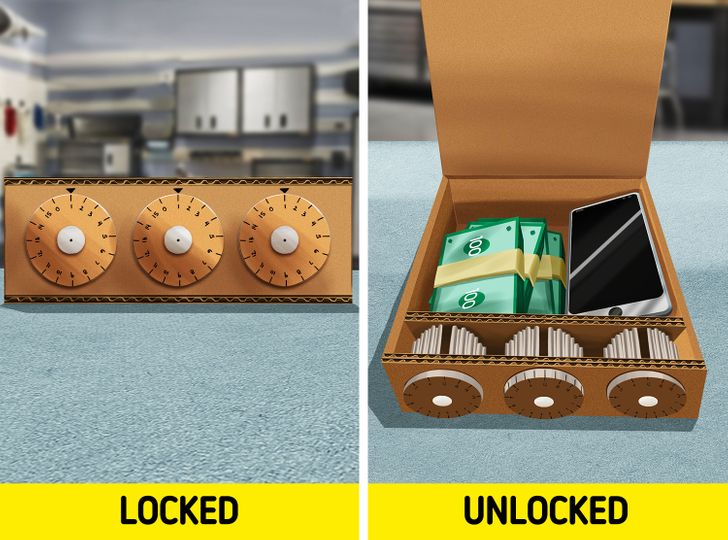
You’ll be able to lock and unlock this cardboard safe as you please. It’ll be unlocked when the mechanism’s space (your password) matches the sticks. In any other position, it’ll be locked, and only those who know the safe’s combination will be able to use it.
Share This Article