How to Paint With Watercolor: 20+ Tricks for Beginners
Anyone can learn to draw. And the more often you use watercolor, the better the results will be. Of course, if you are already talented, it will make the learning process faster but even if you are a novice, by following certain rules and using special tricks and techniques, you will be able to create really good paintings. Every beginner pursues their own goals, but watercolor is probably the best choice for anyone when they are just starting out. It allows the artist to create illustrations pretty fast, and even draw landscapes and portraits. And it’s also relatively cheap.
5-Minute Crafts is going to tell you about the tricks you can use to help you draw with watercolor even if you’ve never done it before.
The materials you need
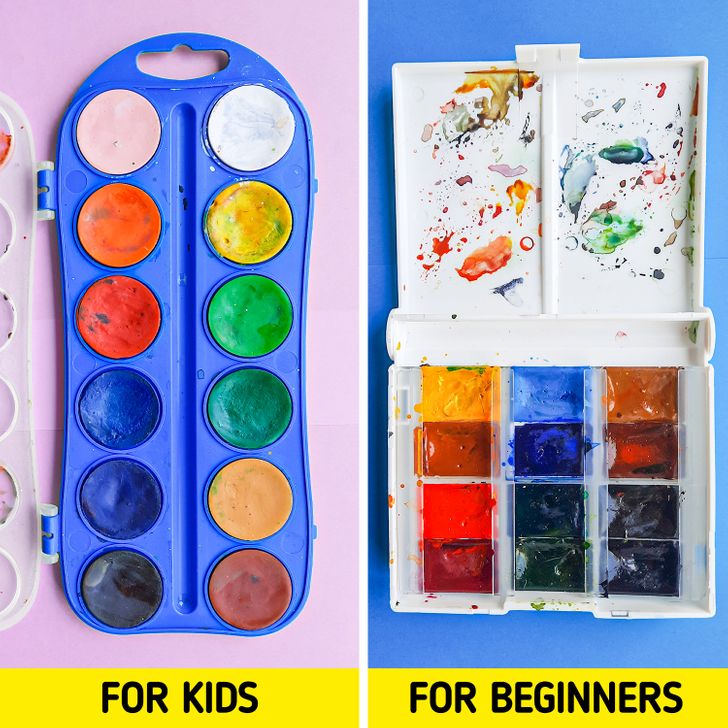
- Watercolor
If you can, don’t buy watercolor for kids, instead, buy a set for students. It should contain at least 12 colors in a plastic box.
- Brushes
When you are just starting out, buy 2-3 round brushes in different sizes, 1 thin brush for small details, and if you want, 1 medium flat brush. Most people use brushes made of natural hair, and some use synthetic brushes. There are more interesting choices, like bamboo brushes that are traditionally used by artists in Asia.
- Watercolor paper
You can’t use regular paper for drawing: the water will make the sheet lose its shape and tear, and the watercolor will not spread evenly. It’s better to buy special watercolor paper. There are different sizes, thicknesses, textures, and so on. The characteristics determine how the paper absorbs water.
- Water jar
Some people love using 2 jars at the same time to get rid of the extra paint first and then use pure water. This way, you won’t have to wash the brushes and change the water very often.
- Paper napkins
The napkins are used to remove excess water. This often helps when editing the picture.
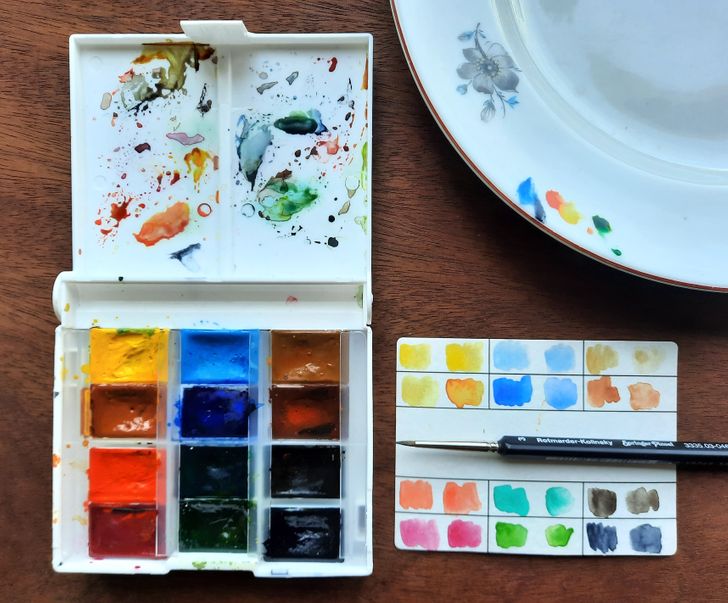
- Ceramic plate (optional)
To get different colors, paint is mixed on a palette. Sometimes, people use the top of the paint box to do this but some prefer using a ceramic plate (without any drawings) because water and paint react to this surface better.
Mixing colors on a palette lets you to create new colors. For example:
- red + blue = purple
- yellow + red = orange
- yellow + blue = green
- orange + blue = brown
- yellow + red + blue = black
Advice: Before you start working, create a color chart so you know exactly what your watercolor will look like on paper when it dries. Cut a sheet of paper so that it fits into the kit. Then, make a chart with enough boxes for all the colors. Keep the color chart with you at all times.
How to draw with watercolor
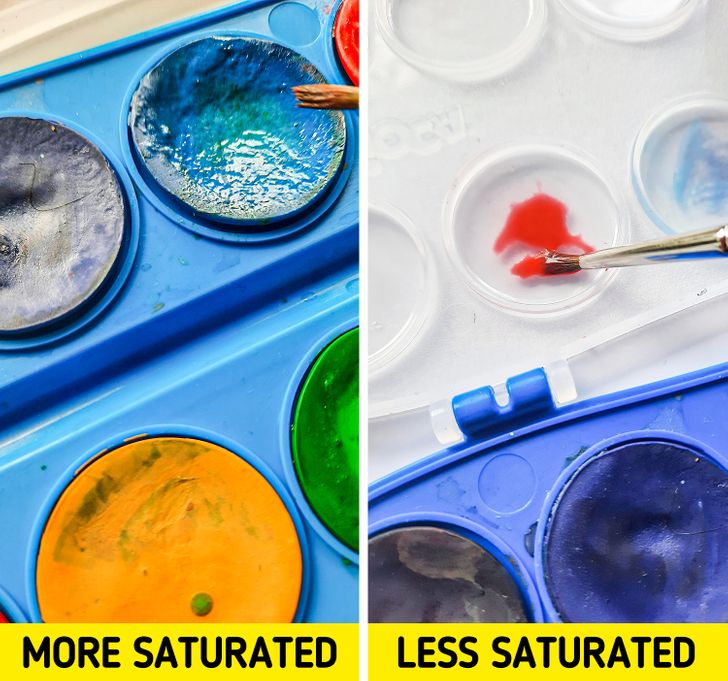
The basics of drawing with watercolors are these: an artist puts the brushes into the water, touches the color, it fills the brush mixing with the water, and then the artist puts brush to paper.
- Do you draw on dry or wet paper?
If you need clear lines and shapes, you should use dry paper. The paper can be clean or already painted with a different color. The less water there is on the brush, the brighter the color on the paper.
To make a background or mix different colors, the wet-on-wet technique is used: the watercolor is put on wet paper. Depending on the combination of colors and their subtones, you can make the picture light, increase the color saturation, add shades, or show glares. One of the perks of using this technique is that you can always remove the excess paint or a wrong shade by using a napkin.
- How do you adjust the color saturation?
Let’s say you need a bright, saturated color. You take a wet brush, touch the paint itself, and draw on the paper. If the paper is dry, the color will be even more saturated. You can improve the saturation if you put the paint on the paper, let it dry, and put one more layer on top.
When the paint is put with a wet brush on the palette first, it’s dissolved with more water, and the color will be more transparent and light. If the paper is wet, the color will be even less saturated.
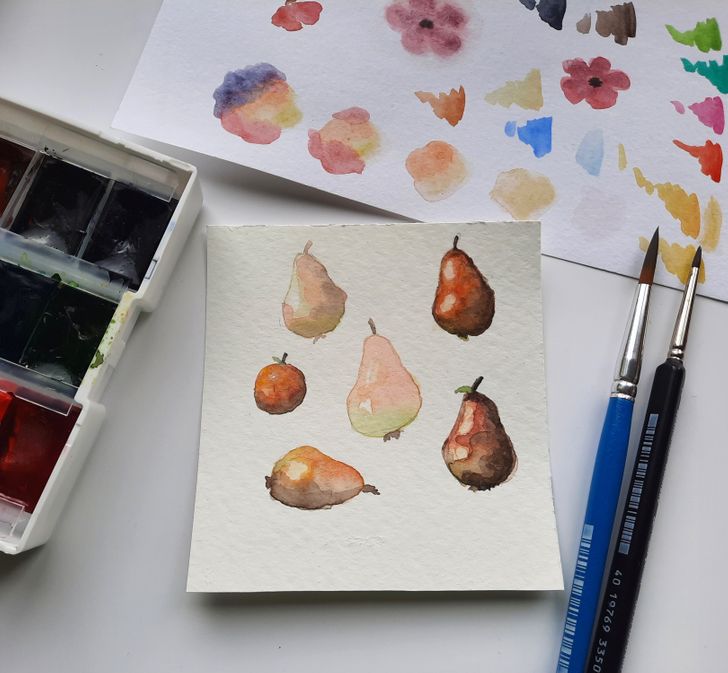
By switching these techniques, you can use the right shade, change its saturation, create glares, and add shades to make the result more voluminous and realistic. When working with watercolor, artists usually start with light shades and move to darker ones. Again, it’s easier to create the background on wet paper, then mix different colors, and then move to drawing the details on the dry picture.
Try drawing simple voluminous details using real objects as a reference, for example, a pear or an apple: choose the spot where the glare will be, draw the shadows. First, put the paint on wet paper, and make sure that all the next layers are darker than the previous ones. Finally, when the paper is dry, draw the shadows and small details: the tip and the sides.
It’s also a good idea to use masking liquid: it protects the necessary places from accidental spots of dark colors. You put the masking liquid on the light parts of the picture, then add the dark colors where you need them and after everything dries, you remove the mask and edit the light spots if needed.
How to create unusual textures and effects
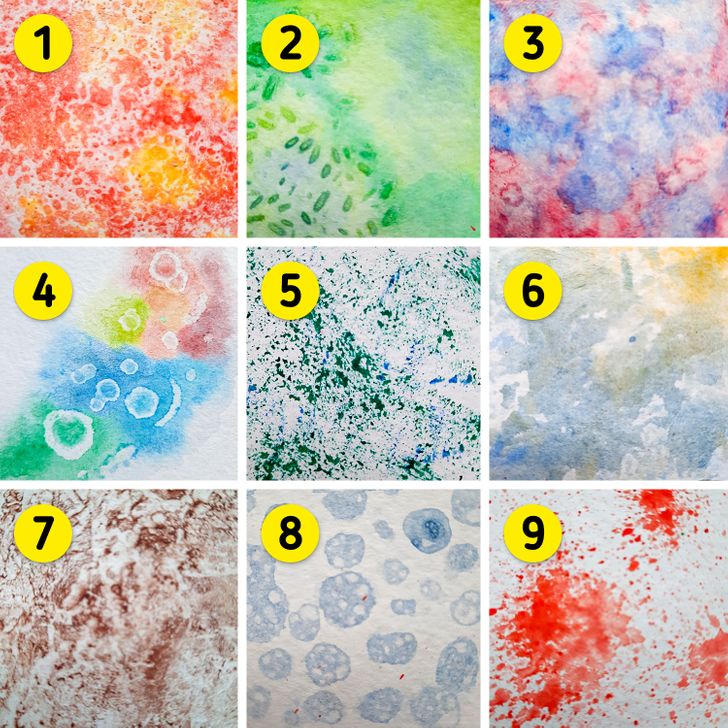
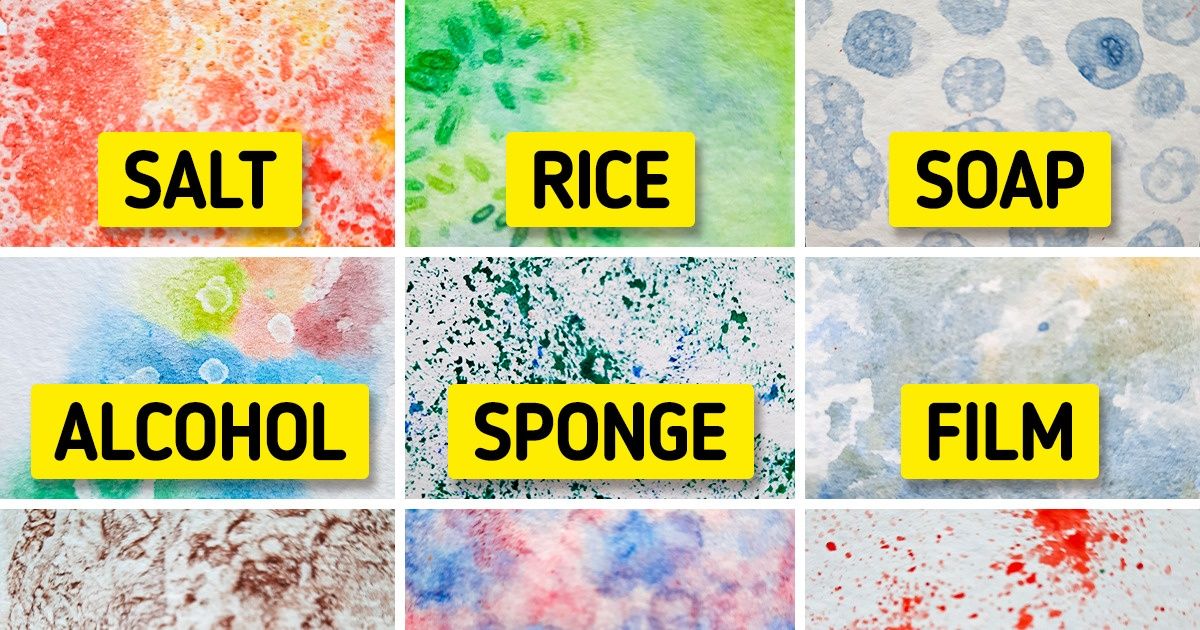
You can make the picture look even more interesting if you use different materials.
- Put some paint on wet paper and add salt. Wait for the paper to dry and blow the salt away. If you use big salt crystals, the stains will look like winter frost on windows.
- Rice absorbs water leaving oval-shaped outlines on the paper. Put some watercolor on wet paper, and then place the rice. After the paper dries, remove the rice.
- Dissolve a few drops of bleach in a bit of water and then put the water on the paper with watercolor.
- Soak the brush in alcohol, touch the wet paper with watercolor to make spots with a white edge and a colorful center.
- Use an ordinary sponge for drawing: put some paint on it and then touch dry paper with it. It will look like vegetation.
- Paint the page with different colors and before the paper dries, put a piece of folded food film or a plastic bag on top. Wait a few seconds and remove the film to get unusual imprints. If needed, repeat to make the texture deeper. Use less water and more paint to get clearer lines and shapes.
- Use a dry paper towel to touch barely wet paper with watercolor to create light spots of different sizes and shapes.
- Mix some water and liquid soap or dish soap and add watercolor. Take a drinking straw, put the end into the liquid, and start blowing on the other side to get bubbles on the surface. You can carefully move them to a dry sheet of paper.
- Put watercolor on an old toothbrush and then quickly flick your thumb on the brush so that drops get on the dry sheet of paper you’re using. The more drops that get on the brush, the bigger the spots will be. This way, you can quickly create starry skin on a dark background. You can use an ordinary brush instead of a toothbrush.
These techniques help amateur artists create great pictures in a matter of minutes.
Example № 1: Flamingo
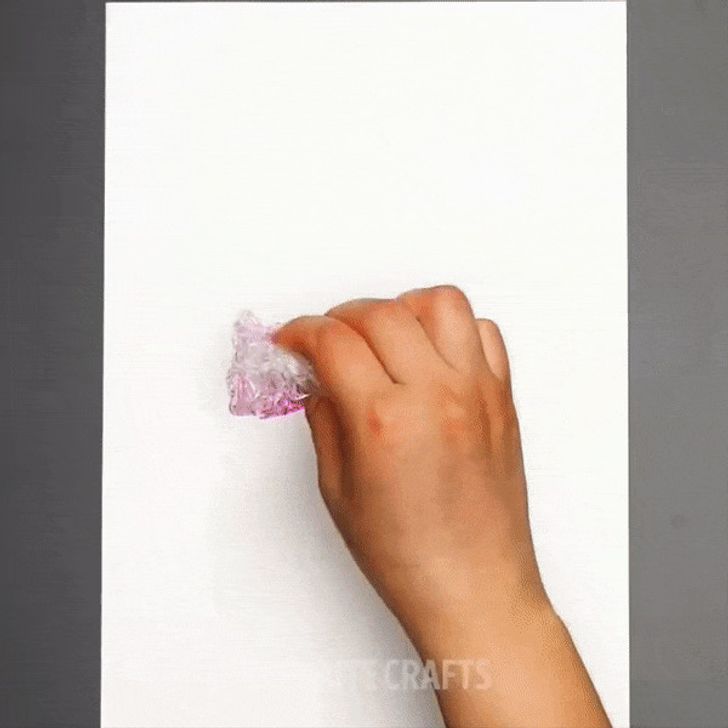
- Take plastic wrap and squeeze it to make a roll. Put some watercolor on it.
- Touch a dry sheet of paper to create a flamingo body.
- Draw the head, the legs, and the beak with a thin brush.
- Add some colorful splashes around the bird. Done!
Example № 2: Tree
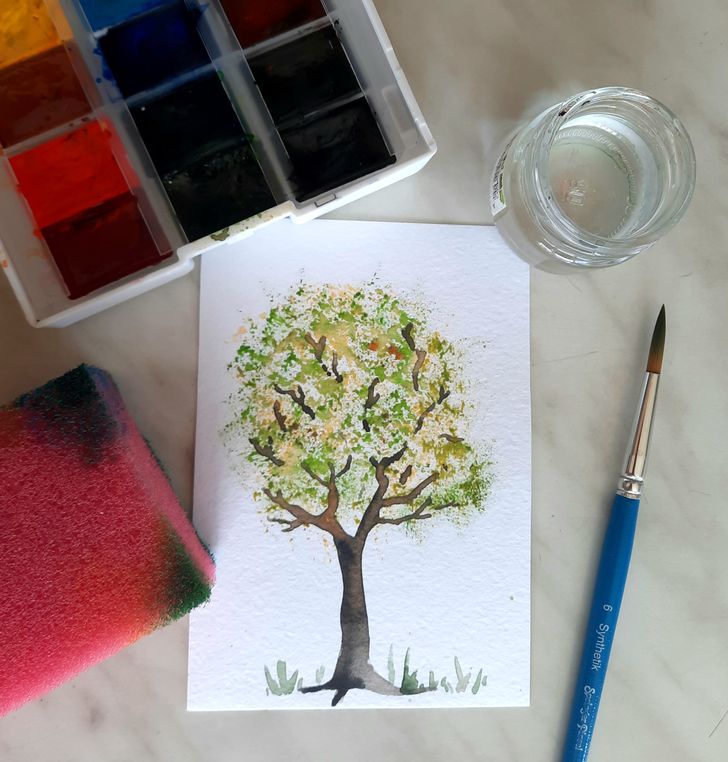
- Take an ordinary sponge. It should be a bit wet. Touch yellow paint with it.
- Then, put it on a dry sheet of paper making the leaves of the tree. When the paint dries, repeat it with green color. Again, wait for it to dry and add dark green.
- Use a brush to add the trunk of the tree, the branches, and the grass around. Done!
Example № 3: Forest and night sky
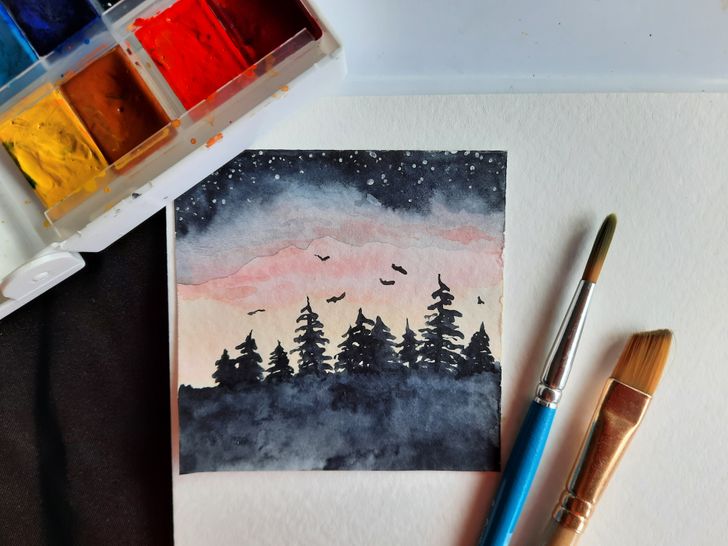
- Put water on a dry sheet of paper. Before the water dries, create the background: make a line of yellow in the middle, add a line of pink on the top, and then, add blue, so that the colors mix a bit. Then, add dark blue at the top and at the bottom.
- Before it all dries, add a few more lines of different colors to make different layers on the sky. At the bottom, add another layer of dark paint.
- Wait for the picture to dry, and add birds and trees with a thin brush.
- Cover the lower part of the picture with a napkin and add some white paint sprinkles at the top to create a starry sky effect. Done!
Example № 4: Simple flowers
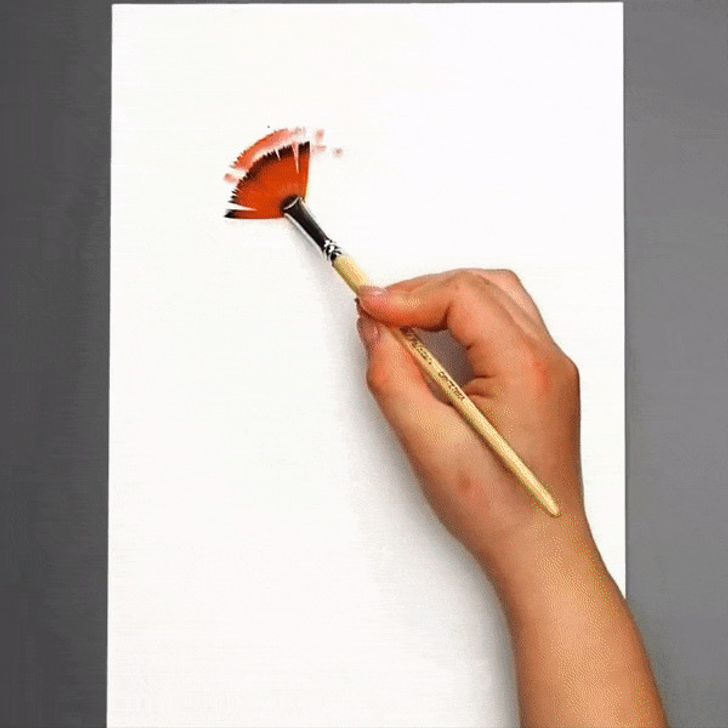
- Get some scarlet paint with a fan brush and start touching a dry sheet of paper the way the animated picture shows to make the petals of the flower. Repeat 3 times.
- Using an ordinary brush, add the leaves and the stem of the flower. Done!
Example № 5: Balloons
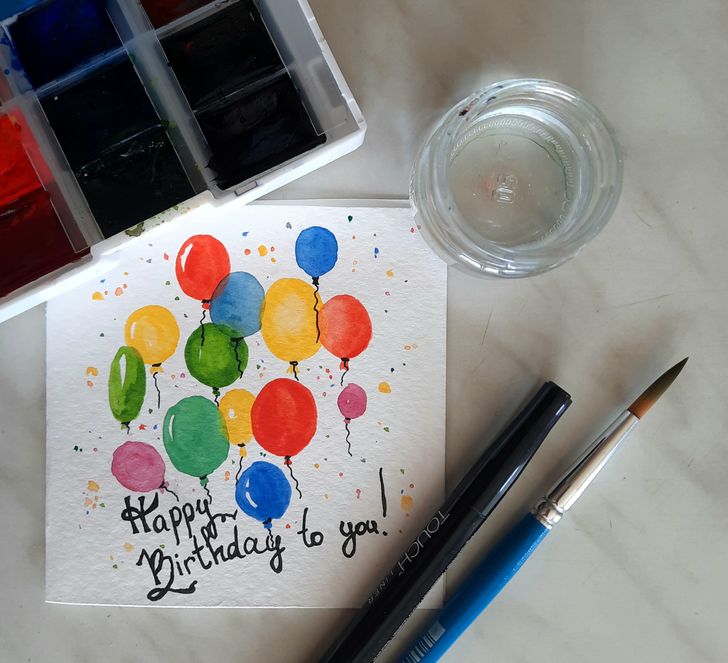
- On a dry sheet of paper, draw balloons in different shapes and sizes. Start with light ones and gradually move to darker shades. After using each new color, wait for them to dry. Remember: if the balloons are semi-transparent, the picture will have more volume if several balloons are on top of each other.
- Use a thin dark marker to add the threads on the balloons and words if needed.
- Use a regular brush to add confetti. Done!
Example № 6: Sea and ship
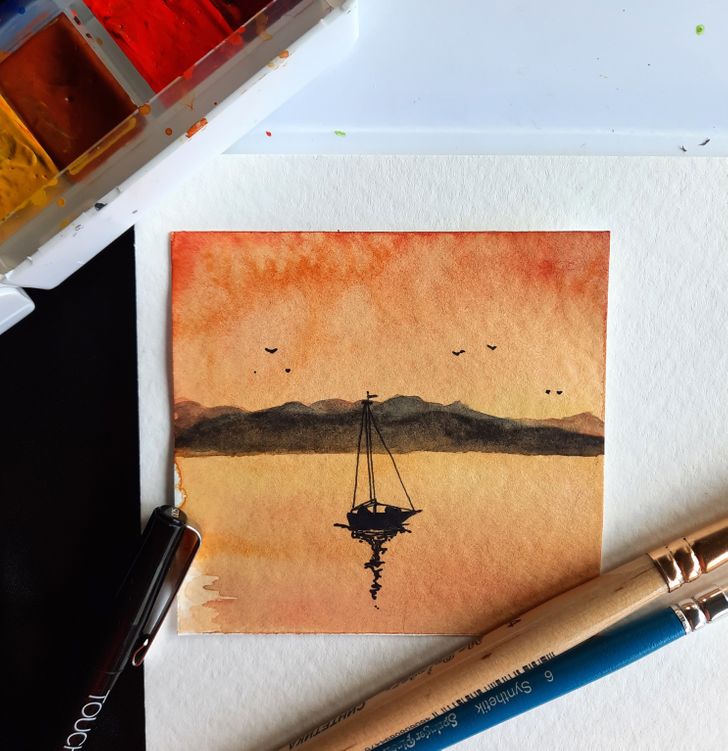
- Put some water on a dry sheet of paper. Before it dries, add some yellow and then orange paint. Add a line of red at the top. The paper should be wet so that the colors mix.
- Wait for the paper to dry. Draw the outline of land in the center. Make several layers to make the picture appear richer.
- After the sheet dries, draw a ship, its shadow on the sea, and birds in the sky. Done!
Example № 7: Different-colored hearts
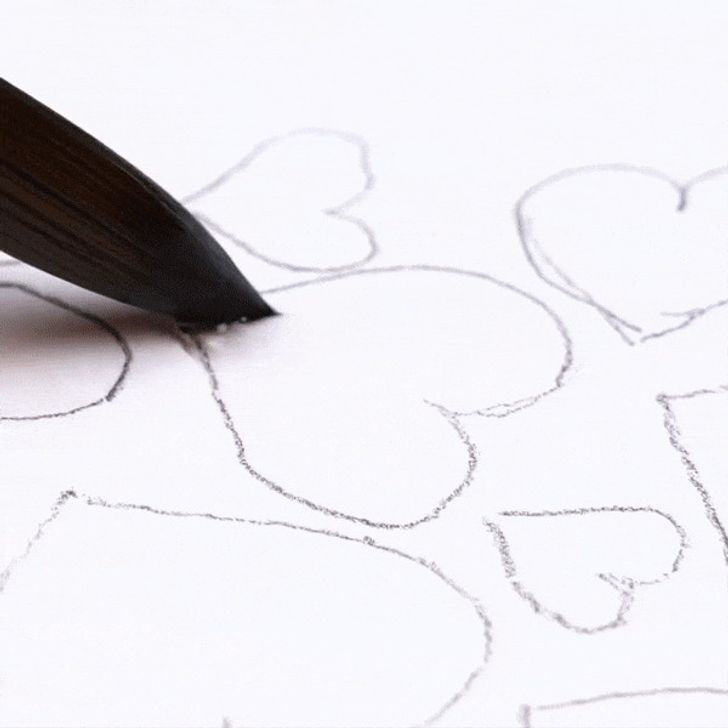
- On a dry sheet of paper, draw a big heart with a pencil and a lot of small hearts in the middle. Erase the big heart in the middle.
- Using a brush, paint over all the small hearts with water and then with 2 different colors, as the animated picture shows. Wait for it to dry. Done!
Example № 8: Houses
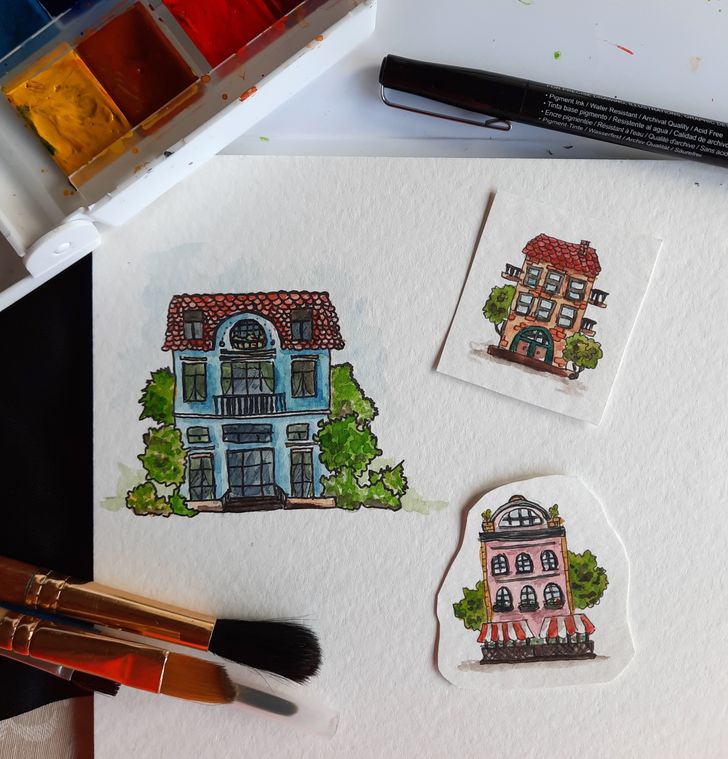
- Draw a small house with a regular pencil. Draw the windows, doors, balconies, roof, trees, stairs, and other details.
- Make the outline with a dark liner. Erase the pencil.
- Using a thin brush, paint over it with watercolor. When the picture dries, use darker shades to add the details. Done!
Example № 9: Flowers on an abstract background
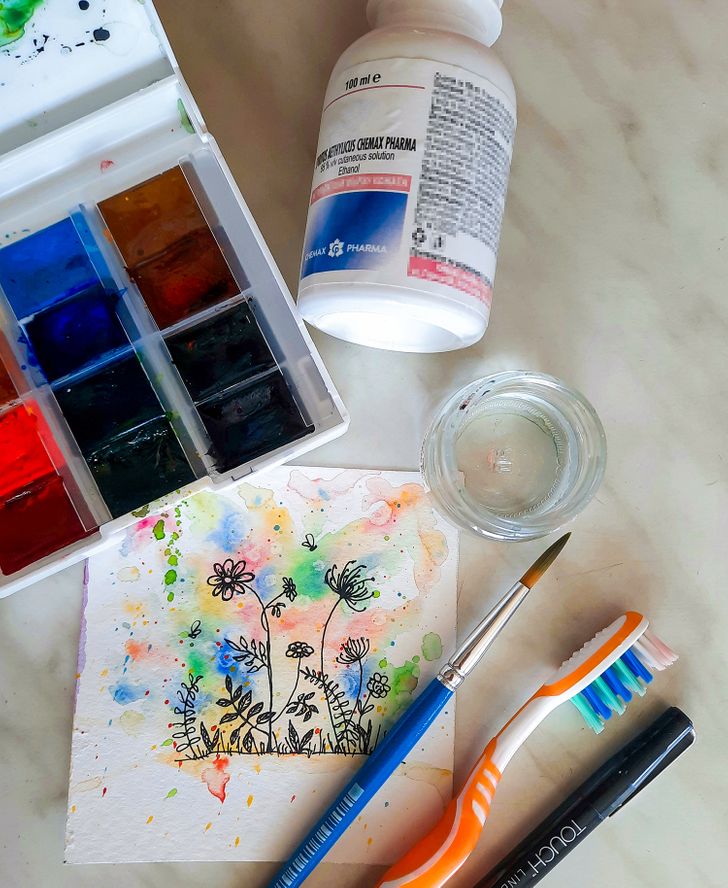
- Put some water on a dry sheet of paper in random order. Before it dries, add more colors to allow them to mix.
- Sprinkle the picture with drops of alcohol.
- Wait for the image to dry, put some watercolor on a toothbrush, and then add some colorful spots on the picture.
- Wait for the picture to dry and then add flowers and insects. Done!
Useful tricks
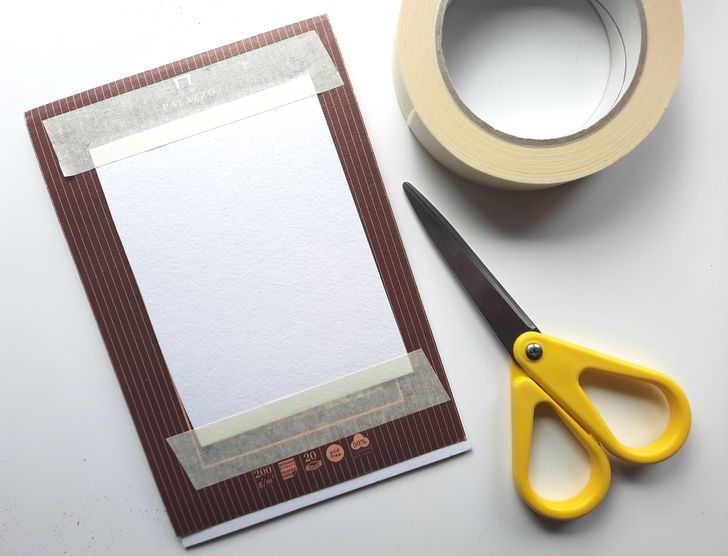
- To prevent the sheet from folding, you can fix it with paper clips or stick it to the base with tape. It is also useful if you are drawing outside when the weather is windy.
- Tape can help you create perfect-looking rectangular frames around the picture: put it on the perimeter of the sheet and when the picture is ready, remove the tape.
- If the tape is too sticky, stick it to any cotton piece of clothing, then remove it and put it on the paper. It won’t damage the paper afterward.
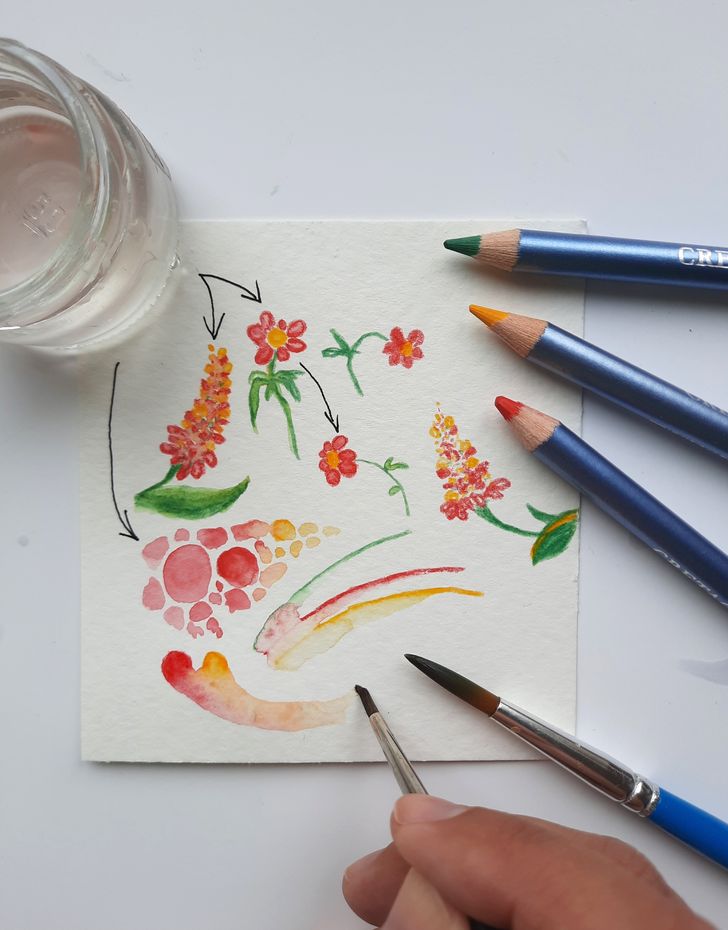
- If you are drawing something complex, use a regular soft pencil that will be almost invisible after you add the water.
- There are also watercolor pencils. They are great to use on dry paper and you can use an eraser to remove all the mistakes. After that, just go around the painting with a wet brush to make the picture look as if it were drawn with watercolor.
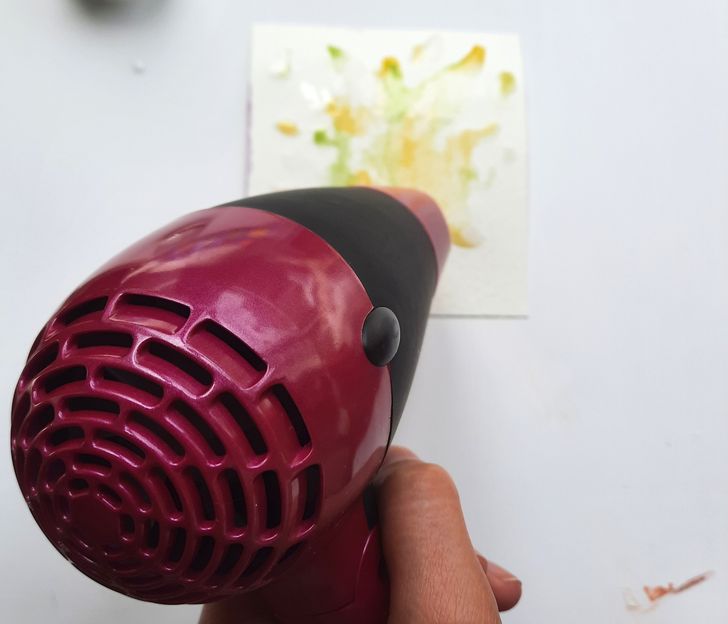
- In order not have to wait for all the paint layers to dry, carefully dry the paper with a hairdryer. Keep the temperature and the hairdryer power low to avoid ruining the picture.
- If the edges of the picture want to roll, put some heavy books on the picture and the sheet will be flat by the morning.
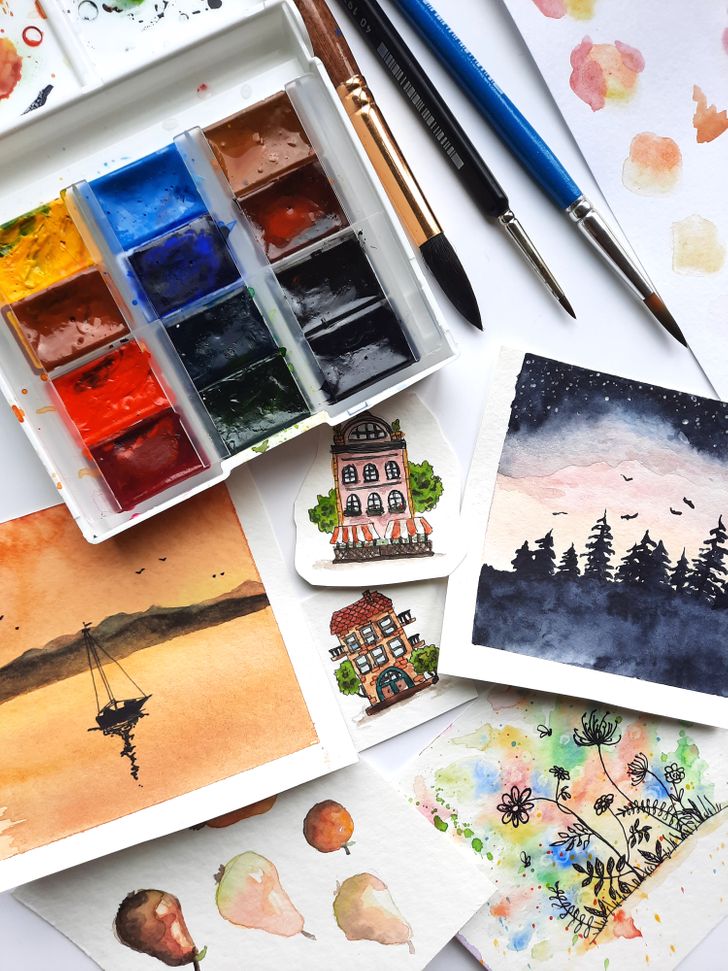
- A beginner might need hours to draw the things that professionals can draw in just a few minutes. So, don’t try to draw really big pictures with a lot of details. Start with small pictures to train your eyes and hands and then add details and colors as you get better.
- You can find a lot of drawing lessons for beginners where experienced artists explain in detail how to draw a certain thing. If you draw at least once a week with the supervision of a professional and practice every day, in 1-2 months, you will already be able to surprise other people with your work.
