How to Sculpt Clay | A Guide for Beginners
Allowing creativity to leave your body has never been easier. People often combine their skills and create masterpieces that steal almost everyone’s breath away. Clay sculpting is a form of art that requires both visual and hand practice. Following these simple steps can ease your workflow, allow you to make sculptures at home, and prevent common troubles from occurring.
Types of tools that you will use
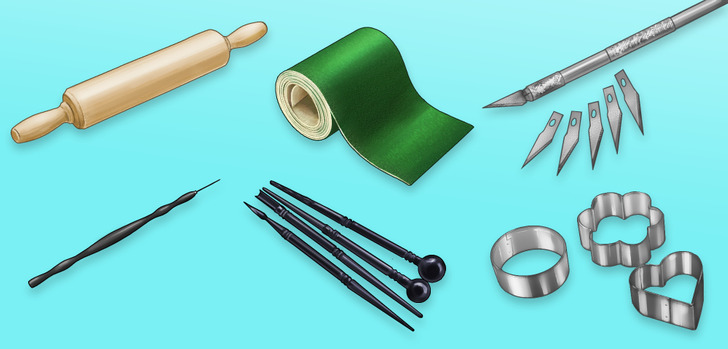
Aside from modeling the clay with your hands, there are various tools that can ease the work and add the best touches to the final product.
- Needle end pointers: tools that create miniature details for different crafts that mostly need openings
- Clay blades: tools to cut the modeling clay
- Rolling pins: used to flatten the sheets of clay
- Shapers: tools to blend and smooth seams without leaving a mark
- Shape cutters: different-sized clay molds for cutting perfect shapes
- Sandpaper: used to finish the edges and provide it with a fine look
Understanding the types of modeling clay
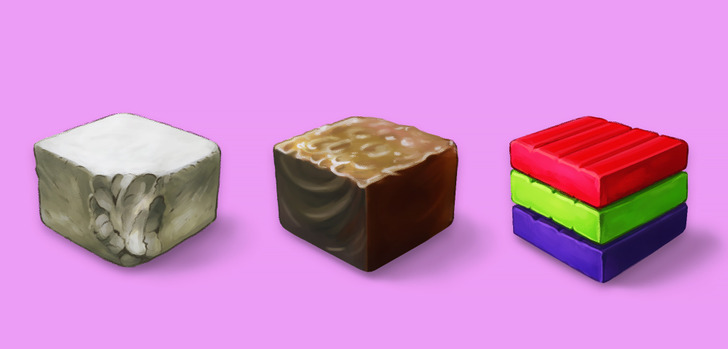
In order to have quality results, there are simple things that you have to know in order to distinguish between each type of clay and understand what you’re getting yourself into.
- Water-based clay: This is water-mixed clay, and it’s prone to drying out if it’s not properly covered after use. It is easily manipulated.
- Oil-based clay: It won’t dry out like water-based alternatives and contains minerals and waxes. It needs heat to soften and mold. This clay is unsuitable for finished craft creations since it’s usable for a long time and doesn’t harden.
- Polymer clay: This is a type of modeling clay that has gel-like composition, which hardens after baking. It is mostly used to make jewelry and easy crafts and comes in a variety of colors.
Before you start working with clay, be sure to do the following:
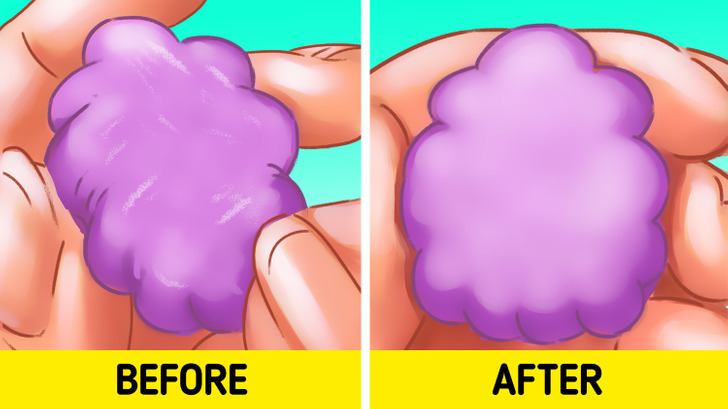
- Don’t use canvas mats or other materials to protect the workspace from clay, as they can be dust collectors. The dust from the clay might be dangerous if not treated properly.
- Always clean the working area with wet rags. Avoid vacuuming or sweeping the floor because the dust will still stay in the air.
- Clean the tools you are using regularly.
- Bring fresh air into the room when you are working with clay.
- Once you are done working with clay, make sure to cover it in order to protect it from drying out.
- Clay must be scored and slipped together while it is still wet or stored with firm leather in order for it to stick together.
- The clay should be completely dry before having it fired, and check if it has spots completely enclosed. If there are air bubbles, create a hole so air can escape, and be sure to wedge clay
properly afterward so it won’t break during the process of hardening.
How to make simple sculptures: a vase
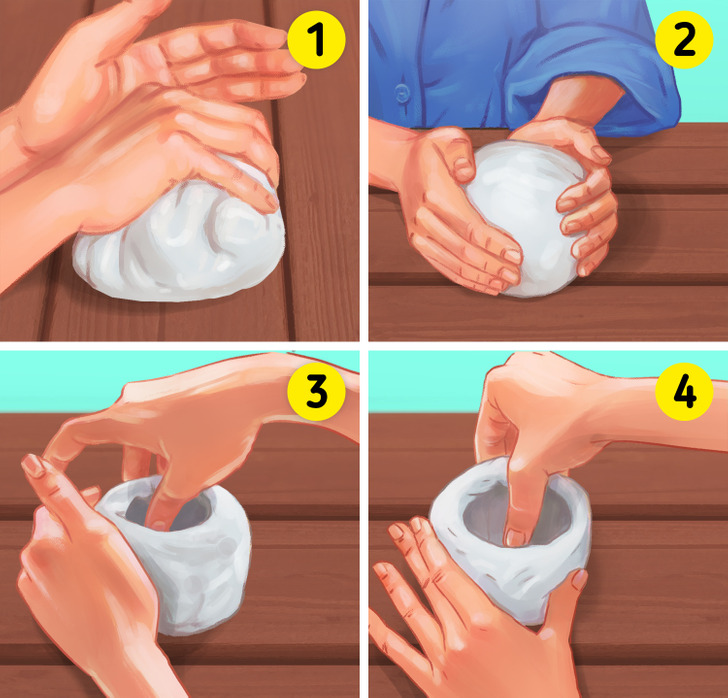
🟧 Step 1: Start by removing the clay from its packaging. Measure 400 g and knead it until soft and smooth. The clay will become flexible and simpler to form with this method.
🟧 Step 2: Place it in a clean working space and gather the clay into a ball. Roll it until it’s perfectly shaped before you start sculpting.
🟧 Step 3: Use the pinch pot technique — find the middle of the ball and pinch a hole in it. Roll the ball firmly to create a larger indentation.
🟧 Step 4: Using your thumb on the inside of the hole and the rest of your fingers on the outside, begin to thin the walls of the cup and form the original shape of the sculpture.
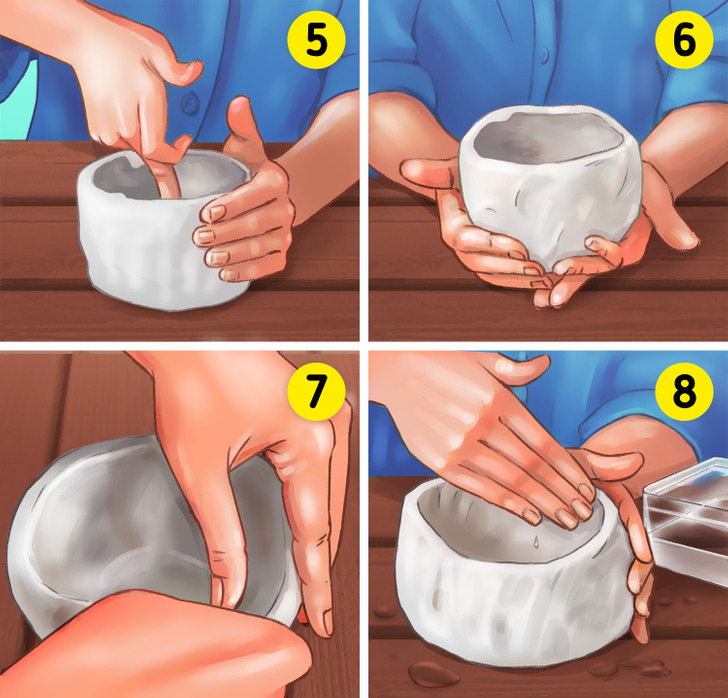
🟧 Step 5: As you start sculpting, begin to tighten the walls from the inside, but be careful with the pressure you apply so they don’t warp or crack.
🟧 Step 6: Grasp the sculpture in both palms, move it from one hand to the other, round the bottom on the outside, and flatten it so it can stand flat.
🟧 Step 7: With easy movements, begin sculpting the inside of the cup so that the thickness is the same on all sides.
🟧 Step 8: Once the primitive cup has the same width, dip your hands in a bowl with water and smooth the edges. Place it in a warm spot and let it dry.
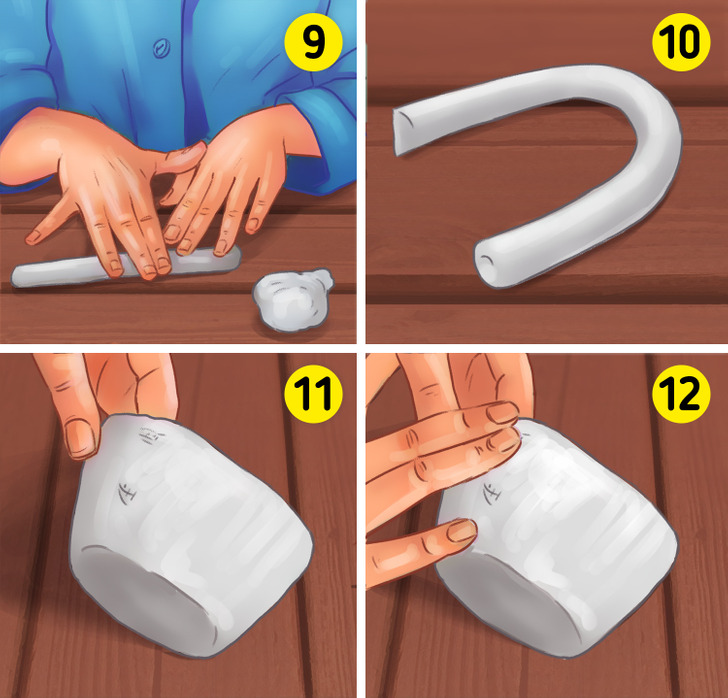
🟧 Step 9: Cut a small piece of clay, soften it, and knead it to form a cylinder. Roll the handle and make sure it has the same width on all sides.
🟧 Step 10: Leave a longer part for the handle, as it will shrink during shaping and trimming once it dries and bakes. Bend the handle into a crescent shape.
🟧 Step 11: Mark the cup where the handle will sit and make small grooves across the handle as well so they can be joined together. The grooves shouldn’t be deep enough to be visible on the other side, but not so shallow that they cannot be combined.
🟧 Step 12: Soak the grooves on the handle and the cup with drops of water where they will connect.
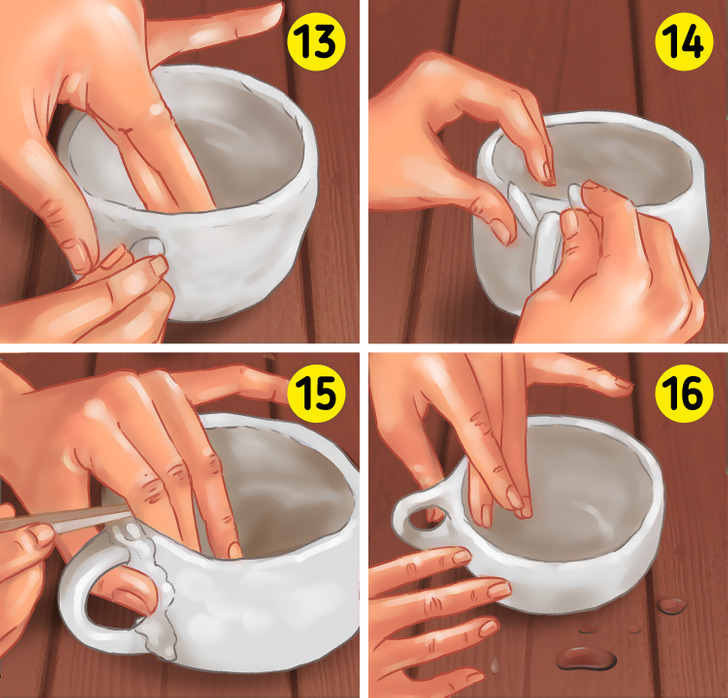
🟧 Step 13: Press the handle together and make sure it’s properly adjusted.
🟧 Step 14: Once every piece is set, smoothly fill in the gaps you need. You might need a bit more clay to paste the handle and bowl together or add a ring out of clay around the handle to strengthen it.
🟧 Step 15: Using wooden tools or spoons, weld the handle with the sculpture, removing the excess parts.
🟧 Step 16: Once you have finished sculpting the cup, wet your hands and rub them against the walls to make the final touches and smoothen it.
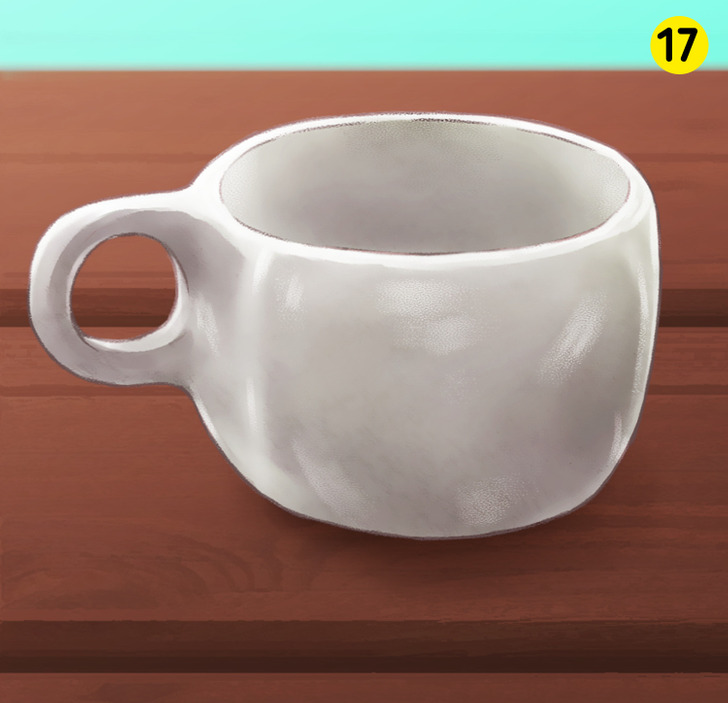
🟧 Step 17: Let the sculpture air-dry, or bake it according to the instructions on the package, and the cup is ready!
Every skill is improved and perfected by practicing and trying new methods. Don’t give up if you aren’t successful at first because the effort always pays off in the end.
Do you have a skill that you want to master in the future?