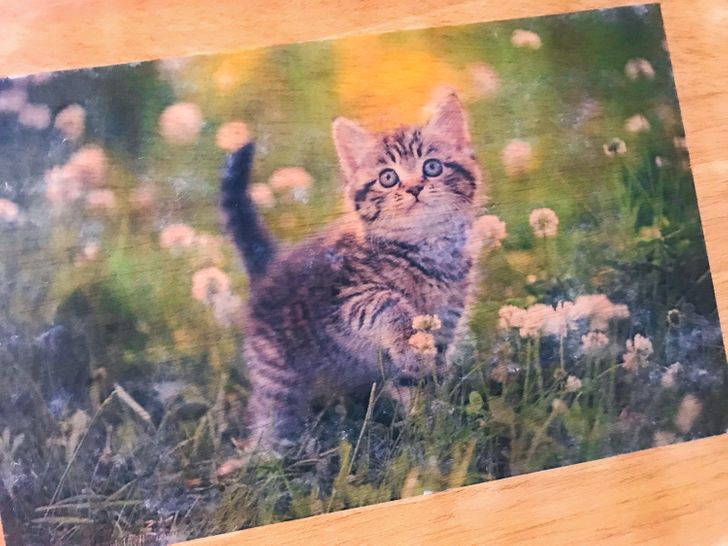
How to Transfer a Picture to Wood
A unique way to display your favorite prints is by transferring them onto wood. You can use any type of wood you wish, like on trays, stools, crates, or simply a piece of scrap wood. The procedure is easy, and you can just follow the steps laid out for you by 5-Minute Crafts below.
1. Gather your supplies.
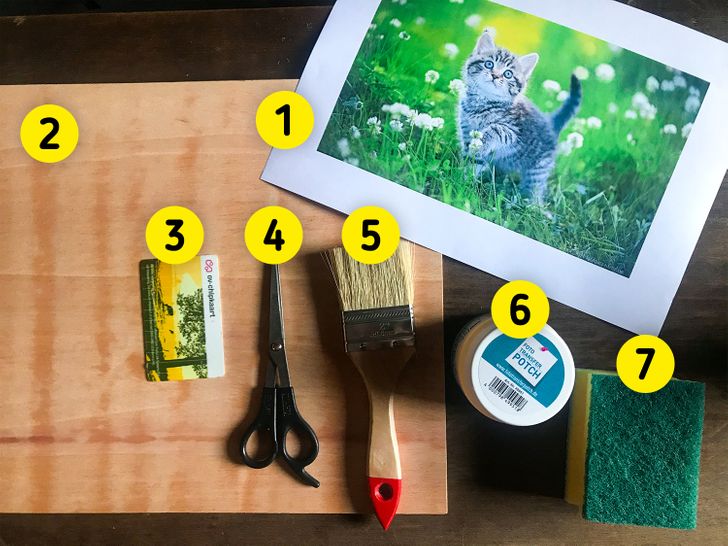
- Select the picture you’d like to print. Note that the result on the wood will show the mirrored version of your picture, so make sure you flip your picture horizontally beforehand. Also, don’t use a picture printed in photo gloss paper. Printing the image on a thin A4 sheet will give the best results.
- Pick a smooth piece of wood. You can use any type of wood you’d like to have your image printed on. Make sure that the surface of the wood is smooth. You can always use a small piece of sandpaper to make it more smooth if you’d like. The wood also has to be clean and dry.
- Get an (old) plastic card. For this, you can use any type of card that you don’t need anymore, such as an expired credit card.
- Snag some scissors (optional). You’ll only need scissors to get rid of the white border around your picture after printing. This step is optional but highly recommended.
- A paintbrush
- Get photo transfer glue. There are many types of glue that you can use. You can probably find some in a local craft shop or you can always order it online.
- An old sponge or cloth
- Sandpaper (optional)
- Transparent varnish (optional)
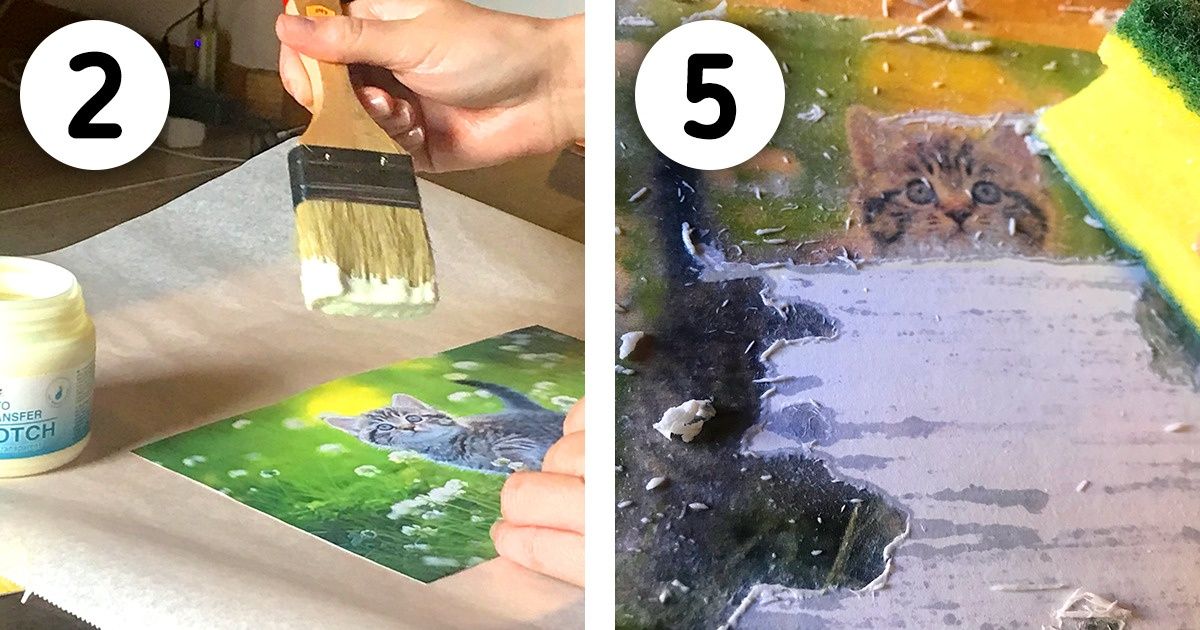
2. Apply the glue to the picture.
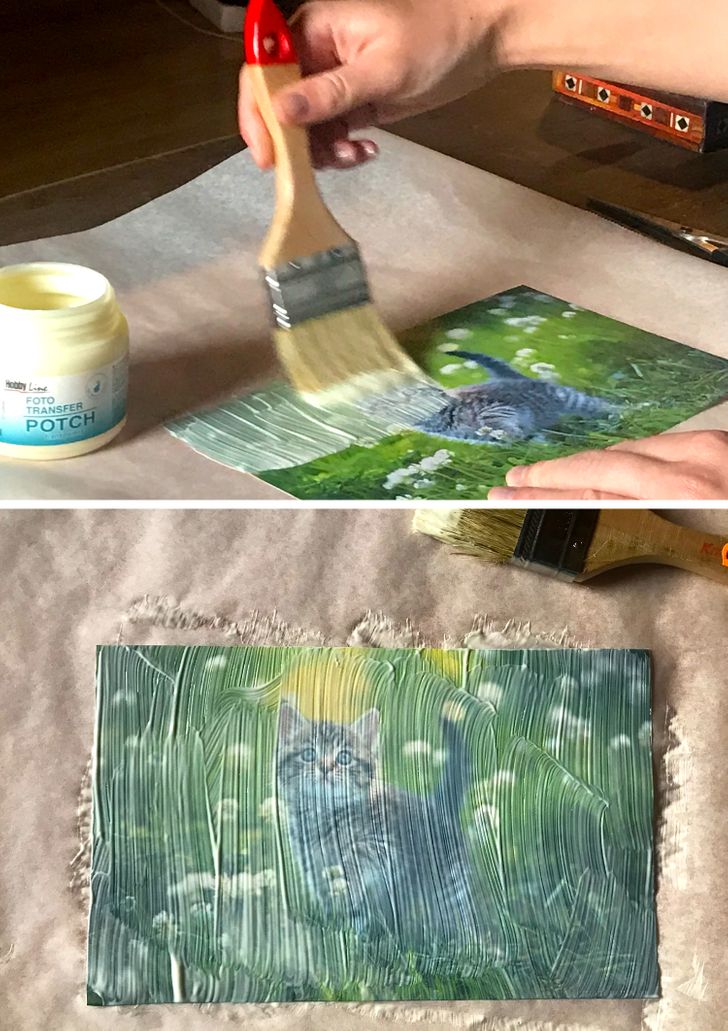
Start by coating the picture with a nice thick layer of glue. Make sure you get all the corners.
- Tip: If you don’t have a craft table or something similar, you can put a piece of baking paper under the picture so that you won’t get any glue on your own table.
3. Put the picture on the wood.
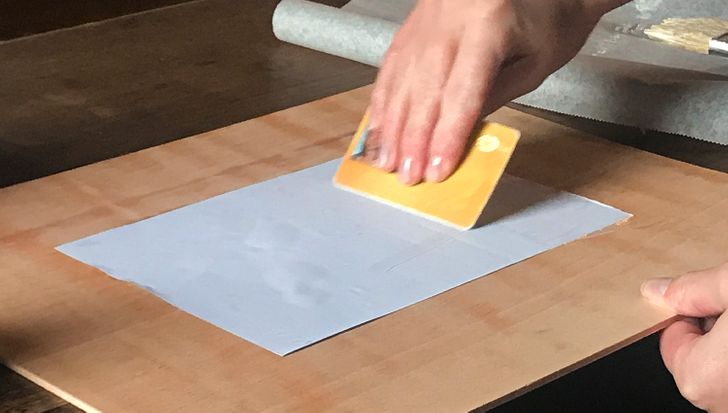
4. Wet the surface.
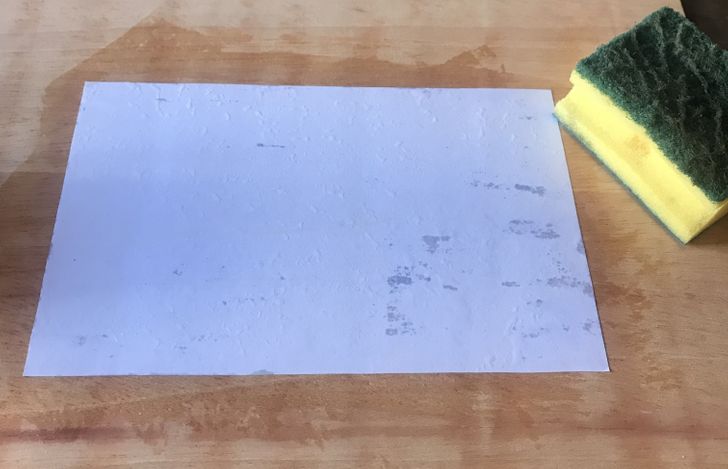
Now that the glue has dried, pat the photo with a wet sponge or cloth so that the entire surface is moist.
5. Rub off all the paper.
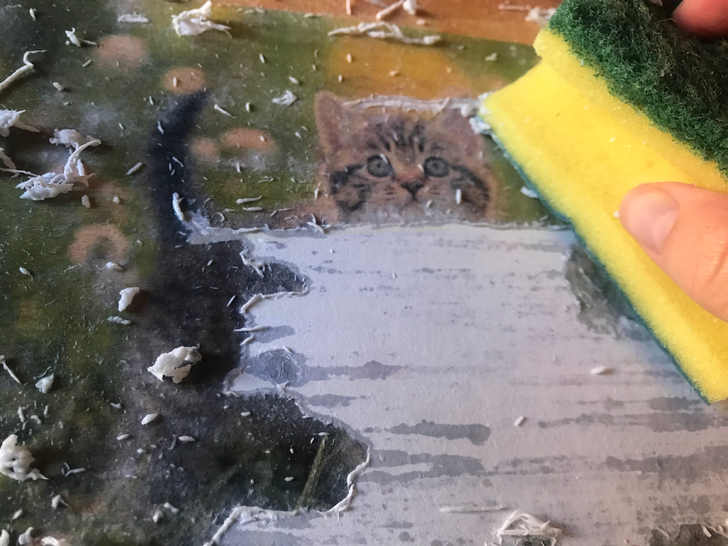
Carefully rub the surface with a wet sponge or cloth. The goal is to make the paper come loose.
- Warning: Don’t rub too hard or you might scratch the picture away. Apply enough pressure to get the paper off, but that’s it.
6. Repeat the previous step.
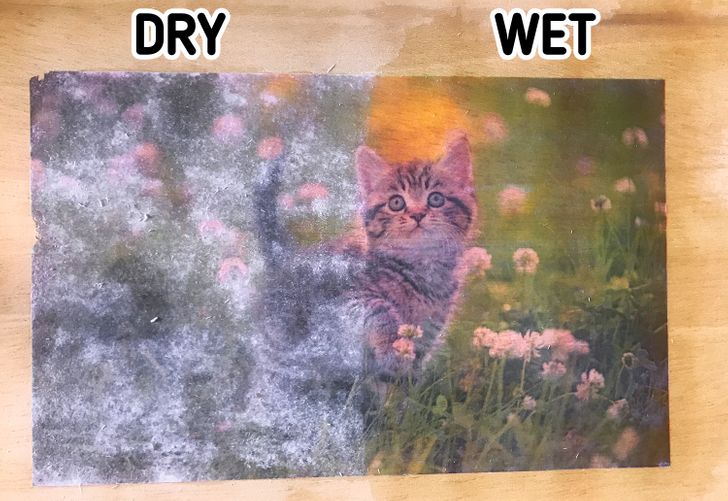
If the wood is still wet, it might seem like you’ve already reached the final result. However, after the wood dries again, the picture might become blurry because not all the paper was scraped off. In this case, you can just rub the paper off again with a moist sponge. The procedure is the same as the previous step.
7. Finish it up to your liking.
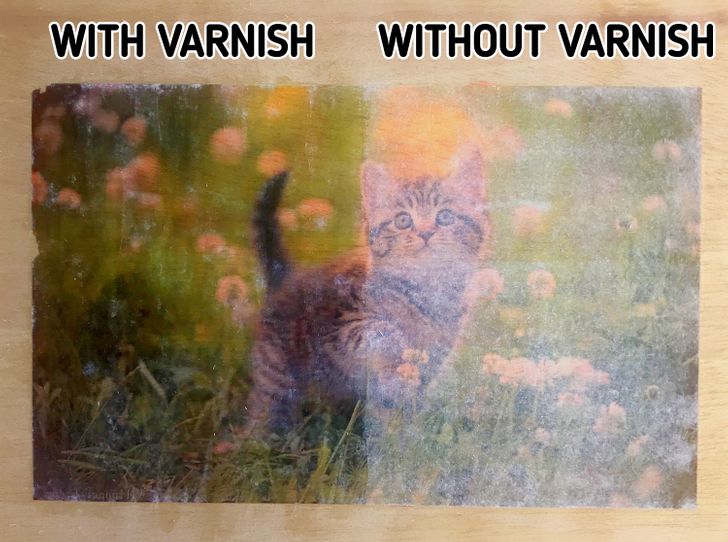
You can decide whether or not to finish things off by adding a layer of gloss. A layer of special acrylic varnish will give you the best result as it makes the picture appear shiny. Otherwise, you can simply put a very thin layer of the photo transfer glue on top and wait for it to dry.
You can also use a piece of sandpaper to carefully fade in the edges to give it a more vintage look.
8. Enjoy the final result!
