What to Do With an Old Rock Collection
We all keep a bunch of stuff at home with no particular reason behind it. Sometimes, we feel an attachment to the items, perhaps an important person gave something to us, or there are things we simply refuse to throw away for whatever reason. And while keeping a rock collection is a great hobby, it can take a lot of space and weighs a ton.
Instead of throwing the rocks away, 5-Minute Crafts picked some creative ways to upcycle them.
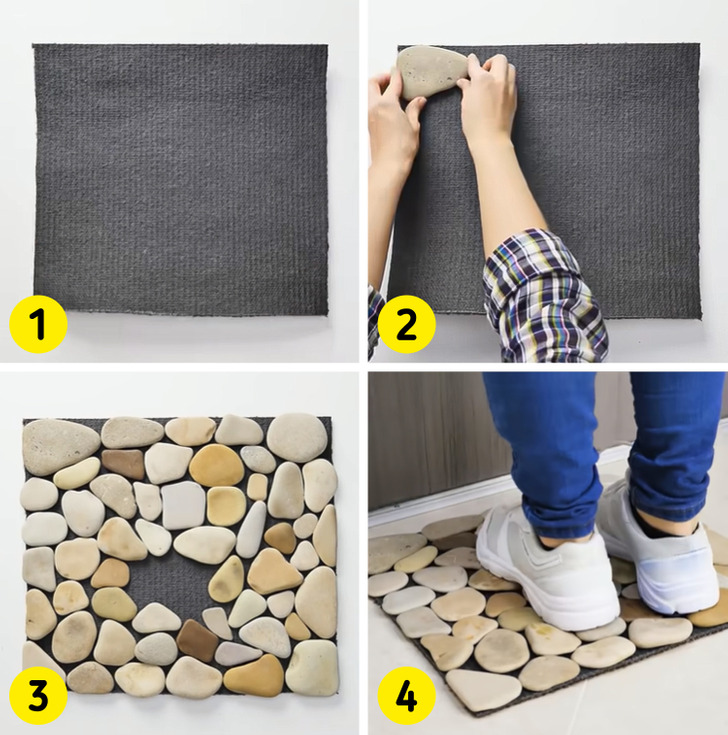
1. Doormat
Materials:
- Plain doormat
- Rocks
- Super Glue
Step 1: Take a plain doormat and clean it.
Step 2: Find flat rocks and place them on to cover the whole mat.
Step 3: Use super glue to fix them to the doormat.
Step 4: Wait for the glue to dry.
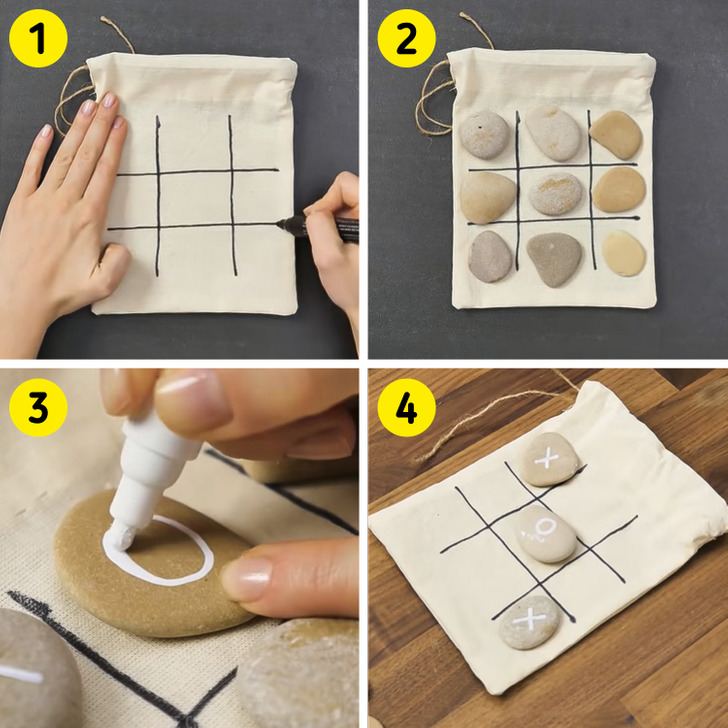
2. Tic-tac-toe
Materials:
- 10 Rocks
- A canvas bag
- A marker
- A ruler
Step 1: Take the canvas bag and draw 2 lines to create 3 columns. Rotate the canvas and repeat the process.
Step 2: Place each stone on the squares on the bag.
Step 3: Grab a marker and add either “X” or “O” on the front surface.
Step 4: Once the rocks are dry, you can enjoy playing the game.
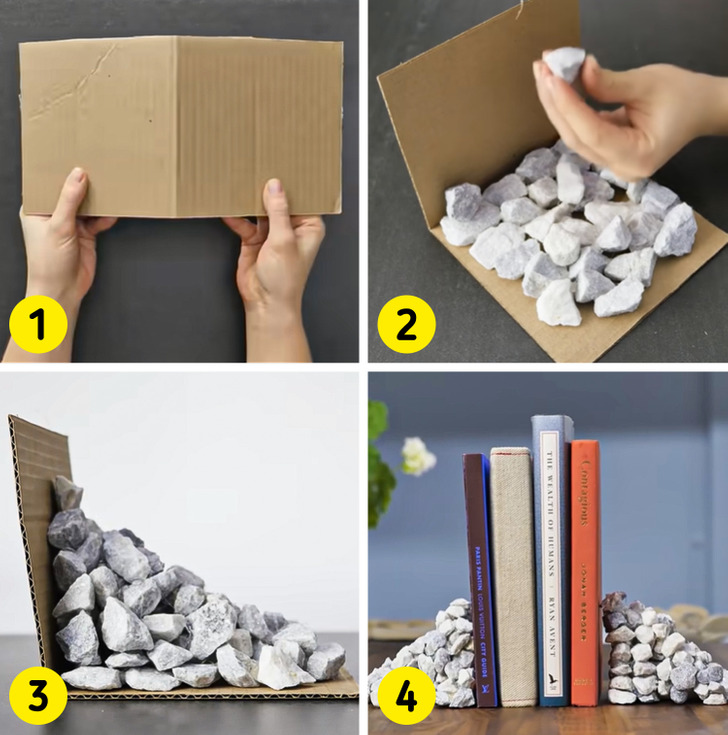
3. Rock bookends
Materials:
- Different sizes of rocks
- Super Glue or a glue gun
- Acrylic paint
Step 1: Grab a piece of cardboard and fold it in half.
Step 2: Put stones on one side of the cardboard and glue them together.
Step 3: Stack the stones from the larger to the smallest and glue them with hot glue.
Step 4: Place the bookstands on the desk and add books between them.
4. Wired jewelry
Materials:
- Rocks
- Wire
- Jewelry chain
- Pliers
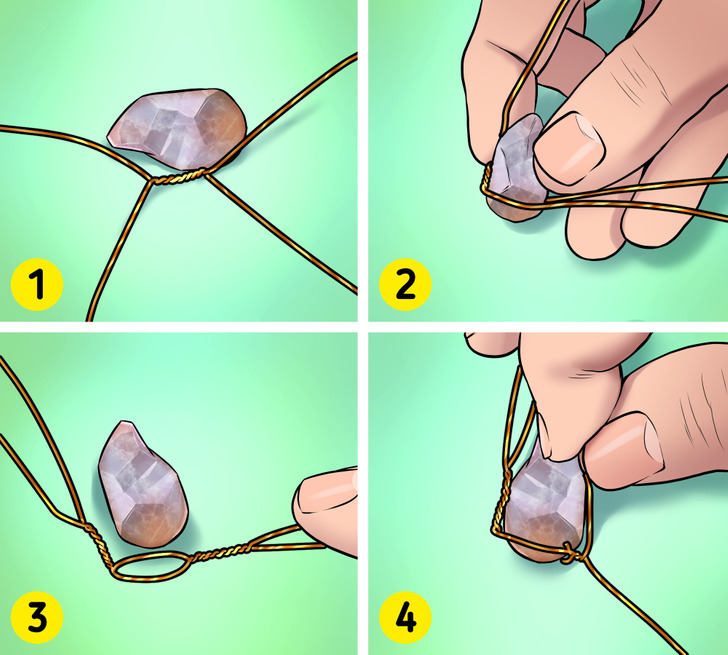
Step 1: Take 2 long pieces of wire of the same size. Cross them in the center and twist.
Make sure the twisted part is at least half the length of the stone.
Step 2: Place the wrapped part on the side of the stone, then take 2 loose wires and wrap one wire around the front and the other around the back of the stone. Secure it by twisting the 2 wires together.
Step 3: Remove the stone. Twist the wire together until it is the same length as the first twist.
Step 4: Place the stone back. Bring one wire from each side to the front and back of the stone and twist them. The twists should be toward the top of the stone.
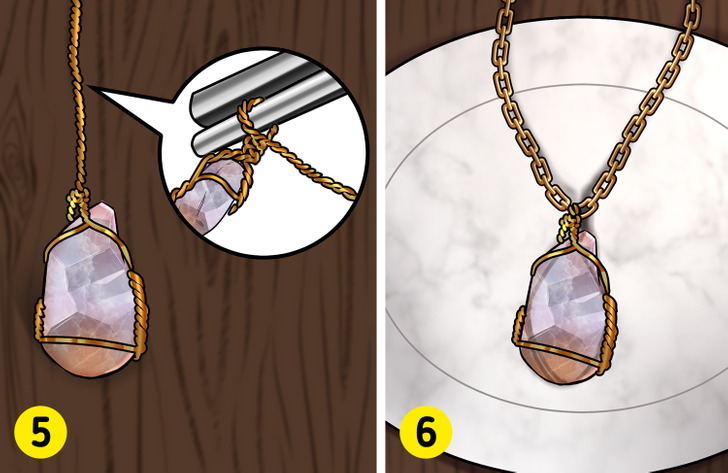
Step 5: Wrap one wire around the other. Trim the end and continue twisting a little more.
Step 6: Make a loop big enough to hang the chain. Secure the loop by wrapping the wire over the previous wraps.
5. Rock magnets
Materials:
- Rocks
- Acrylic paint
- Magnets
- Hot glue
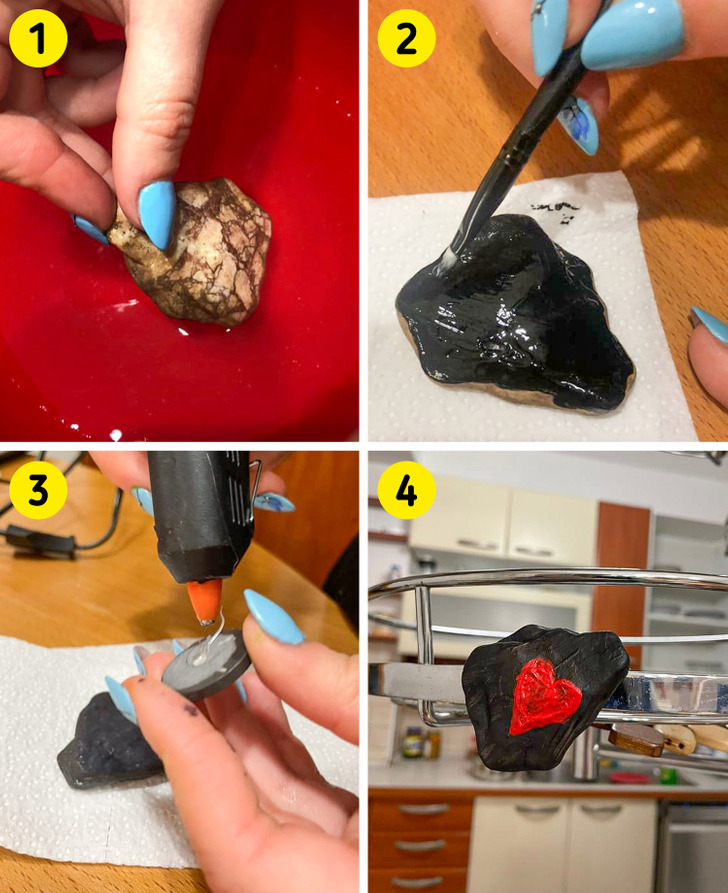
Step 1: Pick different-sized rocks. Wash them with water and wait for them to dry.
Step 2: Paint the rock in different colors.
Step 3: Once they are dry, attach the magnets to the rocks with hot glue.
Step 4: Once the glue is dry, you can put the magnet wherever you want.
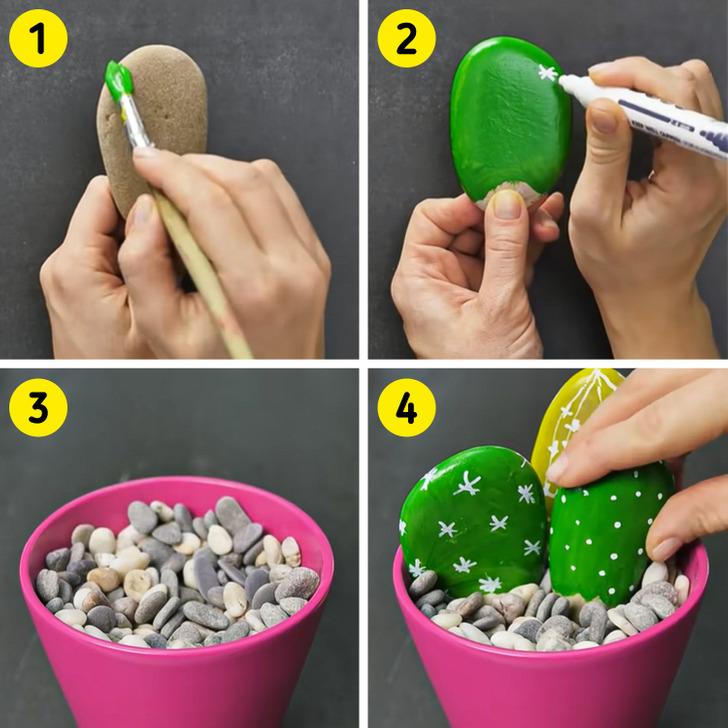
6. Rock cactus decoration
Materials:
- Oval-shaped rocks
- Green and white acrylic paint
- Soil
- A flower pot
Step 1: Pick several oval-shaped rocks and wash them with water. Using acrylic paint, color them in different shades of green.
Step 2: Once they are dry, use white acrylic paint and draw lines and stars on the green surface to make spikes.
Step 3: Take a flowering pot. Put soil and small rocks in it.
Step 4: Add the “rock cacti” to it.
7. Rock fishbowl
Materials:
- Rocks
- Acrylic paint
- Fake aquarium plants
- A fishbowl
- Seashells
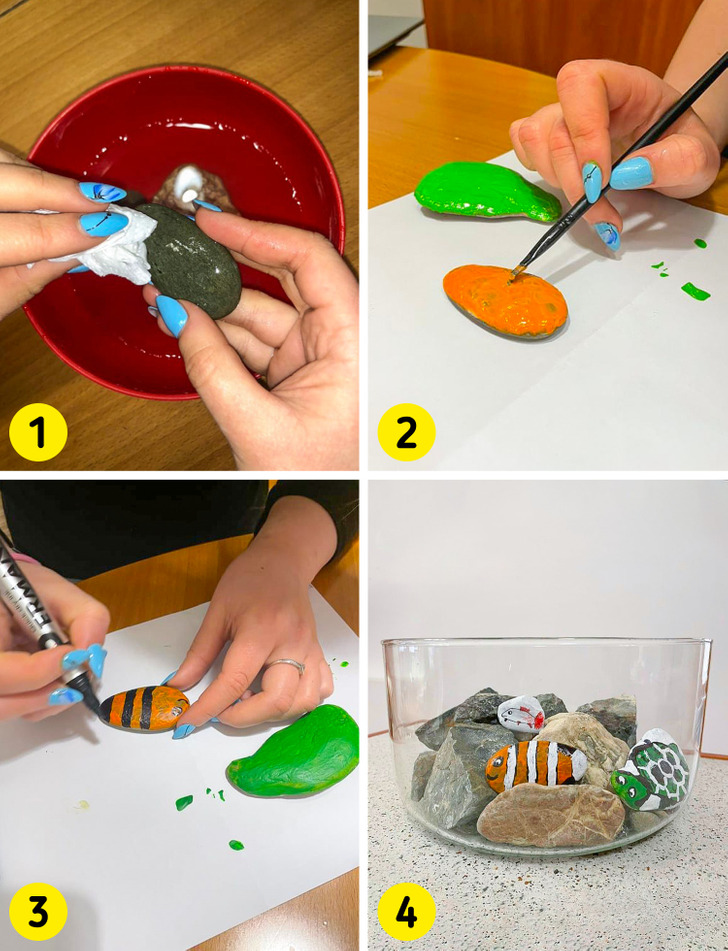
Step 1: Chose bigger, oval-shaped rocks and clean them underwater.
Step 2: Start painting the first layers with white paint so it will be easier for the color to set in. Then paint the whole rock in the color of the fish’s body.
Step 3: Draw fish bodies on the rocks with a black marker or black pen.
Step 4: Color the drawings of fish and place the rocks in a fishbowl with other unpainted stones as well.
8. Rock frame
Materials:
- Frame
- Rocks
- Hot glue or Super Glue
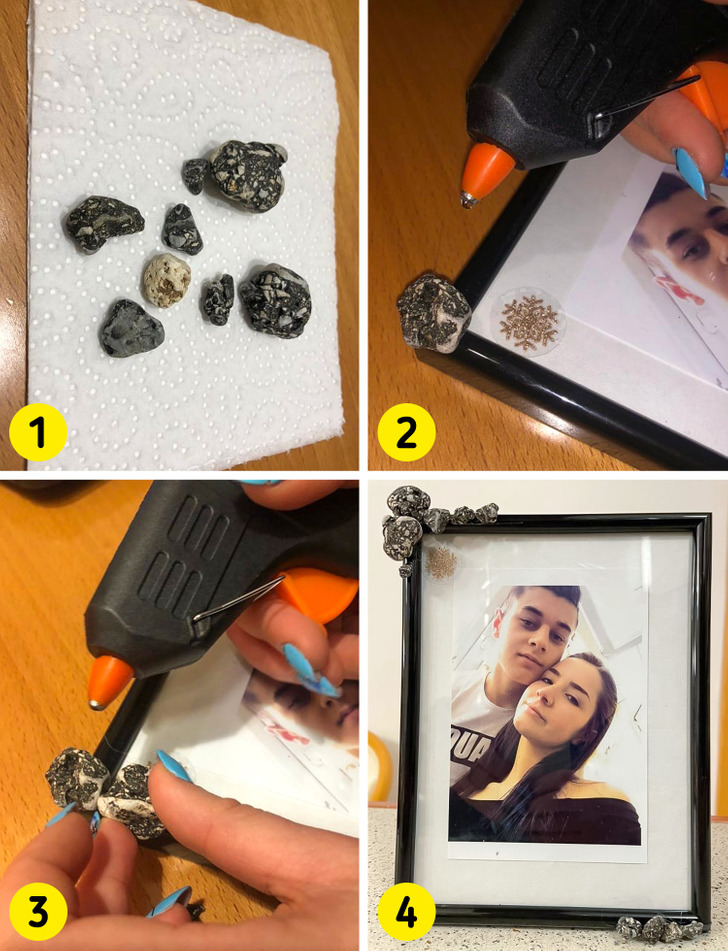
Step 1: Take small rocks, carefully clean the dirt off of them, and put them on a paper towel to dry.
Step 2: Apply hot glue to the corner of the frame.
Step 3: Glue the rocks on the upper left and bottom right.
Step 4: Wait for it to dry.
Bonus: You can add more rocks to the frame if you like it better that way.
9. Rock lamp stand
Materials:
- Large rocks
- Power drill
- Pliers
- A lampshade
- A metal nipple
- A hollow threaded rod tube
- Hex nuts
- A light bulb
- A keyless socket holer
- A socket cap
- Cable
- Wires
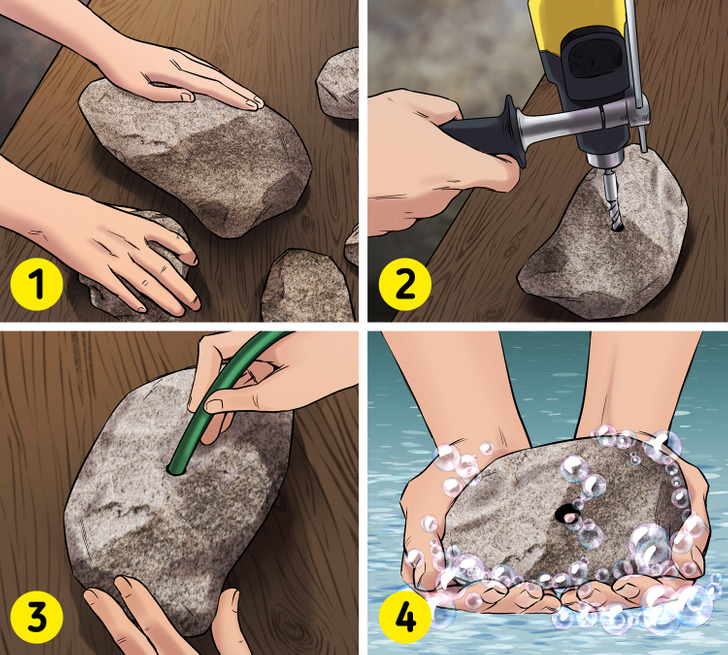
Step 1: Place the rocks on a work surface. The flat side should be facing down with the top sides facing up.
Step 2: Use a drill to make holes through the center of each rock. Make sure the hole is big enough for the lamp cord.
Step 3: Test the fit by placing the cord into the channel. Make the channel larger if necessary.
Step 4: Clean the rocks using soap foam and water. You can use a toothbrush if the rocks need a deeper clean.
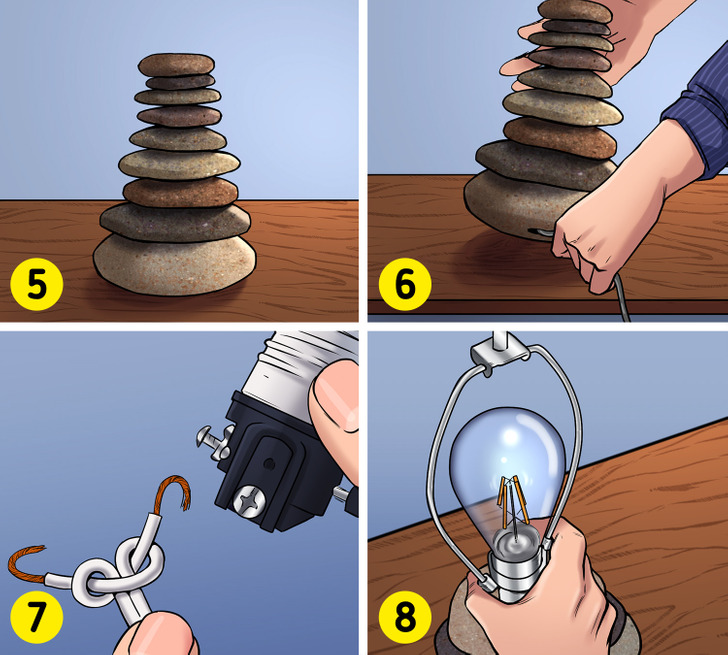
Step 5: Stack the rocks. The largest one should be at the bottom and the smallest at the top.
Step 6: Put a hollow threaded rod tube down through the center holes. Thread the metal lock nut onto the rod so that the outside of the nut is flush with the bottom of the rock.
Step 7: Put the cable inside it and wire the keyless socket. Strip the wire covering with wire cutters and wire the 2 screws on the socket.
Step 8: Press the lamp harp over it and screw the socket cap. The harp is placed between the socket and socket cap.
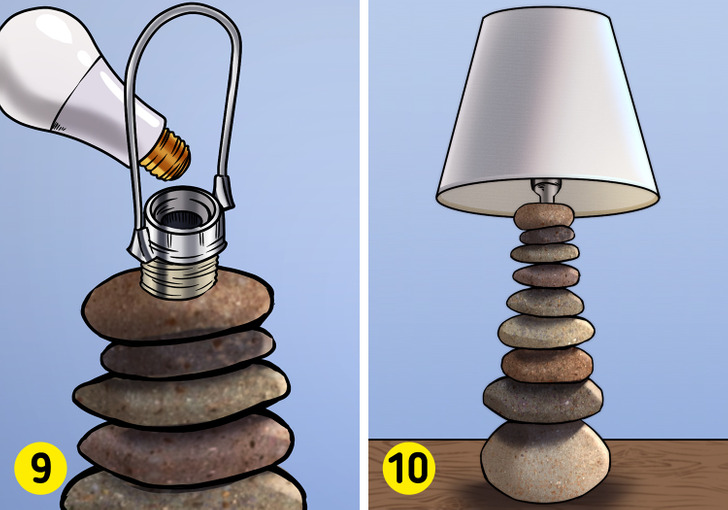
Step 9: Screw the light bulb into the socket and add the lampshade over the harp.
Step 10: The lamp is ready.
Have you ever tried these hacks? Which one of them are you planning to do?
