What to Do With Broken Crayons
Buying crayons, colored pencils, and school supplies might have been one of our favorite things to do when we were in school. But now some of them may be lying around in drawers, untouched, broken, and old.
5-Minute Crafts picked several creative ideas that will help you use these crayons instead of throwing them away.
1. New crayons from molds
What you’ll need:
- old crayons
- silicone molds
- knife
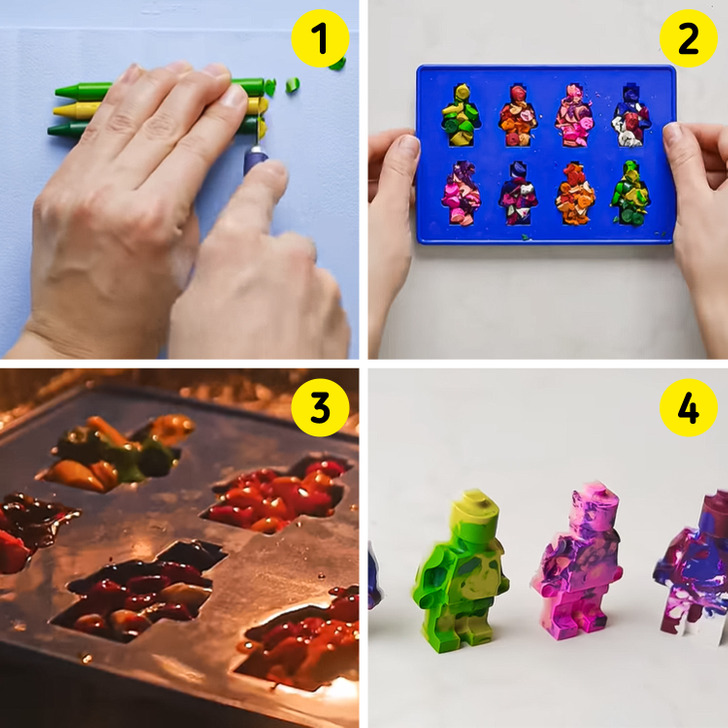
Step 1: Remove the wrapping from the crayons and organize them by their color. Start cutting them into small pieces.
Step 2: Chose the colors you’d like to combine and put the crayons in the silicone molds.
Step 3: Put the mold in the microwave or in the oven for 15 minutes at 200°C and melt the crayons.
Step 4: Once they are melted take them out of the oven and put them in the fridge overnight. Then, remove the new crayon molds from the silicone.
2. Candles
What you’ll need:
- crayons
- wicks
- hot glue
- glass
- wooden stick
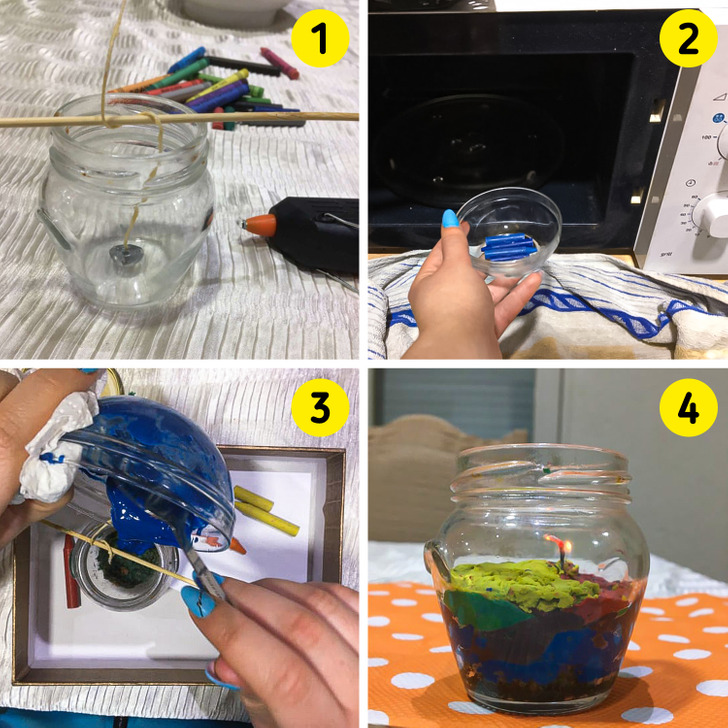
Step 1: Place the wick at the bottom of the glass. Glue it to the bottom of the jar using hot glue and wrap it around a wooden stick to secure it in place.
Step 2: Put the crayons in the microwave in a separate glass for about 2 minutes. Add more minutes if the wax wasn’t completely melted.
Step 3: Pour it into the glass where you glued the wick. Wait for the melted crayons to harden, and repeat the second step with different colors. You can use the same glass, clean it and leave it to cool down for a little.
Step 4: Once you fill the glass with different layers, let it harden, and it’s finished.
3. Crayon wax seals
What you’ll need:
- old crayons
- glue gun
- seal stamp
- envelope
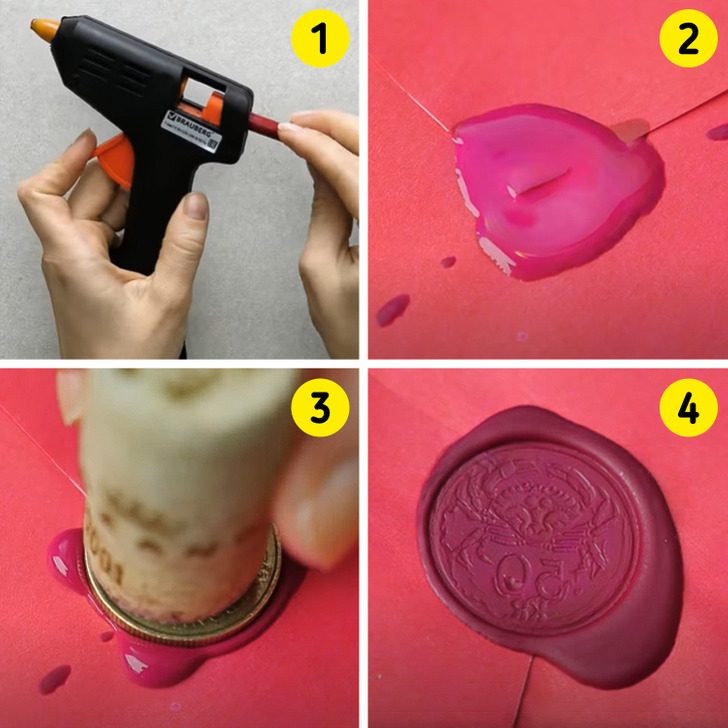
Step 1: Use a cheap glue gun and make sure that this one will just be used for crayons instead of hot glue. Put the crayon inside the hot glue gun.
Step 2: Once it’s melted apply the melted crayon in a circle on the backside of an envelope.
Step 3: Use a seal stamp to close the envelope.
Step 4: Wait for a minute to let it completely cool down.
4. Decorate Easter eggs
What you’ll need:
- Easter eggs
- Crayons
- Hair dryer
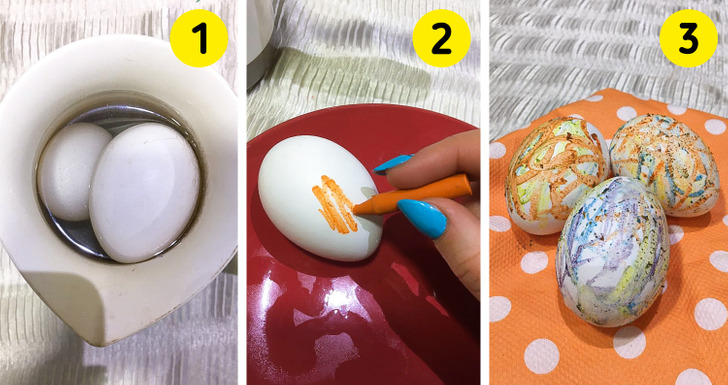
Step 1: Boil the eggs and leave them in boiling water for 10 minutes.
Step 2: Draw anything you’d like on the eggs while they are still hot.
Step 3: Once you are done, put the eggs in the fridge to let the color set.
Bonus: You can decorate the eggs by using a hairdryer to melt the crayons.
5. Crayons in a lip balm container
What you’ll need:
- Coconut oil
- Crayons
- Empty lip balm containers/ small plastic containers
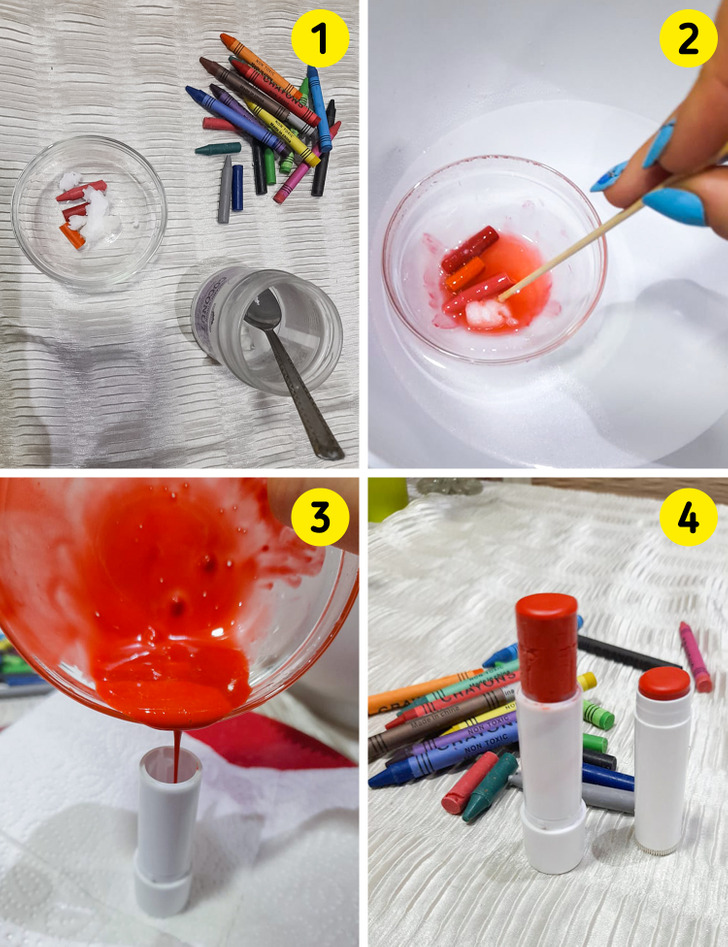
Step 1: Chop the crayons into small pieces and put them in a small bowl. Add 2 tsp of coconut oil to the plate.
Step 2: Heat a double-boiler and put the bowl inside it so the ingredients can melt. Stir the mixture with a chopstick.
Step 3: Once it’s melted, add the mixture to the empty lip balm containers.
Step 4: Put them in the fridge for about 2 minutes to cool down.
❗This DIY is not meant to be used as makeup. It is meant for drawing and will help you to avoid getting your hands dirty.
6. Decorate ornaments
What you’ll need:
- Clear egg ornaments
- Crayons
- Hairdryer
- Twine
- Grater or vegetable peeler
- Glitter
- Scissors
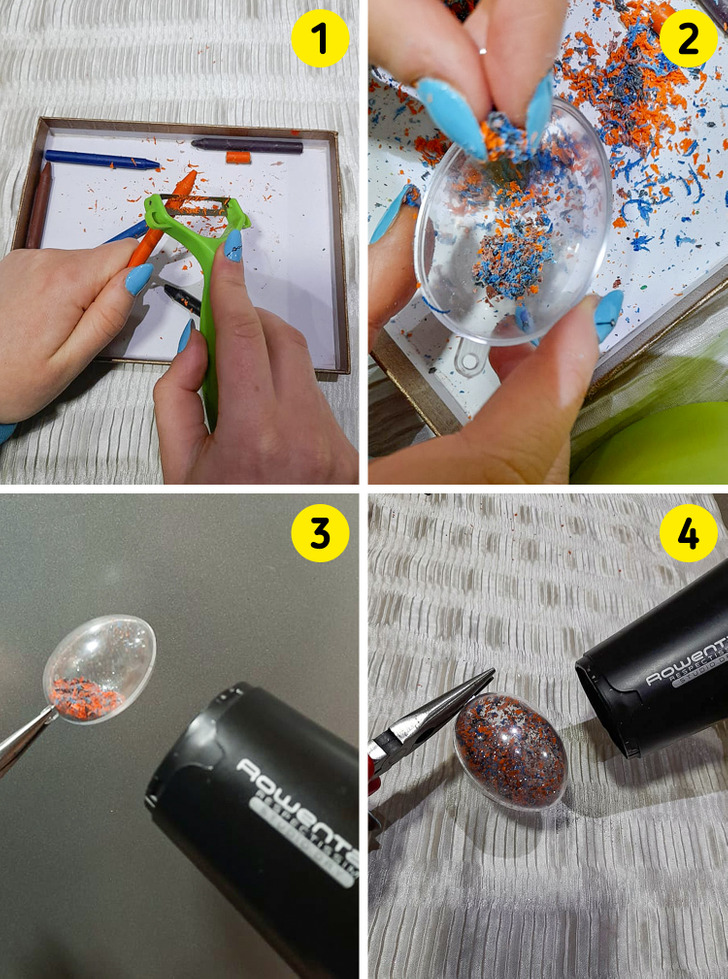
Step 1: Separate the crayons by color and grate them with a grater or vegetable peeler.
Step 2: Remove half of the egg ornament and pour the peelings into it using your hands.
Step 3: Hold the top of the ornament with pliers and start heating it with a hairdryer. Keep heating it and rotate the ornament when the crayon starts to melt into it.
Step 4: Continue heating until the ornament is all covered with grated crayon. You shouldn’t feel any grated crayon when shaking the ornament.
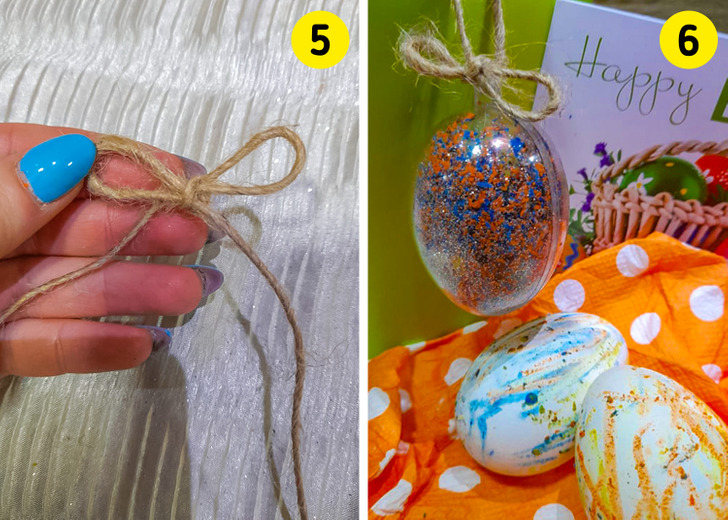
Step 5: Once the ornament has cooled from the heat, grab a piece of twine and tie a bow.
Step 6: Tie the ribbon to the egg ornament and hang it.
Bonus: You can do the ornament with one color or different colors. Also, you can add glitter if you like a more sparkly look.
7. Customized shirt
What you’ll need:
- White shirt
- Paper
- Wooden chopping board
- Old crayons
- Grater
- Wax paper
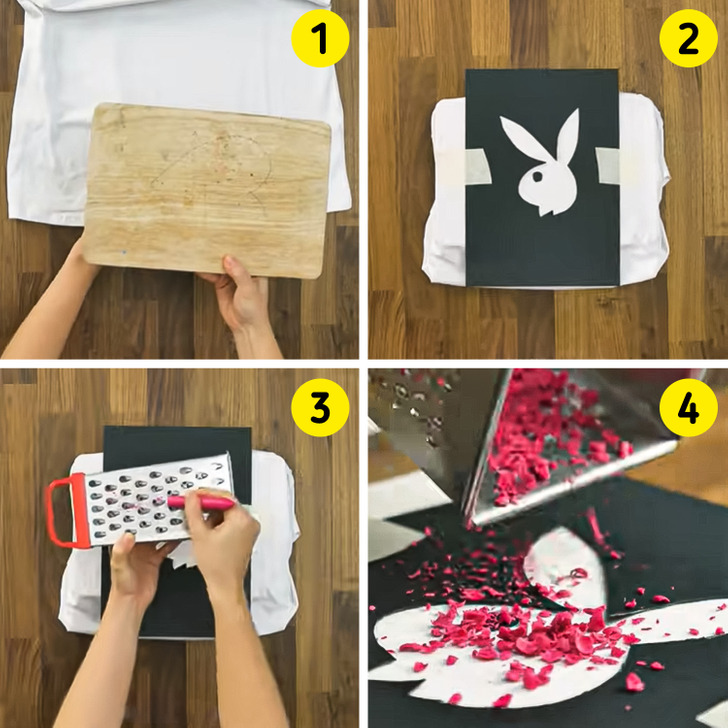
Step 1: Take a plain shirt and place it on a flat surface.
Step 2: Cut the design you want out of a piece of paper and tape it to the shirt using clear tape.
Step 3: Grate the crayons over the paper.
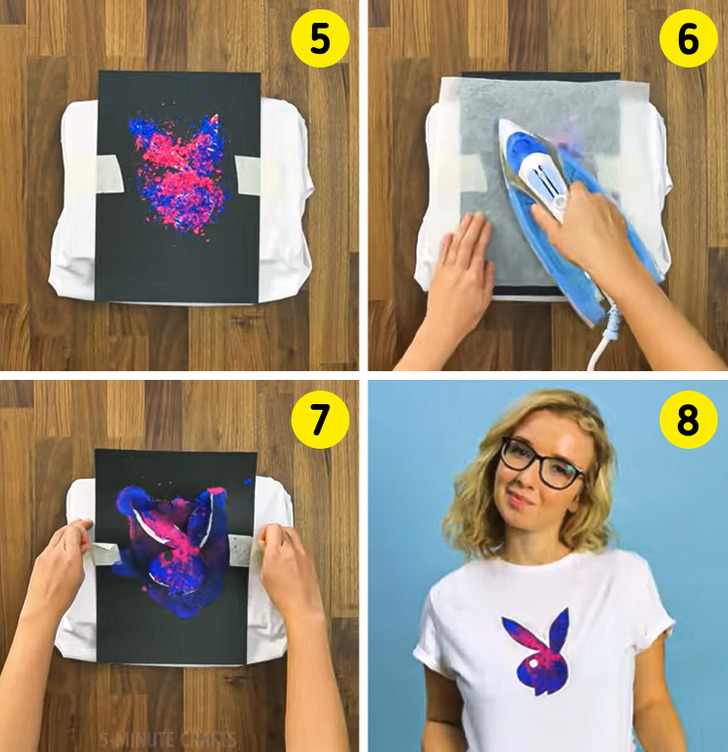
Step 4: Put them over the whole cut to cover the design.
Step 5: Place the wax paper over the grated crayons.
Step 6: Iron the wax paper.
Step 7: Once the crayon is melted remove the wax paper.
Step 8: Let the design dry out and the shirt is done.
Which one of the designs did you like the most?
