What You Can Make From Old Toys
If you have a lot of toys at home that no one plays with, don’t rush to throw them away. It’s an opportunity to feel like a real designer who can cleverly transform ordinary things into something original — in fact, a rubber duck toy can become an excellent holder for a smartphone, and parts of a children’s construction set can bring old shoes back to life.
We at 5-Minute Crafts have more than a dozen outstanding tips for those who want to give new life to old toys and don’t mind awakening their creative side.
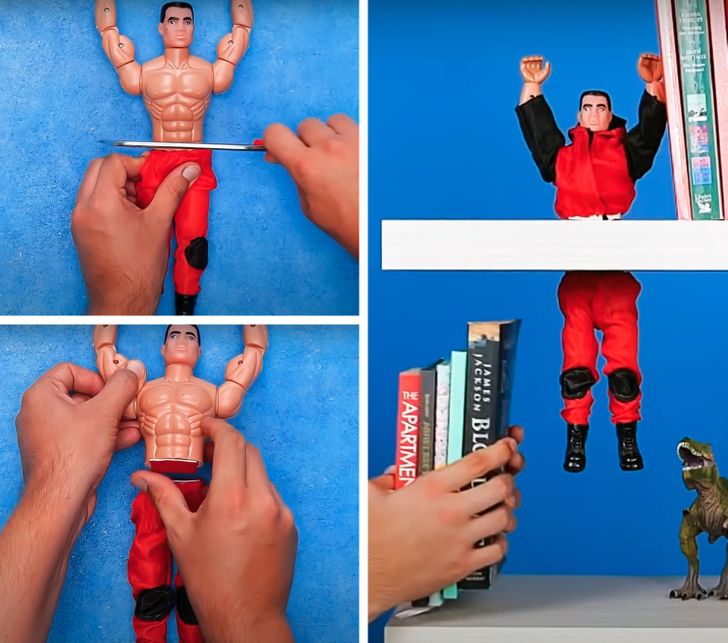
15. A book holder
What you’ll need:
- A doll
- Double-sided tape
- A small saw or utility knife
How to do it: Cut the doll in half along the waist. Attach a piece of double-sided tape to each half of the doll and glue the toy to the shelf so that one half of the body is located on top of the shelf and the other half is under it.
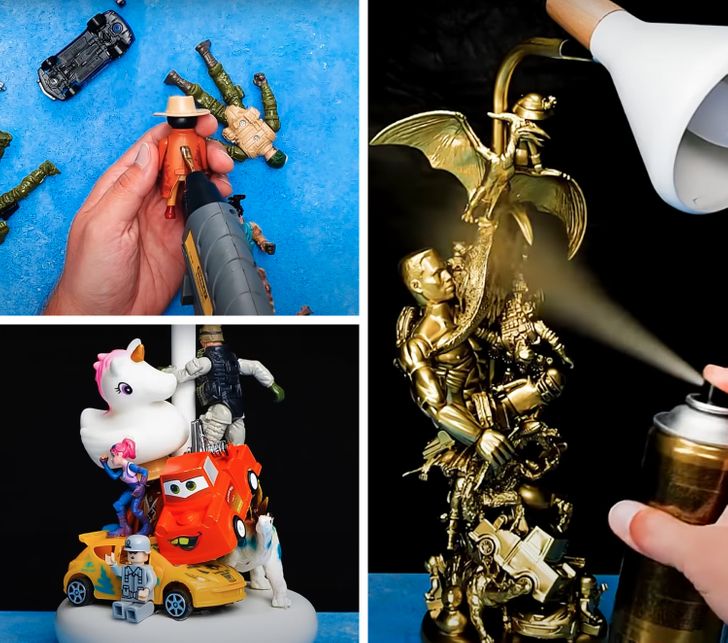
14. Table lamp
What you’ll need:
- Different toys
- An ordinary table lamp
- Universal transparent glue
- Golden spray paint
How to do it: Using glue, chaotically attach the toys to the base and the leg of the lamp (you can create a slide as is shown in the photo above). Let the glue dry and apply some gold paint.
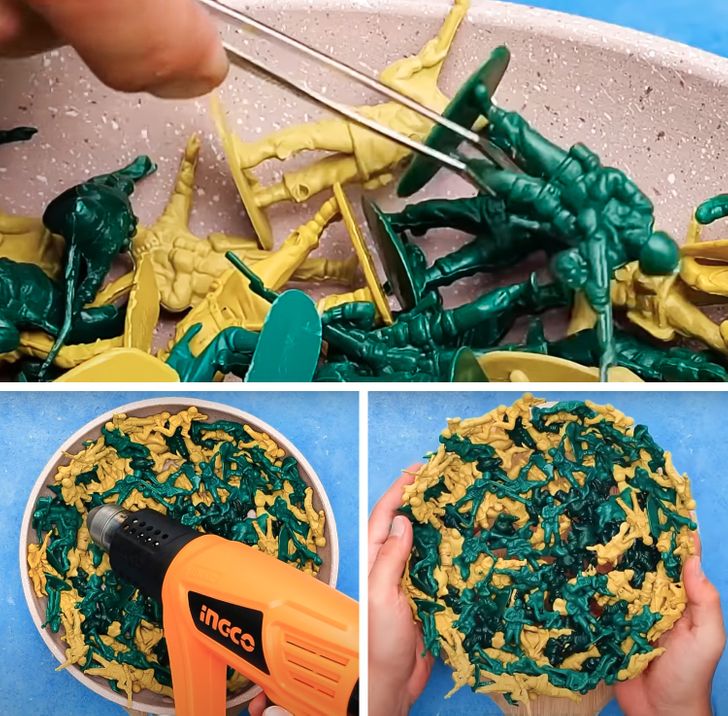
13. Decorative bowl
What you’ll need:
- Plastic soldiers
- Fireproof plates
- A heat gun
How to do it: Place the soldiers along the sides of the plate and fill the bottom of the plate with them. Take a heat gun and blow hot air evenly so that the figures slowly melt and glue together. Let them dry and remove the soldier bowl from the plate. If you don’t have a heat gun on hand, turn on the oven, heat it up to a temperature of about 302°F to 356°F, and put the plate with the soldiers there for 5-10 minutes.
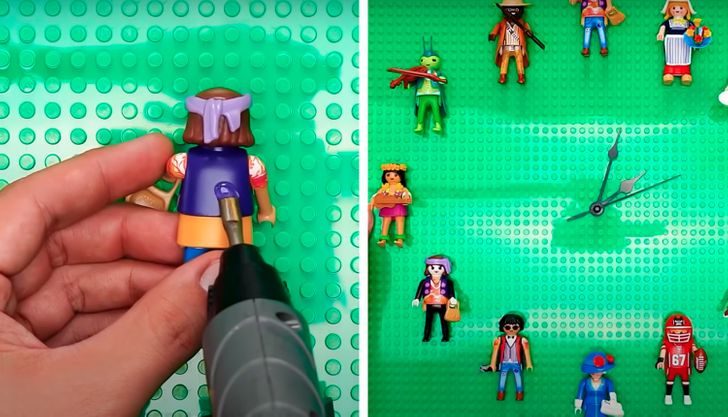
12. Wall clock
What you’ll need:
- A base plate from the construction set
- 12 figures from the construction set
- Clockwork
- 4 clock hands
- A pyrography tool
How to do it: Make a hole in the middle of the base plate with a pyrography tool. Glue 12 figures around the hole in a circle so that their positions correspond to the 12 time marks on the clock. On the reverse side of the plate, secure the clockwork, and on the front side, attach the clock hands to it. Instead of the figurines, you can use construction set parts to create the numbers.
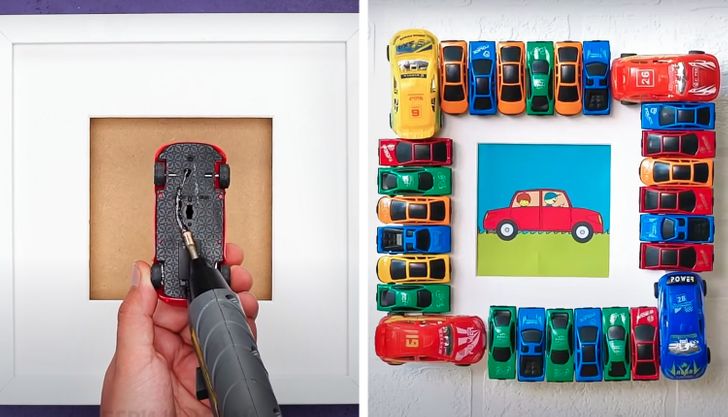
11. Photo frame
What you’ll need:
- A solid white photo frame
- Cars of different colors and sizes
- Universal transparent glue
How to do it: Apply glue to the backs of the cars and attach them around the frame. Let the glue dry. Instead of toy cars, you can use pencils or other small toys.
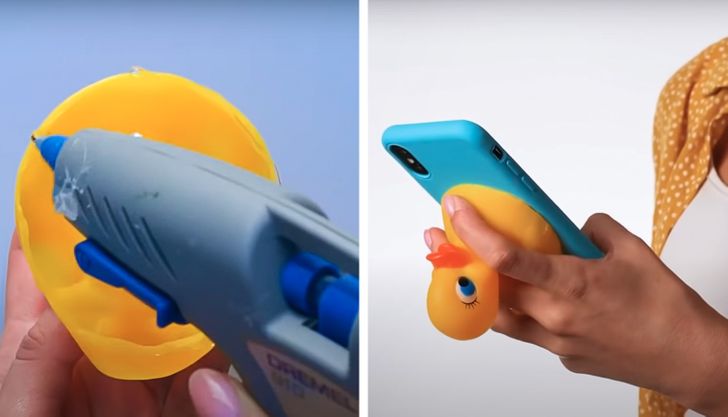
10. Smartphone holder
What you’ll need:
- A rubber duck toy
- A plastic case for a smartphone
- A stationery knife
- Universal transparent glue
How to do it: Carefully cut off the base of the rubber duck toy and wipe the inside of the toy. Use glue to attach the duck to the middle of the outer part of your smartphone case. Let it dry.
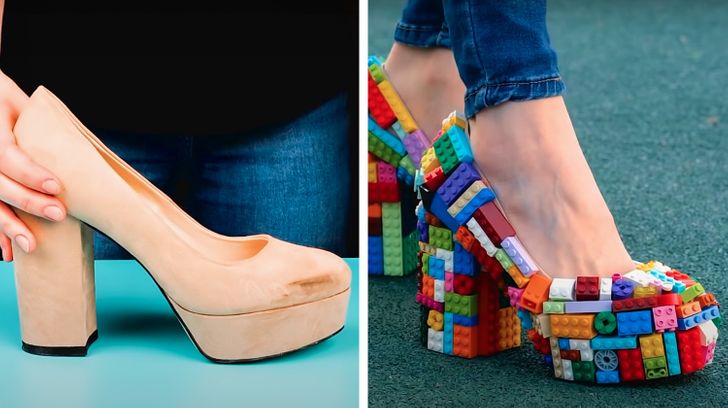
9. Shoes from a construction set
What you’ll need:
- Old shoes (preferably with a rough exterior)
- Universal transparent glue
- PIeces from a children’s construction set
How to do it: Using glue, attach the parts of the children’s construction set to the shoes as close to each other as possible. Let the glue dry. You’re done!
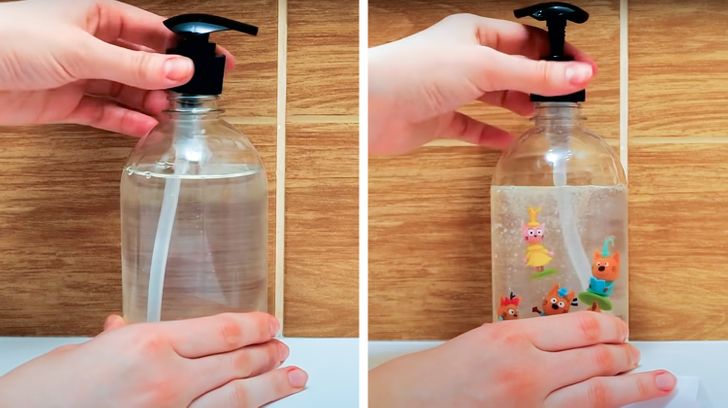
8. Decorations for a bottle of liquid soap
What you’ll need:
- A transparent container for liquid soap
- Liquid soap
- Tweezers
- Small figures and toys
How to do it: Pour liquid soap into an empty container and carefully place figures and toys inside it using tweezers. Close the container with the dispenser.
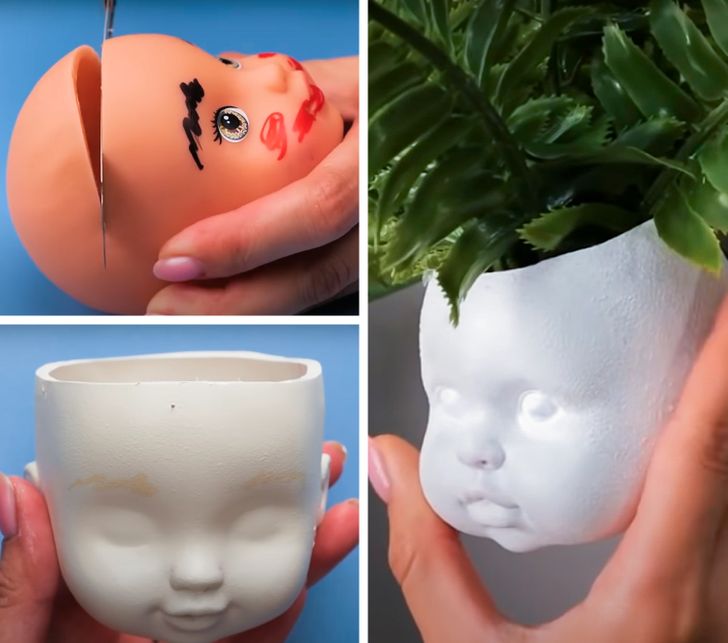
7. A mini planter with a magnet
What you’ll need:
- An old doll
- A stationery knife
- A round magnet
- Universal glue
- Water-based paint
- Soil for a plant
- A plant
How to do it: Take the doll’s head and cut off the top part where its hair is. Apply paint to the rest of the head and let it dry. Glue a magnet to the back of the head, pour the soil inside it, and plant the plant there.
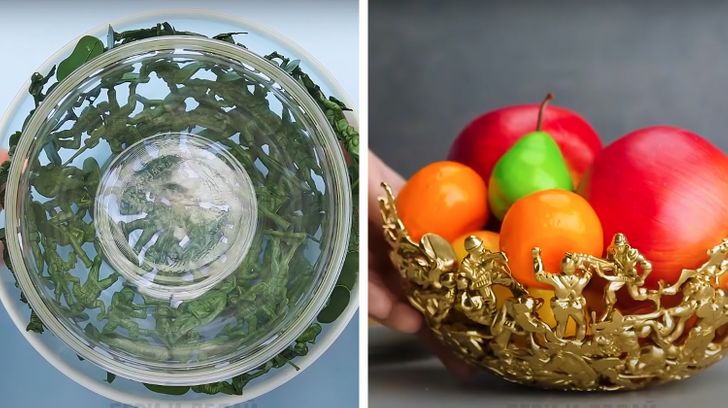
6. Fruit bowl
What you’ll need:
- 2 fireproof deep bowls of different sizes
- Plastic soldiers
- Golden spray paint
- An oven
How to do it: Put a few soldiers at the bottom of a large bowl and put a smaller bowl on top of them. Put the soldiers in the space between the bowls so that they fit snugly against each other. Turn on the oven and preheat it to 356°F, then place the bowls there. When the toys are melted, remove the bowls from the oven and let them cool. Remove the soldier bowl and apply golden paint.
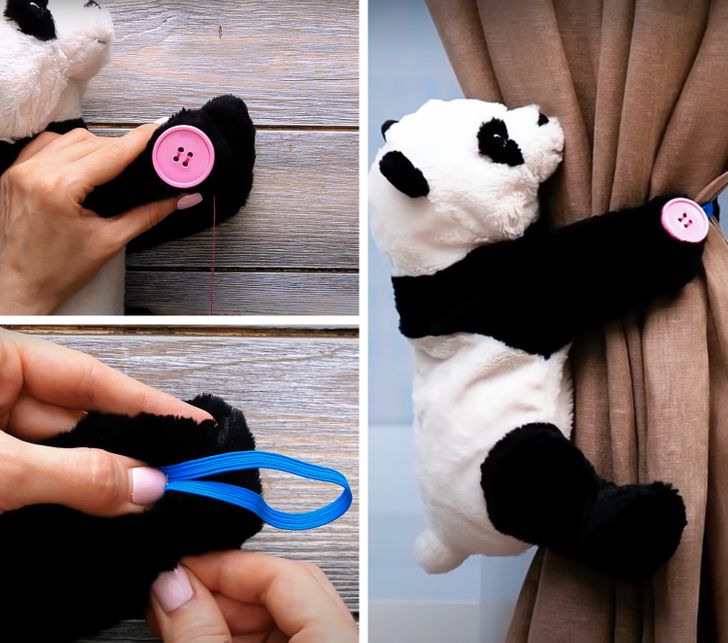
5. Curtain holder
What you’ll need:
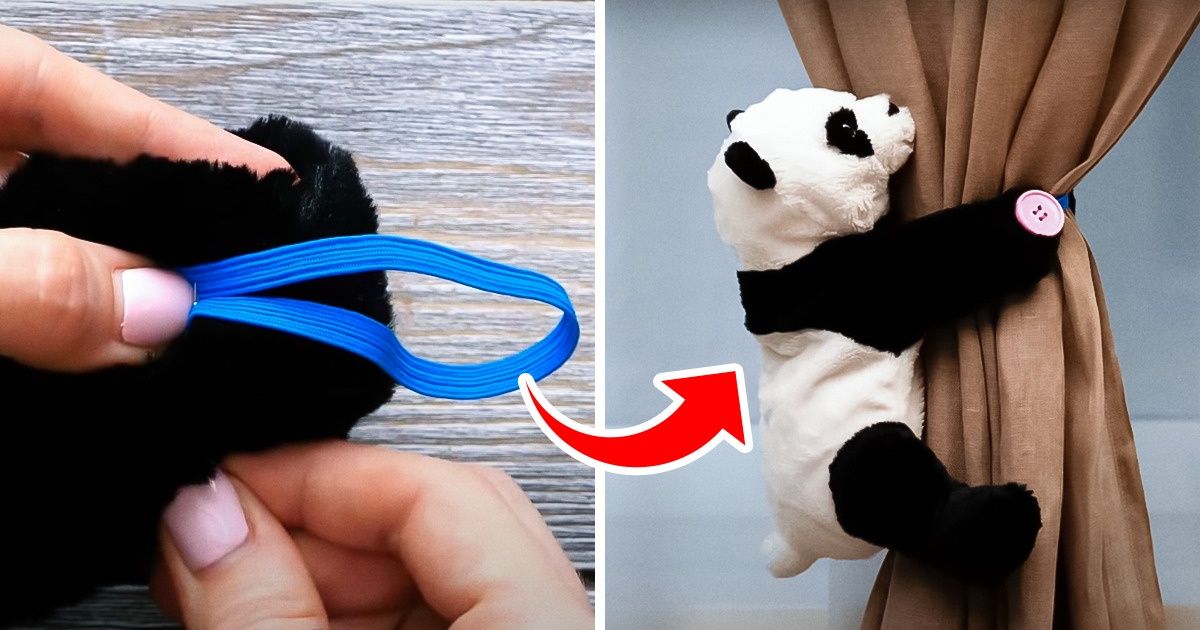
- A recumbent medium-sized soft toy (so that it can clasp the curtains with its paws)
- A large button
- An elastic band
- A needle
- Thread
How to do it: Sew a button to one foot of the toy and an elastic band gathered in a small loop to the other. Place the toy on the assembled curtain and secure its legs by threading the button through the loop.
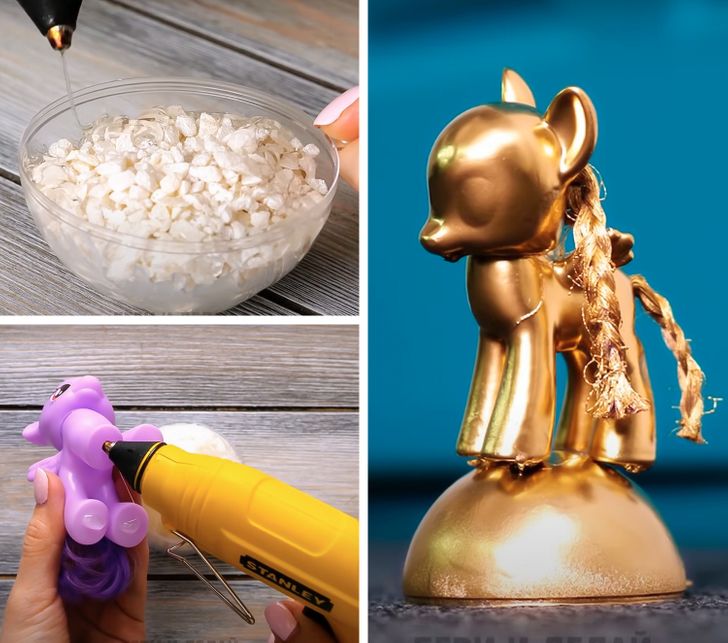
4. A catch (stopper) for the door
What you’ll need:
- A medium-sized pony toy
- A plastic bowl
- Pebbles or any small stones
- Universal transparent glue
- Golden spray paint
How to do it: Place stones in a bowl and pour glue on top of them to create a level surface. The glue layer should hold the stones together and keep them inside the bowl. Turn the bowl over and glue the figurine on top of it. Spray it with the paint.
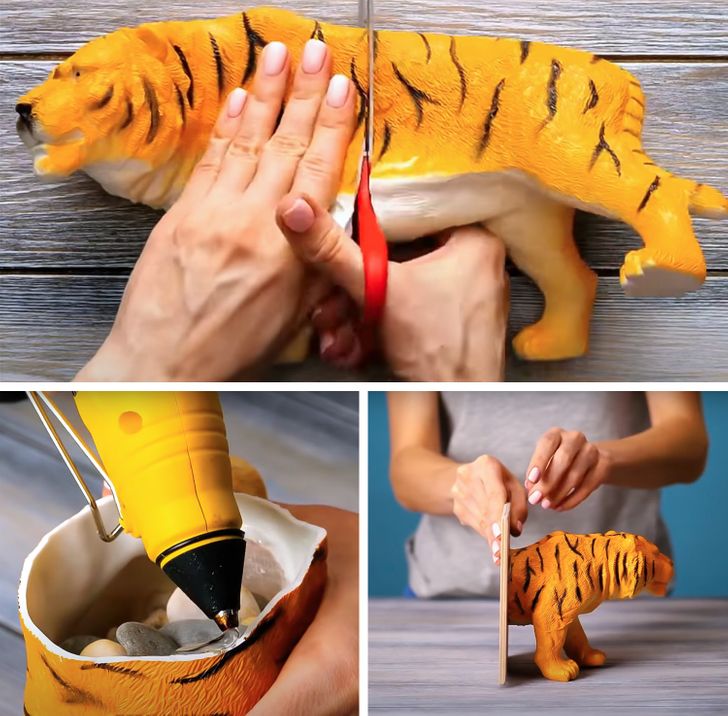
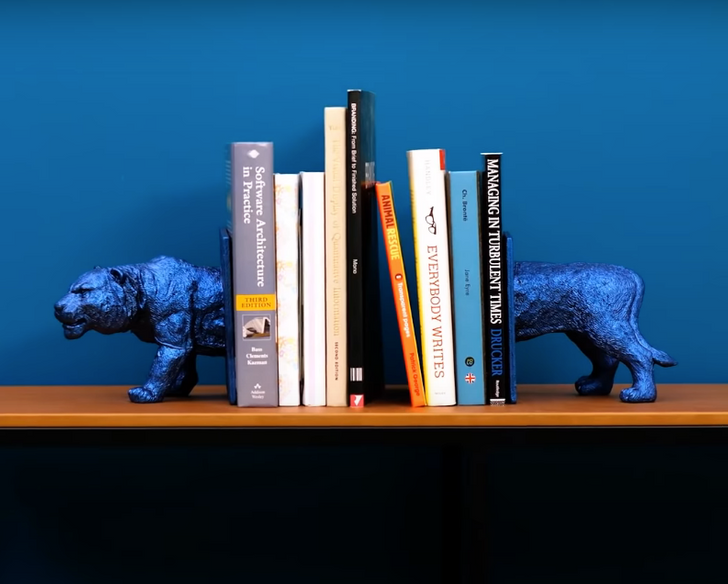
3. Book holder
What you’ll need:
- A medium-sized rubber tiger
- Square coasters for glasses
- Pebbles
- Universal transparent glue
- Scissors or a utility knife
- Blue metallic spray paint
How to do it: Cut the toy in half. Pour pebbles into each half and fill everything with glue to hold the stones together. Glue the coasters to the cut piece. Apply the paint.
Important: Make sure that the weight of the stones is correctly distributed inside the toy, especially in its front part — otherwise the tiger will fall forward.
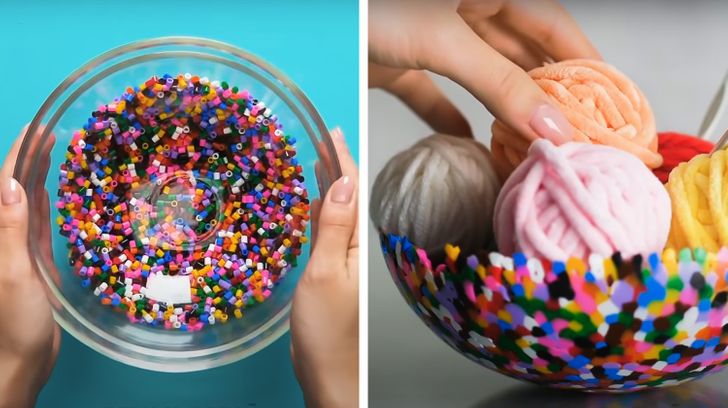
2. Decorative bowl
What you’ll need:
- Colored plastic beads
- 2 fireproof deep bowls of different sizes
- A geat gun
How to do it: Place the beads on the bottom of a larger bowl. Place a second bowl on top of the beads and fill the remaining space between the bowls with beads. Point the heat gun to the bowls so that the beads begin to melt and stick together. Wait a couple of minutes for the plastic to cool. Now you’re done!
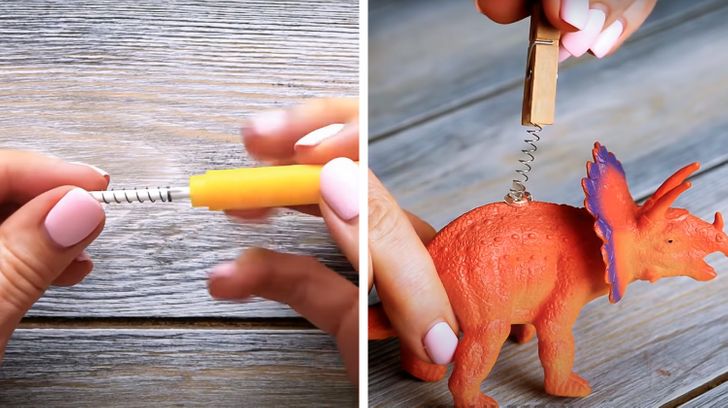
1. Photo holder
What you’ll need:
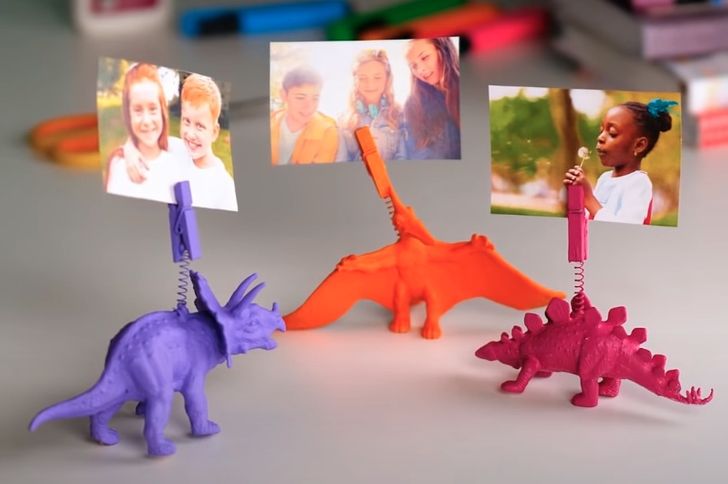
- Rubber dinosaur toys
- Old fountain pens
- Small wooden clothespins
- Universal transparent glue
- Spray paint
How to do it: Unscrew the bottom of the fountain pen and remove the spring from there. Use glue to attach one end of the spring to the back of the toy. Secure a clothespin on the other end of the spring. Apply paint and the photo holder is ready. If the toy is big enough, you can place several photos over it at once.
