How to Dye Easter Eggs
Dying Easter eggs is a fun and creative activity for both adults and children. Many of us have our own favorite methods of dyeing, but sometimes we want to try something new and unusual. Therefore, we would like to offer you some new creative solutions where you can use red cabbage, shaving foam, or food coloring.
5-Minute Crafts would like to share 11 methods with you for how to dye Easter eggs. They also include natural dyes.
Note: Before using any of these methods, wash the eggs thoroughly to ensure the overall spread of the dye.
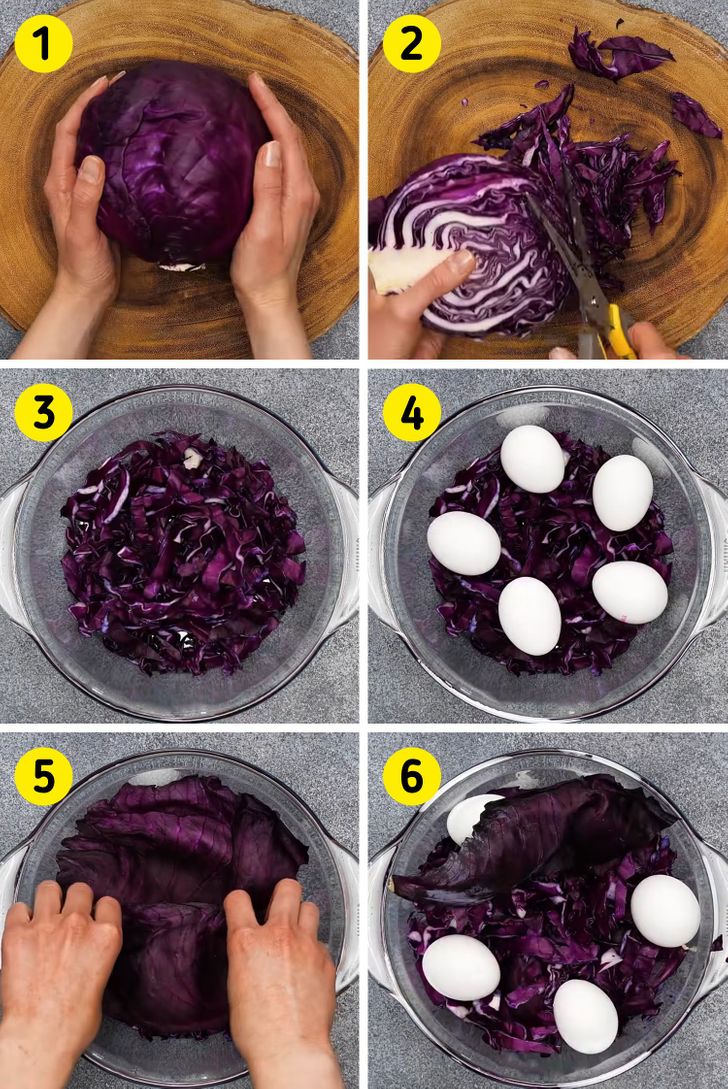
Method 1: With the help of red cabbage
1. Take a head of red cabbage.
2. Cut it in half and chop it.
3. Put a layer of chopped cabbage on the bottom of a saucepan.
4. Put raw eggs on top of the cabbage layer.
5. Put whole cabbage leaves on top the eggs.
6. On the cabbage leaves, put a layer of chopped cabbage, then again more eggs.
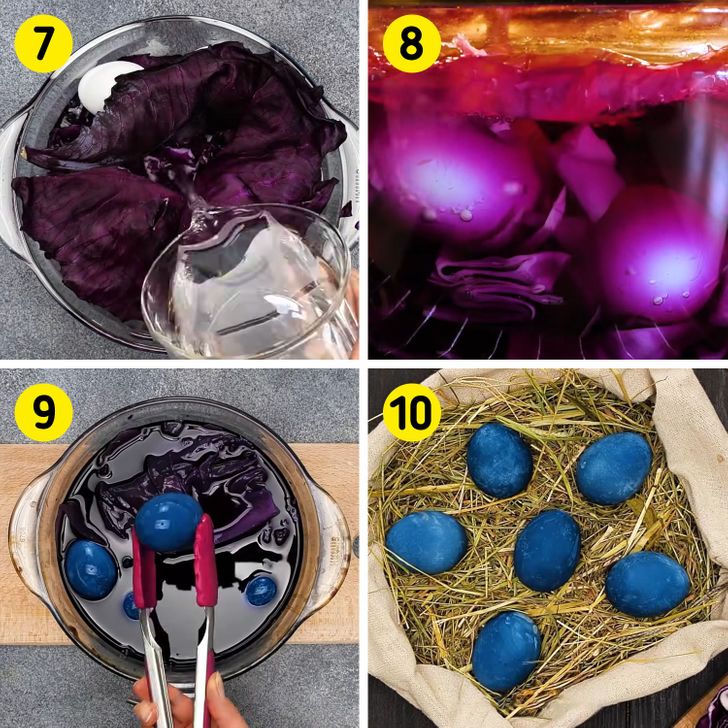
7. Cover the top layer of eggs with whole cabbage leaves. Fill the saucepan with cold water.
8. Boil the eggs and then leave them in the saucepan with the dye solution for 30 minutes.
9. Use tongs to take the eggs out from the dye solution.
10. Bon appetit!
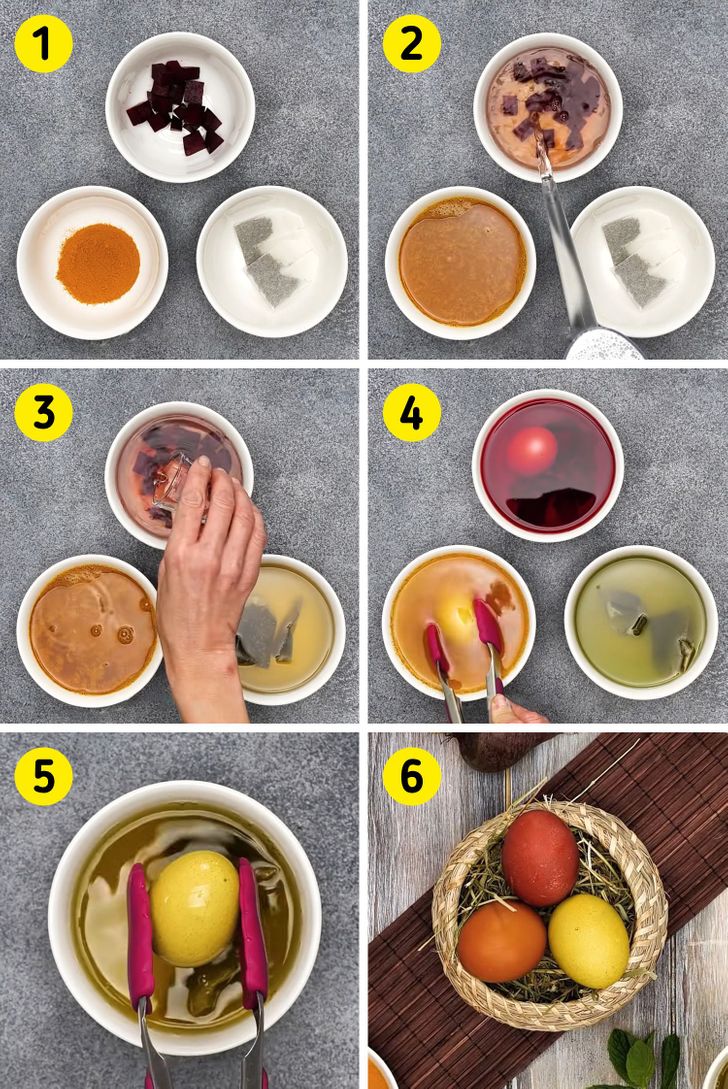
Method 2: With the help of beetroot, turmeric, and green tea
1. Take 3 deep bowls. Put diced beetroot in the first bowl, 2 tablespoons of ground turmeric in the second bowl, and 2 green tea bags in the third bowl.
2. Pour boiling water in them.
3. Add 1/3 of a small cup of table vinegar to each bowl and stir well.
4. Put a boiled egg into each bowl so that the eggs are completely submerged in the liquid. Leave it in for 30 minutes.
5. Afterward, take the eggs out.
6. Enjoy your meal!
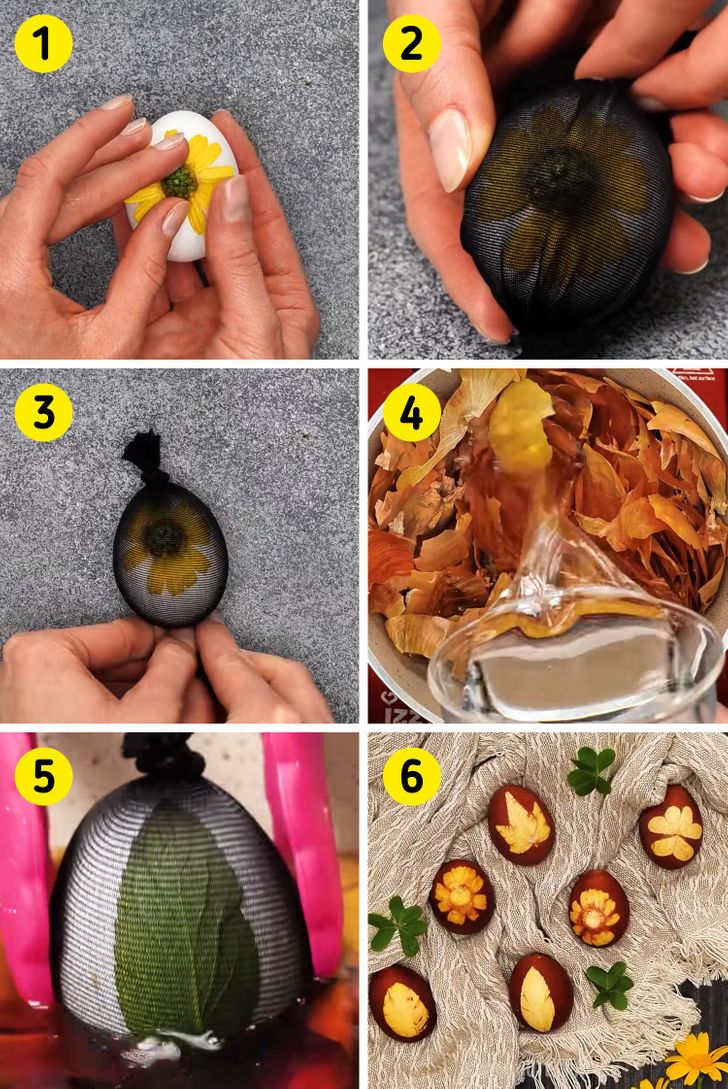
Method 3: With onion skins
1. Take a flower and press it against an egg (you can make it wet so that it sticks more tightly).
2. Pull a nylon stocking over the egg to prevent the flower from moving.
3. Tie the stocking tightly on both ends.
4. Fill a saucepan with onion skins. Then pour in cold water. Grind the skins down with a spoon so that they are completely submerged in the water.
5. Use culinary tongs to submerge the eggs in water too. Boil the eggs for 8 to 10 minutes starting from the moment the water begins to bubble.
6. Take the eggs out, and carefully remove the stockings by cutting them. Remove the flowers and the leaves with a paper towel.
Method 4: With the help of berries
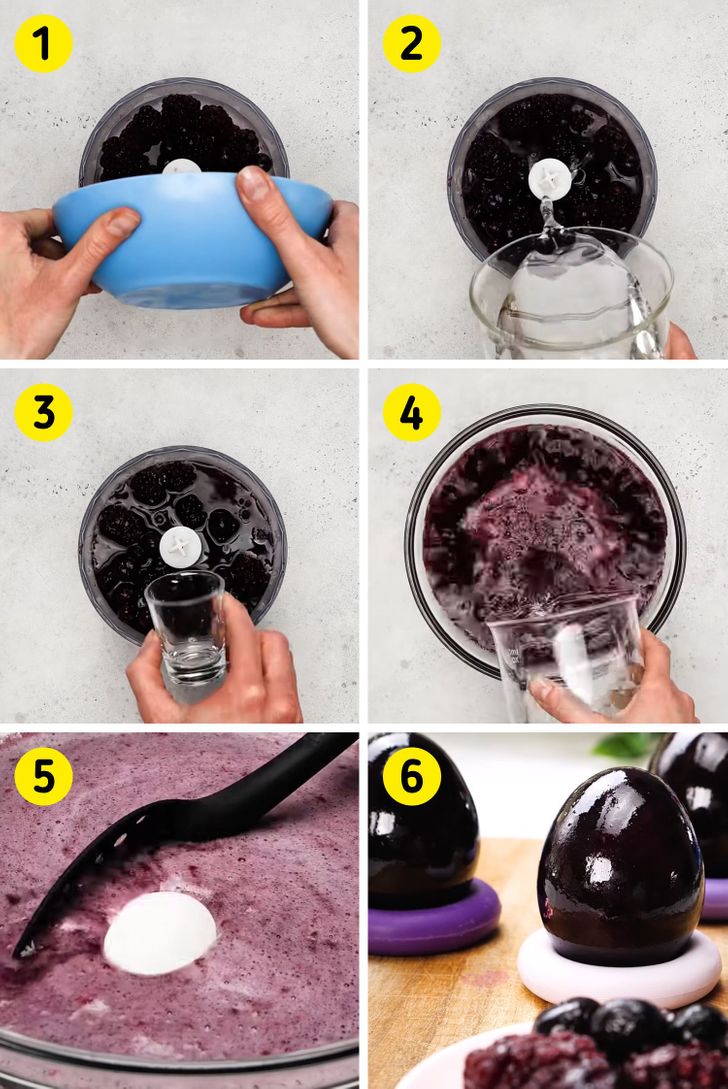
1. Pour a mixture of blackberries and black currants or blueberries into the blender.
2.— 3. Add water and 1 tablespoon of table vinegar. Mix the ingredients with the blender until the mass is smooth.
4. Pour the mass into a saucepan. Top it off with water. Stir with a spoon.
5. Immerse the boiled eggs in the mass and leave it for one hour.
6. Take the eggs out, and dry them with a paper towel. To make them shine, you can wipe them with a cloth moistened with vegetable oil.
Method 5: With the help of nail polish
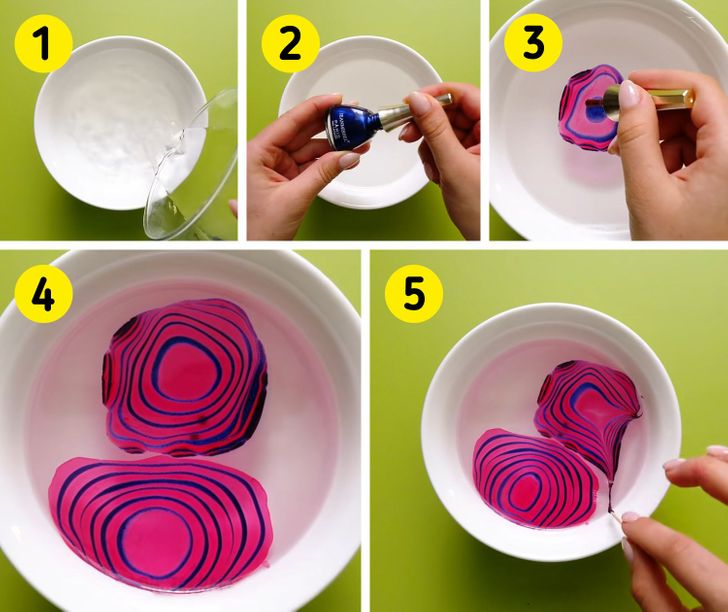
1. Take a bowl filled with water.
2.— 3. Alternately drop nail polish of different colors into the water — a drop of one color first, then a drop of another.
4. Make 2 large multi-colored nail polish spots.
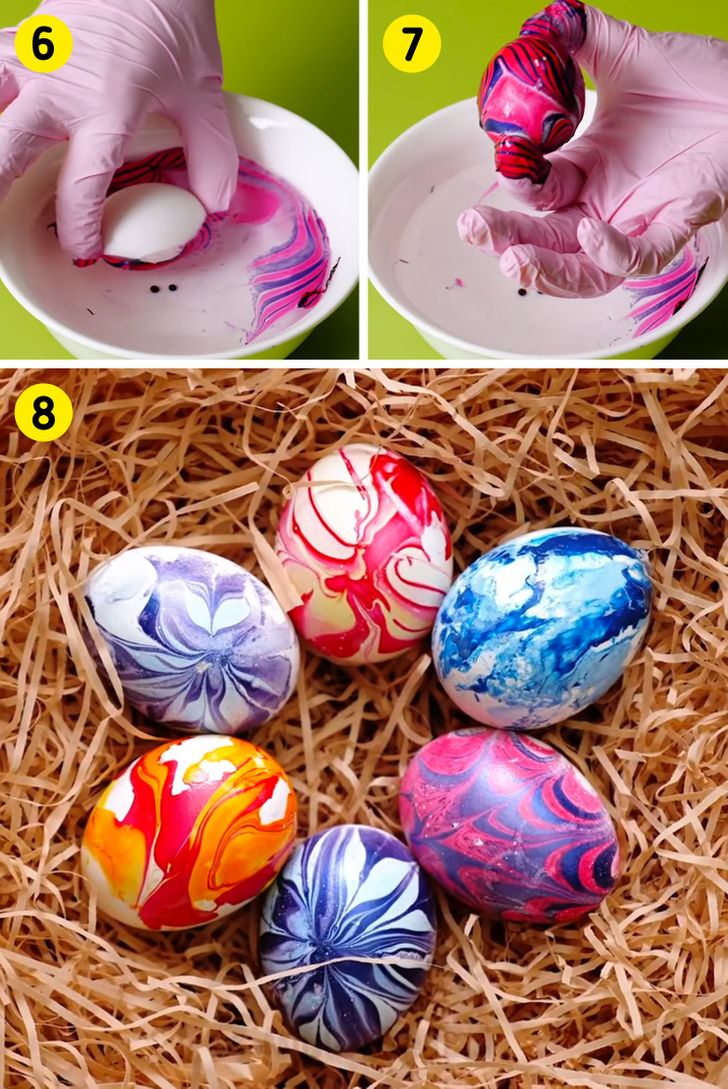
5. Use a toothpick to stretch them over the surface of water.
6. Dip the egg into the nail polish. Wear gloves to protect your hands.
7. Take the egg out and let it dry.
8. Use nail polish in different colors to create unusual patterns.
Note: Eggs painted with nail polish should not be eaten, but they can be used for the decoration of the interior or for an Easter tree.
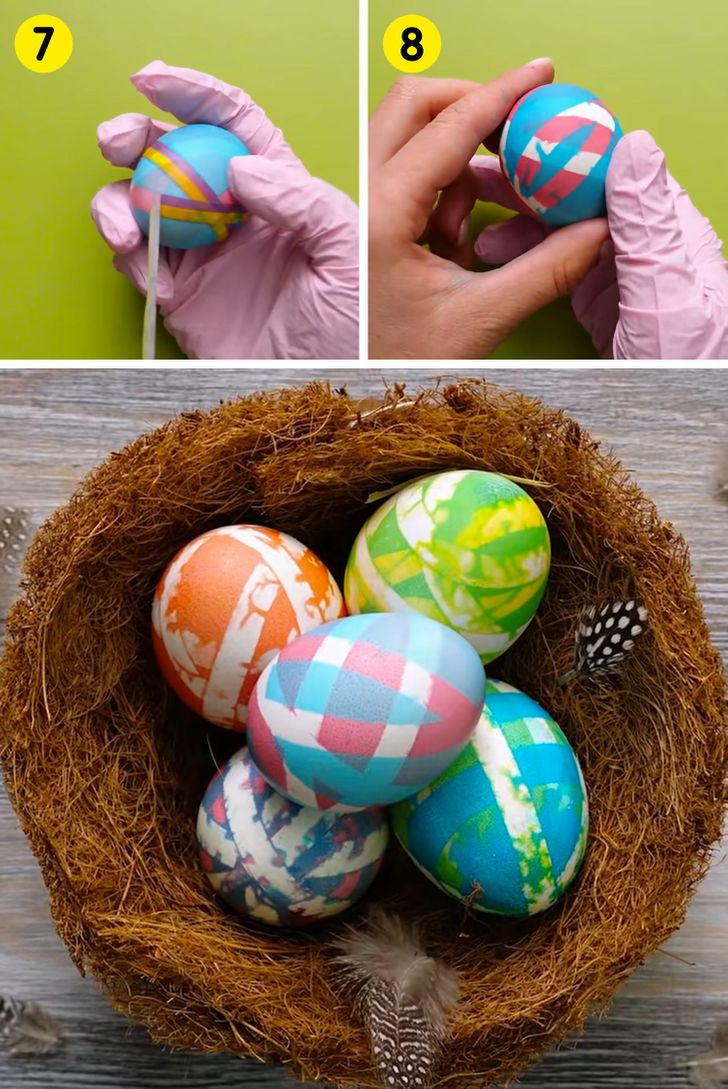
Method 6: With the help of food coloring and duct tape
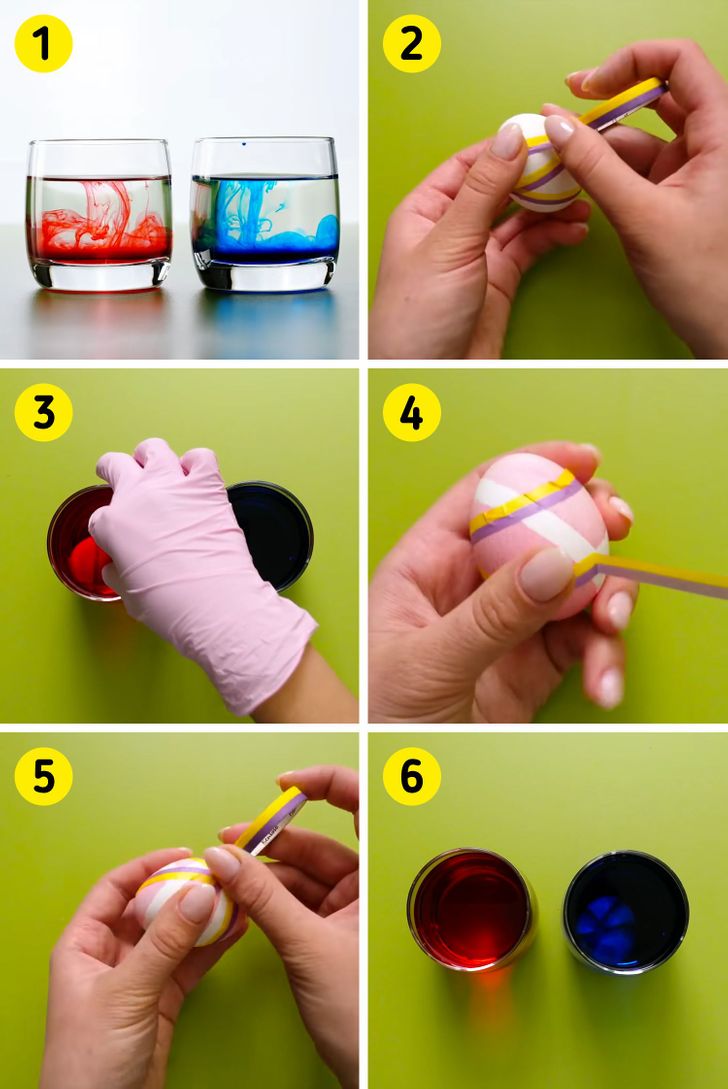
1. Take 2 cups of water. Dilute red food coloring in one cup and blue coloring in the other. Dilute the food coloring according to the instructions on the pack.
2. Wrap thin duct tape over a boiled egg.
3. Put the egg in the cup filled with food coloring for the time recommended by the food coloring manufacturer.
4. Take the egg out, dry it, and remove the duct tape.
5. Wrap the egg with the duct tape again, but in a different way.
6. Put the egg in the cup with the different food coloring.
7. Remove the tape from the egg.
8.— 9. Experiment with different colors of food coloring. Bon appetit!
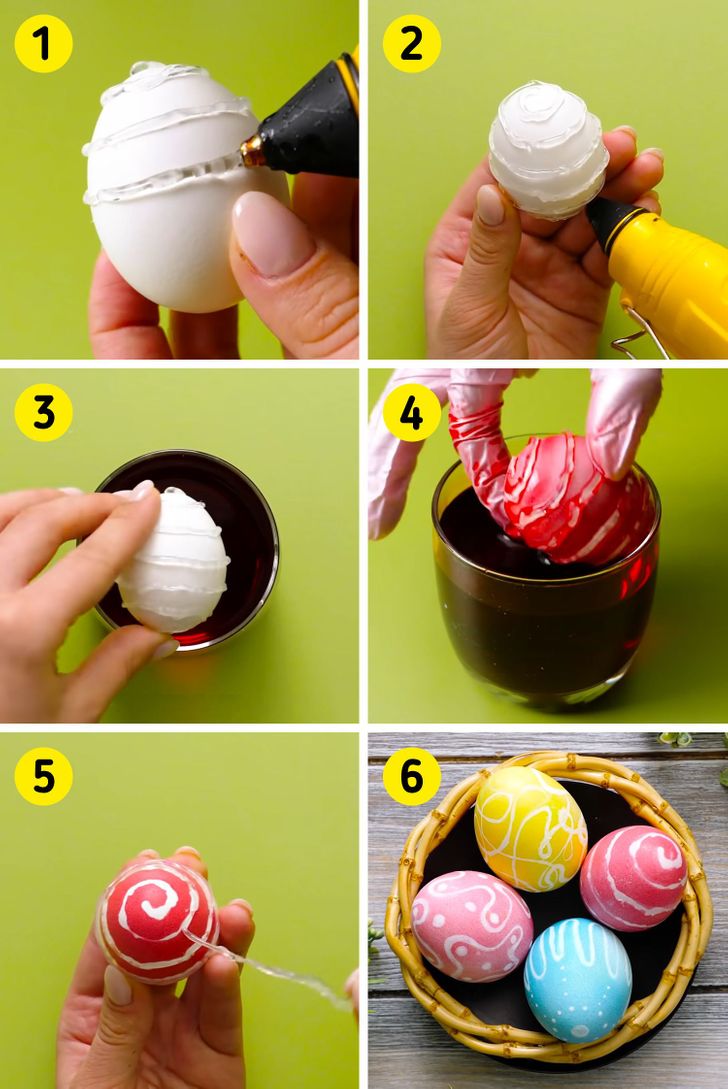
Method 7: With the help of a hot glue gun and food coloring
1.— 2. Use a hot glue gun to apply glue to an egg in a spiral pattern.
3. Put the egg in the bowl filled with food coloring diluted in water according to the instructions on the pack.
4.—5. After the time indicated in the instructions, take the egg out and remove the glue spiral.
6. You can create different glue patterns on eggs.
Note: Eggs dyed in accordance with this method should not be eaten.
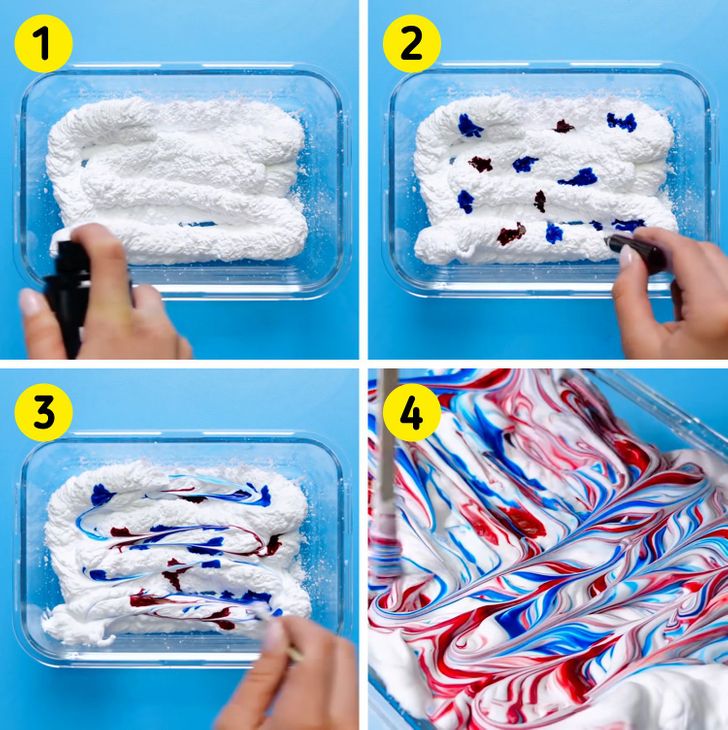
Method 8: With the help of shaving foam
1. Take a container with low sides and fill it with shaving foam.
2. Drip food coloring in 2 different but matching colors (for example, blue and red) on the foam.
3.—4. Stir the foam with a stick by moving your hand first from the right to the left, and then up and down.
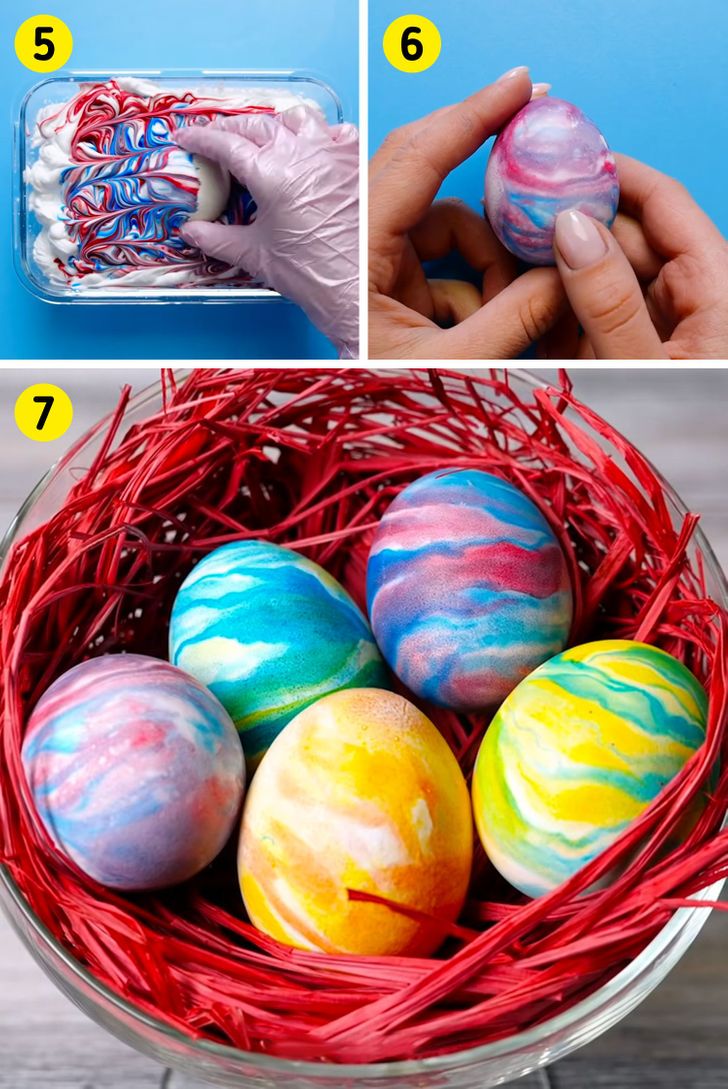
5. Immerse a boiled egg in this colored foam and let it sit there for a few minutes.
6. Then dry the egg with a paper towel. Now you can serve it!
7. You can experiment with different colors.
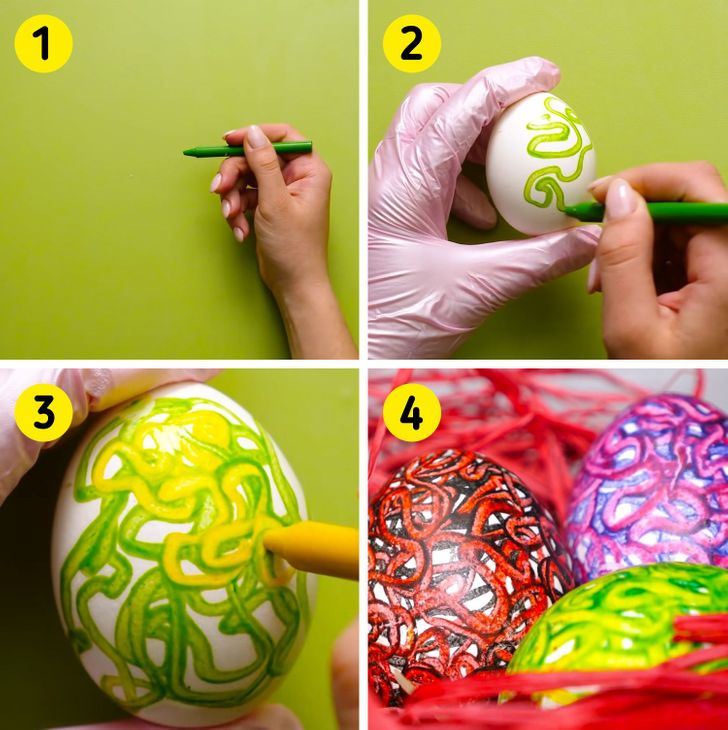
Method 9: With the help of crayons
1. Take a crayon and take off its paper wrapper.
2. Draw chaotic patterns on a freshly boiled, still warm egg with the crayon (see photos above). Be careful to not burn yourself.
3. Next, outline the patterns with a crayon in a different color.
4. Enjoy your meal!
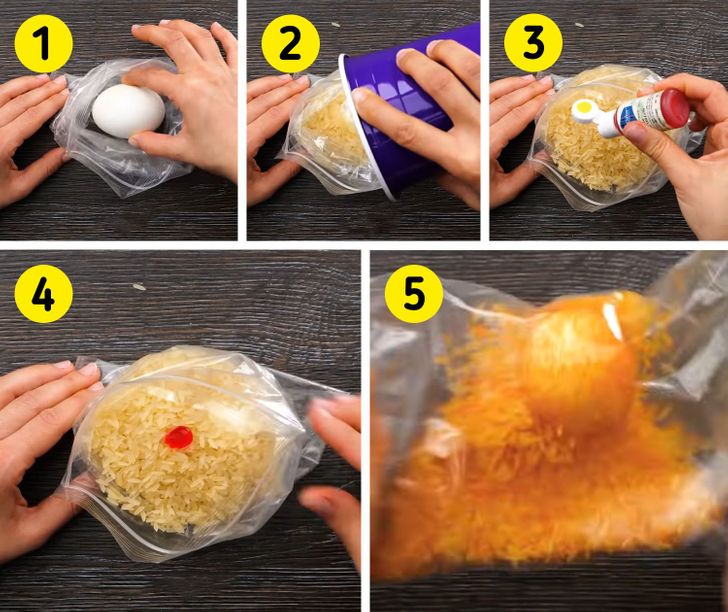
Method 10: With the help of rice
1. Take a Ziploc bag and put a boiled egg into it.
2. Then pour rice into the bag so that it covers the egg completely.
3.—4. Drip food coloring on the rice.
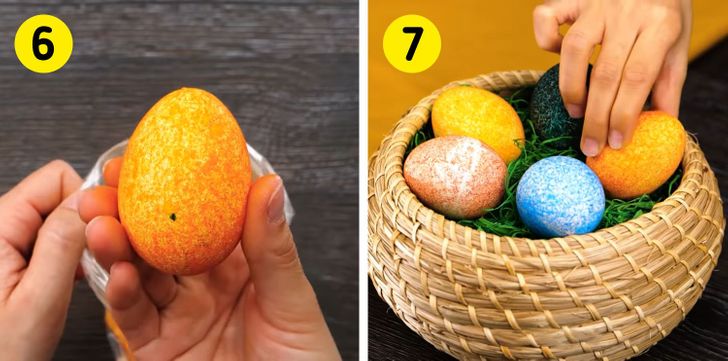
5. Close the bag and shake it well, so the color adheres to the rice and the egg.
6. Remove the egg from the bag.
7. Dye eggs in different colors with the help of this method.
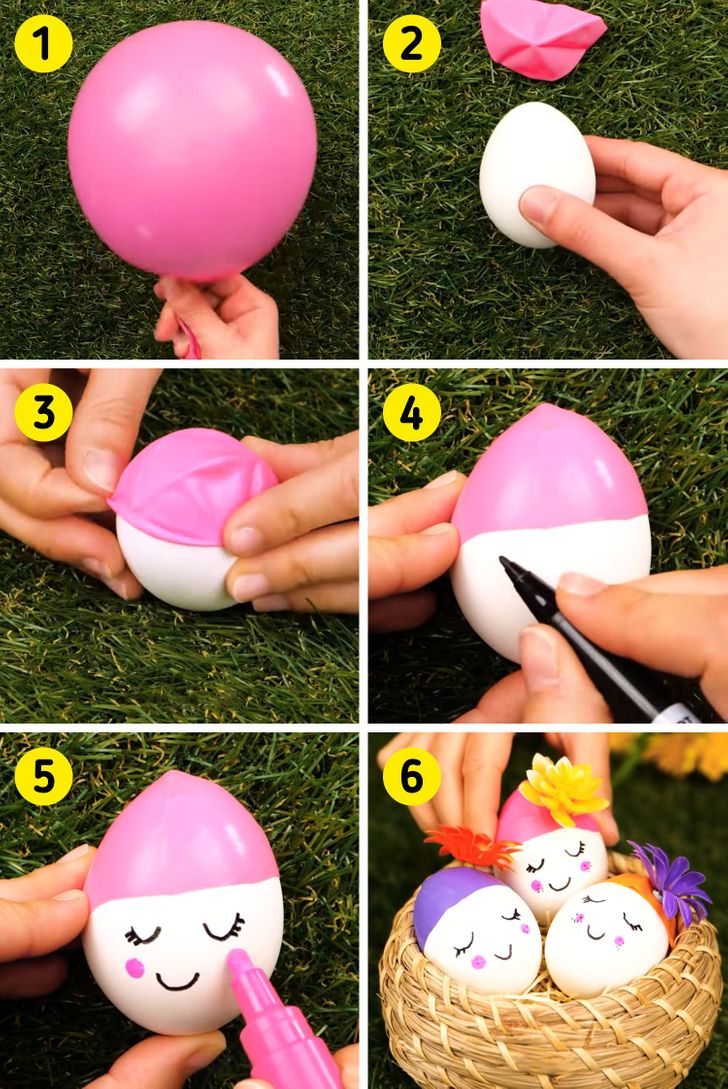
Method 11: With the help of balloons
1. Take a balloon.
2.—3. Pop it up and put the top part of the balloon on an egg, like a hat .
4. Using a black marker, draw closed eyes with eyelashes and a mouth on the egg.
5. Use a pink marker to draw blush on the cheeks.
6. You can attach artificial flowers to the “hats” on the eggs.
