16 Ways to Decorate a Cake
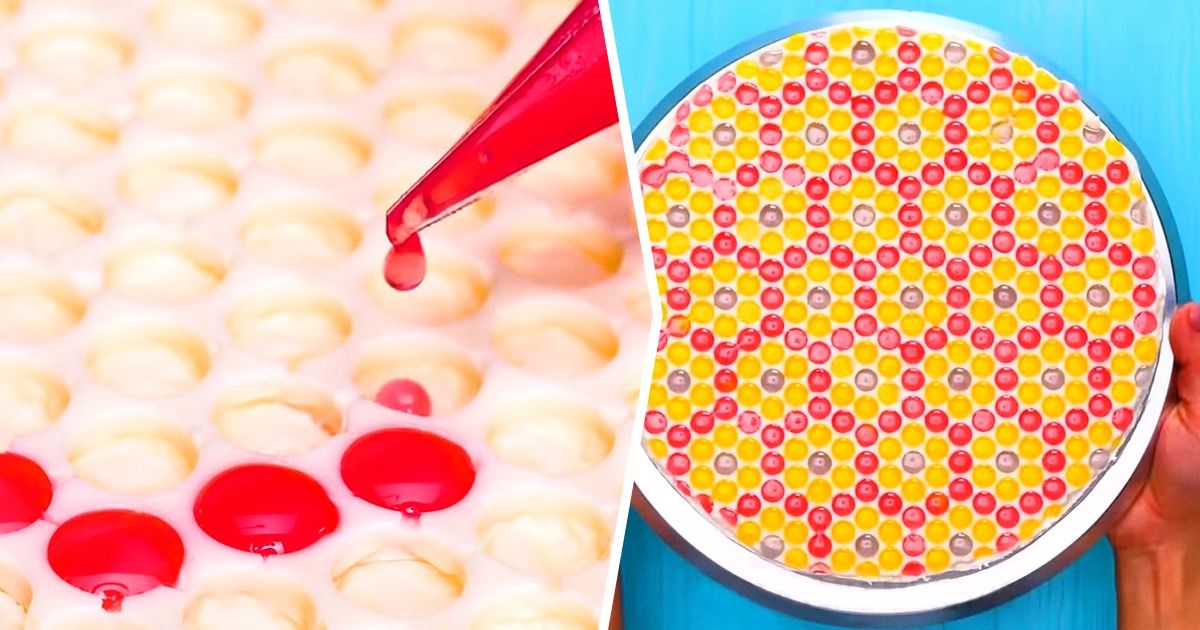
It might seem complicated, but there are several ways to decorate a cake without having to spend too much money and time. You can actually do it at home and you don’t need to have experience in baking. With just a few steps, you can get a fun and eye-catching design.
5-Minute Crafts wants to show you 16 cake decorating ideas.
1. With bubble wrap
What you’ll need:
-
Bubble wrap
-
Cake piping bag with colored sugar syrup
Instructions:
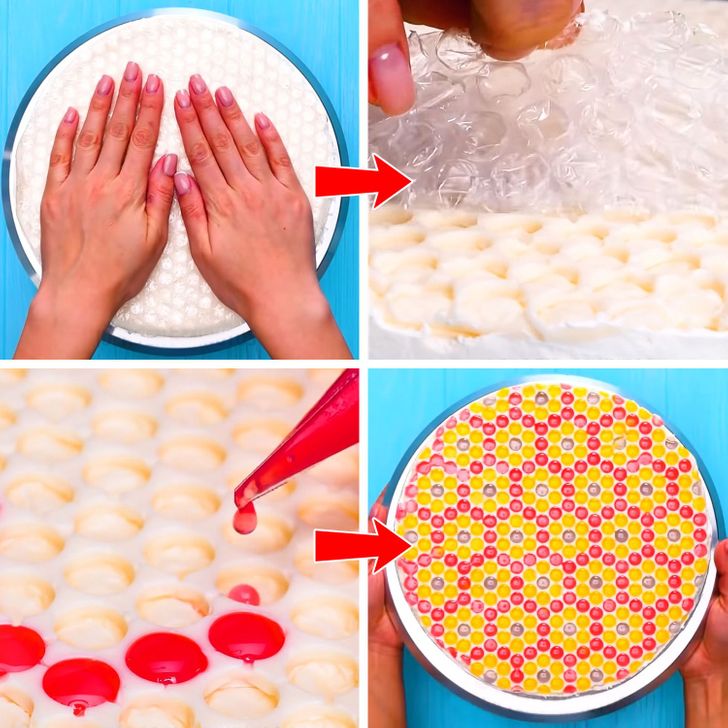
- Place the bubble wrap on top of the freshly frosted cake and press it down to cover the entire surface.
- Give it time to set and then slowly remove it.
- Fill the holes created by the bubble wrap with colored sugar syrup.
2. With a plastic bag
What you’ll need:
-
Plastic bag
-
Cake piping bag with melted milk chocolate
Instructions:
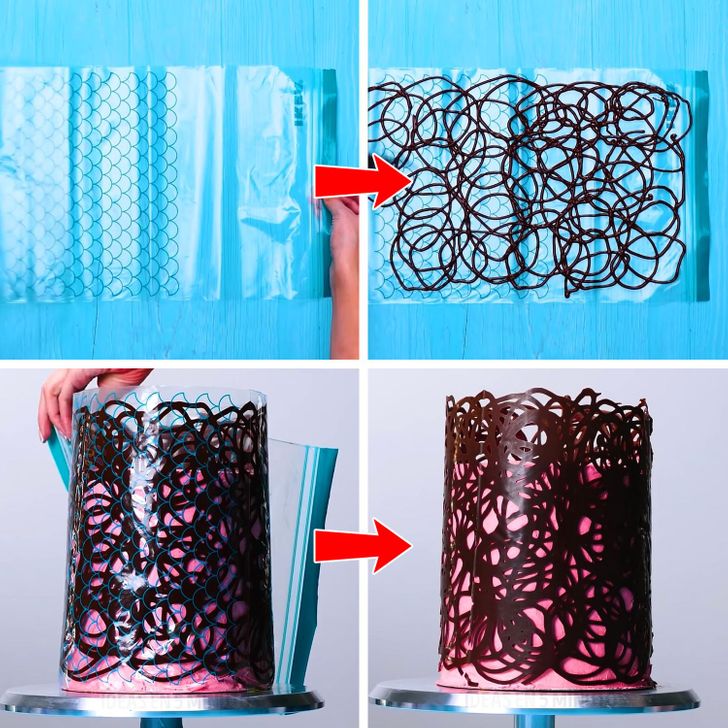
- Use the cake piping bag that contains the chocolate to make spiral shapes on the plastic bag.
- Wait about 10 minutes for the chocolate to harden a bit, but not completely.
- Place the bag around the cake.
- Remove the bag.
3. With marshmallows
What you’ll need:
- Large marshmallows
- Small marshmallows
- Cake piping bag filled with frosting
Instructions:
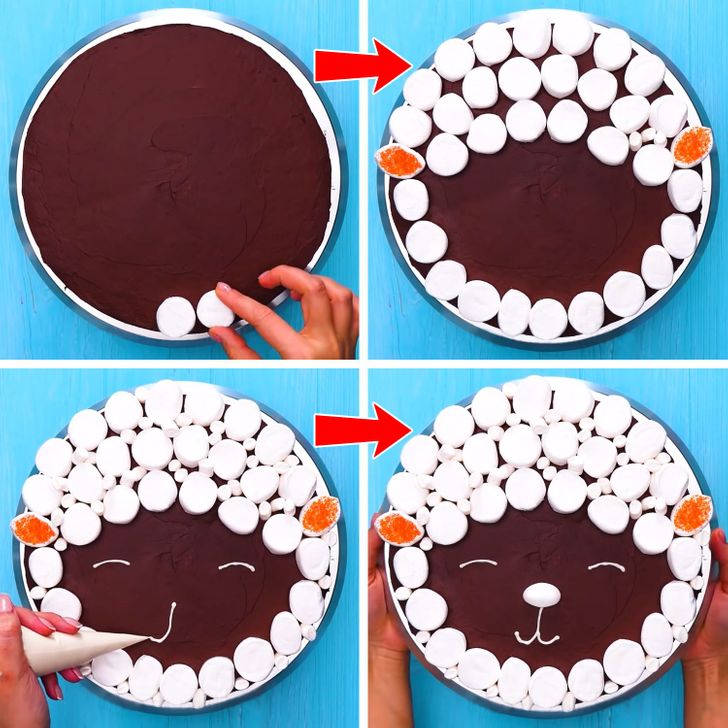
- Place large marshmallows all over the top of the cake, but leave enough room to draw a face.
- Place the small marshmallows in the spaces left between the big ones.
- Draw eyes and a mouth with the icing contained in the cake piping bag.
- Use a large marshmallow to make the nose that completes the sheep’s face.
4. With ground cookies
What you’ll need:
- Crushed or ground cookies in different colors
- Strainer
Instructions:
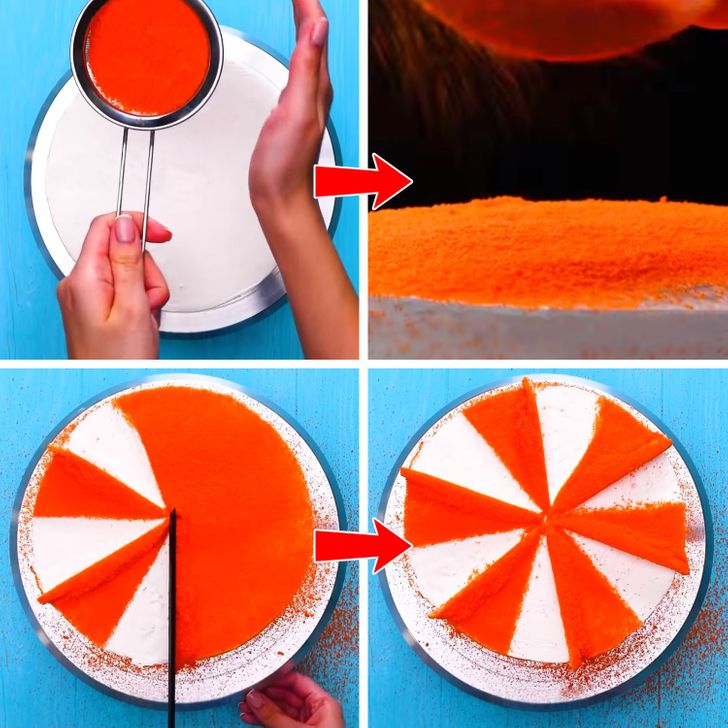
- Place the crushed cookies in the strainer and sprinkle over the entire top of the cake.
- With a ruler placed from the center to the end, turn the cake until you see a triangle is formed with the cookie crumbs.
- Create one triangle with the cookie crumbs and one without the cookie crumbs, until you turn the cake all the way around.
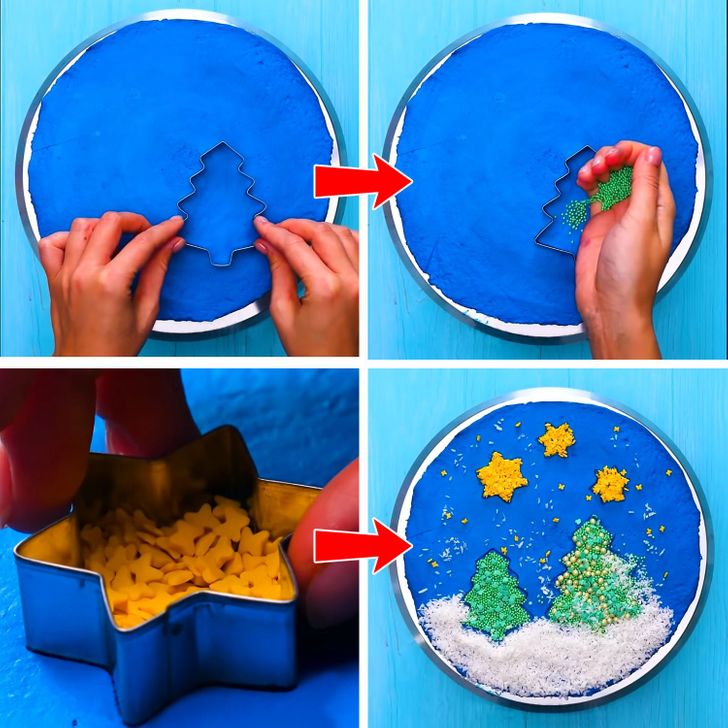
5. With cookie cutters
What you’ll need:
- Cookie cutters in various shapes
- Confectionery accents in various shapes and sizes
Instructions:
- Place one of the cookie cutters on top of the cake, and press down just a little bit.
- Add any confectionary accents that you’d like inside the mold. For example, if the cutter is shaped like a Christmas tree, then use green confections to fill it in.
- Remove and repeat the process with that and other cutters on other parts of the cake frosting.
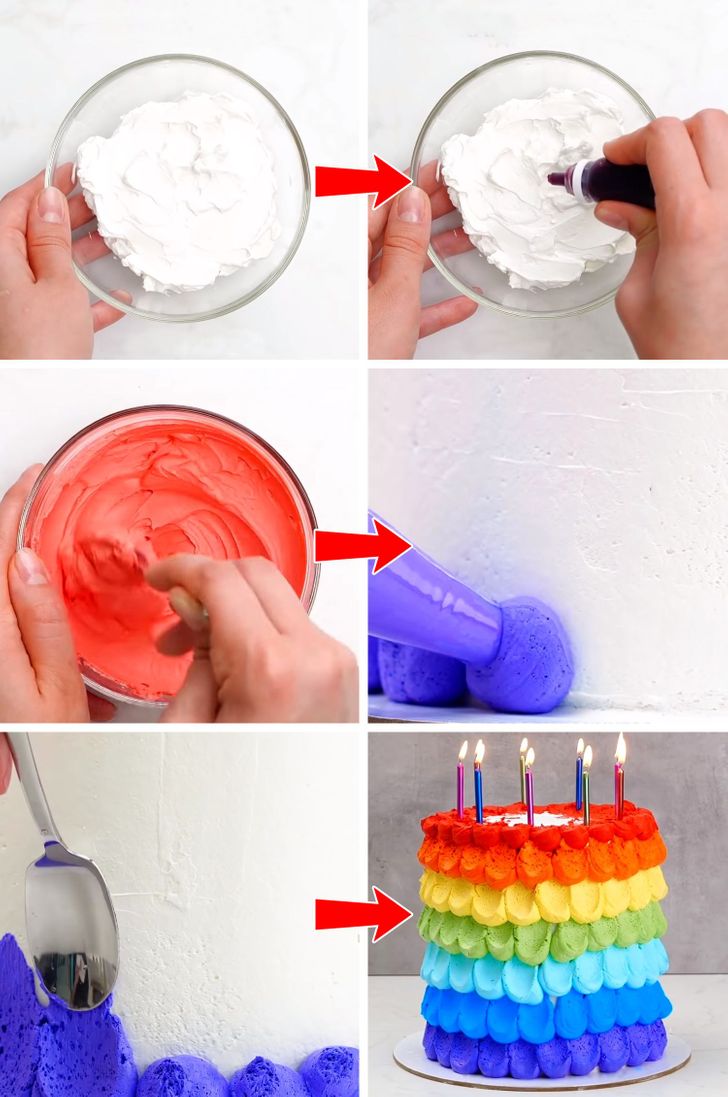
6. With whipped cream
What you’ll need:
- Whipped cream
- Food coloring
- Cake piping bag
- Spoon
Instructions:
- Add a few drops of food coloring to a container with whipped cream.
- Mix until all the whipped cream has changed color.
- Repeat the same procedure with different colors in different bowls of whipped cream.
- Add the colored whipped cream to a cake piping bag and place small colored balls around the cake.
- Spread the whipped cream upward with a spoon.
- Repeat the procedure with the other colors until the entire cake is covered.
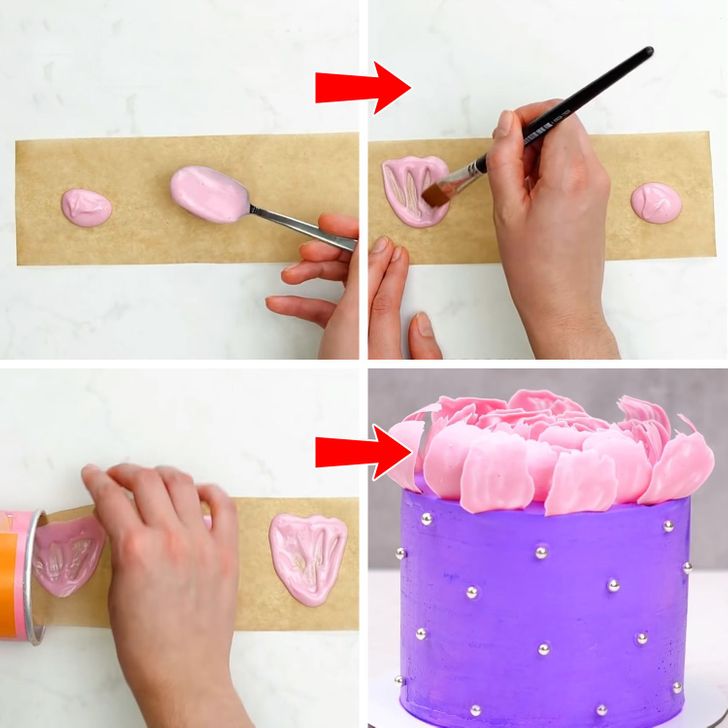
7. With confectionery glaze
What you’ll need:
- Confectionery glaze
- Brush
- Parchment paper
Instructions:
- Transfer a small portion of confectioner’s glaze to a rectangle of parchment paper.
- Use the brush to shape the glaze into petals.
- Place the paper inside a tubular container and freeze.
- Remove the petals and place them on the cake.
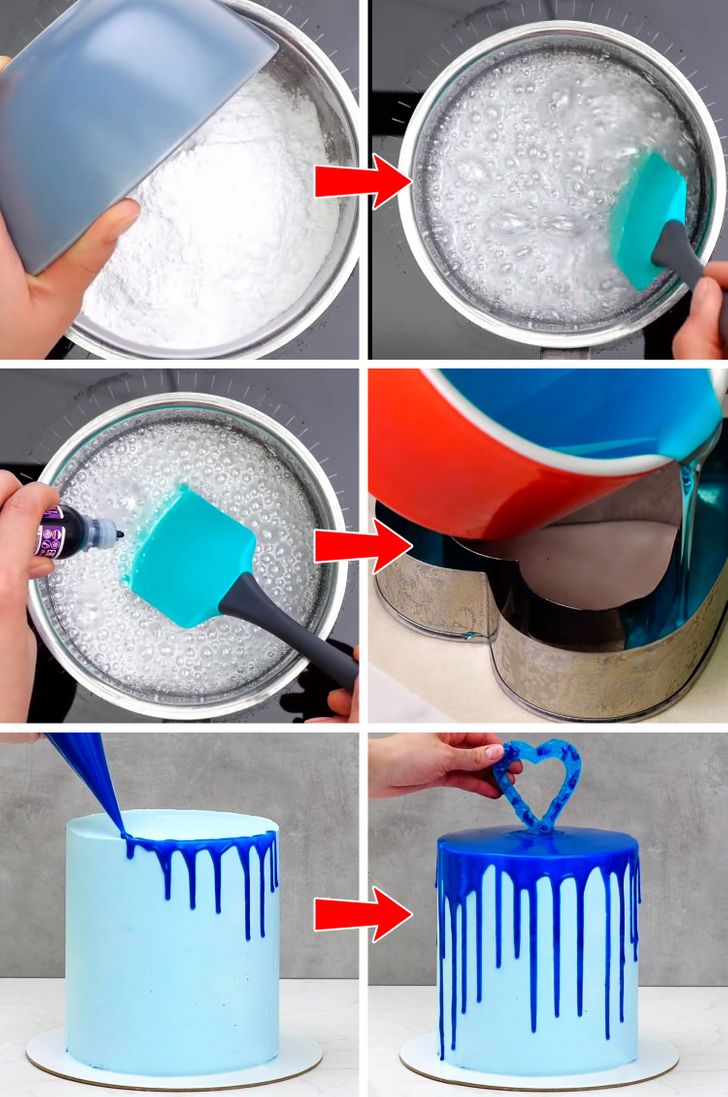
8. With isomalt
What you’ll need:
- Isomalt
- Spatula
- Food coloring
- Mold (any shape is fine)
Instructions:
- Pour the isomalt into a saucepan and bring to a boil.
- Stir with the spatula and add 2 drops of food coloring and mix until the color is well incorporated.
- Place some of the mixture in the cake piping bag and add it over the top edges of the cake.
- Pour a part of the mixture into a figure mold.
- Unmold and place on top of the cake.
9. With candies
What you’ll need:
- Candies
- Waxed paper
- Cake piping bag with melted chocolate
- Knife
Instructions:
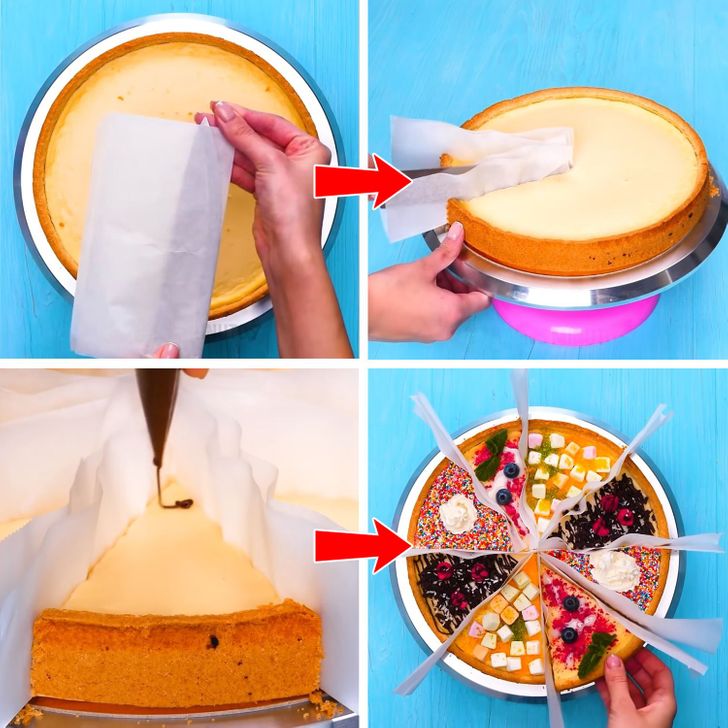
- Wrap the knife’s edges with waxed paper and cut the cake as you would normally do if you wanted to have a slice. When slicing the cake, make sure the waxed paper stays in place by removing the knife gently.
- Repeat this process until the whole cake is sliced evenly.
- With a piping bag filled with melted chocolate, decorate each section of the cake with lines.
- Top with chocolate chips and candies of your choice.
10. Moon cake design
What you’ll need:
- Cake piping bag
- Glaze
- Melted milk chocolate
- A plate
- Confections
Instructions:
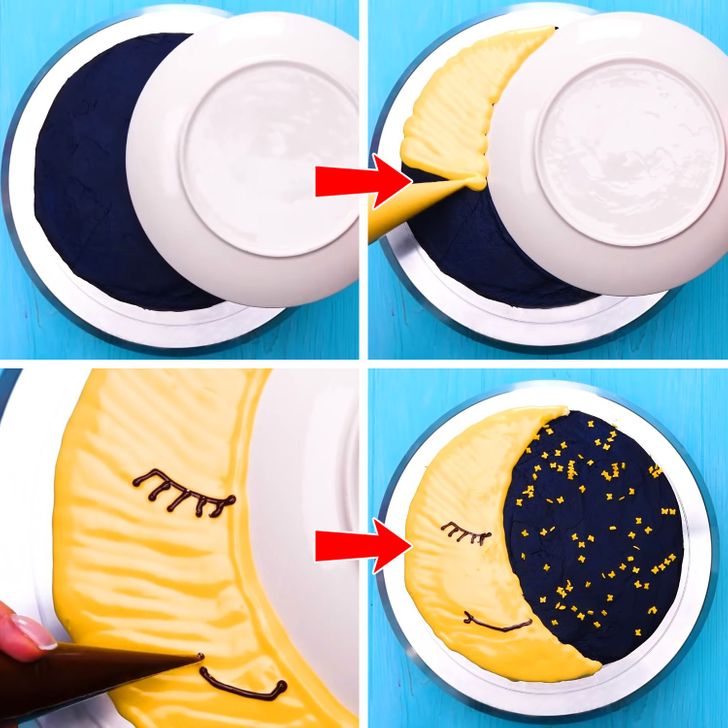
- Place a plate upside down against the cake. It should cover a little less than half of the cake. Make sure you don’t press the plate against it to avoid any marks.
- Fill the uncovered part of the cake with icing using a piping bag.
- Then, using another chocolate-filled piping bag to draw the eyes and mouth of the moon.
- Remove the plate and add the confections.
11. With candies
What you’ll need:
- Ziploc bag (or any other bag that can be closed)
- Candies in different colors
- Letter or number molds
Instructions:
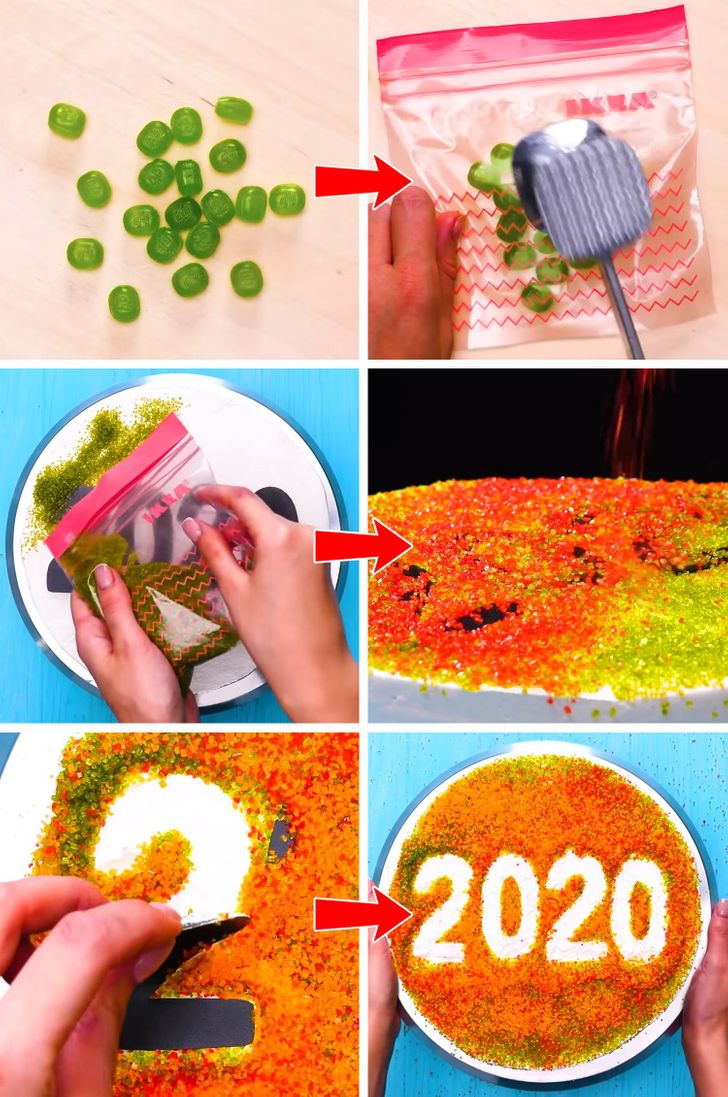
- Place molds shaped like letters or numbers, depending on what you want the cake to read.
- Place the candy inside the bag.
- Crush the candy inside the bag until it’s fully-ground and repeat the procedure with the rest of the candies.
- Sprinkle the ground candies over the cake.
- Remove the molds.
12. With a spoon
What you’ll need:
- Spoon
- Squeeze bottle or piping bag with melted chocolate
Instructions:
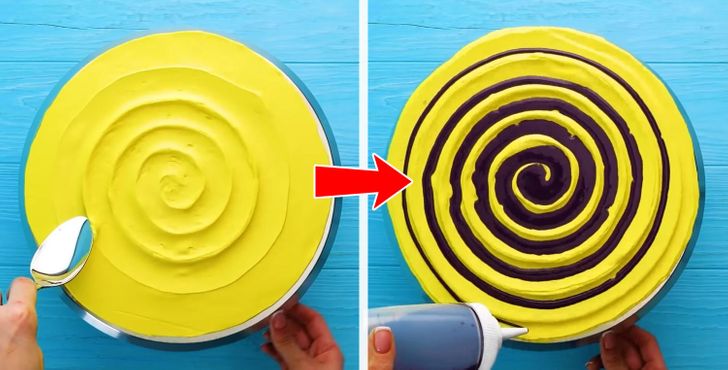
- Place the spoon in the center of the cake and then rotate the cake, but at the same time move the spoon slowly toward the outer part of the cake to make a spiral.
- Use a squeeze bottle or a piping bag to fill the groove of the spiral with chocolate.
13. With chocolate powder
What you’ll need:
- Melted milk chocolate
- Powdered chocolate
Instructions:
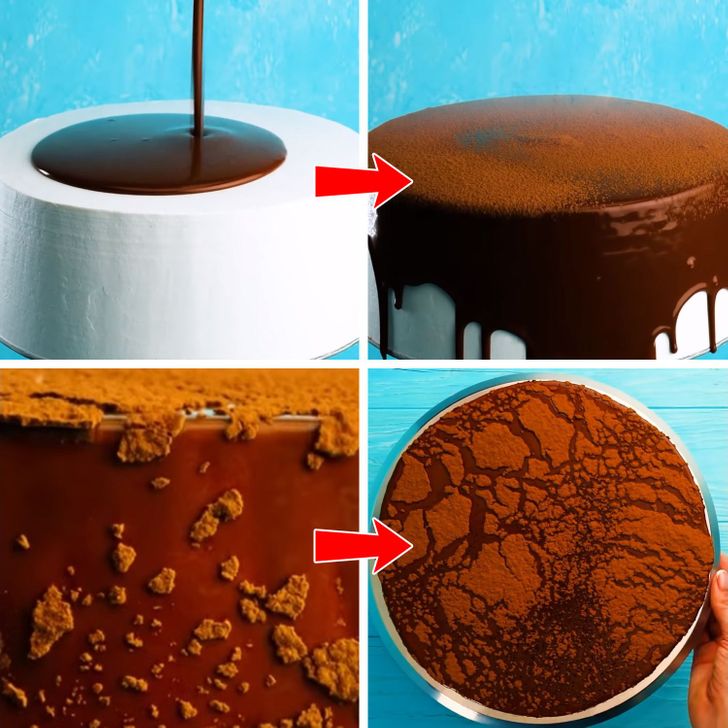
- Pour the melted chocolate over the top of the cake.
- Sprinkle with chocolate powder.
- Turn the cake to spread the chocolate.
14. With pieces of chocolate
What you’ll need:
- Waxed paper
- Melted milk chocolate
Instructions:
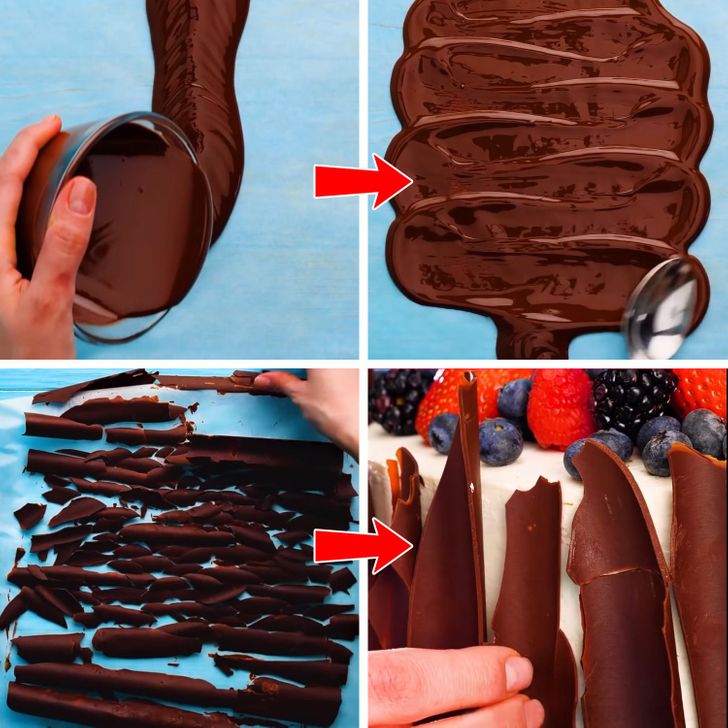
- Pour the melted chocolate over a piece of waxed paper.
- Spread with a spoon all over the paper.
- Roll up the paper and let it dry.
- Unroll the paper, take the chocolate pieces, and place them around the cake.
15. With white chocolate
What you’ll need:
- Melted white chocolate
- Spatula
Instructions:
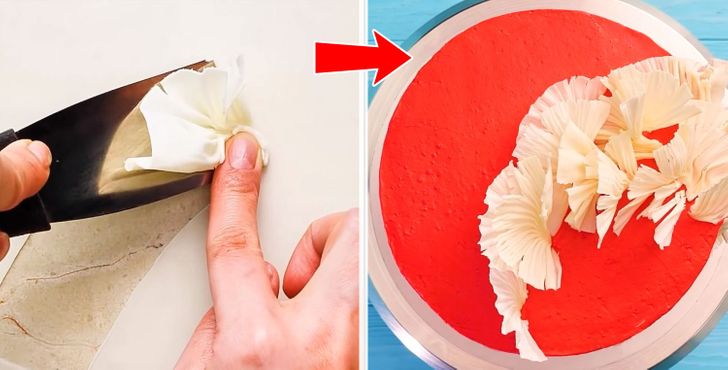
- Pour the white chocolate on a hard surface.
- When it dries, take a spatula, and with your finger on the bottom corner, tear off some of the chocolate.
- Decorate the cake with several of the chocolate figures.
16. Cookie-monster cake design
What you’ll need:
- Large marshmallows
- Small marshmallows
- Fork
- Plastic piping bag with colored frosting
Instructions:
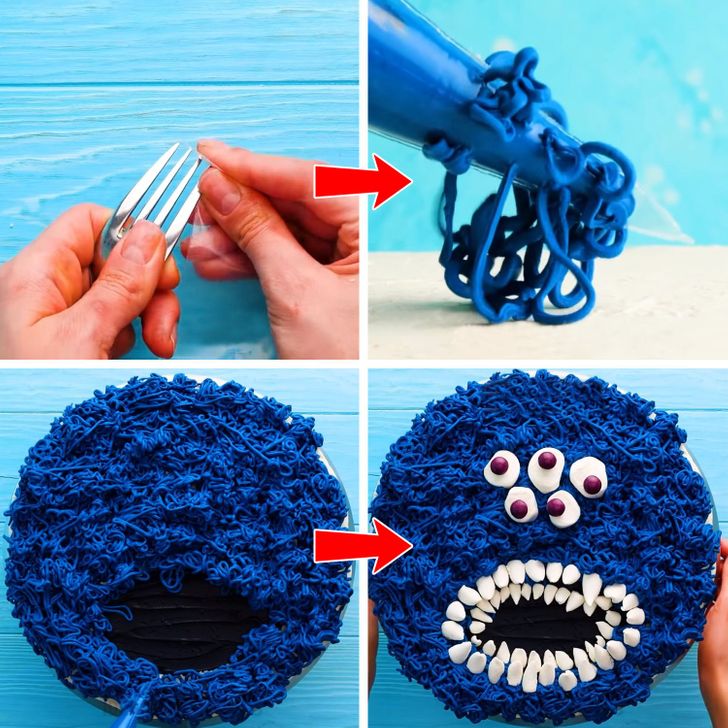
- Take the fork and poke holes in the front part of the cake piping bag.
- Decorate the cake with colored icing and leave some space to make a mouth.
- Place marshmallows around the space you left and place some others right on the top, to make the monster’s eyes.
