How to Make a Paper Airplane
Paper airplanes are easy-to-make toys that can be created by just your hands and a sheet of paper. 5-Minute Crafts will show you the steps to make your own simple paper airplane as well as an advanced version for those who like a little challenge.
A simple airplane — the bulldog dart
Step 1
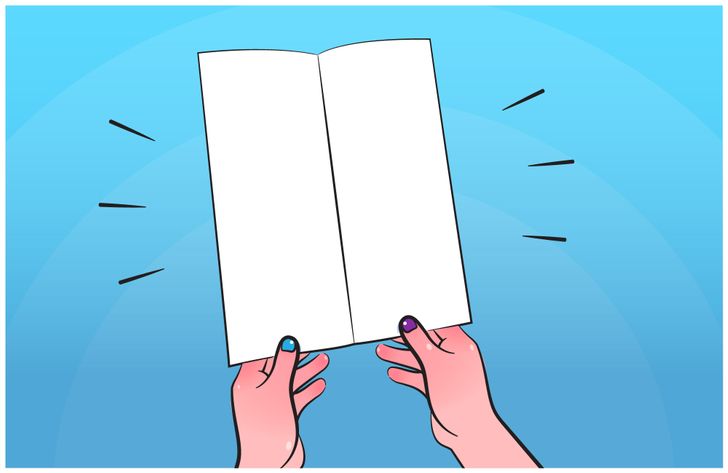
Fold a piece of paper in half and then unfold it.
Step 2
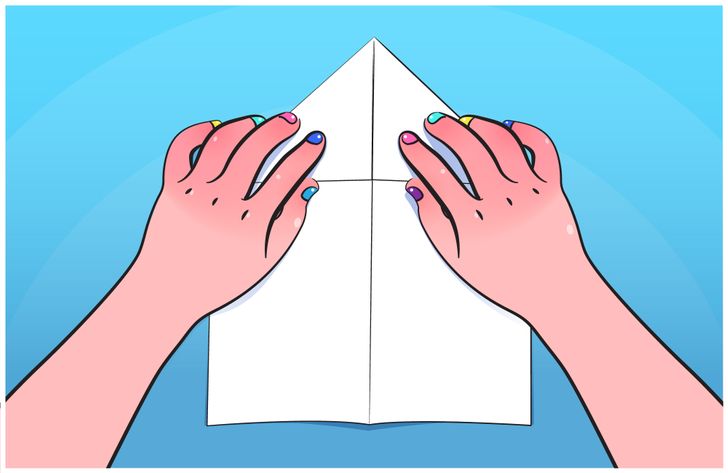
Fold the top 2 corners until they meet in the center.
Step 3
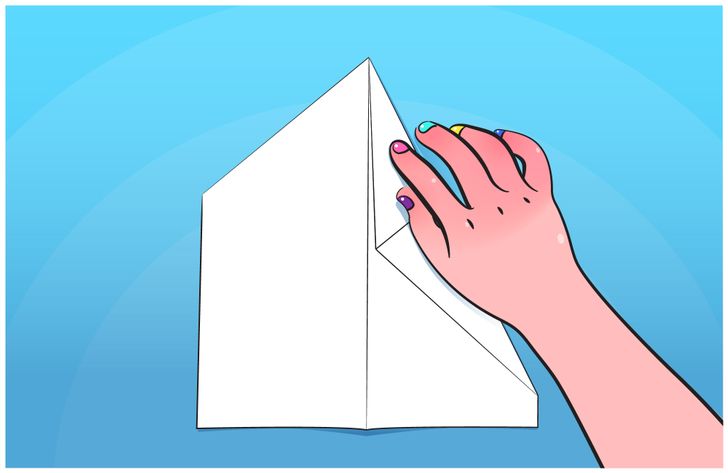
Flip the paper over and fold the corner again to the center. Do this to both sides.
Step 4
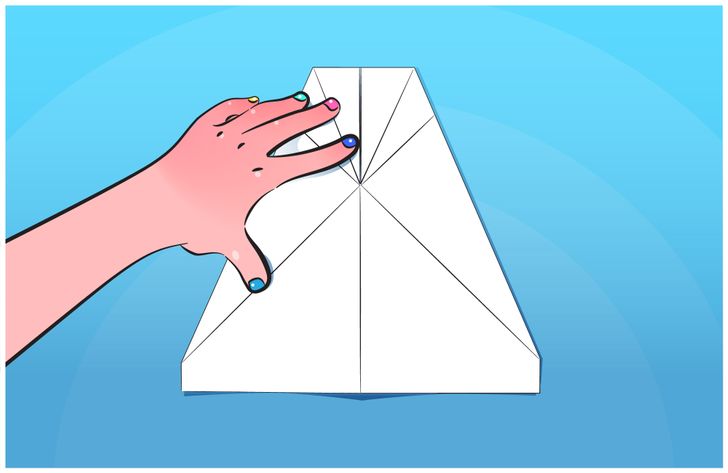
Fold the point at the top down. Make sure the tip meets the bottom of the folds in the step before this one.
Step 5
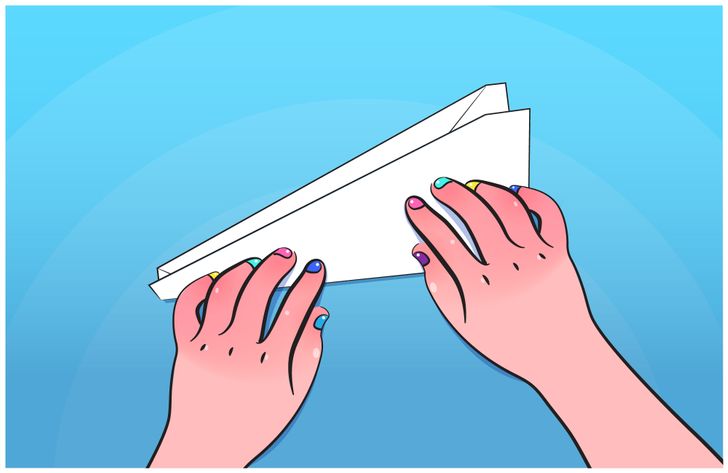
Fold the plane in half, in on itself.
Step 6
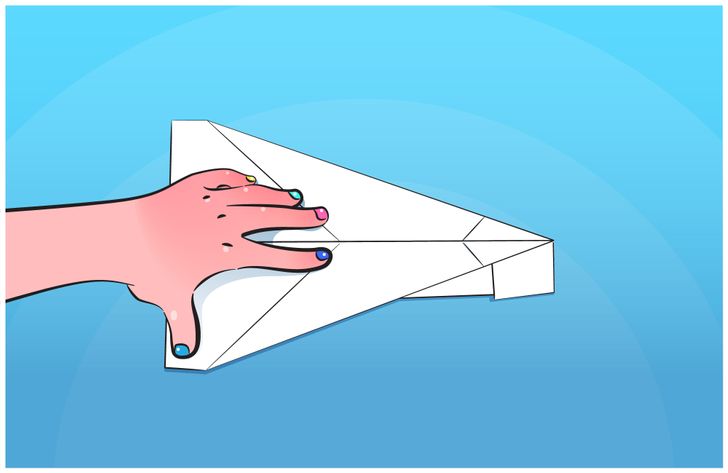
Fold both sides (the wings) down until you make a straight line from the tip of the plane to the back.
Final result
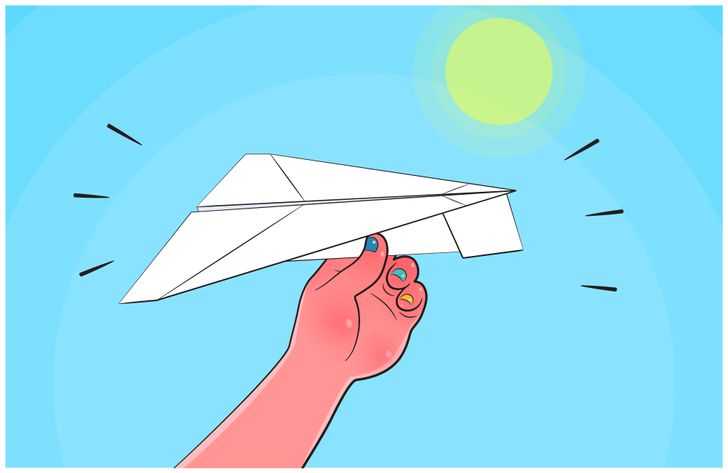
If you followed the steps correctly, your plane should look like this.
Advanced airplane — star crusher
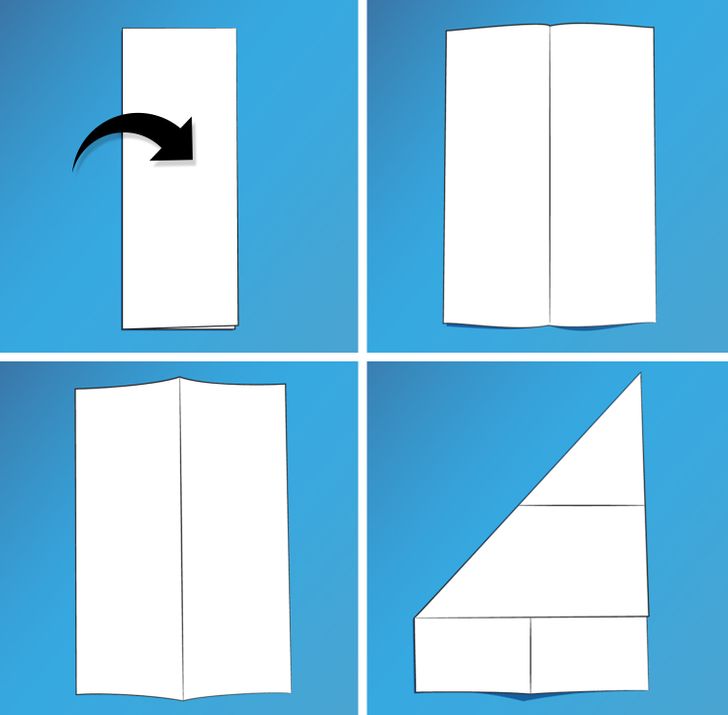
1. Fold a regular piece of paper in half.
2. Unfold it. Now you should have a crease in the middle.
3. Turn the paper over.
4. Fold the top edge to the right edge. The top right corner needs to look super pointy.
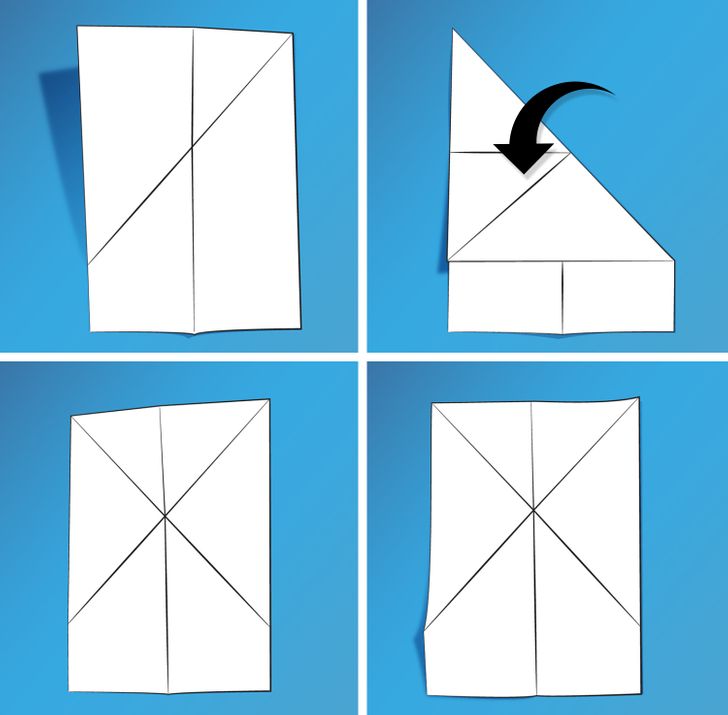
5. Unfold it.
6. Fold the top right edge to the left edge.
7. Unfold it.
8. Turn the piece of paper over.
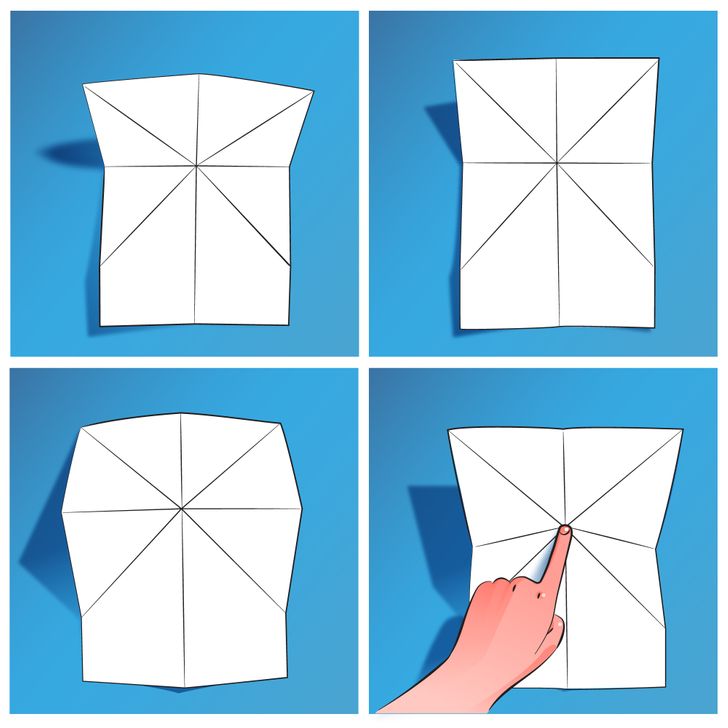
9. Fold the top part down at the center of the crease that formed an “X.” The top corners should touch the starting points of the bottom creases.
10. Unfold it.
11. Turn the paper over.
12. Place your finger in the middle of the “X” and push down until the paper pops inward.
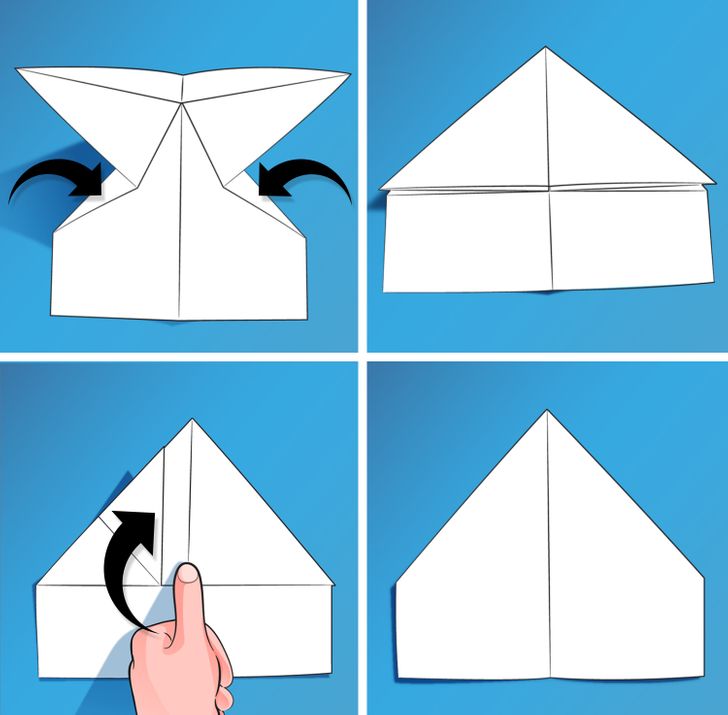
13. Bring the 2 creases on the sides together.
14. Collapse them into a triangle.
15. Fold the left flap up and leave a distance as big as the width of a thumb from the center.
16. Turn the paper over.
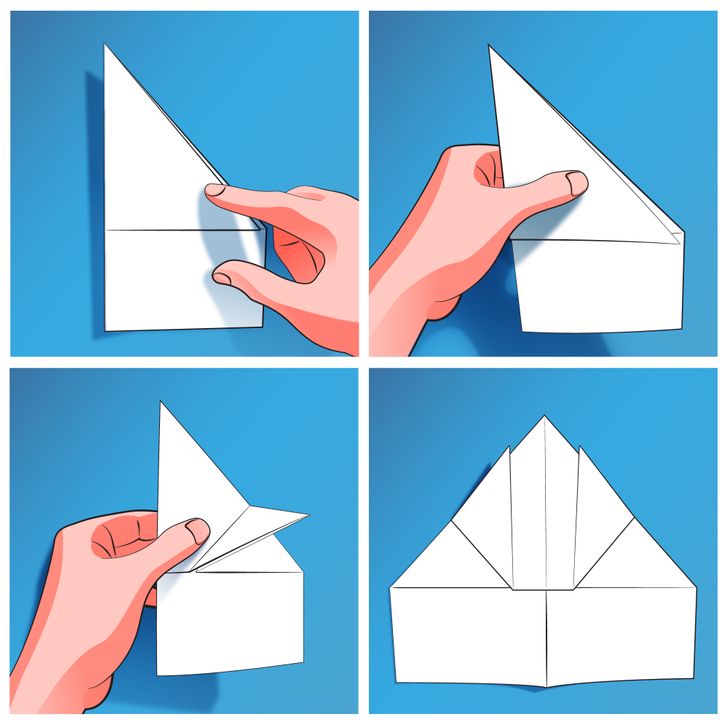
17. Fold the paper in half, bringing the left part to the right.
18. Pick up the paper to help you with the next step.
19. Fold the other flap up and make it line up with the first flap that was folded.
20. Open up the paper. Your plane should look like this now.
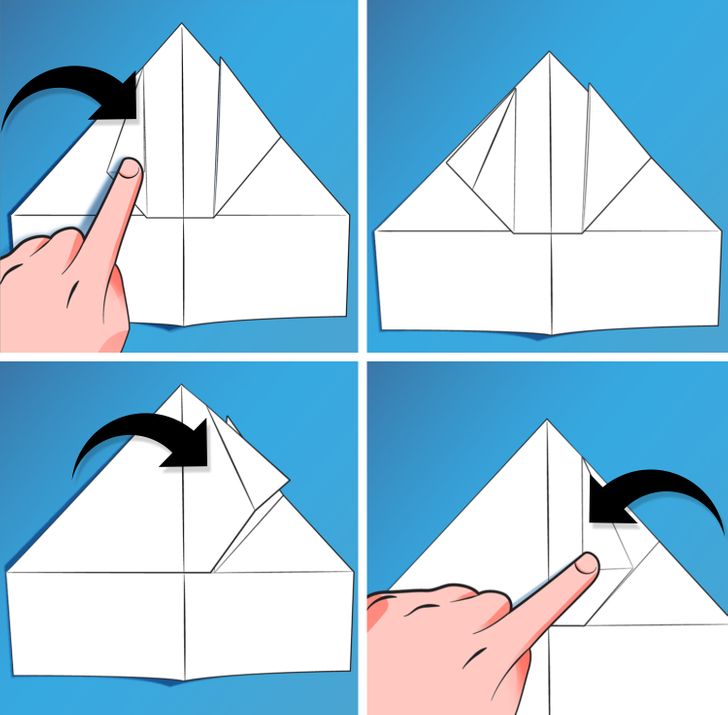
21. Fold the top part of the left flap exactly like in the example.
22. Unfold it. You just need to create a crease.
23. Fold the left flap to the right part of the plane.
24. Crease it by folding in the top part of this flap (in the opposite direction of step 21).
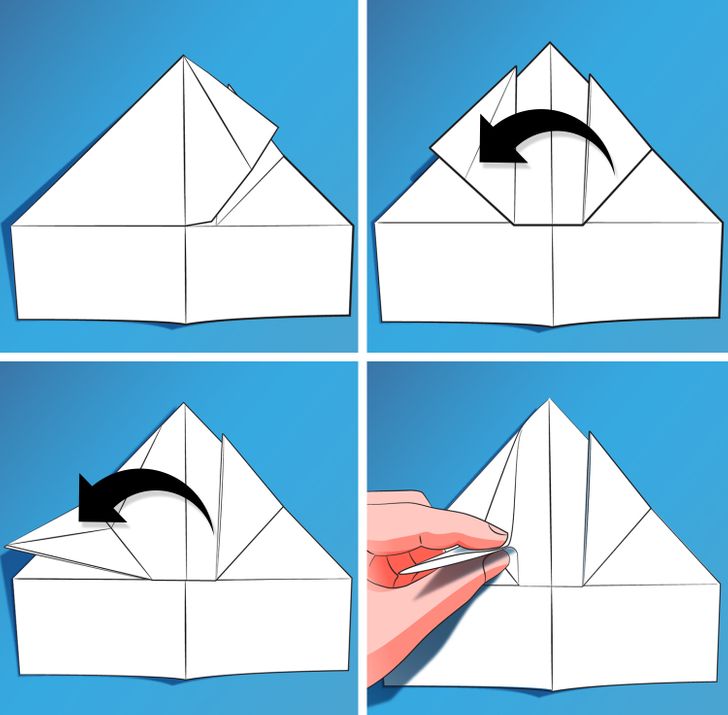
25. Unfold it.
26. Bring the flap back to the left side.
27. Open it up.
28. Squeeze at the crease until you create a sort of “fang.”
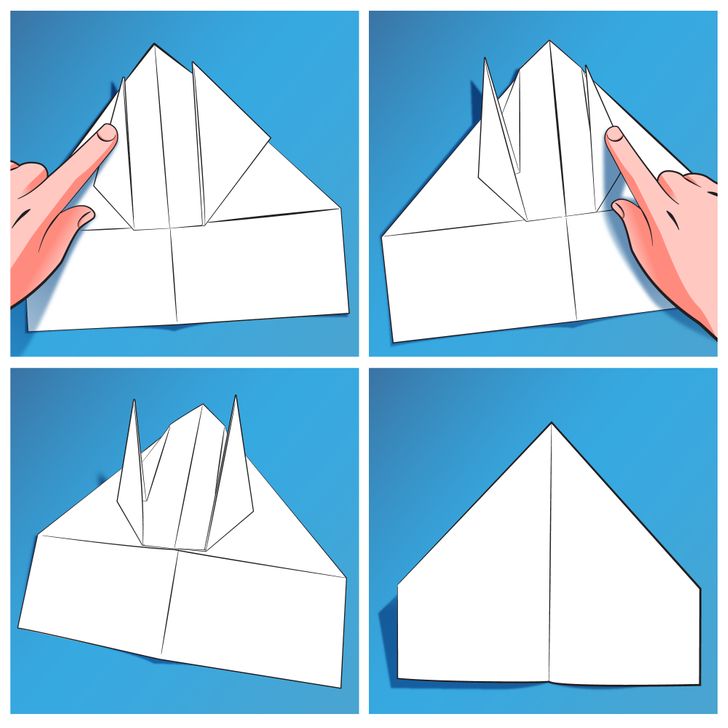
29. Fold the “fang” up.
30. Do to the right side exactly what you did to the left until you fold the “fang” on the right side up as well.
31. The plane should look like this now.
32. Turn the paper over.
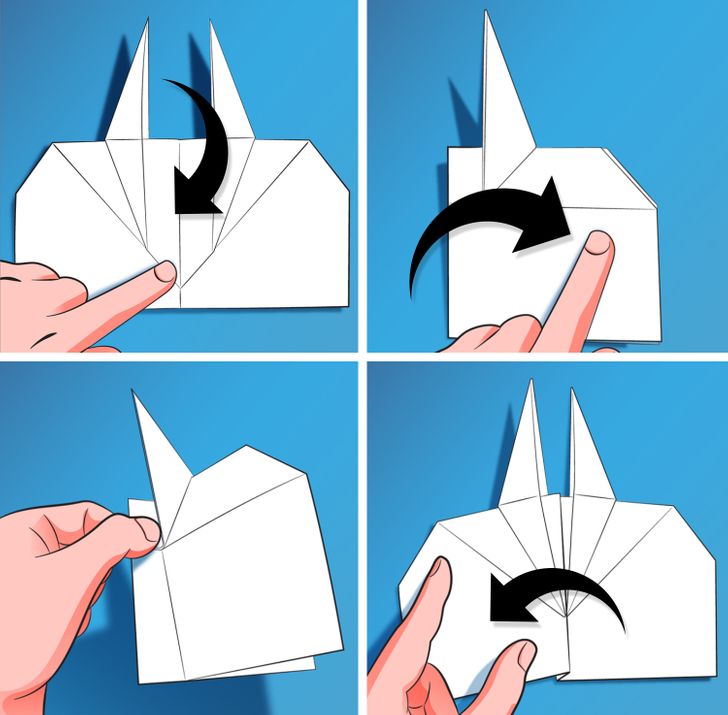
33. Fold the top part as far as it will go until it looks like the image in this step.
34. Fold the left half to the right.
35. Put your fingernail at the bottom of the corner of the “fang.” Fold the wing over to the left side at a slight angle.
36. Here’s what you’ll get.
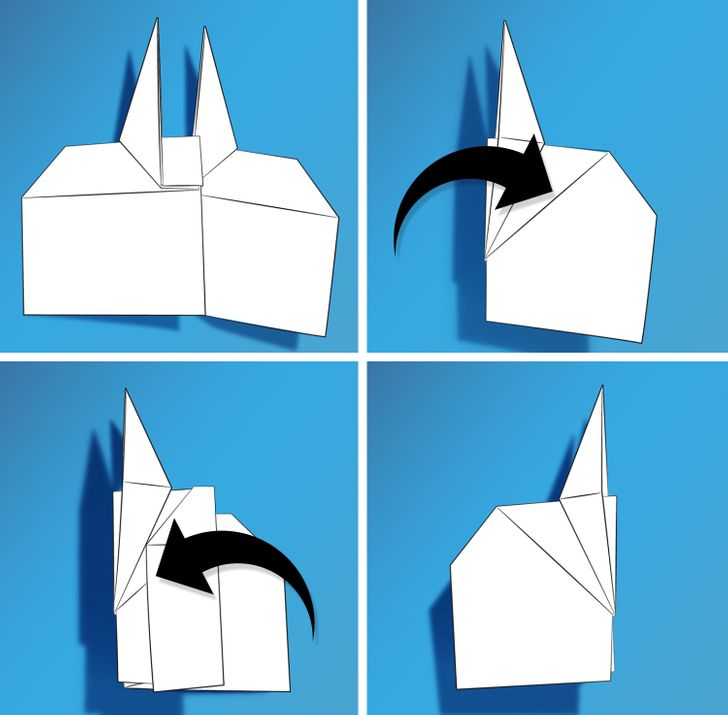
37. Turn the paper over.
38. Fold this wing to line up with the first wing.
39. Fold in the wing’s fin. When folding, make sure the crease is parallel with the edge of the base.
40. Turn the paper over.
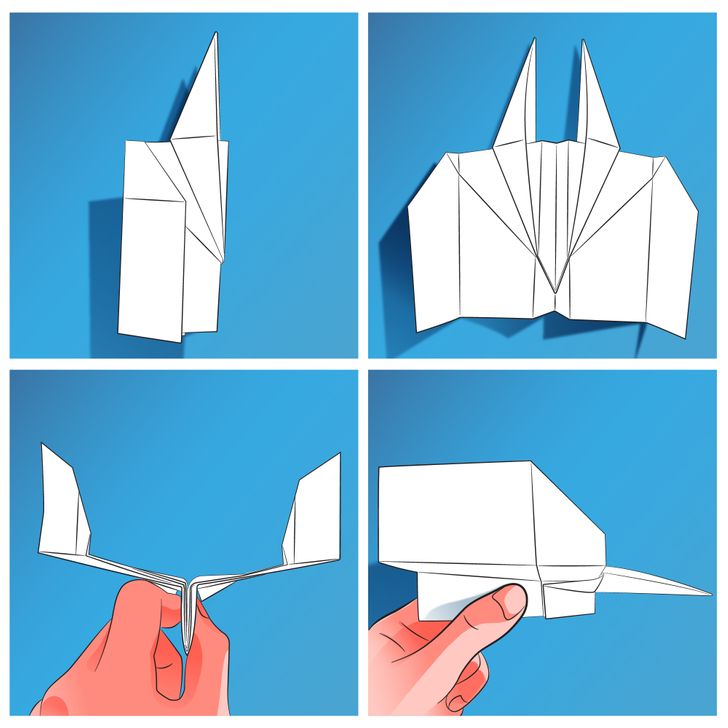
41. Fold this fin and line it up with the first fin.
42. Open up the wings and fins.
43. When you hold the plane, make sure the wings are angled a bit and the fins are standing straight up.
44. The airplane is ready. Hold it like this when you want to launch it.
Final result
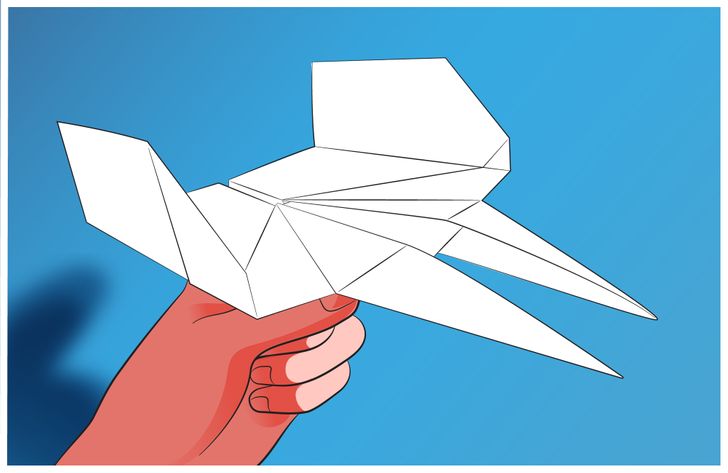
If you did everything right, your plane should look like this.