12 Simple Manicure and Pedicure Hacks to Try at Home
Performing manicures and pedicures at home can help us save a lot of time and money. In addition, it allows us to try some tricks that are definitely worth it. Finally, there are so many simple techniques that it’s really worth just giving them a try at home to see if that’s what you need before actually going to a professional.
5-Minute Crafts has compiled some techniques to help you take care of your hands and feet without having to visit a beauty salon if you don’t want to or if you don’t have time.
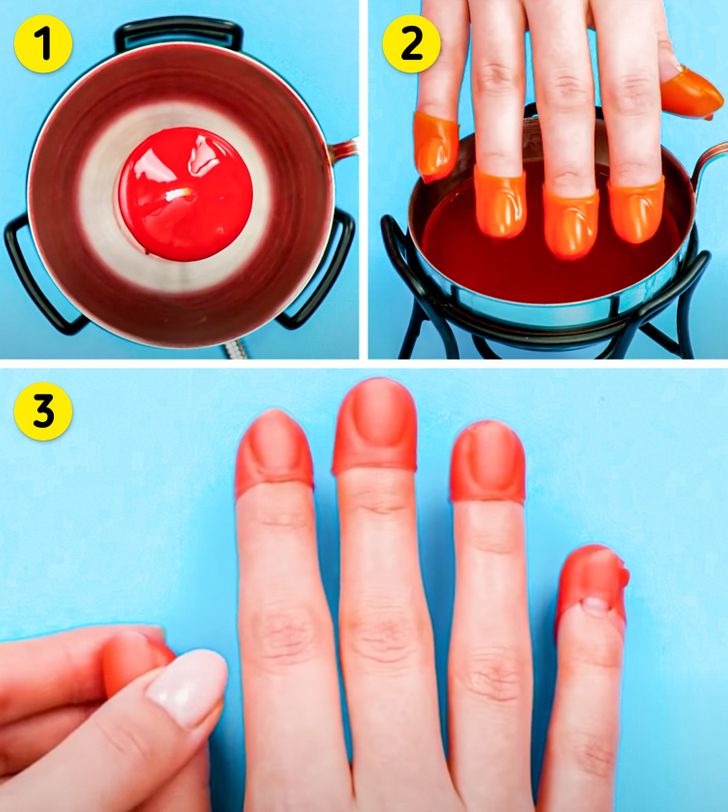
1. Get yourself a paraffin wax
What you’ll need:
- A paraffin candle
- A pot or a small frying pan
Instructions:
- Place the candle in the pot or pan and heat it over low to medium heat until the wax melts and becomes liquid. Let it cool for a few minutes but don’t wait long enough for it to become hard again.
- Dip the tip of your fingers in the melted wax. Be careful and make sure that it’s not too hot.
- Leave them in there for about 10 minutes and then take them out. Paraffin has properties that moisturize your skin and help remove dead skin cells so it works like a charm to treat your nails and fingertips.
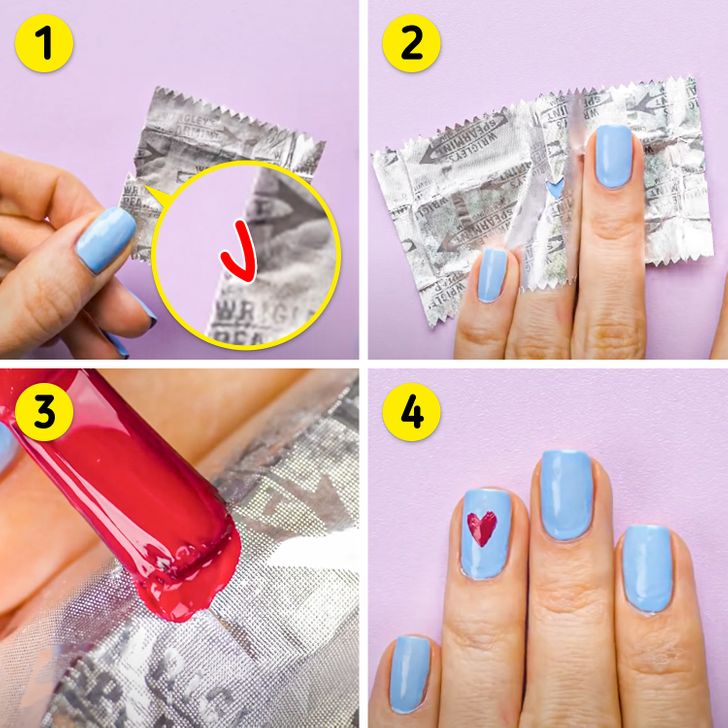
2. Draw perfect hearts quickly and efficiently
What you’ll need:
- 2 nail polishes in different colors
- 1 piece of aluminum foil
- Scissors
Instructions:
- Paint your nails with one of the colors that you chose and wait for it to dry. Make sure it dries well and then fold the aluminum foil. Cut out half of a heart right at the edge of the fold like in the picture above.
- Stretch the aluminum foil over one of your nails, and make sure to hold it properly with your fingers, so it doesn’t move.
- Apply the polish right over the heart shape that you cut out.
- Remove the paper and wait for it to dry. Finish with a layer of clear polish.
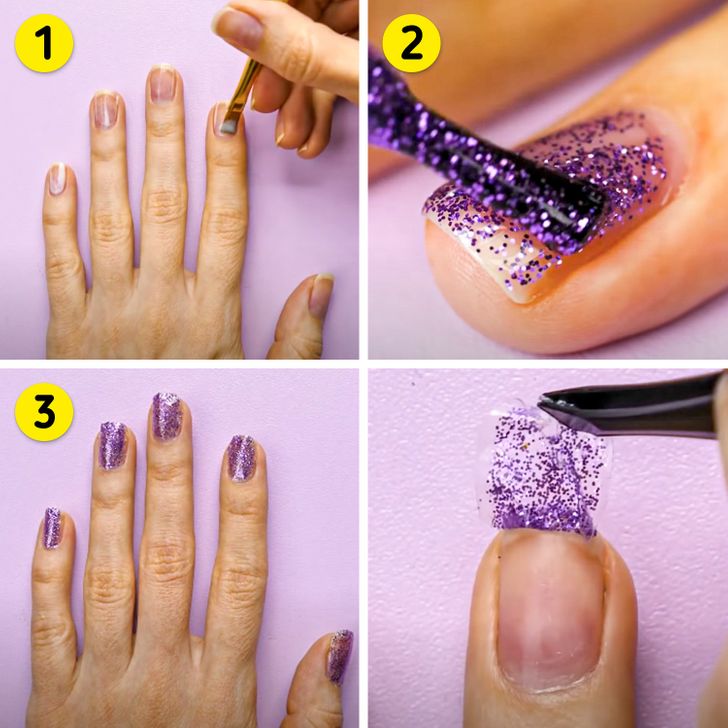
3. Get peel-off nails
What you’ll need:
- Vinyl nail gel
- Brush
- Nail polish
Instructions:
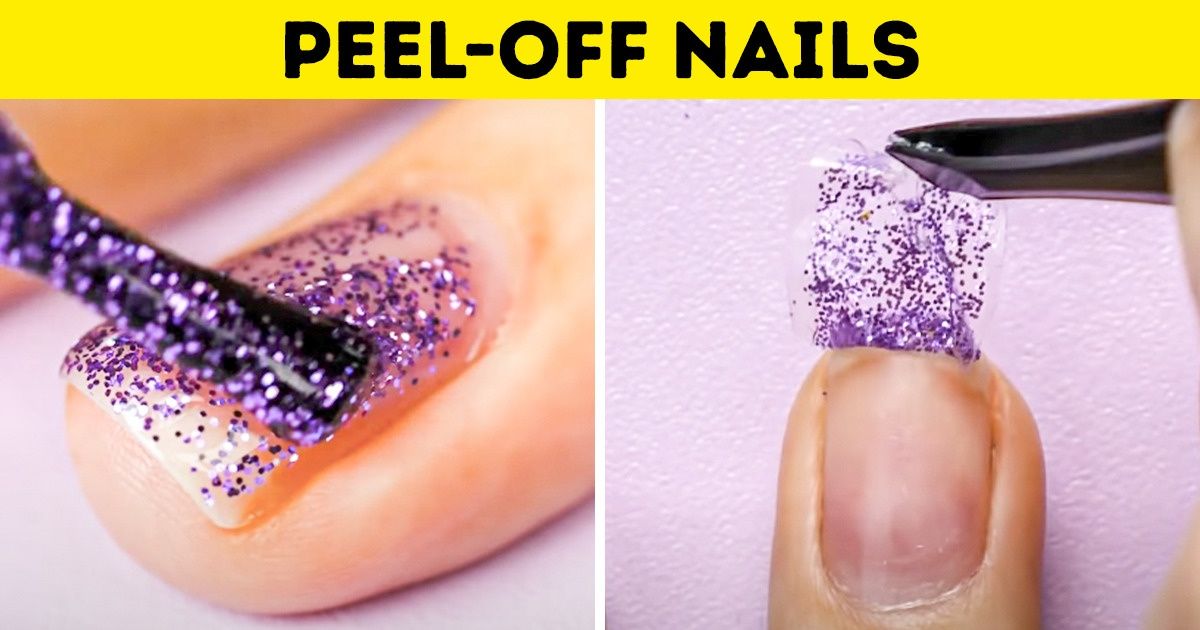
- Apply a layer of vinyl adhesive on your nails using the brush and wait for them to dry.
- Paint your nails with the nail polish of your choice.
- Remove with a pair of tweezers when needed.
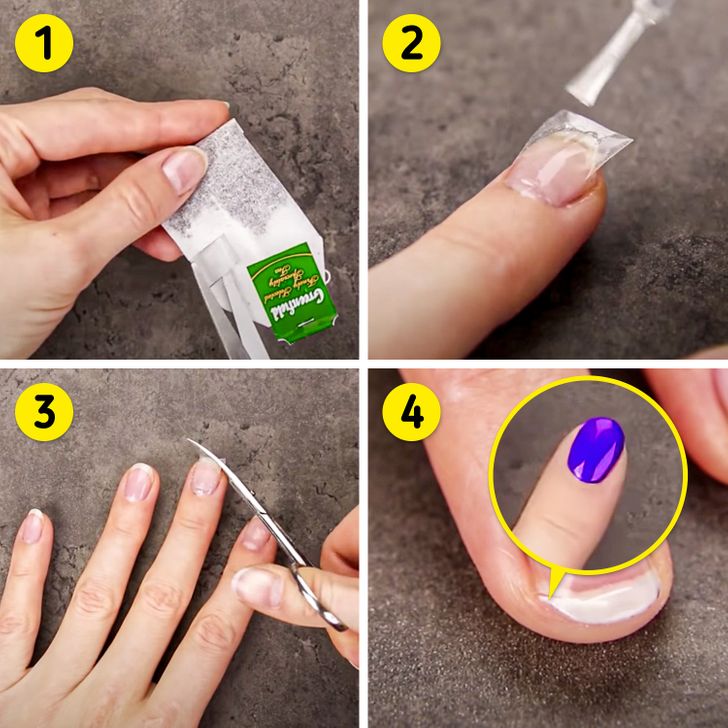
4. Fix a broken nail
What you’ll need:
- 1 teabag
- Clear and colored nail polish
- Nail file
- Scissors
- Tweezers
Instructions:
- Cut a piece of the teabag. Make sure it is big enough to cover your nail.
- Apply any clear or translucent nail polish and place the piece of the teabag on top using tweezers. Then add another layer of clear polish and wait for it to dry.
- Cut off the excess paper with scissors. Then file to even it out.
- Paint with a coat of colored polish to finish.
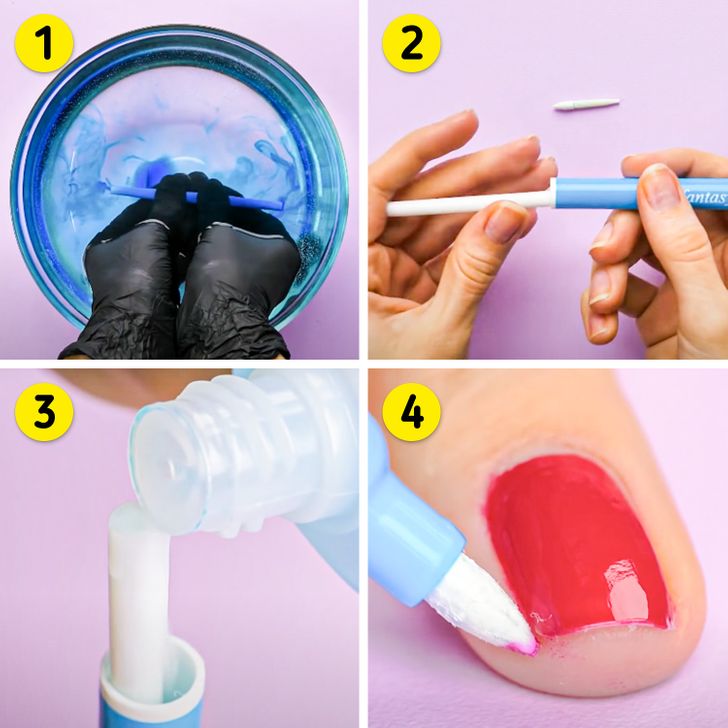
5. Make your own nail polish corrector pen
What you’ll need:
- Marker
- Container with hot water
- Enamel remover
- Latex gloves (optional)
Instructions:
- Put on the latex gloves to avoid staining your hands with the ink from the marker. Then, open the marker and remove the ink from the foam wand that usually comes inside it, as well as the tip, with the hot water. Wait for it to dry.
- Put the pieces back in place.
- Pour a little remover on the foam wand and close your new nail polish corrector pen.
- Use it whenever you need to remove excess nail polish.
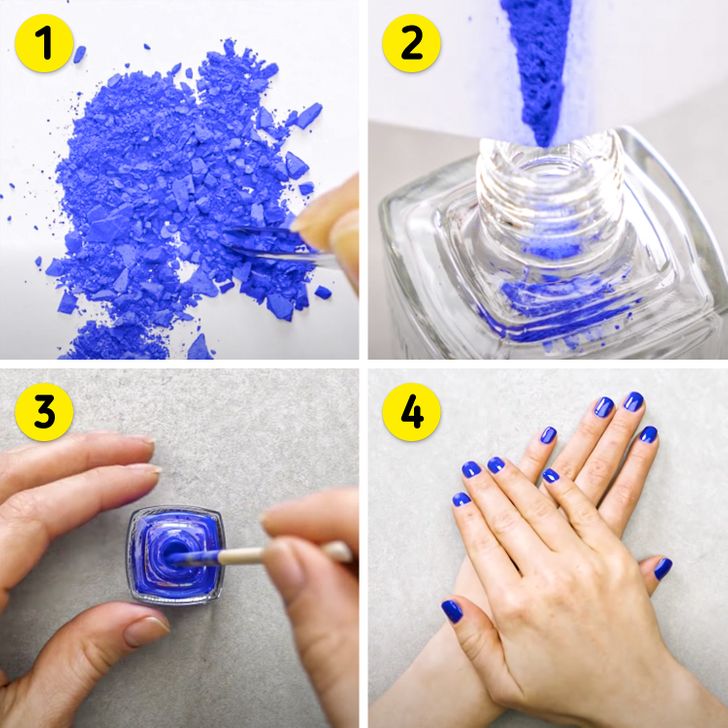
6. Recycle the colors of your eye shadows.
What you’ll need:
- Eye shadow
- Clear nail polish
- Piece of paper
- Tweezers
- Wooden stick
Instructions:
- Remove the eye shadow from its container and crush it completely on the piece of paper.
- Fold the piece of paper in half and pour what should now be mostly powder into the clear polish bottle.
- Stir well with the wooden stick until it dissolves.
- Apply on your nails and let it dry.
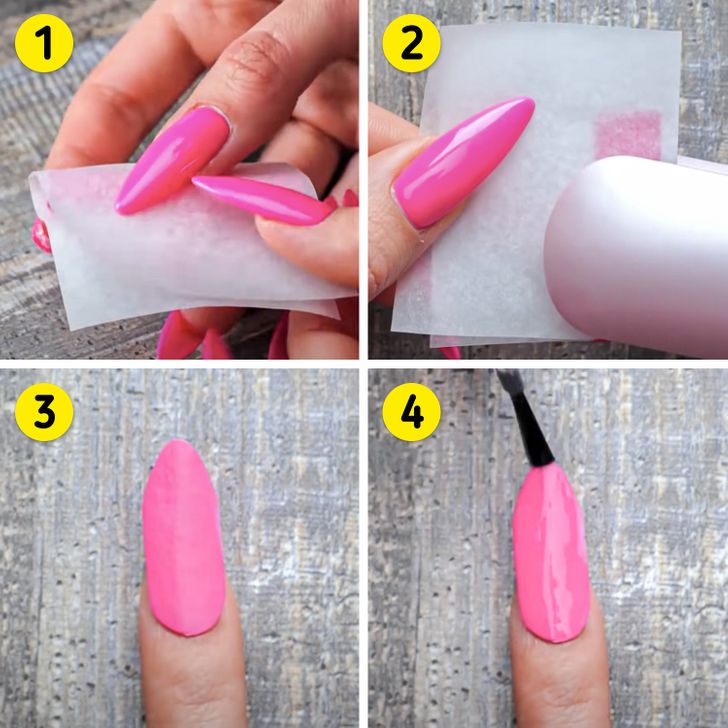
7. Make your own fake nails
What you’ll need:
- Colored straws
- Baking paper
- Hair iron
- Scissors
- Fake nail glue
- Clear nail polish
Instructions:
- Cut a piece of straw. You can choose the size and color you prefer. Place it between a piece of baking paper.
- Flatten the paper with the hair iron until the piece of straw is flattened.
- Trim the straw to shape it like a fake nail. Then glue it to your actual nail using the special glue.
- Finish it with a layer of clear nail polish to make it shine.
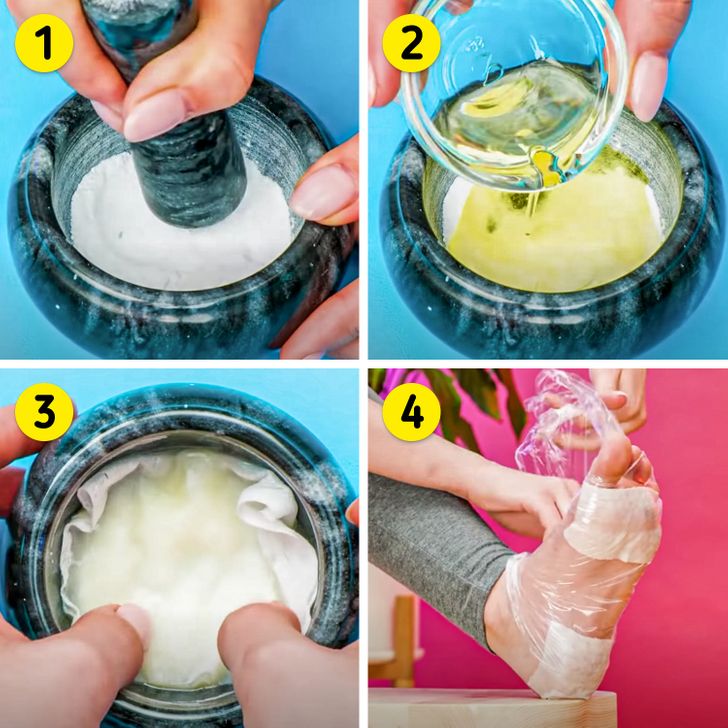
8. Moisturize dry heels and soles using aspirin.
What you’ll need:
- 2 tablets of aspirin
- 2 tbsp of almond oil
- 4 medium pieces of gauze
- 2 small towels
- Plastic wrap
- Mortar and pestle
Instructions:
- Crush the aspirin tablets with the mortar and pestle.
- Add the almond oil and stir until everything is combined well.
- Spread the mixture on the pieces of gauze.
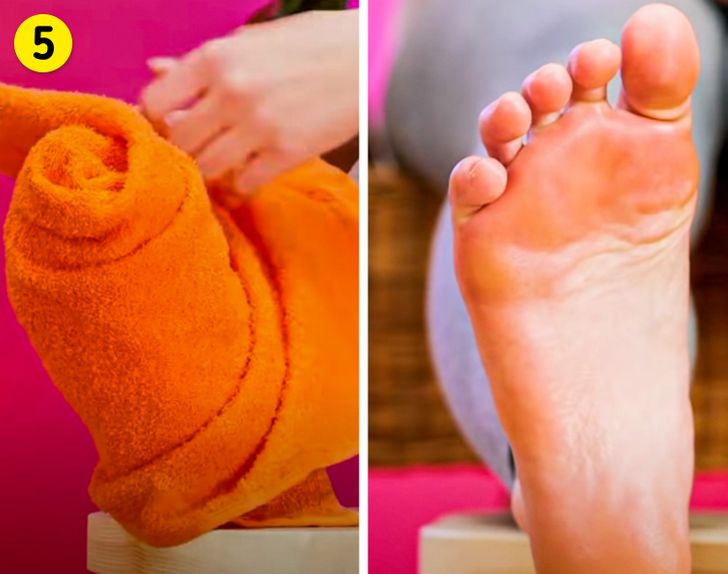
- Place the gauze on your heels and on the areas that have the driest skin. Then, cover with plastic wrap.
- Wrap your feet with each towel, wait 5 minutes, and remove. The salicylic acid in the aspirin can help remove dead skin cells, while the almond oil moisturizes the skin.
9. Fix a broken nail
What you’ll need:
- Brush, preferably a long bristle makeup brush
- Tweezers
- Scissors
- Clear and colored nail polish
- Nail file
Instructions:
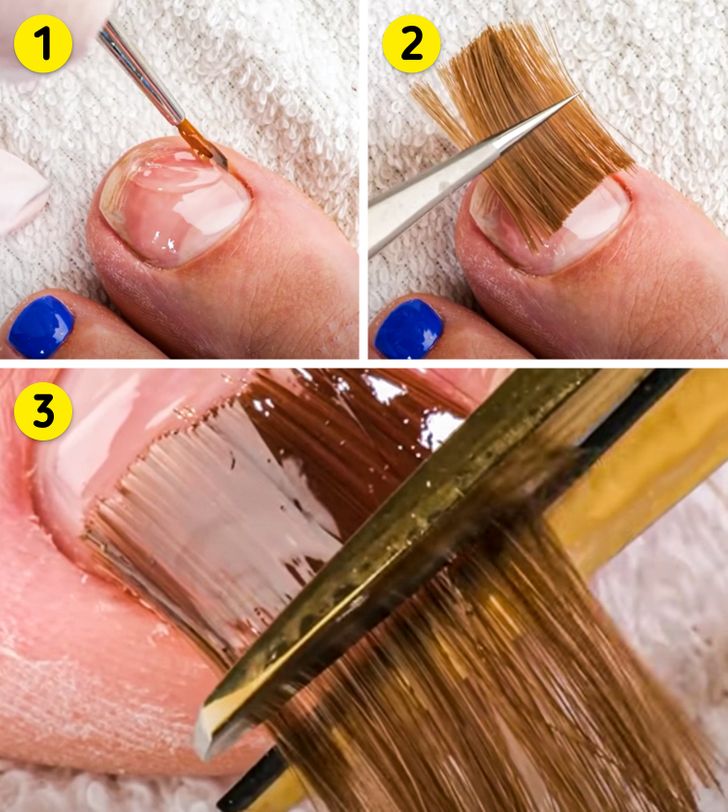
- Apply clear polish over the broken nail.
- Cut several bristles from the brush, enough to cover the space you want to repair. Then, using the tweezers, place them on your nail while the polish is wet.
- Apply another coat of clear polish to attach the bristles to the nail and cut off the excess.
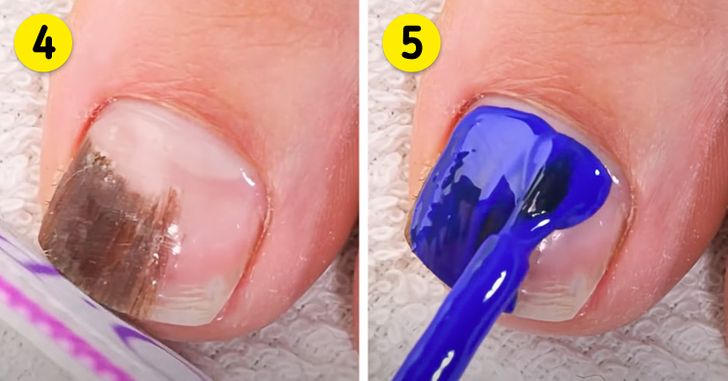
- Once the polish has dried, file the nail over the top to even it out.
- Finish with polish in the color of your choice.
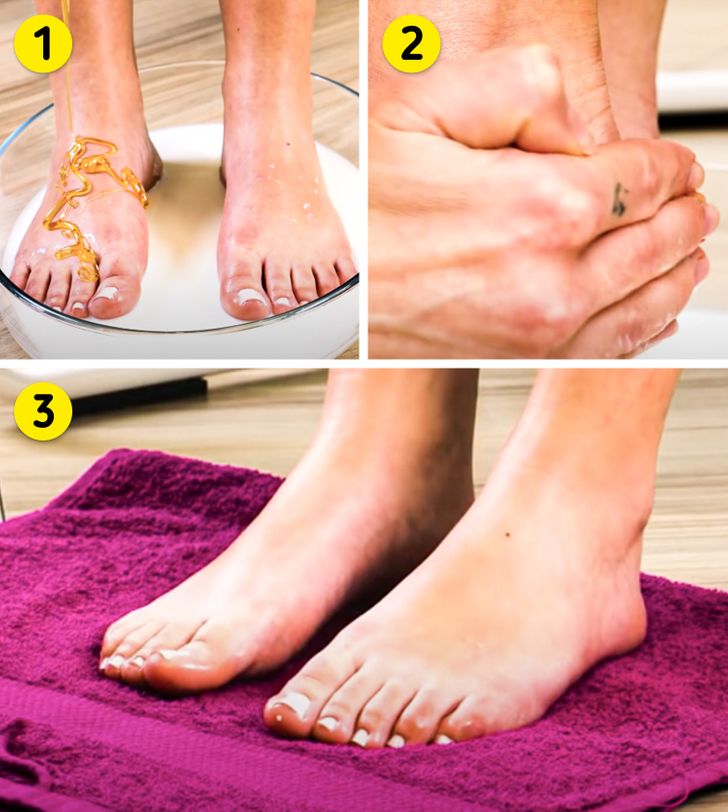
10. Moisturize your feet with milk and honey
What you’ll need:
- 1 liter of milk
- 4 tbsp of honey
- A large bowl
- Towel
11. Remove dirt using clay
What you’ll need:
- 1 cup bentonite clay
- ½ cup water
- Spoon
- Brush
- Towel
Instructions:
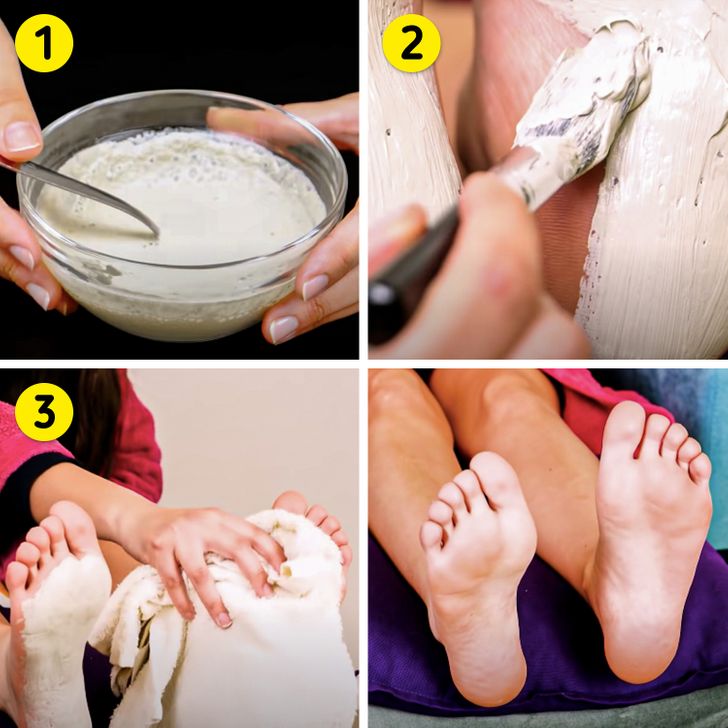
- Mix the bentonite clay and water until you get a homogeneous, thick paste that you’ll later use to spread over your skin.
- Apply on the soles of your feet using a brush and leave it on for 30 minutes.
- Remove the clay using a damp towel. Bentonite clay contains particles that remove dirt and excess oil from the skin, so it works well to restore the natural beauty of your feet.
12. Dry enamel faster
What you’ll need:
- Nail polish
- Large container of ice water
Instructions:
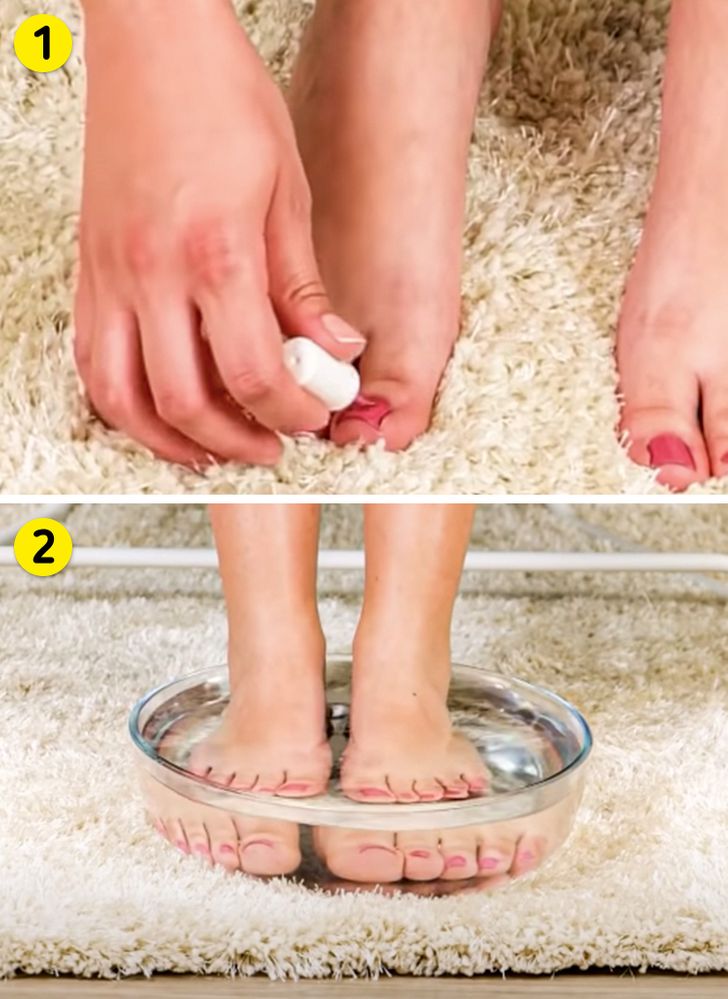
- Paint all your nails.
- Dip your feet in cold water for one minute. When removing them from the ice bath, avoid drying them with a towel or paper, in case the polish has not completely set.
